I was standing in the dairy aisle of my local grocery store last Tuesday, staring at a carton of eggs like it held the secrets to the universe, when the smell hit me. Not an actual smell, you know—a memory-smell. Warm, spiced, sweet but not too sweet. It was the exact scent of my neighbor Mrs. Kowalski’s kitchen every November, the one that drifted through the thin walls of our apartment building when I was eight years old.
Mrs. Kowalski was ancient, or so I thought at the time. She wore floral aprons and kept a bowl of hard candies on her coffee table that nobody ever ate. But her pumpkin pie? That was a different story. I’d sit on her scratchy plaid couch, legs too short to touch the floor, watching her pull that perfect pie from the oven. The crust was always a little too thick, and she’d always burn her fingers getting it out, muttering under her breath in Polish. I never knew what she said, but I knew it mattered.
She moved away when I was twelve, and I never got her recipe. I mean, I’ve tried to recreate it a dozen times over the years, but something was always off. The crust was too fussy, the filling too heavy. Then it hit me last week in that dairy aisle—maybe I didn’t need the crust at all. Maybe what I was really chasing was that silky, spiced custard center, the part that made you close your eyes and forget everything else. So I grabbed the eggs, the pumpkin, and a pint of heavy cream, and I went home to figure it out. Honestly, this Healthy Crustless Pumpkin Pie Custard Cups recipe is the closest I’ve ever gotten to that feeling. Maybe you’ve been there, chasing a taste you can almost but not quite hold onto. Let me tell you, these little cups are it.
Why You’ll Love This Recipe
Let’s be real for a second: most low-carb desserts taste like a compromise. You know the ones—grainy, weirdly sweet, and they leave you wondering why you bothered. These Healthy Crustless Pumpkin Pie Custard Cups are not that. I tested this recipe seven times to get the texture right, and let me tell you, the final version is something I’m genuinely proud of.
- Quick & Easy: Comes together in under 40 minutes, with only 10 minutes of active prep. Perfect for those nights when you need dessert but don’t want to spend an hour in the kitchen.
- Simple Ingredients: No fancy grocery trips needed. You likely already have eggs, pumpkin puree, and spices in your pantry. The heavy cream and cream cheese are the only things you might need to pick up.
- Perfect for Fall Gatherings: These custard cups are great for Thanksgiving, Friendsgiving, or just a cozy Tuesday night. They look fancy but are secretly the easiest thing you’ll make all season.
- Crowd-Pleaser: I brought these to a potluck last week, and three people asked for the recipe before I even sat down. One guy said, “Wait, this is low-carb? No way.” That’s the kind of reaction you want.
- Unbelievably Delicious: The texture is silky smooth, the spices are perfectly balanced, and there’s no weird aftertaste. It’s comfort food reimagined—healthier, faster, but with the same soul-soothing satisfaction.
What makes this recipe different? It’s the cream cheese. Most crustless pumpkin pie recipes skip it, but I found that a small amount of cream cheese gives the custard that rich, velvety mouthfeel without making it heavy. It’s the secret to getting that “real dessert” texture without the carbs. Trust me, I learned this the hard way—my first three batches were either too watery or too dense. This version? It’s just right.
What Ingredients You Will Need
This recipe uses simple, wholesome ingredients to deliver bold flavor and satisfying texture without the fuss. Most of these are pantry staples, and the substitutions are easy if you need them.
- For the Custard Base
- 1 cup pumpkin puree (not pumpkin pie filling—make sure it’s 100% pure pumpkin. I prefer Libby’s for consistent texture)
- 4 large eggs, room temperature (this matters for smooth custard—cold eggs can make it grainy)
- 1/2 cup heavy cream (adds richness; you can use full-fat coconut milk for a dairy-free option)
- 4 oz cream cheese, softened (use full-fat for best texture; Neufchâtel works too)
- 1/3 cup granulated sweetener of choice (I use Lakanto monk fruit sweetener for zero net carbs; erythritol or allulose also work)
- 1 tsp vanilla extract (pure vanilla, not imitation, if you can swing it)
- For the Spice Blend
- 1 1/2 tsp pumpkin pie spice (store-bought is fine, but I’ll share my homemade blend below)
- 1/2 tsp ground cinnamon (I use Ceylon cinnamon—it’s milder and less bitter than cassia)
- 1/4 tsp ground ginger (adds warmth without heat)
- 1/8 tsp ground nutmeg (freshly grated if you have it—it makes a difference)
- Pinch of salt (don’t skip this—it balances the sweetness and brings out the spices)
- For Topping (Optional but Recommended)
- 1/2 cup heavy cream (for whipping; use coconut cream for dairy-free)
- 1 tbsp powdered sweetener (I use Swerve confectioners)
- 1/2 tsp vanilla extract
- Optional: a sprinkle of cinnamon or nutmeg on top
Ingredient Selection Tips: Look for pumpkin puree that’s smooth and not watery. If your puree seems thin, let it drain in a fine-mesh strainer for 15 minutes before using. For the cream cheese, let it soften at room temperature for at least 30 minutes—cold cream cheese will leave lumps in your custard. Trust me, I learned this the hard way on batch number four.
Substitution Guidance: For a dairy-free version, use full-fat coconut milk instead of heavy cream and dairy-free cream cheese (Kite Hill works well). For a nut-free option, stick with the heavy cream. If you don’t have pumpkin pie spice, mix 1 tsp cinnamon, 1/2 tsp ginger, 1/4 tsp allspice, and 1/8 tsp nutmeg. Easy.
Equipment Needed
You don’t need a ton of fancy equipment for this recipe, which is part of why I love it. Here’s what you’ll need:
- 8-ounce ramekins or oven-safe custard cups (I use a set of six from Crate & Barrel that I’ve had for years. You can also use a muffin tin if you don’t have ramekins)
- Large mixing bowl (any bowl works, but a wide one makes whisking easier)
- Whisk (a hand whisk is fine, but an electric hand mixer makes it faster)
- Fine-mesh strainer (optional but helpful for straining out any lumps—I use this for the smoothest texture)
- Baking dish or roasting pan (for the water bath—this is key for even cooking)
- Measuring cups and spoons (I prefer stainless steel for accuracy)
- Rubber spatula (for scraping every last bit of custard into the ramekins—don’t waste a drop)
Budget-Friendly Options: If you don’t have ramekins, use a standard 12-cup muffin tin and reduce the baking time to 20-25 minutes. No water bath? You can skip it, but the texture won’t be as silky. I’ve done it both ways, and the water bath is worth the extra two minutes of setup.
Maintenance Tip: If you use a glass baking dish for the water bath, let it cool completely before washing to avoid thermal shock. I cracked my favorite Pyrex dish this way, and I’m still bitter about it.
Preparation Method
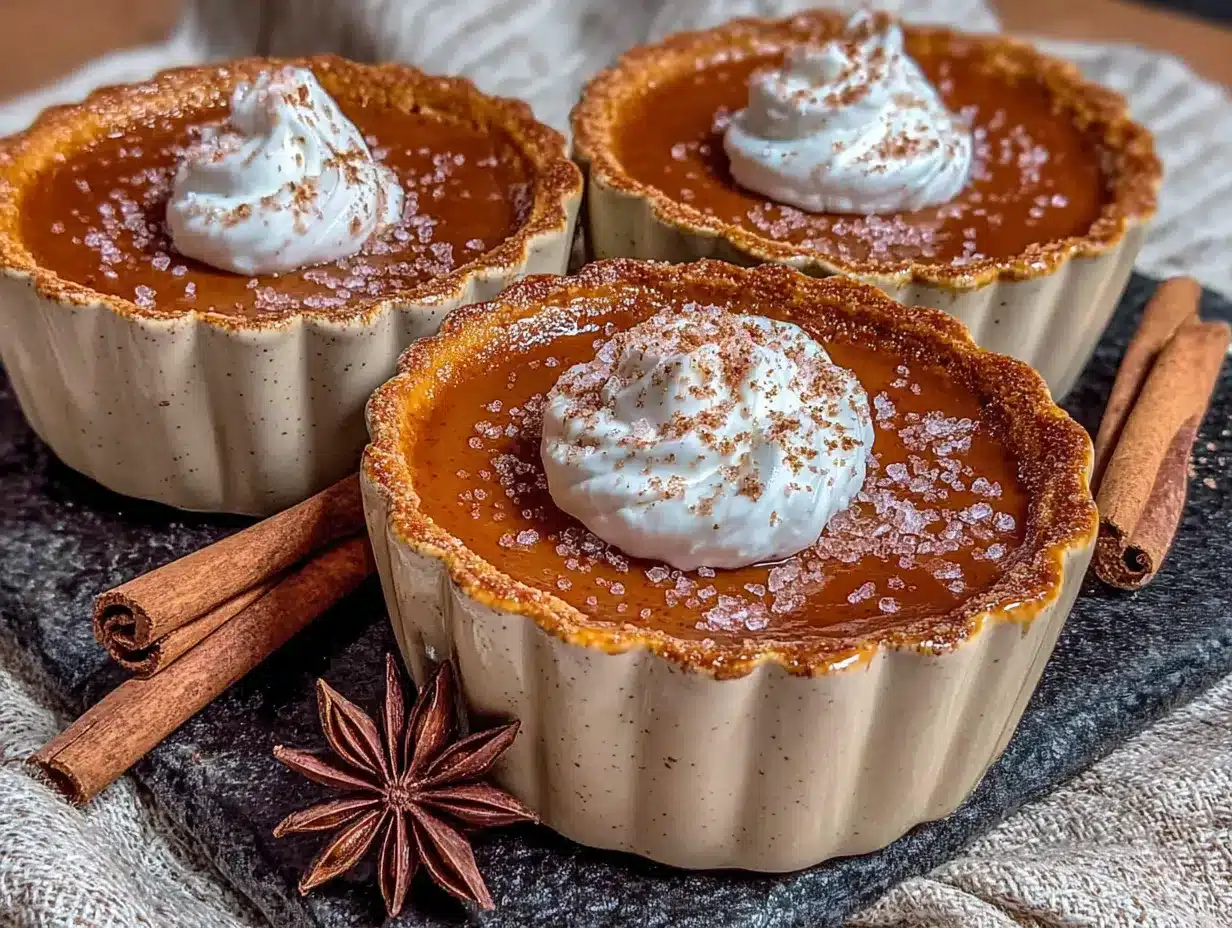
Let’s get cooking. This recipe takes about 40 minutes total, with only 10 minutes of active work. The rest is oven time, which means you can clean up or just sit down and relax.
- Preheat your oven to 325°F (163°C). Place a kettle of water on to boil—you’ll need it for the water bath. While the oven heats, arrange six 8-ounce ramekins in a large baking dish. Make sure they fit without touching each other.
- Soften the cream cheese. If you forgot to take it out of the fridge, microwave it on low power for 10-15 seconds. It should be soft but not melted. I’ve definitely zapped it too long before and ended up with scrambled eggs in my custard—don’t do that.
- Blend the wet ingredients. In a large mixing bowl, combine the softened cream cheese, pumpkin puree, heavy cream, and vanilla extract. Whisk until smooth. If you see lumps, use an electric hand mixer on low speed for 30 seconds. The mixture should be a uniform orange color with no white streaks.
- Add the eggs one at a time. Crack each egg into the bowl and whisk gently after each addition. Don’t overmix—you want to incorporate the eggs without adding too much air, which can cause cracks during baking. The mixture should be smooth and slightly thick.
- Mix the dry ingredients. In a small bowl, whisk together the sweetener, pumpkin pie spice, cinnamon, ginger, nutmeg, and salt. This ensures the spices are evenly distributed—no one wants a mouthful of clumpy cinnamon.
- Combine wet and dry. Slowly add the dry ingredients to the wet mixture, whisking constantly. Scrape the bottom and sides of the bowl with a rubber spatula to make sure everything is incorporated. The batter should be smooth, pourable, and smell like autumn in a bowl.
- Strain the custard (optional but recommended). Pour the mixture through a fine-mesh strainer into a clean bowl or large measuring cup. This catches any lumps or bits of unmixed cream cheese. I do this every time now after my third batch came out with tiny cream cheese chunks—still tasty, but not as pretty.
- Fill the ramekins. Divide the custard evenly among the six ramekins, filling them about 3/4 full. Tap each ramekin gently on the counter to release any air bubbles. You should see a few tiny bubbles rise to the surface—that’s normal.
- Create the water bath. Carefully pour the hot water from your kettle into the baking dish, being careful not to splash water into the ramekins. Fill the water until it reaches halfway up the sides of the ramekins. This gentle, even heat is what gives you that silky texture.
- Bake for 30-35 minutes. The custards are done when the edges are set and the centers jiggle slightly when you gently shake the ramekin. They should look like firm Jell-O, not liquid. If the centers are still wobbly, give them 3-5 more minutes. My oven runs hot, so I start checking at 28 minutes.
- Cool and chill. Remove the ramekins from the water bath using a spatula or tongs (careful—they’re hot). Let them cool on a wire rack for 15 minutes, then refrigerate for at least 2 hours. The custards will continue to set as they cool. I know it’s hard to wait, but don’t skip this step—warm custard is good, but chilled custard is divine.
Sensory Cues: When you pull the custards from the oven, the tops should be slightly golden around the edges but still pale in the center. The smell will be intoxicating—warm, spiced, and sweet. When you tap the ramekin, the center should wobble like a gentle wave. That’s your cue that they’re perfect.
Cooking Tips & Techniques
I’ve made this recipe seven times, and I’ve learned a few things the hard way. Here’s what I wish someone had told me:
The Water Bath Is Non-Negotiable. I tried skipping it once because I was in a hurry. The result? Dry, rubbery custards with cracks running through them. The water bath creates a humid environment that cooks the custard gently and evenly. Without it, the eggs overcook and the texture suffers. Take the extra two minutes—it’s worth it.
Don’t Overmix. I know it’s tempting to whisk vigorously, but too much air in the batter causes bubbles that rise to the surface and create a spongy texture. Mix until just combined, then stop. Think of it like making scrambled eggs—gentle and patient is the way to go.
Room Temperature Eggs Are Your Friend. Cold eggs can cause the cream cheese to seize up, leaving you with lumpy custard. Take your eggs out of the fridge 30 minutes before you start, or place them in a bowl of warm water for 5 minutes. I’ve done the warm water trick more times than I care to admit, and it works every time.
Check Early, Check Often. Ovens vary wildly. My neighbor’s oven runs 25 degrees hotter than mine, so her custards are done in 25 minutes. Start checking at 28 minutes, and don’t be afraid to pull them early if the centers are just barely jiggly. Overbaking is the number one mistake people make with custards.
Patience with Chilling. I know you want to eat them immediately. I’ve been there. But the texture really does improve after a few hours in the fridge. The flavors meld, the custard firms up, and the spices become more pronounced. If you can wait overnight, even better. These are actually better the next day.
Variations & Adaptations
This recipe is flexible, and I’ve tried a few variations myself. Here are some ideas to make it your own:
- Dairy-Free Version: Substitute the heavy cream with full-fat coconut milk and use dairy-free cream cheese (Kite Hill is my go-to). The texture will be slightly less rich, but still delicious. I made this for a friend with a dairy allergy, and she said it was the best low-carb dessert she’d ever had.
- Vegan Option: Use a flax egg (1 tbsp ground flaxseed + 3 tbsp water per egg) and full-fat coconut cream instead of heavy cream. The texture will be a bit more gelatinous, but still tasty. I haven’t perfected this yet, so let me know if you try it!
- Pumpkin Spice Latte Twist: Add 1 tbsp instant espresso powder to the custard base for a coffee kick. I did this on a whim one morning, and it was incredible. The coffee doesn’t overpower the pumpkin—it just adds depth.
- Nut-Free Option: This recipe is naturally nut-free if you use heavy cream. Just check your pumpkin pie spice for any nut-based additives (most are fine, but it’s worth a look).
- Different Sweeteners: I’ve tested this with erythritol, allulose, and monk fruit. Allulose gives the smoothest texture with no cooling aftertaste. Erythritol can have a slight cooling effect, but it’s barely noticeable with the spices. Stevia works too, but start with half the amount and adjust to taste.
- Seasonal Variations: In the summer, swap the pumpkin for mashed cooked butternut squash and add a pinch of cardamom. In the winter, add a tablespoon of dark rum or bourbon to the custard for warmth. I tried the bourbon version last December, and it was a hit at my holiday party.
Serving & Storage Suggestions
These custard cups are versatile, and how you serve them can change the whole experience.
Serving Temperature: Serve cold, straight from the fridge. The texture is silkiest when chilled. If you prefer a warmer dessert, let them sit at room temperature for 15 minutes before serving. I’ve done both, and cold is my preference—it makes the spices pop.
Presentation Ideas: Top each custard with a dollop of whipped cream (I make mine with heavy cream, a splash of vanilla, and a sprinkle of cinnamon). Add a few toasted pecans or a dusting of nutmeg for a fancy touch. For Thanksgiving, I serve them on a platter with fresh cranberries and mint leaves—it looks stunning with minimal effort.
Complementary Dishes: These custards pair beautifully with a cup of hot coffee or spiced chai. For a full low-carb dessert spread, serve them alongside my flourless chocolate lava cake or a plate of cinnamon sugar keto donuts. The contrast of rich chocolate and spiced pumpkin is divine.
Storage Instructions: Store leftover custards in the refrigerator, covered, for up to 5 days. Cover each ramekin with plastic wrap or transfer to an airtight container. The custards will firm up slightly over time, but the flavor actually improves. I’ve eaten them on day four, and they were still perfect.
Freezing Instructions: These custards freeze surprisingly well. Wrap each cooled ramekin tightly in plastic wrap, then foil, and freeze for up to 3 months. Thaw overnight in the refrigerator before serving. The texture might be slightly less silky, but still delicious. I’ve frozen a batch for Thanksgiving prep before, and nobody could tell the difference.
Reheating Tips: If you prefer warm custard, reheat gently in a 300°F oven for 10 minutes, or microwave on low power in 15-second intervals. Be careful not to overheat, or the custard will curdle. Honestly, I prefer them cold, but to each their own.
Nutritional Information & Benefits
Here’s the breakdown for one custard cup (without whipped cream), based on the recipe as written:
- Calories: 185
- Fat: 16g
- Saturated Fat: 9g
- Carbohydrates: 6g
- Fiber: 2g
- Net Carbs: 4g
- Protein: 7g
- Sugar: 3g (from pumpkin and cream, no added sugar)
Health Benefits: Pumpkin is packed with vitamin A (over 200% of your daily needs per cup), which supports eye health and immune function. The eggs provide high-quality protein and choline, which is great for brain health. The spices—cinnamon, ginger, and nutmeg—have anti-inflammatory properties and can help with blood sugar regulation.
Dietary Considerations: This recipe is naturally low-carb, gluten-free, and vegetarian. It’s also nut-free if you use heavy cream. For dairy-free, use the substitutions mentioned above. It’s not vegan, but the vegan variation is a solid alternative.
My Wellness Perspective: I love this recipe because it feels indulgent but is actually packed with nutrients. It’s the kind of dessert that satisfies your sweet tooth without derailing your health goals. I’ve been eating low-carb for two years now, and this is one of my go-to recipes when I need something that feels like a treat but isn’t loaded with sugar and empty calories.
Conclusion
I’ll be honest with you—I didn’t expect to fall this hard for a crustless pumpkin pie. But these Healthy Crustless Pumpkin Pie Custard Cups have become a staple in my kitchen, and I think they’ll become one in yours too. They’re quick, easy, and they taste like the best parts of fall without all the carbs and sugar.
What I love most about this recipe is how adaptable it is. You can make it dairy-free, change up the spices, or add a splash of bourbon for a grown-up twist. It’s forgiving, it’s delicious, and it’s the kind of dessert that makes you feel good about what you’re eating. Honestly, it’s the closest I’ve come to recreating that memory from Mrs. Kowalski’s kitchen—minus the burnt fingers and Polish muttering.
So go ahead and give these a try. Make them for Thanksgiving, make them for a Tuesday, make them just because. And when you do, I’d love to hear about it. Leave a comment below and tell me how yours turned out—did you add a twist? Did your family love them? Let’s keep the conversation going. Happy baking, friends.
Frequently Asked Questions
Can I make these crustless pumpkin pie custard cups ahead of time?
Absolutely! In fact, I recommend it. These custards need at least 2 hours to chill and set, so making them a day ahead is perfect. They actually taste better the next day because the spices have time to meld together. Store them covered in the fridge for up to 5 days.
Why did my custard turn out watery?
Watery custard usually means one of two things: either your pumpkin puree was too watery (drain it next time through a fine-mesh strainer), or you didn’t bake it long enough. The custards should have a slight jiggle in the center when done, but if they’re still liquid, give them 5 more minutes in the oven.
Can I use a different sweetener?
Yes! I’ve tested this with erythritol, allulose, and monk fruit sweetener. Allulose gives the smoothest texture with no cooling aftertaste. If using stevia, start with half the amount and adjust to taste. Just avoid liquid sweeteners, as they can throw off the liquid-to-egg ratio.
Can I bake these without a water bath?
You can, but I don’t recommend it. The water bath creates a gentle, even heat that prevents the custard from curdling or cracking. Without it, you’ll likely end up with dry, rubbery custards. If you’re in a pinch, place a small oven-safe dish of water on the rack below the custards to create steam.
How do I know when the custards are done baking?
The edges should be set and slightly golden, while the centers should jiggle like firm Jell-O when you gently shake the ramekin. If the centers are still liquid, bake for 3-5 more minutes. If the tops are cracking, you’ve overbaked them—try checking earlier next time.
Pin This Recipe!
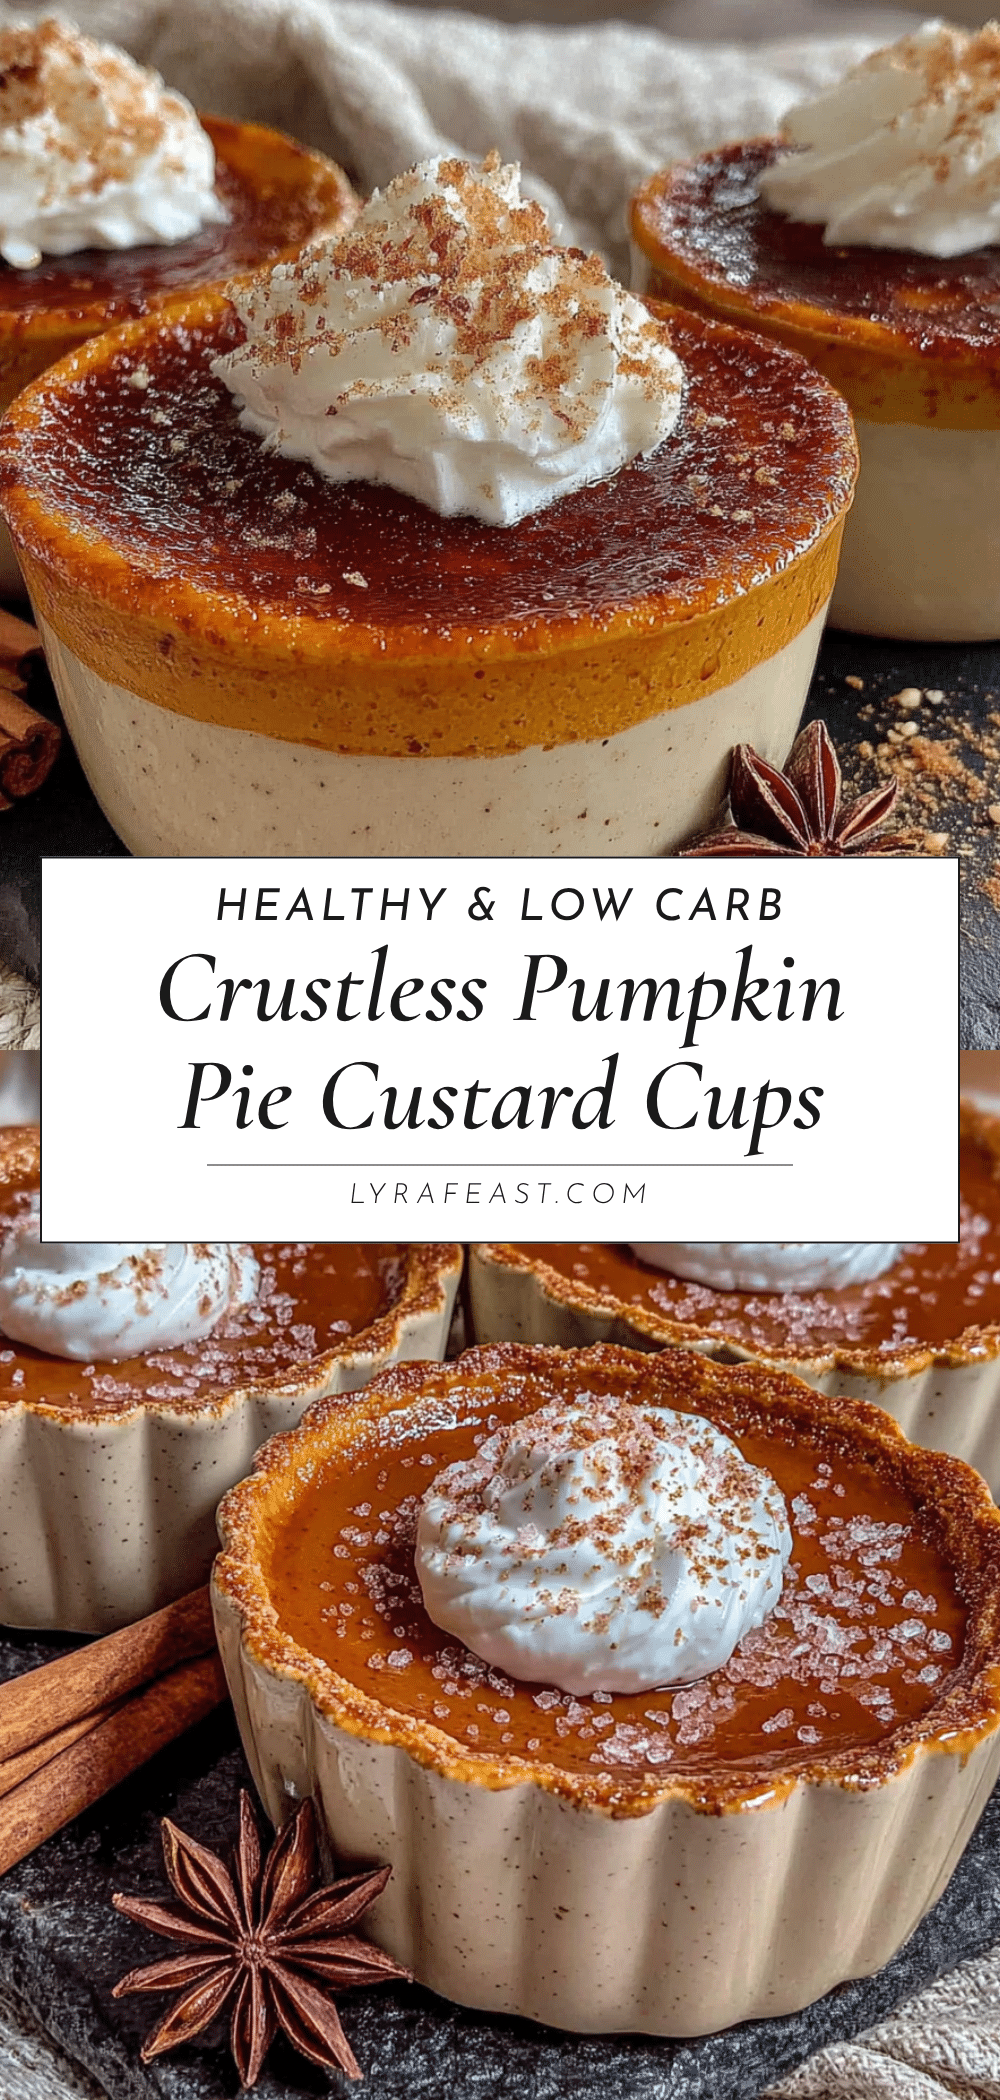
Healthy Crustless Pumpkin Pie Custard Cups: Easy Low Carb Dessert
These Healthy Crustless Pumpkin Pie Custard Cups are a quick and easy low-carb dessert that captures the warm, spiced flavor of fall without the carbs or sugar. Made with simple ingredients like pumpkin puree, cream cheese, and a perfect blend of spices, they’re silky smooth and incredibly satisfying.
- Prep Time: 10 minutes
- Cook Time: 30 minutes
- Total Time: 40 minutes
- Yield: 6 servings 1x
- Category: Dessert
- Cuisine: American
Ingredients
- 1 cup pumpkin puree (100% pure pumpkin, not pumpkin pie filling)
- 4 large eggs, room temperature
- 1/2 cup heavy cream
- 4 oz cream cheese, softened
- 1/3 cup granulated sweetener of choice (e.g., Lakanto monk fruit sweetener, erythritol, or allulose)
- 1 tsp vanilla extract (pure vanilla)
- 1 1/2 tsp pumpkin pie spice
- 1/2 tsp ground cinnamon (Ceylon cinnamon recommended)
- 1/4 tsp ground ginger
- 1/8 tsp ground nutmeg (freshly grated if possible)
- Pinch of salt
- For Topping (Optional):
- 1/2 cup heavy cream (for whipping)
- 1 tbsp powdered sweetener (e.g., Swerve confectioners)
- 1/2 tsp vanilla extract
- Optional: a sprinkle of cinnamon or nutmeg on top
Instructions
- Preheat your oven to 325°F (163°C). Place a kettle of water on to boil for the water bath. Arrange six 8-ounce ramekins in a large baking dish, ensuring they don’t touch each other.
- Soften the cream cheese. If forgotten, microwave on low power for 10-15 seconds until soft but not melted.
- In a large mixing bowl, combine the softened cream cheese, pumpkin puree, heavy cream, and vanilla extract. Whisk until smooth. Use an electric hand mixer on low speed for 30 seconds if lumps remain.
- Add the eggs one at a time, whisking gently after each addition. Do not overmix; the mixture should be smooth and slightly thick.
- In a small bowl, whisk together the sweetener, pumpkin pie spice, cinnamon, ginger, nutmeg, and salt.
- Slowly add the dry ingredients to the wet mixture, whisking constantly. Scrape the bottom and sides of the bowl with a rubber spatula to ensure everything is incorporated.
- Optional but recommended: Pour the mixture through a fine-mesh strainer into a clean bowl or large measuring cup to catch any lumps.
- Divide the custard evenly among the six ramekins, filling them about 3/4 full. Tap each ramekin gently on the counter to release air bubbles.
- Carefully pour the hot water from the kettle into the baking dish, filling until it reaches halfway up the sides of the ramekins. Be careful not to splash water into the ramekins.
- Bake for 30-35 minutes. The custards are done when the edges are set and the centers jiggle slightly when gently shaken. Start checking at 28 minutes.
- Remove the ramekins from the water bath using a spatula or tongs. Let them cool on a wire rack for 15 minutes, then refrigerate for at least 2 hours before serving.
Notes
The water bath is essential for a silky texture; do not skip it. Use room temperature eggs to prevent lumps. For best results, chill the custards for at least 2 hours or overnight. The custards can be stored in the refrigerator for up to 5 days or frozen for up to 3 months.
Nutrition
- Serving Size: 1 custard cup (witho
- Calories: 185
- Sugar: 3
- Fat: 16
- Saturated Fat: 9
- Carbohydrates: 6
- Fiber: 2
- Protein: 7
Keywords: crustless pumpkin pie, low carb dessert, keto pumpkin custard, healthy fall dessert, sugar free pumpkin pie, easy pumpkin custard



