There used to be a tiny bakery in my neighborhood called The Spider’s Web that made the most incredible Halloween dirt cups. When they closed after just two seasons, I felt a genuine pang of loss. I mean, they had this amazing little patio strung with orange lights, and their dirt cups weren’t just kid stuff. They were rich, creamy, and had this perfect crumbly texture on top. After twelve tries — and one particularly disastrous batch that turned into chocolate soup — I finally cracked the code.
Let me be honest, that first successful attempt happened on a rainy Tuesday afternoon. I had my kitchen counter covered in crushed cookies, and I was determined to get that exact texture. The gummy worms kept sticking to my fingers, the kids kept asking for tastes, and at one point I dropped an entire bag of Oreos on the floor. But when I spooned that first bite into my mouth, I knew I had it. It was exactly like the bakery version, maybe even better.
These cozy mini Halloween dirt cups with gummy worms aren’t just another dessert recipe. They’re the kind of treat that makes you feel like a kid again, even if you’re making them for your own little monsters. Maybe you’ve been there too — searching for that one recipe that brings back a specific memory, a particular taste from a place that no longer exists. Well, this is that recipe. And trust me, you’re going to love how simple these are to put together.
Why You’ll Love This Recipe
These cozy mini Halloween dirt cups with gummy worms have become my go-to for every fall gathering, and honestly, they’ve never let me down. Here’s why this version stands out from all the other recipes out there:
- Quick & Easy: Comes together in under 20 minutes, perfect for last-minute Halloween parties or when the kids suddenly announce they need treats for school tomorrow.
- Simple Ingredients: No fancy trips to specialty stores needed. You likely have most of these items in your pantry right now.
- Perfect for Halloween: Great for classroom parties, trunk-or-treat events, or a cozy night in with the family.
- Crowd-Pleaser: Always gets rave reviews from kids and adults alike. I’ve seen grown-ups sneak seconds when they think no one is looking.
- Unbelievably Delicious: The texture combo of silky chocolate pudding and crunchy cookie crumbs is pure comfort food magic.
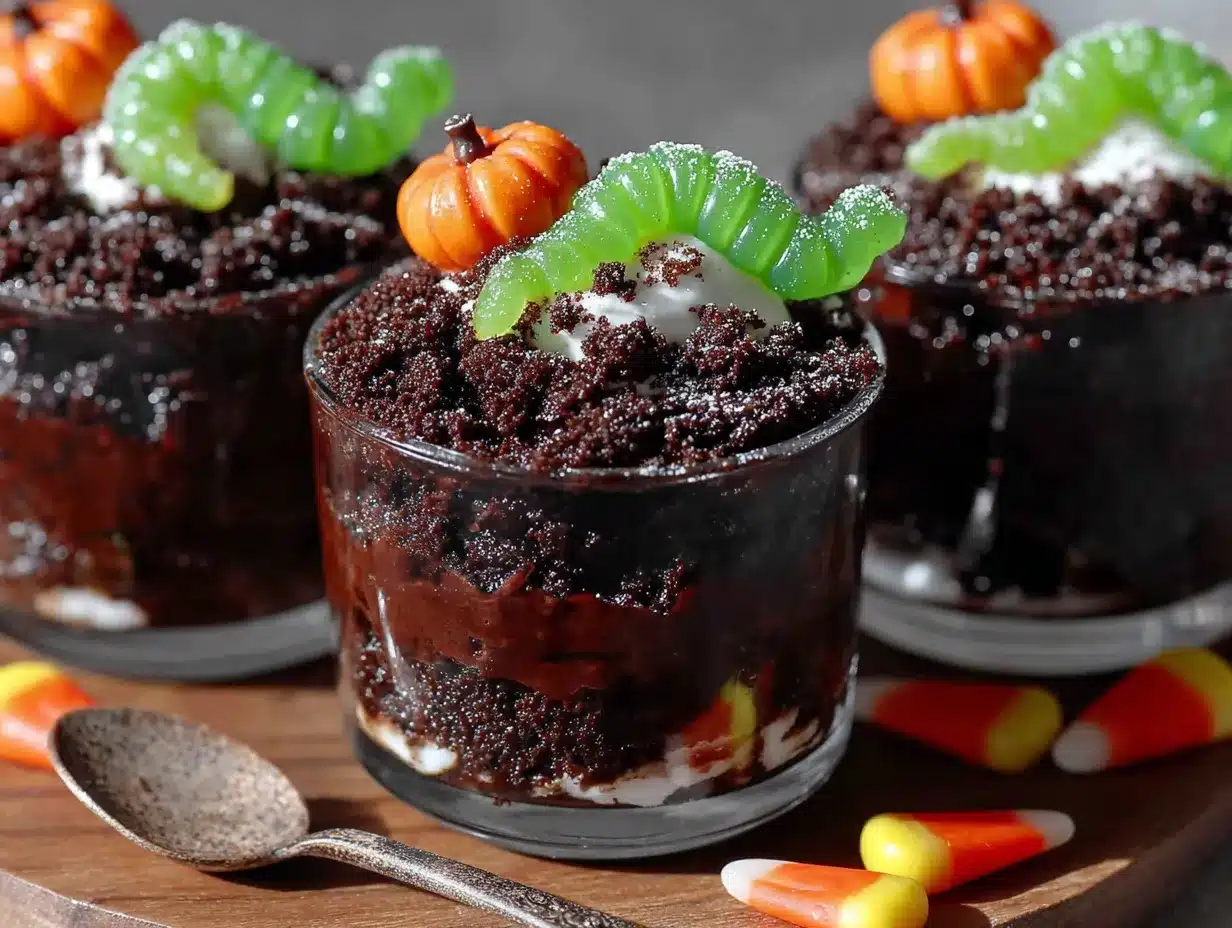
What makes this recipe different is the technique I learned from all those failed attempts. Instead of just layering ingredients, I let the pudding set for just the right amount of time before adding the cookie dirt. This creates that perfect contrast between creamy and crunchy that made the bakery version so special. It’s not just another dirt cup recipe — it’s the one that makes you close your eyes after the first bite and remember why you love Halloween in the first place.
What Ingredients You Will Need
This recipe uses simple, wholesome ingredients to deliver that cozy, nostalgic flavor without any fuss. Most of these are pantry staples you probably already have, which makes these mini Halloween dirt cups perfect for spontaneous baking sessions.
For the Chocolate Pudding Base
- 1 package (3.9 ounces) instant chocolate pudding mix (I prefer Jell-O brand for consistent texture)
- 2 cups cold whole milk (adds richness; use 2% if that’s what you have)
- 1 teaspoon vanilla extract (pure, not imitation, for deeper flavor)
For the Cookie Dirt
- 20 chocolate sandwich cookies (Oreos work best, but any brand will do)
- 2 tablespoons unsalted butter, melted
- 1 tablespoon granulated sugar
For the Assembly
- 12 mini clear plastic cups (4-ounce size works perfectly)
- 12 gummy worms (sour or regular, your choice)
- Optional: 2 tablespoons chocolate shavings for extra texture
- Optional: 1 tablespoon green food coloring for spooky pudding
When choosing your gummy worms, I recommend the classic Trolli brand. They hold their shape well and have that perfect chewy texture. If you’re making these for a school party, check for any allergy concerns with your group. Some gummy worms contain gelatin, so you might want to look for vegetarian-friendly options if needed.
For the cookie crumbs, you want them finely crushed but not powdery. I’ve found that putting the cookies in a zip-top bag and crushing them with a rolling pin gives you the most control. If you’re in a hurry, a food processor works great — just pulse don’t blend continuously, or you’ll end up with cookie dust.
Equipment Needed
You don’t need anything fancy to make these cozy mini Halloween dirt cups with gummy worms. Here’s what you’ll need:
- 12 mini clear plastic cups (4-ounce size) — I found mine at the dollar store
- Medium mixing bowl for the pudding
- Whisk or electric hand mixer
- Rolling pin or food processor for crushing cookies
- Zip-top bag for crushing cookies
- Measuring cups and spoons
- Small spatula for scraping bowls
- Optional: piping bag or zip-top bag with corner snipped for clean pudding layering
If you don’t have plastic cups, small mason jars work beautifully and make the presentation even cuter. I’ve also used small glass ramekins when I wanted to be fancy. The key is to use clear containers so everyone can see those gummy worms peeking through the dirt layers.
One tip I learned the hard way: make sure your cups are completely dry before you start layering. Any moisture on the inside will make the pudding slide down unevenly. I always give mine a quick wipe with a paper towel before starting.
Preparation Method
Making these cozy mini Halloween dirt cups with gummy worms is almost too easy. But don’t let the simplicity fool you — the technique matters. Here’s how to get it perfect every time.
- Start with the pudding. In your medium mixing bowl, whisk together the instant chocolate pudding mix and 2 cups cold milk. Whisk for about 2 minutes until it starts to thicken. The mixture should look glossy and smooth, with no lumps. If you’re using the green food coloring for a spooky twist, add it now and stir until evenly colored.
- Let the pudding set. This is the crucial step most people skip. Let the pudding sit in the refrigerator for exactly 5 minutes. Not 3, not 7. Five minutes. You want it to be thickened but still pourable. If it sets too long, it becomes too stiff to layer properly.
- Crush the cookies. While the pudding is setting, place your chocolate sandwich cookies in a zip-top bag. Seal it tight, then use your rolling pin to crush them into fine crumbs. You want a mix of textures — some fine powder, some tiny chunks. The chunks create that realistic dirt look. If you’re using a food processor, pulse 5-6 times, then check the texture.
- Mix the cookie dirt. In a small bowl, combine your crushed cookies with 2 tablespoons melted butter and 1 tablespoon sugar. Stir with a fork until the butter is evenly distributed. The mixture should look like damp soil. Set aside.
- Layer the cups. Spoon about 2 tablespoons of the slightly set pudding into each mini cup. You want to fill them about halfway. Tap the cup gently on the counter to settle the pudding and remove any air bubbles.
- Add the gummy worms. Take two gummy worms and gently press them into the pudding layer. Let one end stick up slightly, as if the worm is trying to escape. This is the fun part — get creative with how you position them!
- Top with more pudding. Spoon another 2 tablespoons of pudding over the gummy worms, filling the cup almost to the top. Leave about 1/4 inch of space for the cookie dirt layer.
- Add the dirt layer. Sprinkle about 1-2 tablespoons of the cookie crumb mixture over the top of each cup. You want a thick, even layer that completely covers the pudding. This is the “dirt” that makes these cups so fun.
- Final touches. Place one more gummy worm on top of the dirt layer, partially buried. Add a few chocolate shavings if you’re using them. The final presentation should look like a tiny garden bed with worms crawling through the dirt.
- Chill and serve. Refrigerate the cups for at least 30 minutes before serving. This allows the layers to settle and the flavors to meld together. They’re best served cold, straight from the fridge.
One thing I learned from my early attempts: don’t overfill the cups. Leave that little bit of space at the top for the cookie dirt. If you fill them to the brim, the dirt layer will just slide off when you try to serve them. Trust me on this one.
Cooking Tips & Techniques
After making these cozy mini Halloween dirt cups with gummy worms about fifty times, I’ve picked up a few tricks that make a real difference. Let me share what I’ve learned.
Don’t skimp on the chilling time. I know it’s tempting to serve these right away, especially when the kids are hovering around the kitchen. But giving them that full 30 minutes in the fridge makes a huge difference. The pudding firms up, the cookie crumbs soften slightly, and everything comes together into one cohesive bite. I once served them after only 10 minutes, and the layers just fell apart.
Watch your milk temperature. Cold milk is non-negotiable for instant pudding. I’ve tried it with room temperature milk, and the pudding never sets properly. It stays runny and doesn’t hold its shape. If you forget to chill your milk, pop it in the freezer for 10 minutes before starting.
Crush cookies in batches. Don’t try to crush all 20 cookies at once in a food processor. Work in batches of 5-6 cookies for more consistent texture. The first time I made these, I dumped all the cookies in at once and ended up with a mix of whole cookies and dust. Not good.
Make extra cookie dirt. I always make about 25% more than I think I need. The kids love snacking on it, and having extra means you can refresh the tops before serving if they start to look flat. Plus, it stores well in an airtight container for up to a week.
Keep gummy worms cold. Warm gummy worms are sticky and hard to work with. Keep them in the fridge until you’re ready to use them. Cold worms are firmer and easier to position in the pudding without them flopping over.
Variations & Adaptations
One of the best things about these cozy mini Halloween dirt cups with gummy worms is how easy they are to customize. Here are some variations I’ve tried and loved:
Dairy-Free Version: Swap the whole milk for oat milk or almond milk. Just make sure you use a brand that’s thick enough for pudding. I’ve had good luck with oat milk — it gives a creamier texture than almond milk. Use dairy-free butter in the cookie dirt, and check that your pudding mix is dairy-free (most instant pudding mixes are).
Gluten-Free Option: Use gluten-free chocolate sandwich cookies for the dirt layer. There are several good brands available now that taste almost identical to the original. Just make sure your pudding mix is certified gluten-free, as some brands use wheat starch.
Spooky Green Version: Add green food coloring to the pudding for a slime effect. I do this for Halloween parties, and the kids go crazy for it. Use about 1/4 teaspoon of gel food coloring for the most vibrant color. Start with less and add more until you get the shade you want.
Peanut Butter Twist: Swirl in 2 tablespoons of peanut butter into the pudding before layering. This adds a salty-sweet element that pairs beautifully with the chocolate. I tried this on a whim one afternoon, and it’s been a family favorite ever since.
Mint Chocolate Version: Add 1/2 teaspoon of peppermint extract to the pudding for a minty surprise. Top with crushed candy canes instead of chocolate shavings. This is perfect for a Christmas-themed party or a winter treat.
Serving & Storage Suggestions
These cozy mini Halloween dirt cups with gummy worms are best served cold, straight from the refrigerator. The contrast between the chilled pudding and the slightly softened cookie dirt is what makes them so satisfying.
For presentation, arrange the cups on a platter or tray lined with fake spider webs or orange tissue paper. I like to add a few extra gummy worms around the base of the cups for a playful touch. If you’re serving these at a party, label them with a cute sign like “Worm Garden” or “Dirt Cups.”
These pair wonderfully with warm apple cider or hot chocolate. The warmth of the drink balances the cold dessert perfectly. For a grown-up gathering, try serving them alongside a pumpkin spice latte or a dark coffee.
Storage Instructions: These cups will keep in the refrigerator for up to 3 days. Cover them with plastic wrap or transfer to an airtight container to prevent the cookie dirt from absorbing moisture and becoming soggy. If you’re making them ahead for a party, I recommend adding the cookie dirt layer no more than 2 hours before serving for the best texture.
Freezer Instructions: You can freeze these cups for up to 1 month. Prepare them completely, then wrap each cup individually in plastic wrap before placing in a freezer bag. To serve, thaw in the refrigerator overnight. The texture will be slightly different — the pudding will be a bit icier — but they’re still delicious.
One thing I love about these is how the flavors develop over time. The chocolate deepens, and the cookie crumbs soften just enough to create a cake-like texture. Honestly, I think they taste even better on day two.
Nutritional Information & Benefits
While these cozy mini Halloween dirt cups with gummy worms are definitely a treat, they’re not without some redeeming qualities. Here’s the nutritional breakdown for one serving (based on 12 cups):
| Nutrient | Amount Per Serving |
|---|---|
| Calories | 185 |
| Total Fat | 8g |
| Saturated Fat | 4g |
| Cholesterol | 15mg |
| Sodium | 210mg |
| Total Carbohydrates | 28g |
| Dietary Fiber | 1g |
| Sugars | 19g |
| Protein | 3g |
The chocolate pudding provides a small amount of calcium from the milk, and the cookies offer a tiny bit of iron. The gummy worms are mostly sugar, but they do make people smile — and that counts for something, right?
For those with dietary concerns, this recipe contains dairy and gluten. It can be made dairy-free and gluten-free with the substitutions mentioned earlier. Always check labels on pudding mixes and cookies for potential allergens.
I personally see these as a special occasion treat — perfect for Halloween, birthday parties, or when you just need a little comfort. They’re not an everyday dessert, but they’re worth every single calorie when you do make them.
Conclusion
These cozy mini Halloween dirt cups with gummy worms have become a staple in my fall recipe rotation, and I can’t imagine Halloween without them. They bring back that warm feeling of the bakery that started it all, but now they’re even better because I get to share them with the people I love.
I hope you give this recipe a try and make it your own. Maybe you’ll add extra gummy worms, or swap in a different pudding flavor, or surprise your kids with them after a long day. That’s the beauty of this recipe — it’s simple enough to be foolproof but versatile enough to be endlessly customizable.
If you make these, I’d love to hear how they turned out. Drop a comment below and let me know if your little monsters approved. Did you try any fun variations? Did your gummy worms escape from the cups like mine did the first time? Share your stories — I read every single one, and they honestly make my day.
Until next time, happy haunting and happy baking. You’ve got this!
Frequently Asked Questions
Can I make these dirt cups ahead of time?
Absolutely! You can prepare these up to 3 days in advance. Just wait to add the cookie dirt layer until about 2 hours before serving for the best crunchy texture. If you add it too early, the crumbs will get soggy.
Can I use homemade pudding instead of instant?
Yes, you can use homemade chocolate pudding. Just make sure it’s completely cooled and thickened before layering. Homemade pudding tends to be less firm than instant, so you might need to let it set longer in the fridge.
What if I can’t find gummy worms?
No problem! You can use any gummy candy you have on hand. Gummy spiders, bats, or even gummy bears work great. For a non-gummy option, try using candy eyeballs or small chocolate spiders.
How do I prevent the gummy worms from sinking to the bottom?
Let the pudding set for 5 minutes before adding the worms. This creates enough structure to hold them in place. You can also add them in the middle layer rather than pressing them all the way down.
Can I make these in larger cups?
Definitely! Use 8-ounce cups and double the layers. Just increase the chilling time to about 45 minutes to ensure everything sets properly. They make great individual desserts for parties.
Pin This Recipe!
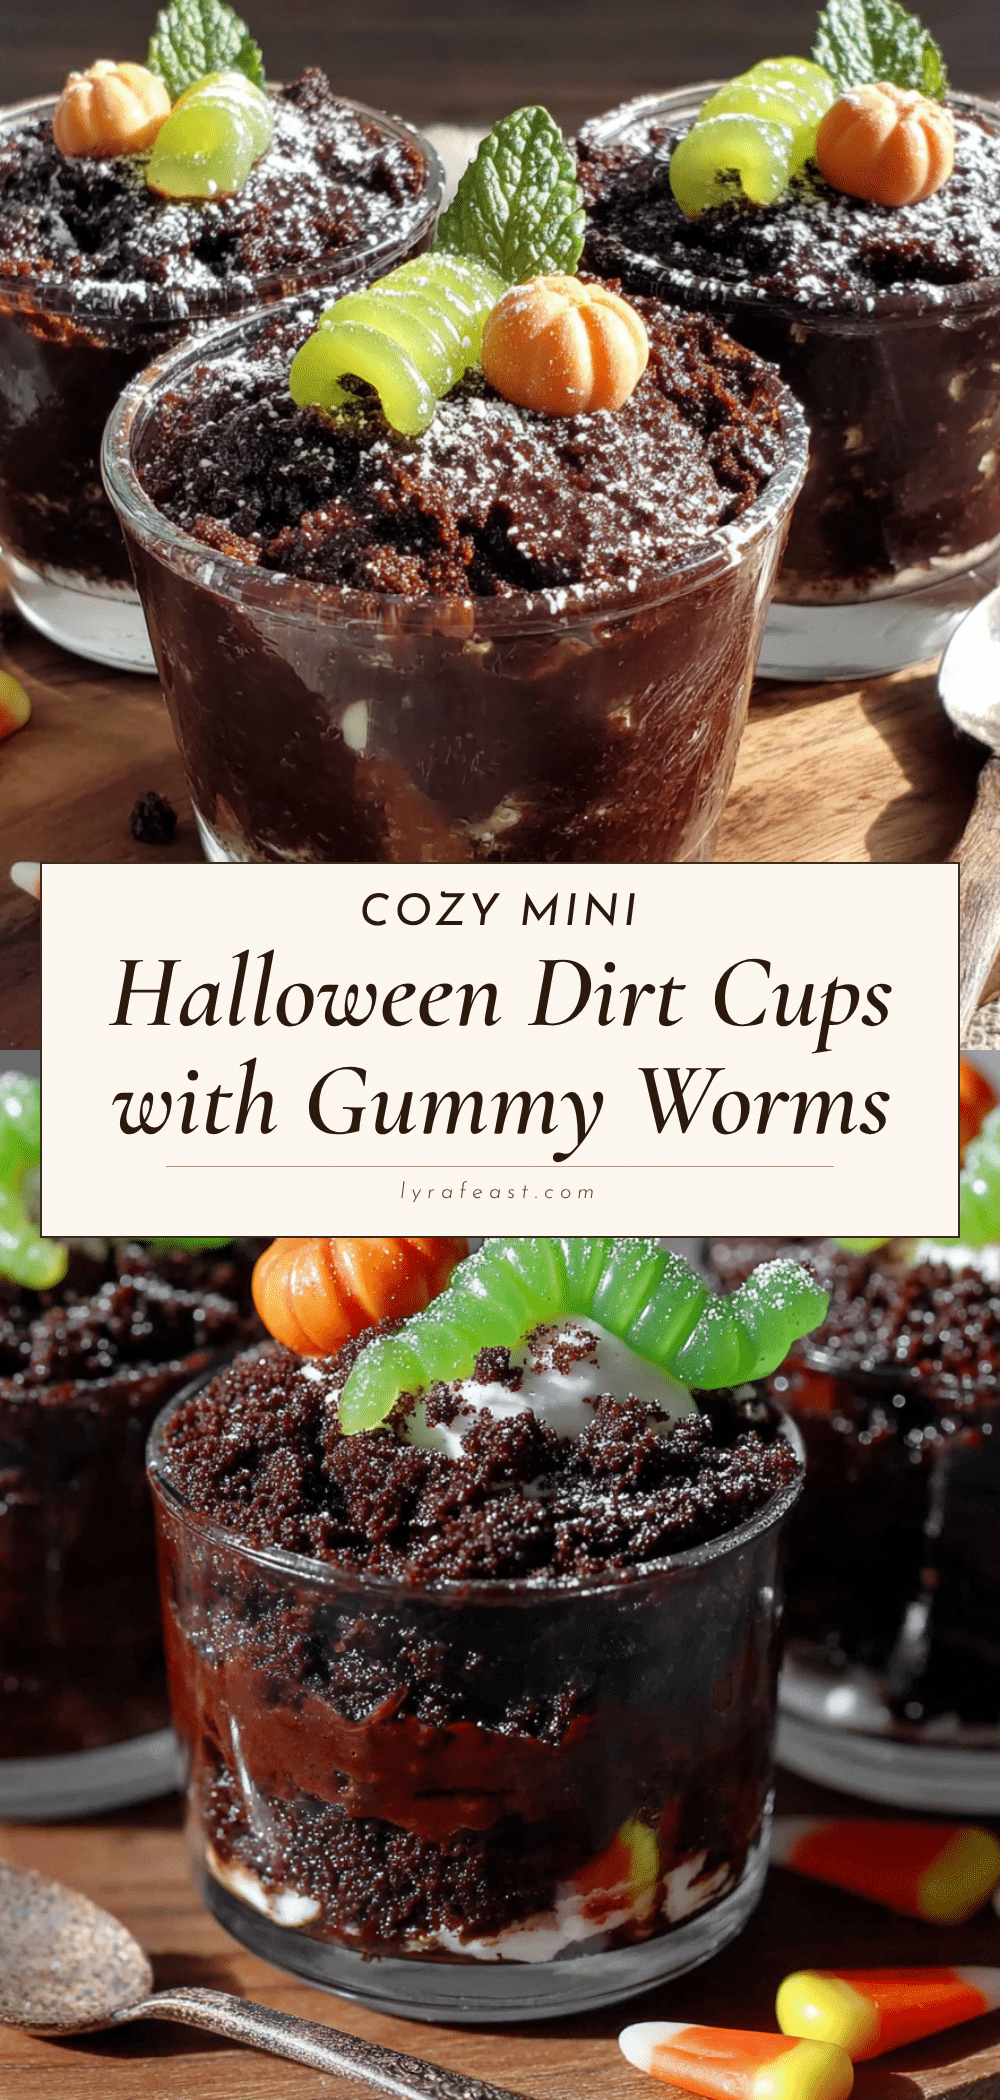
Cozy Mini Halloween Dirt Cups: Easy Gummy Worm Dessert
These cozy mini Halloween dirt cups with gummy worms are a quick and easy dessert that brings back nostalgic bakery flavors. With silky chocolate pudding, crunchy cookie dirt, and playful gummy worms, they’re perfect for Halloween parties or a fun family treat.
- Prep Time: 15 minutes
- Cook Time: 0 minutes
- Total Time: 45 minutes (includes chilling time)
- Yield: 12 servings 1x
- Category: Dessert
- Cuisine: American
Ingredients
- 1 package (3.9 ounces) instant chocolate pudding mix (Jell-O brand recommended)
- 2 cups cold whole milk (or 2% milk)
- 1 teaspoon vanilla extract (pure, not imitation)
- 20 chocolate sandwich cookies (Oreos work best)
- 2 tablespoons unsalted butter, melted
- 1 tablespoon granulated sugar
- 12 mini clear plastic cups (4-ounce size)
- 12 gummy worms (sour or regular, Trolli brand recommended)
- Optional: 2 tablespoons chocolate shavings
- Optional: 1 tablespoon green food coloring
Instructions
- In a medium mixing bowl, whisk together the instant chocolate pudding mix and 2 cups cold milk for about 2 minutes until it starts to thicken. The mixture should be glossy and smooth. If using green food coloring, add it now and stir until evenly colored.
- Refrigerate the pudding for exactly 5 minutes to set slightly. It should be thickened but still pourable.
- While the pudding sets, place the chocolate sandwich cookies in a zip-top bag. Seal and crush with a rolling pin into fine crumbs with some small chunks. Alternatively, pulse in a food processor 5-6 times.
- In a small bowl, combine the crushed cookies with melted butter and sugar. Stir with a fork until the mixture looks like damp soil. Set aside.
- Spoon about 2 tablespoons of the slightly set pudding into each mini cup, filling them about halfway. Tap the cup gently on the counter to settle the pudding and remove air bubbles.
- Press two gummy worms into the pudding layer, letting one end stick up slightly.
- Spoon another 2 tablespoons of pudding over the gummy worms, filling the cup almost to the top, leaving about 1/4 inch of space.
- Sprinkle about 1-2 tablespoons of the cookie crumb mixture over the top of each cup to form a thick, even dirt layer.
- Place one more gummy worm on top of the dirt layer, partially buried. Add chocolate shavings if desired.
- Refrigerate the cups for at least 30 minutes before serving. Serve cold.
Notes
For best texture, let the pudding set exactly 5 minutes before layering. Use cold milk for proper pudding setting. Crush cookies in batches for consistent texture. Make extra cookie dirt for snacking or refreshing tops. Keep gummy worms cold for easier handling. Add the cookie dirt layer no more than 2 hours before serving for crunchiest texture. These cups can be stored in the refrigerator for up to 3 days, or frozen for up to 1 month.
Nutrition
- Serving Size: 1 mini cup
- Calories: 185
- Sugar: 19
- Sodium: 210
- Fat: 8
- Saturated Fat: 4
- Carbohydrates: 28
- Fiber: 1
- Protein: 3
Keywords: Halloween dirt cups, gummy worm dessert, chocolate pudding cups, easy Halloween dessert, mini dirt cups, no-bake dessert



