My sister had avoided pumpkin desserts for as long as I can remember. Every fall, while the rest of us went crazy for pumpkin pie and pumpkin bread and basically anything pumpkin-spiced, she’d just shrug and reach for the apple crisp instead. It wasn’t a dramatic stance or anything—she just didn’t get the hype. Too heavy, too sweet, too much, she’d say. Then last October, I was testing a batch of these lighter pumpkin cheesecake bars for a friend’s dinner party, and I caught her standing at the kitchen counter, fork in hand, scraping the last bits from the pan I’d left to cool. She didn’t even try to look innocent about it. “These are different,” she mumbled, reaching for another corner piece. And that, honestly, was the best compliment I could have gotten.
This recipe started because I wanted something that felt like a real fall treat—cinnamon and ginger and that warm, cozy pumpkin flavor—but didn’t leave you feeling like you needed a nap afterward. You know that feeling, right? When a dessert is so heavy you regret it before you even finish? I wanted none of that. I wanted the kind of bar you could eat after dinner and still feel good about, the kind that satisfies that craving without going overboard. So I played around with cream cheese ratios and cut back on sugar and swapped in a few smarter ingredients, and somehow ended up with these creamy, tangy, perfectly spiced bars that even my pumpkin-skeptic sister couldn’t resist.
The gingersnap crust was an accident, honestly. I ran out of graham crackers and had a bag of gingersnaps sitting in the pantry, and let me tell you—it was one of those happy kitchen mistakes that you keep making on purpose. The spicy, molasses-y crunch pairs so perfectly with the smooth, light filling that I can’t imagine making them any other way now. Three years later, these bars are still the first thing I bake when the weather turns cool, and they never last more than a day. Maybe you’ve been there too, looking for a fall dessert that actually delivers without weighing you down. These are it.
Why You’ll Love This Recipe
These lighter pumpkin cheesecake bars aren’t just another pumpkin recipe floating around the internet. They’re the result of a lot of trial and error, a few burned batches, and one very patient family who taste-tested more versions than I’d like to admit. Here’s what makes them stand out:
- Quick & Easy: From start to finish, you’re looking at about 45 minutes of active time. The oven does most of the work, and the hardest part is waiting for them to chill.
- Simple Ingredients: No weird health-food store finds here. Everything is available at a regular grocery store, and you probably already have most of the spices in your cabinet.
- Perfect for Fall Gatherings: These bars travel well, slice neatly, and look gorgeous on a dessert table. Thanksgiving, potlucks, cozy dinner parties—they fit right in.
- Crowd-Pleaser: I’ve served these to kids, grandparents, and everyone in between. The pumpkin skeptics always go back for seconds, and the cheesecake lovers can’t believe they’re lighter.
- Unbelievably Delicious: The texture is what gets people. It’s creamy without being heavy, rich without being overwhelming, and the gingersnap crust adds this little crunch that makes every bite interesting.
What really sets this recipe apart is the technique. By blending the cream cheese with Greek yogurt and a touch of cottage cheese, you get that luscious, velvety texture without needing a ton of heavy cream or extra sugar. It’s a trick I picked up from a pastry chef friend years ago, and it’s never let me down. The result is a bar that tastes indulgent—like real cheesecake—but leaves you feeling satisfied, not stuffed. It’s comfort food that actually works with your day, not against it.
What Ingredients You Will Need
This recipe relies on simple, wholesome ingredients that come together to create something genuinely special. The beauty is in the balance—each component has a job to do, and they all work together beautifully.
For the Gingersnap Crust
- 1 ½ cups gingersnap cookie crumbs (about 30 cookies, finely crushed—I prefer Anna’s or Mi-Del for that perfect spice level)
- 3 tablespoons unsalted butter, melted (adds richness and helps the crust hold together)
- 1 tablespoon granulated sugar (just a touch to balance the ginger’s bite)
- Pinch of salt (trust me on this—it makes the crust pop)
For the Lighter Cheesecake Filling
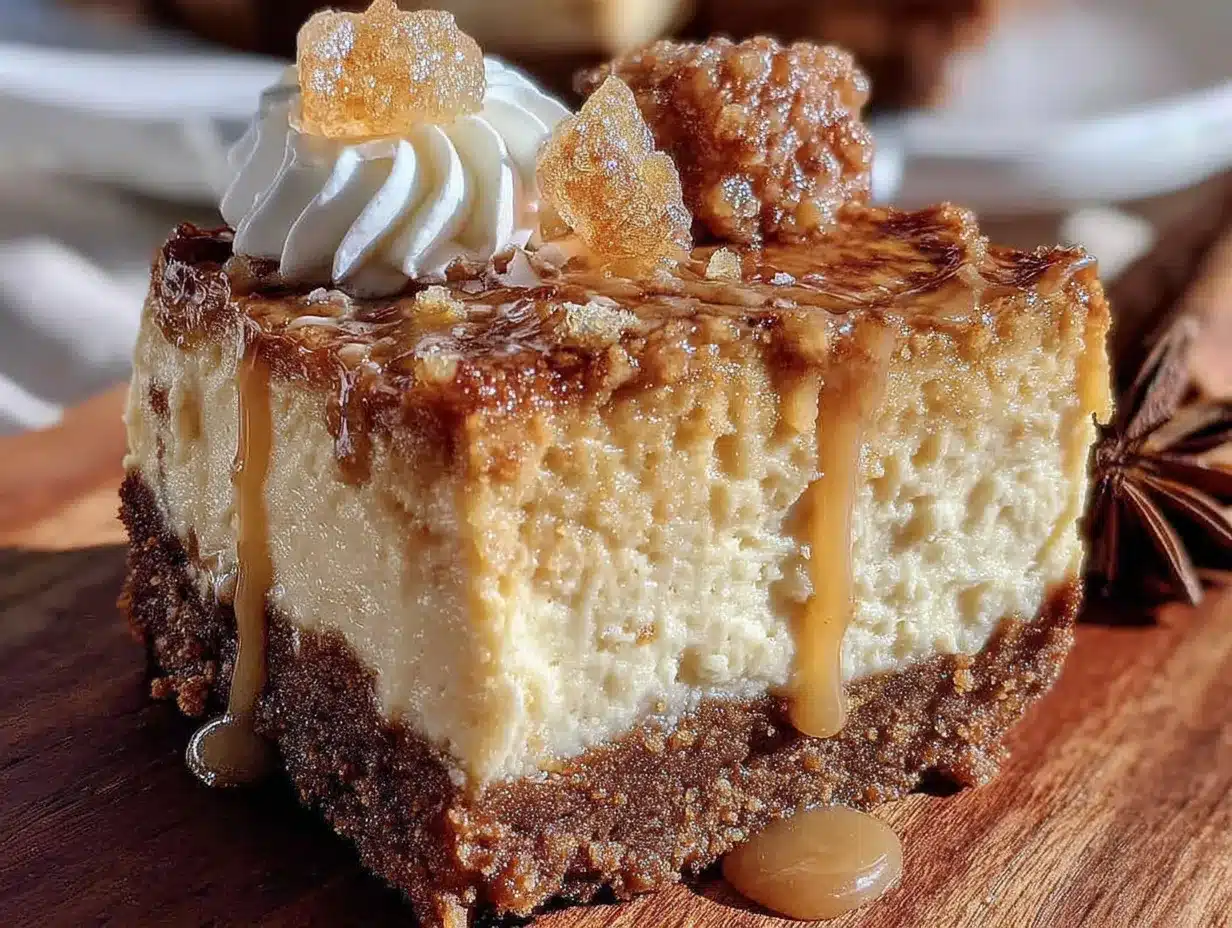
- 8 ounces reduced-fat cream cheese, softened (Neufchâtel works great here; full-fat is fine too if that’s what you have)
- ½ cup plain Greek yogurt (2% or full-fat—avoid nonfat, it gets too watery)
- ¼ cup cottage cheese (small-curd is best; it blends completely and adds creaminess without extra fat)
- ⅔ cup granulated sugar (I’ve tested this with coconut sugar too—use ¾ cup if swapping)
- 2 large eggs, room temperature (cold eggs can make the filling lumpy)
- 1 cup canned pumpkin puree (not pumpkin pie filling—just pure pumpkin. Libby’s is my go-to)
- 1 teaspoon vanilla extract
- 1 ½ teaspoons pumpkin pie spice (or make your own: ½ tsp cinnamon, ¼ tsp ginger, ¼ tsp nutmeg, ⅛ tsp cloves)
- ½ teaspoon ground cinnamon (for extra warmth)
- ¼ teaspoon salt
A note on the cottage cheese: I know it sounds weird in cheesecake, but I promise you can’t taste it. It just makes the filling extra creamy and light. Just blend it well—a food processor or high-speed blender works perfectly. If you’re dairy-sensitive, you can use dairy-free cream cheese and skip the cottage cheese, though the texture will be a bit denser.
Equipment Needed
You don’t need a professional kitchen to pull these off, but a few specific tools make the process much smoother.
- 8×8-inch baking pan (a 9×9 works too, but the bars will be slightly thinner and may need less baking time)
- Parchment paper (for easy lifting—let it hang over the edges like handles)
- Food processor or blender (for the filling; a hand mixer works but won’t get the cottage cheese as smooth)
- Mixing bowls (one medium, one large)
- Rolling pin or zip-top bag (for crushing the gingersnaps)
- Rubber spatula (for scraping every last bit of filling—trust me, you want it all)
- Measuring cups and spoons
If you don’t have a food processor, you can crush the gingersnaps in a bag with a rolling pin (it’s actually kind of therapeutic), and use an electric mixer for the filling. Just blend the cottage cheese separately until smooth before adding it to the cream cheese mixture. I’ve done it both ways, and while the food processor is faster, the hand-mixed version works just fine. Also, a glass or metal baking pan works better than ceramic here—it conducts heat more evenly and gives you a cleaner slice.
Preparation Method
Take your time with these steps—each one builds on the last, and rushing is the fastest way to end up with cracks or a soggy crust. I learned that the hard way, believe me.
- Preheat your oven to 325°F (160°C). Line your 8×8-inch pan with parchment paper, leaving a 2-inch overhang on two opposite sides. This is your lifting handle later, so don’t skip it.
- Make the crust: Crush the gingersnap cookies into fine crumbs. I use a food processor for this—just pulse until they look like sand. If you’re going the bag-and-rolling-pin route, make sure no large chunks remain. Transfer the crumbs to a medium bowl, add the melted butter, sugar, and salt, and stir with a fork until everything is evenly moistened. It should look like wet sand that holds together when you squeeze it.
- Press the crust: Dump the crumb mixture into your prepared pan and press it down firmly and evenly. Use the bottom of a measuring cup or a flat glass to really pack it in—a loose crust will fall apart when you cut the bars. Bake for 10 minutes, then set aside to cool slightly while you make the filling.
- Blend the cottage cheese: In your food processor or blender, combine the cottage cheese and Greek yogurt. Blend until completely smooth, about 30 seconds. Scrape down the sides and blend again if needed—you don’t want any graininess.
- Cream the cream cheese: In a large bowl, beat the softened cream cheese with an electric mixer (or in the food processor if you’ve cleaned it) until smooth and fluffy, about 2 minutes. Add the sugar and beat for another minute until light and creamy.
- Add the wet ingredients: Beat in the eggs one at a time, mixing on low speed after each just until combined. Overmixing at this stage adds too much air and can cause cracks later. Add the pumpkin puree, vanilla, pumpkin pie spice, cinnamon, and salt, and mix until just incorporated.
- Fold in the yogurt mixture: Gently fold the cottage cheese-yogurt blend into the pumpkin mixture using a rubber spatula. Fold until no streaks remain, but don’t stir aggressively—you want a smooth, uniform batter.
- Pour and spread: Pour the filling over the pre-baked crust and spread it evenly with your spatula. Give the pan a gentle tap on the counter to release any air bubbles.
- Bake: Place the pan in the center of the oven and bake for 35-40 minutes. The edges should be set and slightly puffed, but the center should still jiggle just a little when you gently shake the pan. That slight jiggle is your friend—it means the bars will be creamy, not dry. Overbaking is the number one mistake, so start checking at 30 minutes.
- Cool completely: Transfer the pan to a wire rack and let it cool to room temperature, about 1 hour. Then cover loosely with plastic wrap and refrigerate for at least 4 hours, but overnight is better. I know the waiting is the worst part, but the bars need this time to set properly. Cutting them too early is like opening the oven door on a soufflé—everything collapses.
- Slice and serve: Once fully chilled, lift the bars out using the parchment overhang. Use a sharp knife to slice into 16 squares, wiping the blade clean between cuts for neat edges. Serve cold or at room temperature—both are delicious.
Cooking Tips & Techniques
After making these bars more times than I can count, I’ve collected a few hard-won lessons that will save you from my early mistakes.
Room temperature ingredients matter more than you think. Cold cream cheese makes lumpy filling, and cold eggs can cause the batter to curdle. Set everything out on the counter about 30 minutes before you start. If you’re in a rush, you can soften cream cheese in the microwave for about 10 seconds, but honestly, the patience pays off.
Don’t overmix the filling. I know it’s tempting to keep beating until everything is perfectly smooth, but too much air creates bubbles that rise to the surface and cause cracks. Mix just until combined, and use the food processor for the cottage cheese step separately. This was my biggest failure in early batches—I ended up with bars that looked like a topographical map.
The water bath debate. Traditional cheesecake recipes often call for a water bath to prevent cracking. For these bars, I’ve found it’s unnecessary. The thinner profile and the Greek yogurt make them much more forgiving. Just don’t overbake them, and you’ll be fine. If you’re nervous, you can place a shallow pan of hot water on the bottom rack of the oven while they bake—it adds humidity without the hassle of wrapping your pan in foil.
Chill time is non-negotiable. I once tried to speed things up by popping the bars in the freezer for an hour, thinking it would work the same. It didn’t. The texture was gummy and the slices were a mess. Four hours in the fridge is the minimum, and overnight is genuinely better. The flavors meld, the texture firms up perfectly, and you get those clean, beautiful slices that make people think you bought them from a bakery.
Use a hot knife for clean cuts. Run your knife under hot water, dry it off, and slice. Wipe and repeat between each cut. It takes an extra 30 seconds and makes the difference between messy smears and picture-perfect bars.
Variations & Adaptations
One of the best things about this recipe is how flexible it is. I’ve played around with it quite a bit, and here are some versions that really worked.
Gluten-Free Version: Swap the gingersnaps for gluten-free gingersnap cookies (Mi-Del makes a good one) or use gluten-free graham crackers with a teaspoon of ground ginger and a pinch of cloves added to the crust. The texture is slightly less crisp, but the flavor is still spot-on.
Dairy-Free Adaptation: Use dairy-free cream cheese (I like Kite Hill or Miyoko’s) and replace the Greek yogurt with a thick coconut yogurt. Skip the cottage cheese or use a silken tofu instead—blend it the same way. The crust can be made with vegan butter. The bars will be a little softer, so chill them extra long before slicing.
Lower Sugar Option: Reduce the sugar to ⅓ cup and add 2 tablespoons of maple syrup or honey. The bars will be slightly less sweet but still delicious, and the pumpkin flavor really shines through. I’ve made this version for friends who are watching their sugar intake, and they always ask for the recipe.
Pumpkin-Spiced Swirl: Reserve about ¼ cup of the plain cheesecake filling before adding the pumpkin. Pour the pumpkin filling into the crust, then drop spoonfuls of the reserved plain filling on top and swirl with a knife. It gives you a beautiful marbled effect that looks impressive with zero extra effort.
Chocolate Gingersnap Crust: Replace half the gingersnaps with chocolate wafer cookies. The chocolate-and-ginger combo is unexpectedly amazing, and it adds a deeper, more complex flavor that pairs beautifully with the pumpkin. I stumbled on this one by accident when I ran out of gingersnaps and had some chocolate wafers left over from another recipe.
Serving & Storage Suggestions
These bars are versatile enough to work for almost any occasion, but a few serving touches can really make them shine.
Serving temperature: I prefer them cold straight from the fridge—the texture is firmer and the flavors are clean and bright. But they’re also lovely at room temperature, especially if you’re serving them alongside coffee or tea. Just let them sit out for about 15 minutes before serving.
Presentation ideas: A light dusting of powdered sugar or a tiny pinch of flaky sea salt right before serving adds a professional touch. For a fancier presentation, top each bar with a dollop of lightly sweetened whipped cream and a sprinkle of cinnamon. During the holidays, I sometimes add a small candied ginger piece on top—the chewy, spicy-sweet bite is a perfect finish.
What to serve with them: These bars pair beautifully with a hot cup of chai, a spiced latte, or even a glass of cold milk (seriously, it’s a classic for a reason). If you’re serving them as part of a dessert spread, they work well alongside apple crisp, pumpkin bread, or a simple vanilla panna cotta.
Storage: Keep the bars in an airtight container in the refrigerator for up to 5 days. Place a piece of parchment paper between layers if you’re stacking them. The flavor actually improves after the first day as the spices meld together. I’ve never had them last long enough to test beyond 5 days, but I’ve heard they freeze beautifully.
Freezing instructions: To freeze, place the fully cooled and sliced bars on a baking sheet and freeze until solid, about 2 hours. Transfer to a freezer-safe container with parchment between layers. They’ll keep for up to 3 months. Thaw in the refrigerator overnight before serving. I keep a batch in the freezer for unexpected guests or those random Tuesday nights when you just need a little something special.
Nutritional Information & Benefits
One of the best things about these lighter pumpkin cheesecake bars is that they actually deliver on the “lighter” promise without tasting like a compromise. Here’s what you’re looking at per bar (based on 16 servings):
- Calories: Approximately 165
- Fat: 9g (with 5g saturated)
- Carbohydrates: 18g
- Protein: 5g
- Fiber: 1g
- Sugar: 13g
Compared to traditional pumpkin cheesecake bars, you’re saving about 80-100 calories and 8-10 grams of fat per serving. That’s significant, especially when you consider that the texture and flavor are just as satisfying.
The health benefits go beyond the numbers. Pumpkin is packed with vitamin A (great for your eyes and immune system), fiber, and antioxidants. The Greek yogurt adds protein and probiotics, while the ginger in the crust offers anti-inflammatory properties. Even the cottage cheese contributes calcium and protein without the heavy fat content of traditional cheesecake ingredients. It’s not health food, exactly, but it’s a dessert that actually adds some nutritional value to your day. And honestly, that feels pretty good.
If you’re watching your sugar intake, you can easily reduce the sugar to ⅓ cup without sacrificing texture—the pumpkin and spices provide plenty of natural sweetness. For a lower-carb option, use a sugar substitute like monk fruit or allulose in the filling (though the crust is harder to modify).
Conclusion
These lighter pumpkin cheesecake bars have become my go-to fall dessert for a reason. They’re the kind of recipe that makes people close their eyes after the first bite, the kind that gets requested year after year, the kind that proves you don’t need a ton of butter and sugar to make something truly special. The gingersnap crust is crunchy and spicy, the filling is creamy and light, and the whole thing comes together in less time than it takes to watch a movie. What’s not to love?
I hope you give these a try, and I hope you make them your own. Maybe you’ll add a swirl of caramel on top, or swap the gingersnaps for speculoos cookies, or double the recipe because one pan is never enough. Whatever you do, let me know how it goes. Drop a comment below, tag me in your photos, or send me a message—I genuinely love hearing about your kitchen victories (and your happy accidents too). After all, that’s how the best recipes are born.
Happy baking, friends. And remember—the secret ingredient is always a little patience.
Frequently Asked Questions
Can I use fresh pumpkin instead of canned?
Yes, you can, but you’ll need to roast and puree it first, then drain off any excess liquid. Canned pumpkin is more consistent in moisture content, which is why I prefer it for baking. If you use fresh, expect a slightly softer texture.
Why did my cheesecake bars crack on top?
Cracks usually happen from overbaking or overmixing. The center should still jiggle slightly when you take them out of the oven. Also, make sure your cream cheese is fully softened and you’re not beating too much air into the batter. A gentle hand goes a long way.
Can I make these bars in a 9×13 pan?
Absolutely. Double all the ingredients and increase the baking time to about 45-50 minutes. Keep an eye on the center—it should still have that slight jiggle. You’ll get about 24 bars from the larger pan.
How do I know when the bars are done baking?
The edges will look set and slightly puffed, and the center will jiggle like Jell-O when you gently shake the pan. If the center looks liquid or sloshy, give it another 5 minutes. If it’s completely firm and doesn’t move at all, you’ve probably overbaked it.
Can I skip the cottage cheese?
You can, but the texture won’t be as light and creamy. Replace it with an equal amount of Greek yogurt or, if you want a richer result, use an extra 2 ounces of cream cheese. The bars will still be delicious, just a bit denser.
Pin This Recipe!
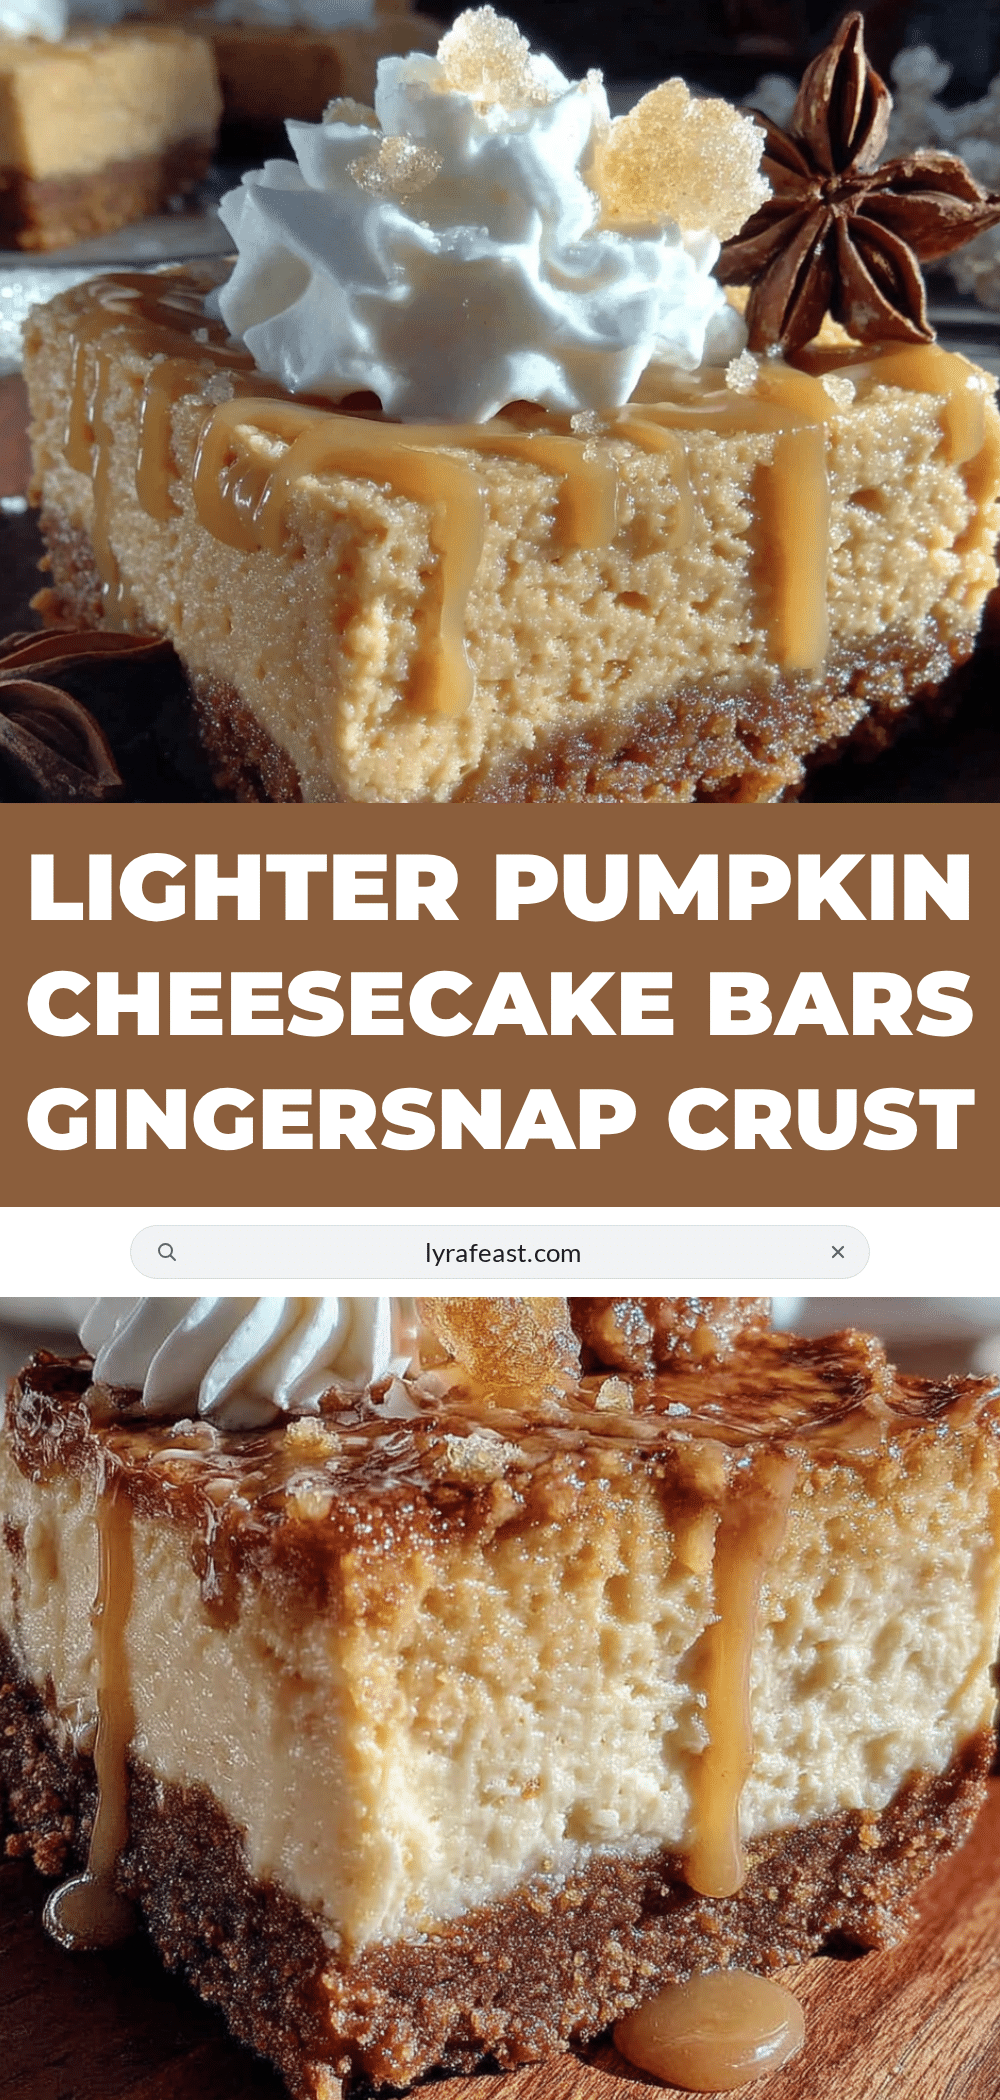
Lighter Pumpkin Cheesecake Bars with Gingersnap Crust
These lighter pumpkin cheesecake bars feature a spicy gingersnap crust and a creamy, tangy filling made with Greek yogurt and cottage cheese. They’re a guilt-free fall treat that even pumpkin skeptics love.
- Prep Time: 15 minutes
- Cook Time: 35-40 minutes
- Total Time: 4 hours 50 minutes (including chilling)
- Yield: 16 bars 1x
- Category: Dessert
- Cuisine: American
Ingredients
- 1 ½ cups gingersnap cookie crumbs (about 30 cookies, finely crushed)
- 3 tablespoons unsalted butter, melted
- 1 tablespoon granulated sugar
- Pinch of salt
- 8 ounces reduced-fat cream cheese, softened
- ½ cup plain Greek yogurt (2% or full-fat)
- ¼ cup cottage cheese (small-curd)
- ⅔ cup granulated sugar
- 2 large eggs, room temperature
- 1 cup canned pumpkin puree (not pumpkin pie filling)
- 1 teaspoon vanilla extract
- 1 ½ teaspoons pumpkin pie spice
- ½ teaspoon ground cinnamon
- ¼ teaspoon salt
Instructions
- Preheat your oven to 325°F (160°C). Line an 8×8-inch baking pan with parchment paper, leaving a 2-inch overhang on two opposite sides.
- Make the crust: Crush the gingersnap cookies into fine crumbs. Transfer to a medium bowl, add melted butter, sugar, and salt, and stir until evenly moistened.
- Press the crust into the prepared pan firmly and evenly. Bake for 10 minutes, then set aside to cool slightly.
- Blend the cottage cheese and Greek yogurt in a food processor or blender until completely smooth, about 30 seconds.
- In a large bowl, beat the softened cream cheese with an electric mixer until smooth and fluffy, about 2 minutes. Add sugar and beat for another minute.
- Beat in the eggs one at a time on low speed until just combined. Add pumpkin puree, vanilla, pumpkin pie spice, cinnamon, and salt, and mix until just incorporated.
- Gently fold the cottage cheese-yogurt blend into the pumpkin mixture using a rubber spatula until no streaks remain.
- Pour the filling over the pre-baked crust and spread evenly. Tap the pan gently on the counter to release air bubbles.
- Bake for 35-40 minutes, until edges are set and center jiggles slightly when shaken.
- Cool completely on a wire rack, about 1 hour. Then cover loosely with plastic wrap and refrigerate for at least 4 hours, preferably overnight.
- Once fully chilled, lift the bars out using the parchment overhang. Slice into 16 squares with a sharp knife, wiping the blade clean between cuts.
Notes
Room temperature ingredients are key for a smooth filling. Don’t overmix the batter to avoid cracks. Chill time is non-negotiable for clean slices. Use a hot knife for neat cuts.
Nutrition
- Serving Size: 1 bar
- Calories: 165
- Sugar: 13
- Fat: 9
- Saturated Fat: 5
- Carbohydrates: 18
- Fiber: 1
- Protein: 5
Keywords: pumpkin cheesecake bars, lighter cheesecake, gingersnap crust, fall dessert, pumpkin dessert, healthy cheesecake



