Introduction
“I wasn’t expecting to find the best corn on the cob recipe at the local flea market,” I confessed to my friend last summer. It was one of those scorching Saturday afternoons, and while browsing through dusty books and vintage kitchen gadgets, I stumbled across a handwritten note tucked inside a cookbook. The note was from someone named Gloria, who swore by her “juicy grilled or microwave-ready corn on the cob” method. Honestly, I was skeptical — grilling corn is classic, but microwave? That seemed like cheating.
Still, I gave it a shot that very evening, juggling some last-minute dinner prep and a few chaotic phone calls (you know how it goes). The smell of corn sizzling on the grill mixed with the quick convenience of the microwave option made me realize this recipe wasn’t just practical; it was downright addictive. The kernels were tender, juicy, and had this subtle smoky sweetness that made every bite feel like a summer celebration.
Maybe you’ve been there—craving perfectly cooked corn but short on time or outdoor space. This recipe stuck with me because it’s flexible, foolproof, and honestly, it’s the kind of simple joy that makes you close your eyes and savor the moment. So, whether you have a grill ready to fire up or just a microwave at your disposal, let me tell you how to make corn on the cob that’s juicy, flavorful, and easy enough for any day of the week.
Why You’ll Love This Recipe
After testing this corn on the cob recipe multiple times—on sweltering summer nights and rushed weekday dinners—I can confidently say it’s a keeper. Here’s why it stands out:
- Quick & Easy: Ready in under 15 minutes, perfect for busy evenings or last-minute BBQ cravings.
- Simple Ingredients: Only fresh corn, butter, salt, and optional seasonings—no fancy extras needed.
- Perfect for Any Occasion: Great for backyard barbecues, casual dinners, or adding a summery touch to weeknight meals.
- Crowd-Pleaser: Kids and adults alike can’t get enough of the juicy, tender kernels.
- Unbelievably Delicious: The grilling adds just the right smoky kiss, while the microwave method locks in natural sweetness and moisture.
This recipe isn’t just your average corn on the cob. The grilling technique caramelizes the sugars slightly, giving a subtle char that feels gourmet yet effortless. The microwave method, on the other hand, keeps the corn incredibly juicy with zero hassle—perfect when you can’t step outside or want dinner fast. I recommend trying both methods to find your favorite, but trust me, either way, you end up with corn that’s bursting with flavor.
It’s comfort food made easy, with that nostalgic taste that reminds me of summer evenings and laughter around the table. Whether you’re feeding a crowd or just craving a cozy snack, this corn on the cob recipe delivers every time.
What Ingredients You Will Need
This recipe uses simple, wholesome ingredients that let the natural sweetness of the corn shine through. Most are pantry staples, and you likely have them on hand already.
- Fresh Corn on the Cob: Choose ears with bright green husks and plump kernels. Smaller ears tend to be sweeter and more tender.
- Unsalted Butter: About 2 tablespoons (30g), softened for easy spreading. I like Plugrá for its creamy texture.
- Salt: Kosher or sea salt, to taste. Salt enhances sweetness and balances flavors perfectly.
- Black Pepper: Freshly cracked, optional but adds a nice touch of warmth.
- Optional Seasonings: Garlic powder, smoked paprika, or chili flakes for a little extra kick.
- Fresh Herbs: Chopped parsley or cilantro to sprinkle on top (adds color and brightness).
- Lemon or Lime Wedges: For a splash of acidity right before serving.
If you prefer dairy-free, swap butter for olive oil or a plant-based spread—still delicious! When grilling, husks can be soaked briefly in water to prevent burning, but if you’re using the microwave method, leave the husks on for natural steaming.
Equipment Needed
- Grill: Charcoal or gas grill works great. If you don’t have one, a grill pan on the stovetop can substitute.
- Microwave: A standard kitchen microwave is all you need for the quick method.
- Tongs: For safely turning corn on the grill.
- Brush or Knife: To spread butter evenly on cooked corn.
- Kitchen Timer: Helps keep track of cooking times for perfect doneness.
- Aluminum Foil: Optional for wrapping corn on the grill if you like a steamed effect with smoky flavor.
For grilling, I recommend a pair of long-handled tongs for safety and ease—mine have lasted years with minimal wear. If you’re on a budget and don’t have a grill, the microwave method is a fantastic alternative that requires zero extra tools beyond your microwave-safe plate.
Preparation Method
- Prepare the Corn: For grilling, gently peel back the husks without detaching them, remove the silk threads, and fold husks back into place. Soak the ears in cold water for 10 minutes to avoid burning. For microwaving, leave husks intact to lock in moisture.
- Grill the Corn: Preheat your grill to medium-high heat (about 400°F / 200°C). Place the soaked corn directly on the grill grates. Cook for 15-20 minutes, turning every 5 minutes with tongs to char evenly. The husks may blacken, but don’t worry—that’s flavor! The kernels should be tender and lightly browned.
- Microwave the Corn: Place one or two ears of corn with husks on a microwave-safe plate. Microwave on high for 4-5 minutes per ear (depending on your microwave wattage). Let cool briefly before husking—the steam inside will have cooked the kernels perfectly.
- Butter and Season: Once cooked, spread softened butter evenly over the hot corn. Sprinkle with salt, pepper, and any optional seasonings or herbs you like. A squeeze of lemon or lime adds a lovely bright contrast.
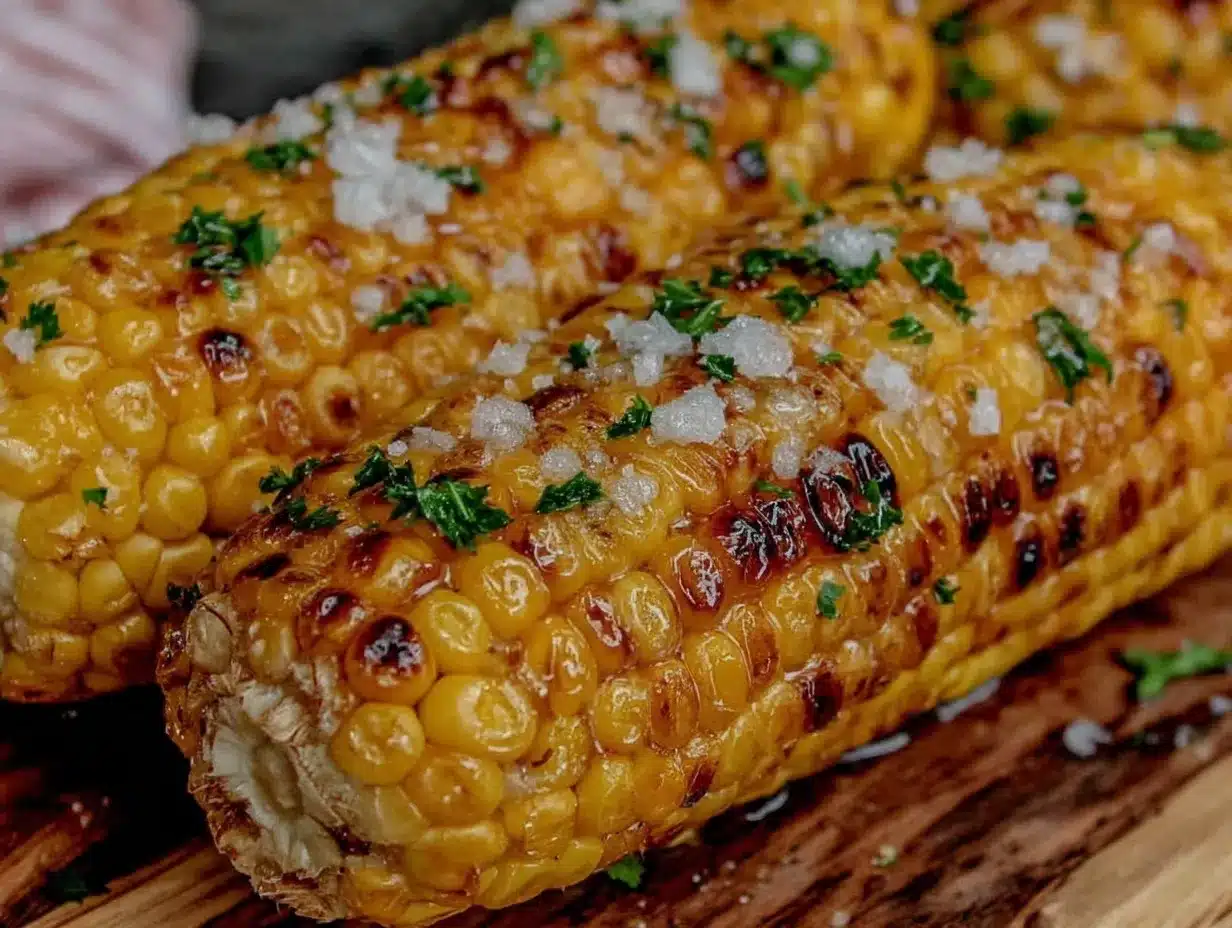
- Serve: Arrange on a platter and enjoy immediately. The corn should be juicy, tender, with a little smoky char from grilling or a sweet steamed flavor from the microwave.
Pro tip: If your grill seems too hot, move the corn to a cooler spot after the initial char to avoid burning. Also, don’t rush husking after microwaving—let it cool for a minute or two, or the steam can surprise you!
Cooking Tips & Techniques
Grilling corn on the cob feels like an art, but a few tricks make it foolproof. Start with soaking the husks; it’s a simple step that prevents them from catching fire while locking in moisture. When turning the corn, use tongs gently to avoid tearing the husks too much, which can let kernels dry out.
Microwaving corn with the husk on is honestly a game-changer for quick meals. The husk traps steam and cooks the corn evenly. I once tried microwaving without husks, and the kernels ended up a bit rubbery—so husks on is key!
Butter is a must, but spreading it while the corn is hot helps it melt into every crevice. For extra flavor, add a pinch of smoked paprika or even a dash of cayenne for subtle heat. If you’re a fan of spicy rubbed chicken, this seasoning combo will feel right at home.
Don’t forget the finishing touch—fresh herbs or a squeeze of citrus brightens the whole dish and balances richness. Timing is important, especially on the grill: turning the corn regularly prevents burning and promotes even cooking. For the microwave, start with 4 minutes for one ear and adjust based on your appliance.
One mistake I made early on was peeling the husks too soon after microwaving; the heat and steam can scorch your fingers. Let the corn rest for a minute, then peel carefully.
Variations & Adaptations
There are plenty of ways to make this corn on the cob recipe your own:
- Mexican Street Corn Style: Slather the grilled corn with mayo, sprinkle with cotija cheese, chili powder, and fresh cilantro for a zesty twist.
- Herbed Garlic Butter: Mix softened butter with finely minced garlic and chopped fresh herbs like rosemary or thyme before spreading on hot corn.
- Vegan Option: Use olive oil or coconut oil brushed on after cooking instead of butter, and add a pinch of smoked sea salt for depth.
- Seasonal Twist: In fall, sprinkle with a dash of cinnamon and brown sugar for a sweet-savory combo that’s surprisingly delightful.
- Microwave in Husk or Shucked: If you’re short on time, shuck the corn before microwaving and wrap it in a damp paper towel to keep it moist.
One personal favorite is the herbed garlic butter version—it feels fancy but takes just minutes, especially when paired with lemon rosemary roast chicken. Honestly, the combination never fails to impress guests at casual dinners.
Serving & Storage Suggestions
Serve corn on the cob hot and fresh for the best experience. Presentation-wise, arrange on a rustic wooden board with a few lemon wedges and extra butter on the side—simple and inviting. It pairs wonderfully with grilled meats, light salads, or even a chilled glass of white wine or iced tea.
If you need to store leftovers, wrap the corn tightly in plastic wrap or foil and refrigerate for up to 2 days. Reheat gently in the microwave for 1-2 minutes wrapped in a damp paper towel to keep it moist. Avoid overheating or the kernels can dry out.
Flavors tend to mellow a bit after refrigeration, so fresh corn is always best, but reheated corn still makes a satisfying snack or side. For longer storage, you can cut kernels off the cob and freeze them in airtight bags for later use in soups or salads.
Nutritional Information & Benefits
This delicious corn on the cob recipe is naturally gluten-free and low in fat (when you control the butter). One medium ear of corn (about 90g) provides roughly 90 calories, 2 grams of fiber, and essential vitamins like B-complex and vitamin C.
Corn is a good source of antioxidants, including lutein and zeaxanthin, which support eye health. The fiber content aids digestion and keeps you feeling full. Using fresh ingredients and minimal added fats makes this recipe a balanced, wholesome side dish.
For those watching carbs or on a low-sodium diet, you can easily control butter and salt amounts. Plus, the microwave method means no extra oils or fats if you prefer it plain and steamed.
Conclusion
This juicy, delicious corn on the cob recipe has become a staple in my kitchen for good reason. Whether you’re firing up a grill or just need a quick microwave option, it’s a straightforward way to get perfectly tender, flavorful corn every time. I love how versatile it is—you can keep it simple or add your own flair with spices and herbs.
Give it a try and make it your own! Share your favorite seasoning combos or tell me how you like to serve your corn on the cob. Trust me, once you nail this, you’ll find yourself craving it year-round.
Here’s to many joyful meals and juicy bites ahead!
Frequently Asked Questions
How long does it take to grill corn on the cob?
Grilling takes about 15-20 minutes over medium-high heat, turning every 5 minutes for even cooking and a nice char.
Can I microwave corn on the cob without the husk?
Yes, but wrap it in a damp paper towel to keep it moist. Cooking time may be shorter, around 3-4 minutes per ear.
What’s the best way to keep corn kernels juicy?
Cooking with the husk on—whether grilling or microwaving—traps steam and moisture, keeping kernels tender and juicy.
Can I prepare corn on the cob ahead of time?
You can cook corn in advance and refrigerate it for up to 2 days. Reheat gently in the microwave wrapped in a damp towel to maintain moisture.
Are there good alternatives to butter for topping corn?
Yes! Olive oil, coconut oil, or plant-based spreads work well, especially for dairy-free or vegan diets.
Pin This Recipe!
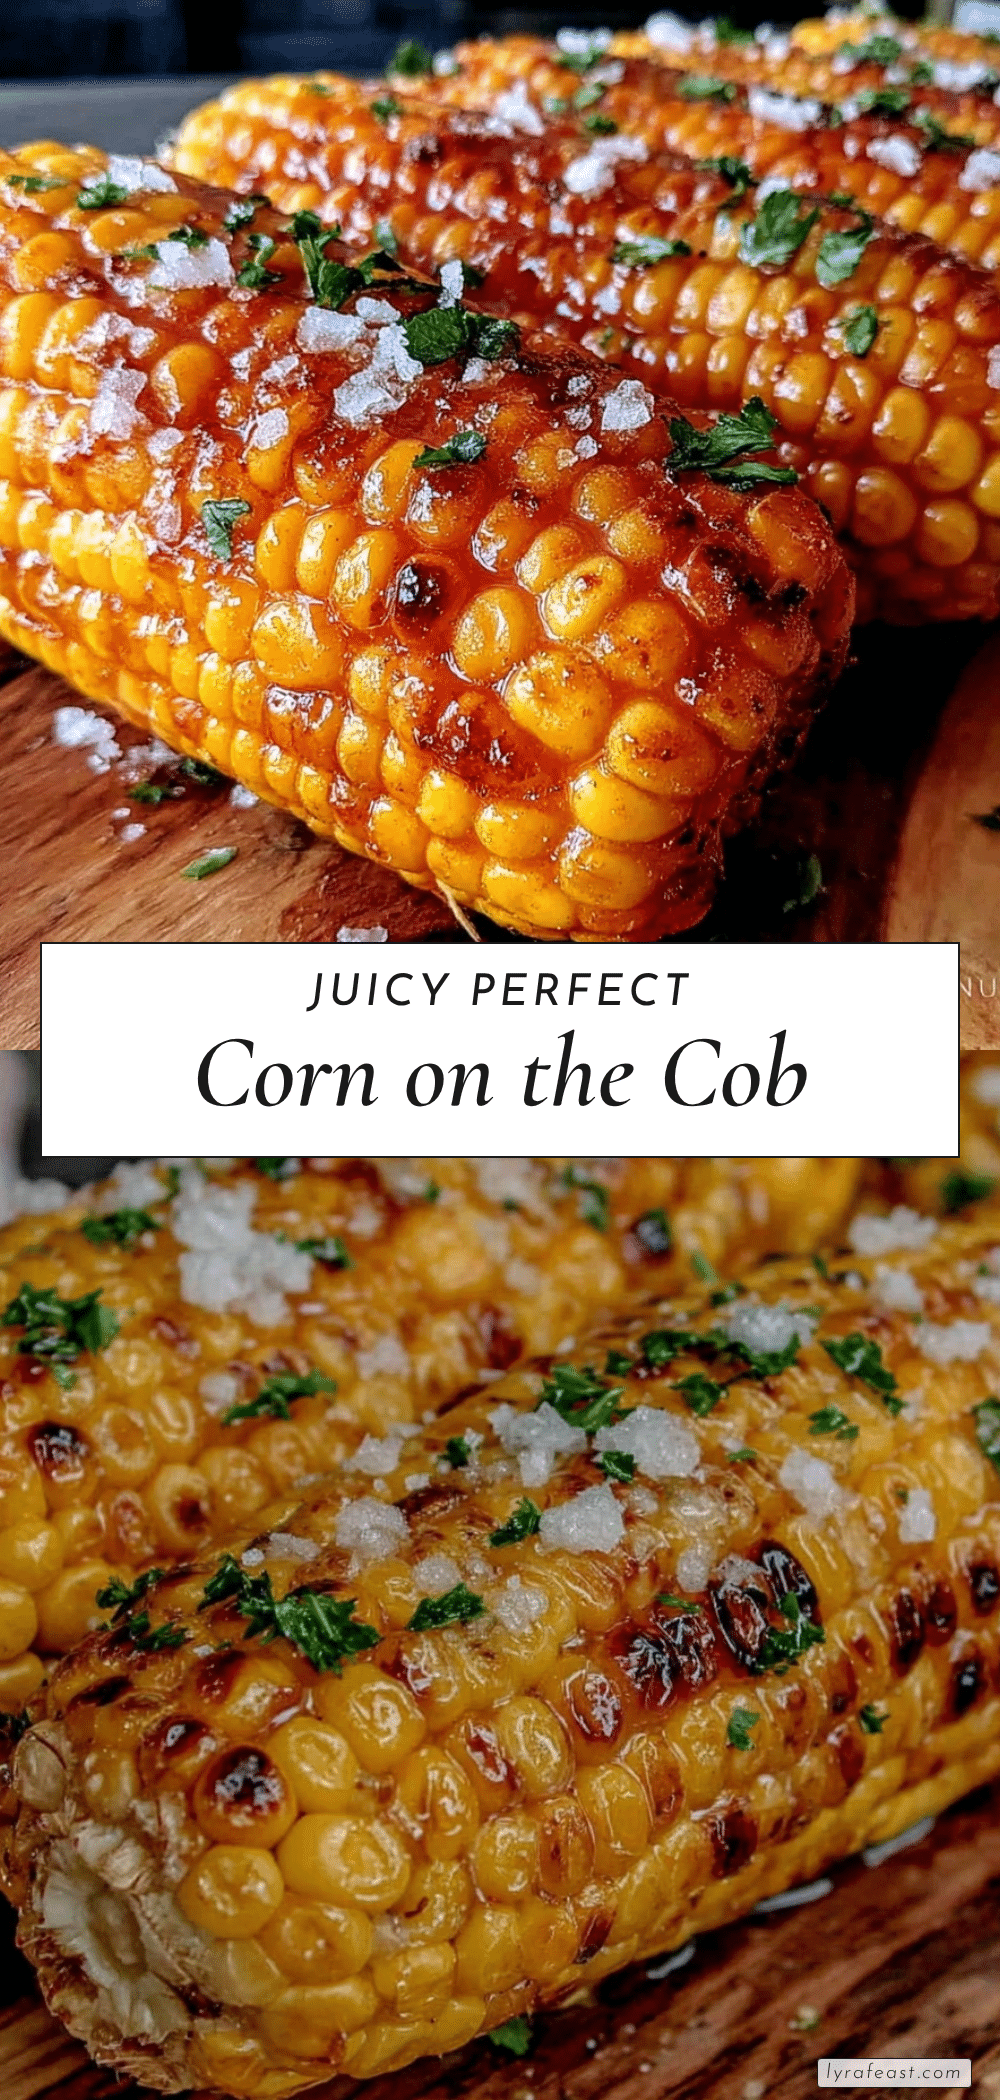
Delicious Corn on the Cob Recipe Easy Juicy Grilled and Microwave Ready
A flexible and foolproof corn on the cob recipe that can be grilled for a smoky flavor or microwaved for quick, juicy results. Perfect for busy evenings or backyard barbecues.
- Prep Time: 10 minutes
- Cook Time: 15-20 minutes (grilling) or 4-5 minutes per ear (microwave)
- Total Time: 25-30 minutes (grilling) or 15 minutes (microwave)
- Yield: 2-4 servings 1x
- Category: Side Dish
- Cuisine: American
Ingredients
- Fresh corn on the cob (ears with bright green husks and plump kernels)
- 2 tablespoons (30g) unsalted butter, softened
- Salt to taste (kosher or sea salt)
- Freshly cracked black pepper (optional)
- Optional seasonings: garlic powder, smoked paprika, chili flakes
- Fresh herbs (chopped parsley or cilantro)
- Lemon or lime wedges
Instructions
- Prepare the Corn: For grilling, gently peel back the husks without detaching them, remove the silk threads, and fold husks back into place. Soak the ears in cold water for 10 minutes to avoid burning. For microwaving, leave husks intact to lock in moisture.
- Grill the Corn: Preheat your grill to medium-high heat (about 400°F / 200°C). Place the soaked corn directly on the grill grates. Cook for 15-20 minutes, turning every 5 minutes with tongs to char evenly. The husks may blacken, but don’t worry—that’s flavor! The kernels should be tender and lightly browned.
- Microwave the Corn: Place one or two ears of corn with husks on a microwave-safe plate. Microwave on high for 4-5 minutes per ear (depending on your microwave wattage). Let cool briefly before husking—the steam inside will have cooked the kernels perfectly.
- Butter and Season: Once cooked, spread softened butter evenly over the hot corn. Sprinkle with salt, pepper, and any optional seasonings or herbs you like. A squeeze of lemon or lime adds a lovely bright contrast.
- Serve: Arrange on a platter and enjoy immediately. The corn should be juicy, tender, with a little smoky char from grilling or a sweet steamed flavor from the microwave.
Notes
Soak husks before grilling to prevent burning. Leave husks on when microwaving to lock in moisture. Let corn cool briefly before husking after microwaving to avoid steam burns. Butter spreads best when corn is hot. For dairy-free options, substitute butter with olive oil or plant-based spreads.
Nutrition
- Serving Size: One medium ear of co
- Calories: 90
- Sugar: 6
- Sodium: 150
- Fat: 5
- Saturated Fat: 3
- Carbohydrates: 19
- Fiber: 2
- Protein: 3
Keywords: corn on the cob, grilled corn, microwave corn, easy corn recipe, summer side dish, juicy corn, quick corn recipe