Introduction
“‘You really think you can feed twenty people with this?’ my friend Mark asked, eyeing the giant bowl I’d just assembled on my tiny kitchen counter. It was a Wednesday evening, and honestly, I was a little frazzled—halfway through prepping for our neighborhood game night potluck. I’d promised something simple but delicious and was holding my breath hoping this Easy Make-Ahead Layered Taco Salad Bar would do the trick.
What started as a last-minute idea, born from the chaos of an overbooked week and a nearly empty fridge, turned into a meal that vanished faster than I expected. The layers of seasoned meat, beans, crunchy veggies, and creamy cheeses came together in a way that made everyone pile their plates high. I remember the hum of laughter and the clinking of glasses as folks returned for seconds (and thirds!), and honestly, I was relieved I’d made extra.
Maybe you’ve been there—the stress of feeding a crowd without wanting to spend hours cooking. This recipe was a lifesaver then, and it still is now. It’s the kind of dish that invites everyone to customize their own plate while keeping your prep sane. Plus, it’s one of those rare dishes where making it ahead of time actually improves the flavors. So, let me tell you how this Easy Make-Ahead Layered Taco Salad Bar became my go-to for crowd-pleasing meals.
Why You’ll Love This Recipe
After testing this Easy Make-Ahead Layered Taco Salad Bar recipe several times—sometimes with unexpected helpers in the kitchen—I can confidently say it’s a winner for all kinds of gatherings. Here’s why it’s such a crowd favorite:
- Quick & Easy: Comes together in about 30 minutes of active prep, making it perfect for busy weeknights or last-minute events.
- Simple Ingredients: Uses pantry staples and fresh produce you probably already have on hand—no specialty stores required.
- Perfect for Gatherings: Whether it’s a casual family dinner, potluck, or Sunday game day, everyone loves customizing their own salad.
- Crowd-Pleaser: Kids, adults, picky eaters—this recipe hits all the right notes with its layers of flavor and texture.
- Unbelievably Delicious: The combination of savory taco-seasoned beef, creamy avocado, crunchy tortilla chips, and zesty dressing is downright addictive.
This recipe stands out because it’s not just a tossed salad or a sloppy taco mix—it’s thoughtfully layered so the flavors meld beautifully when chilled but still keep their individual textures on serving. Plus, the make-ahead factor means less stress for you, and honestly, the flavors seem to have a little extra pep after resting overnight. It’s comfort food done smart.
What Ingredients You Will Need
This recipe uses simple, wholesome ingredients to deliver bold flavor and satisfying texture without the fuss. You’ll find most of these in your pantry, fridge, or local grocery store. Feel free to swap or adjust based on your preferences or what’s in season!
- For the Meat Layer:
- 1 lb (450g) ground beef (or ground turkey for a lighter option)
- 1 packet taco seasoning mix (or homemade blend: chili powder, cumin, garlic powder, paprika, salt)
- 1/4 cup water
- For the Beans & Corn:
- 1 can (15 oz/425g) black beans, drained and rinsed
- 1 cup (150g) frozen corn, thawed (or canned, drained)
- For the Salad Layers:
- 4 cups (120g) shredded romaine lettuce
- 1 cup (150g) cherry tomatoes, halved
- 1/2 cup (75g) diced red onion
- 1 cup (115g) shredded cheddar cheese
- 1/2 cup (120g) sour cream or Greek yogurt (for a tangy twist)
- 1 ripe avocado, diced (optional but highly recommended!)
- 1 cup (120g) crushed tortilla chips (for crunch)
- For the Dressing:
- 1/4 cup (60ml) salsa (choose your favorite heat level)
- 2 tablespoons lime juice (freshly squeezed if possible)
- 1 tablespoon olive oil
- Salt and pepper to taste
Pro tip: I like to use Old El Paso taco seasoning for consistency, but homemade blends work beautifully if you want full control. For the beans, Goya black beans are reliable and flavorful. If fresh tomatoes aren’t in season, cherry tomatoes work great frozen and thawed or even using canned diced tomatoes drained well.
Equipment Needed
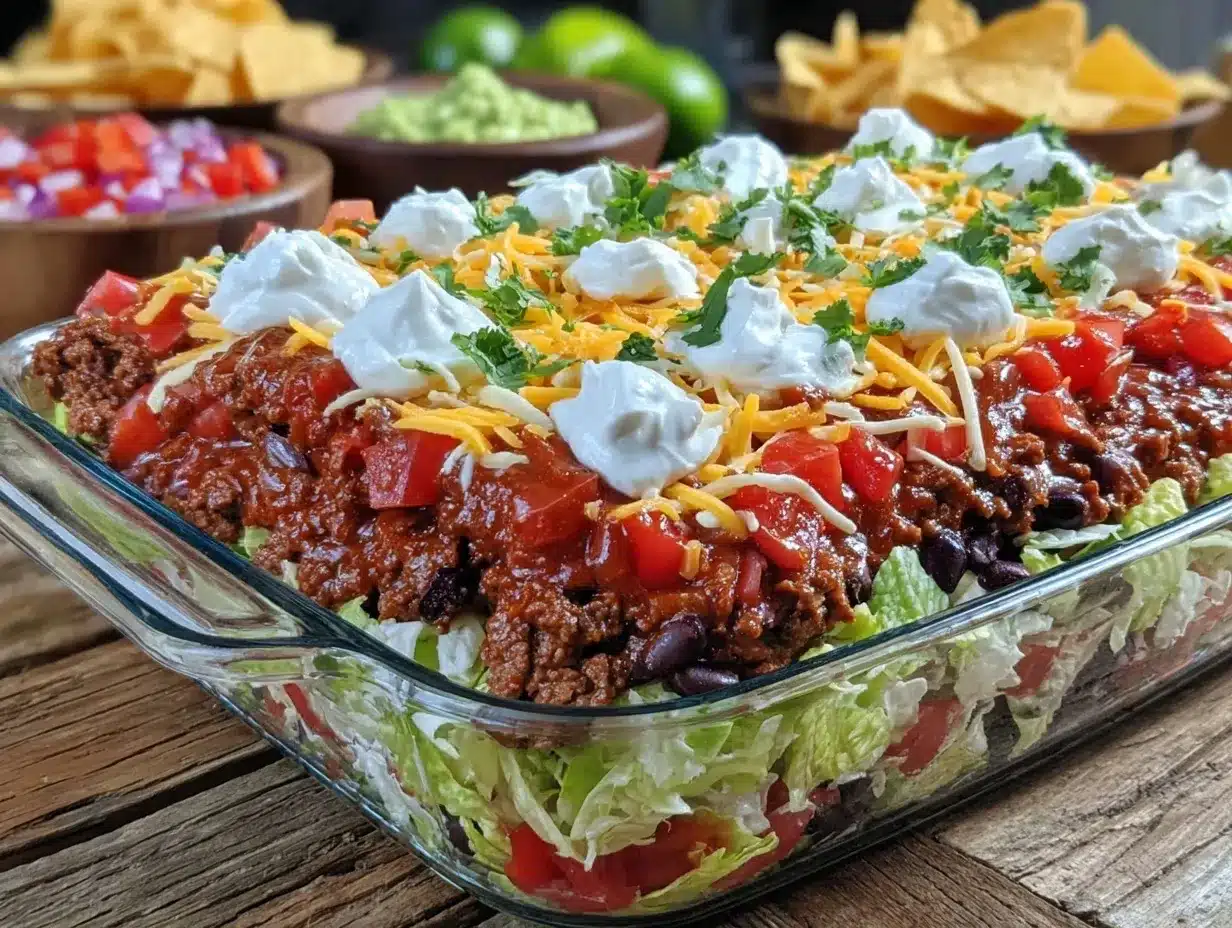
To make this Easy Make-Ahead Layered Taco Salad Bar, you don’t need any fancy gadgets—just some basics:
- Large skillet or frying pan for cooking the ground beef
- Large mixing bowl for combining ingredients
- 9×13 inch (23×33 cm) glass or ceramic baking dish (perfect for layering and serving)
- Sharp knife and cutting board for prepping veggies
- Measuring cups and spoons for precise seasoning and dressing
- Spatula or wooden spoon for stirring and spreading layers
If you don’t have a 9×13 dish, a deep casserole dish or even a large trifle bowl can work well. I’ve found glass dishes hold heat evenly and look nice on the table, but you can absolutely use what you have. For cleaning, a quick soak after dinner usually does the trick—no special maintenance needed.
Preparation Method
- Cook the Meat: Heat a large skillet over medium-high heat. Add the ground beef and cook, breaking it up with a spatula, until browned and no longer pink, about 7-8 minutes. Drain excess fat if needed.
- Add Seasoning: Stir in the taco seasoning and 1/4 cup (60ml) water. Reduce heat to medium and simmer for 3-4 minutes until the liquid is mostly absorbed and the meat is flavorful. Remove from heat and let cool slightly.
- Prepare Beans and Corn: In a mixing bowl, combine the drained black beans and thawed corn. Stir gently and set aside.
- Make the Dressing: Whisk together the salsa, lime juice, olive oil, salt, and pepper in a small bowl. Taste and adjust seasoning if needed.
- Layer the Salad: In your 9×13 inch dish, start with a base layer of shredded romaine lettuce evenly spread out.
- Next, add the seasoned meat layer, spreading it evenly over the lettuce.
- Follow with the beans and corn mixture, then scatter the diced red onion and halved cherry tomatoes on top.
- Drizzle half of the dressing evenly over the layers.
- Sprinkle the shredded cheddar cheese across the salad.
- Add diced avocado in an even layer (if using), then dollop or spread the sour cream or Greek yogurt.
- Top everything with the crushed tortilla chips for a satisfying crunch.
- Cover the dish tightly with plastic wrap and refrigerate for at least 1 hour, preferably overnight. This resting time lets the flavors meld beautifully.
- Before serving, drizzle the remaining dressing on top or serve it on the side for guests to add as they like.
Note: If you’re short on time, layering and serving immediately still tastes great, but chilling helps everything settle and makes serving easier. Also, if you want to keep the chips crispy longer, you can add them just before guests arrive.
Cooking Tips & Techniques
Making the Easy Make-Ahead Layered Taco Salad Bar is pretty straightforward, but here are some tips I’ve learned over multiple game nights and family dinners:
- Drain the Meat Well: After browning the ground beef, drain off the excess fat. This prevents the salad from becoming soggy and keeps the flavors clean.
- Use Fresh Lime Juice: It makes a surprising difference in the dressing, cutting through the richness with brightness.
- Layering Matters: Placing the lettuce at the bottom keeps it from wilting quickly. If you add chips too early, they get soggy, so adding them last or just before serving keeps the crunch alive.
- Chill for Flavor: Letting the salad rest lets the spices meld and the dressing soak into the layers without making things mushy—balance is key.
- Customize the Heat: Adjust the salsa or add jalapeños to the meat for more kick. I’ve found this pleases a crowd with varying spice tolerance.
- Multitasking: While the meat simmers, chop your veggies and prepare the dressing. This saves time and keeps your workflow smooth.
Honestly, the first time I forgot to drain the beef, the salad turned out too greasy, and guests joked about it—but that taught me to pay attention to that step! The dressing is also forgiving, so taste and tweak as you go.
Variations & Adaptations
This recipe is incredibly flexible—perfect if you want to switch things up or cater to different diets:
- Vegetarian Version: Swap the ground beef for seasoned lentils or plant-based crumbles. Black beans and corn add protein and texture here.
- Low-Carb Option: Skip the tortilla chips and corn, and add extra avocado and cheese. Use a bed of mixed greens instead of romaine for more variety.
- Seasonal Twist: In summer, add fresh diced mango or grilled corn kernels for a sweet contrast. In fall, roasted sweet potatoes add warmth and depth.
- Cooking Method Variation: You can cook the meat in an Instant Pot on sauté mode or bake it in the oven if preferred—just watch the seasoning and moisture.
- Personal Favorite: I once added a swirl of chipotle mayo in place of sour cream for a smoky flavor that had everyone asking for the recipe.
Serving & Storage Suggestions
This layered taco salad bar shines when served chilled or at room temperature. I like to let it sit out for 10-15 minutes before serving if it’s been in the fridge, so the flavors open up a bit.
For presentation, garnish with extra chopped cilantro, lime wedges, and maybe a few whole tortilla chips standing upright for a festive look. Pair it with crispy garlic chicken or a light fruit salad for a balanced meal.
Leftovers store well in an airtight container in the refrigerator for up to 3 days. Keep the chips separate if possible to maintain crunch. Reheat the meat layer gently in the microwave or on the stovetop before assembling fresh layers if you want to serve it warm.
Flavors tend to deepen after a day, so leftovers can be even tastier—just keep that crunch in mind when reheating or serving.
Nutritional Information & Benefits
Per serving (approximate): 350 calories, 20g protein, 18g fat, 25g carbohydrates, 7g fiber.
This recipe offers a balanced mix of protein from the beef and beans, fiber from the veggies and beans, and healthy fats from avocado and olive oil. It’s naturally gluten-free if you choose gluten-free tortilla chips, and dairy-free options are easy by swapping sour cream for coconut yogurt and omitting cheese.
From a wellness perspective, it’s a satisfying meal that keeps you full without feeling heavy—great for busy days when you want something nourishing but not complicated.
Conclusion
If you’re looking for a meal that’s simple to prep, fun to serve, and guaranteed to please a crowd, this Easy Make-Ahead Layered Taco Salad Bar is a no-brainer. You can tweak it to suit your family’s tastes, dietary needs, or what’s in your pantry, making it a flexible staple for many occasions.
Honestly, I keep coming back to this recipe because it’s reliable, delicious, and somehow still feels special every time. I’d love to hear how you customize it or what twists you add—drop a comment below and share your taco salad stories!
Happy cooking, and here’s to many stress-free, tasty gatherings ahead!
FAQs
Can I make this layered taco salad bar entirely vegan?
Yes! Use plant-based meat substitutes or lentils, skip the cheese and sour cream or replace them with vegan alternatives, and use vegan tortilla chips.
How far ahead can I prepare this salad?
You can assemble it up to 24 hours in advance. Keep it tightly covered in the refrigerator, and add the tortilla chips just before serving to keep them crunchy.
What’s the best way to keep the lettuce from getting soggy?
Make sure to dry the lettuce well after washing, and keep it at the bottom of the layers to prevent direct contact with wet ingredients.
Can I use ground chicken or turkey instead of beef?
Absolutely! Ground turkey or chicken works well. Just adjust cooking times as needed and season generously.
Is there a gluten-free option for the tortilla chips?
Definitely. Many brands offer certified gluten-free chips—just double-check the packaging to be sure.
Pin This Recipe!
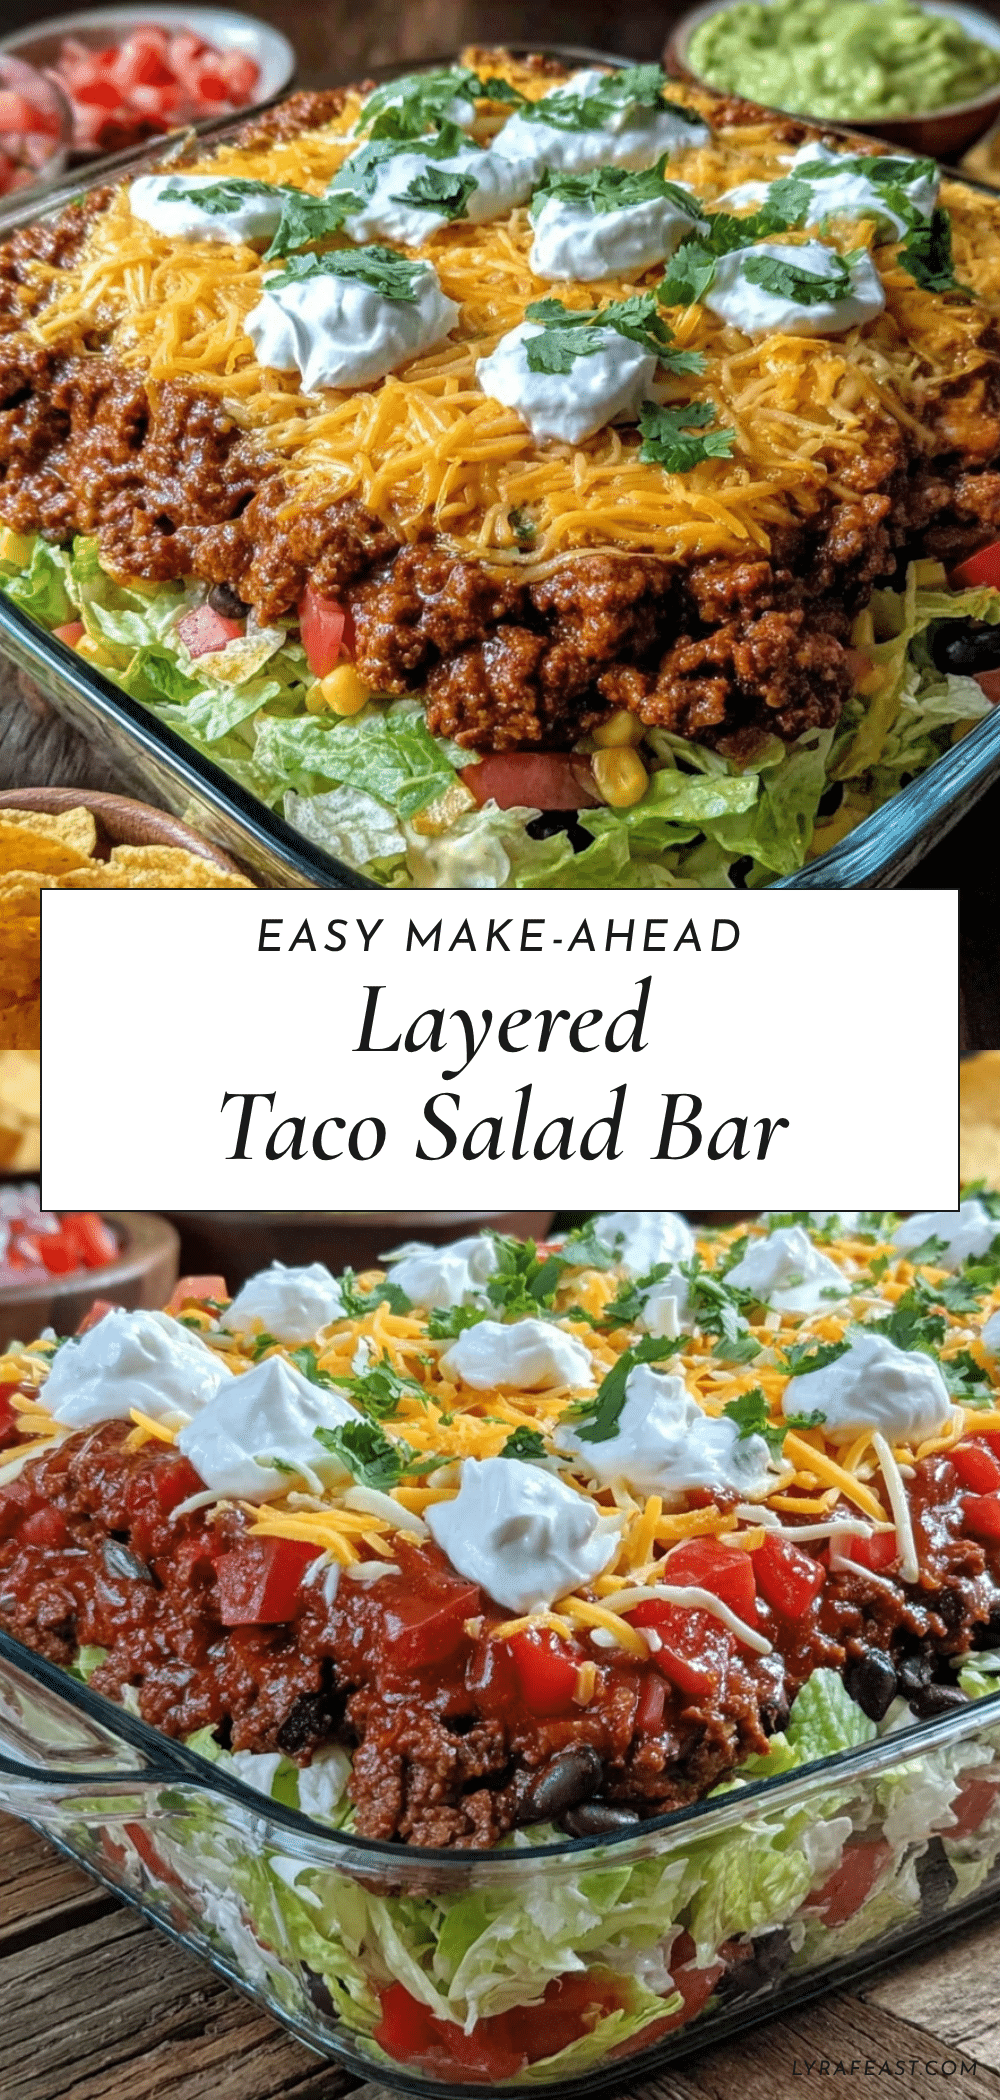
Easy Make-Ahead Layered Taco Salad Bar Recipe for Crowd-Pleasing Meals

A simple, delicious layered taco salad bar perfect for feeding a crowd with make-ahead convenience and customizable layers.
- Prep Time: 30 minutes
- Cook Time: 12 minutes
- Total Time: 1 hour 42 minutes
- Yield: 20 servings 1x
- Category: Main Course
- Cuisine: Mexican
Ingredients
- 1 lb ground beef (or ground turkey for a lighter option)
- 1 packet taco seasoning mix (or homemade blend: chili powder, cumin, garlic powder, paprika, salt)
- 1/4 cup water
- 1 can (15 oz) black beans, drained and rinsed
- 1 cup frozen corn, thawed (or canned, drained)
- 4 cups shredded romaine lettuce
- 1 cup cherry tomatoes, halved
- 1/2 cup diced red onion
- 1 cup shredded cheddar cheese
- 1/2 cup sour cream or Greek yogurt
- 1 ripe avocado, diced (optional)
- 1 cup crushed tortilla chips
- 1/4 cup salsa
- 2 tablespoons lime juice
- 1 tablespoon olive oil
- Salt and pepper to taste
Instructions
- Heat a large skillet over medium-high heat. Add the ground beef and cook, breaking it up with a spatula, until browned and no longer pink, about 7-8 minutes. Drain excess fat if needed.
- Stir in the taco seasoning and 1/4 cup water. Reduce heat to medium and simmer for 3-4 minutes until the liquid is mostly absorbed and the meat is flavorful. Remove from heat and let cool slightly.
- In a mixing bowl, combine the drained black beans and thawed corn. Stir gently and set aside.
- Whisk together the salsa, lime juice, olive oil, salt, and pepper in a small bowl. Taste and adjust seasoning if needed.
- In a 9×13 inch dish, start with a base layer of shredded romaine lettuce evenly spread out.
- Add the seasoned meat layer, spreading it evenly over the lettuce.
- Follow with the beans and corn mixture, then scatter the diced red onion and halved cherry tomatoes on top.
- Drizzle half of the dressing evenly over the layers.
- Sprinkle the shredded cheddar cheese across the salad.
- Add diced avocado in an even layer (if using), then dollop or spread the sour cream or Greek yogurt.
- Top everything with the crushed tortilla chips for a satisfying crunch.
- Cover the dish tightly with plastic wrap and refrigerate for at least 1 hour, preferably overnight.
- Before serving, drizzle the remaining dressing on top or serve it on the side for guests to add as they like.
Notes
Drain the cooked meat well to avoid sogginess. Use fresh lime juice for a bright dressing. Add tortilla chips just before serving to keep them crunchy. The salad tastes better after chilling overnight. Customize heat by adjusting salsa or adding jalapeños. Leftovers keep well for up to 3 days; store chips separately.
Nutrition
- Serving Size: Approximately 1/20th
- Calories: 350
- Fat: 18
- Carbohydrates: 25
- Fiber: 7
- Protein: 20
Keywords: taco salad, layered salad, make-ahead, crowd-pleaser, easy dinner, taco seasoning, ground beef, healthy, customizable



