Introduction
“You know that moment when you’re at a summer picnic, and someone pulls out a dessert that instantly makes you feel like you’re wrapped in a warm hug? That’s exactly how I stumbled upon Mom’s Cherry Dump Cake. It wasn’t in some fancy cookbook or a well-known blog—it was scribbled in faint pencil on a crinkled recipe card that my Aunt Linda handed me one sunny Saturday afternoon at the park.
She told me, “It’s the easiest dessert you’ll ever make, and everyone always asks for seconds.” Honestly, I was skeptical at first—dump cake? I thought, how can dumping ingredients into a pan create something memorable? But I gave it a shot, and let me tell you, it’s a picnic classic for a reason.
That day, the cake came out golden with a bubbly cherry filling peeking through, and the sweet aroma drifted across the picnic blanket. The best part? I forgot to bring a serving spoon, so it got a bit messy, but that only added to the charm. Since then, this cherry dump cake has been my go-to for potlucks, family gatherings, or just a cozy night in when I want something simple yet soul-soothing.
Maybe you’ve been there—standing in the kitchen, short on time but craving something sweet and satisfying. This recipe is just that: uncomplicated, quick, and utterly delicious. It’s the kind of dessert that feels like a warm memory, even on your busiest days.
Why You’ll Love This Recipe
This Mom’s Cherry Dump Cake recipe has been through countless kitchen tests—by me, my family, and friends—and it always delivers that comforting, nostalgic flavor. Here’s why it stands out:
- Quick & Easy: Ready in under 45 minutes, it’s perfect when you need a fuss-free dessert fast.
- Simple Ingredients: No exotic items here; just pantry staples and canned cherries, making it a breeze to prepare.
- Perfect for Picnics & Potlucks: It travels well and can be served warm or at room temperature, great for outdoor gatherings.
- Crowd-Pleaser: Kids and adults alike rave about the balance of sweet cherry filling and buttery cake topping.
- Unbelievably Delicious: That crunchy, golden crust paired with juicy cherries is pure comfort food magic.
What really makes this recipe different is the balance—it’s not too sweet, and the buttery cake mix topping crisps up just right without any complicated mixing or baking skills required. I also love that it’s flexible; you can swap cherries for other fruits or add a sprinkle of cinnamon for a cozy twist. Honestly, it’s the kind of dish that makes you close your eyes after the first bite and sigh with contentment.
What Ingredients You Will Need
This recipe uses simple, wholesome ingredients to deliver bold flavor and satisfying texture without the fuss. Most of these you probably have on hand, which makes it an easy pick for last-minute dessert plans.
- Cherry Pie Filling: 2 cans (21 ounces / 595 grams each) of sweetened cherry pie filling (I trust Libby’s for consistent quality).
- Yellow Cake Mix: 1 box (15.25 ounces / 432 grams) of dry yellow cake mix (avoid any pudding-in-the-mix versions for best texture).
- Unsalted Butter: 1 cup (2 sticks / 226 grams), sliced thinly and chilled (adds richness and helps create that crisp topping).
- Optional Add-Ins: ½ teaspoon ground cinnamon (for a subtle warmth), ½ cup chopped pecans or walnuts (adds crunch).
If you want to make it gluten-free, you can swap the yellow cake mix with a gluten-free version like Betty Crocker Gluten-Free Yellow Cake Mix. For a dairy-free option, use a vegan butter substitute—though I recommend something with a high fat content to keep that topping perfectly crisp.
Equipment Needed
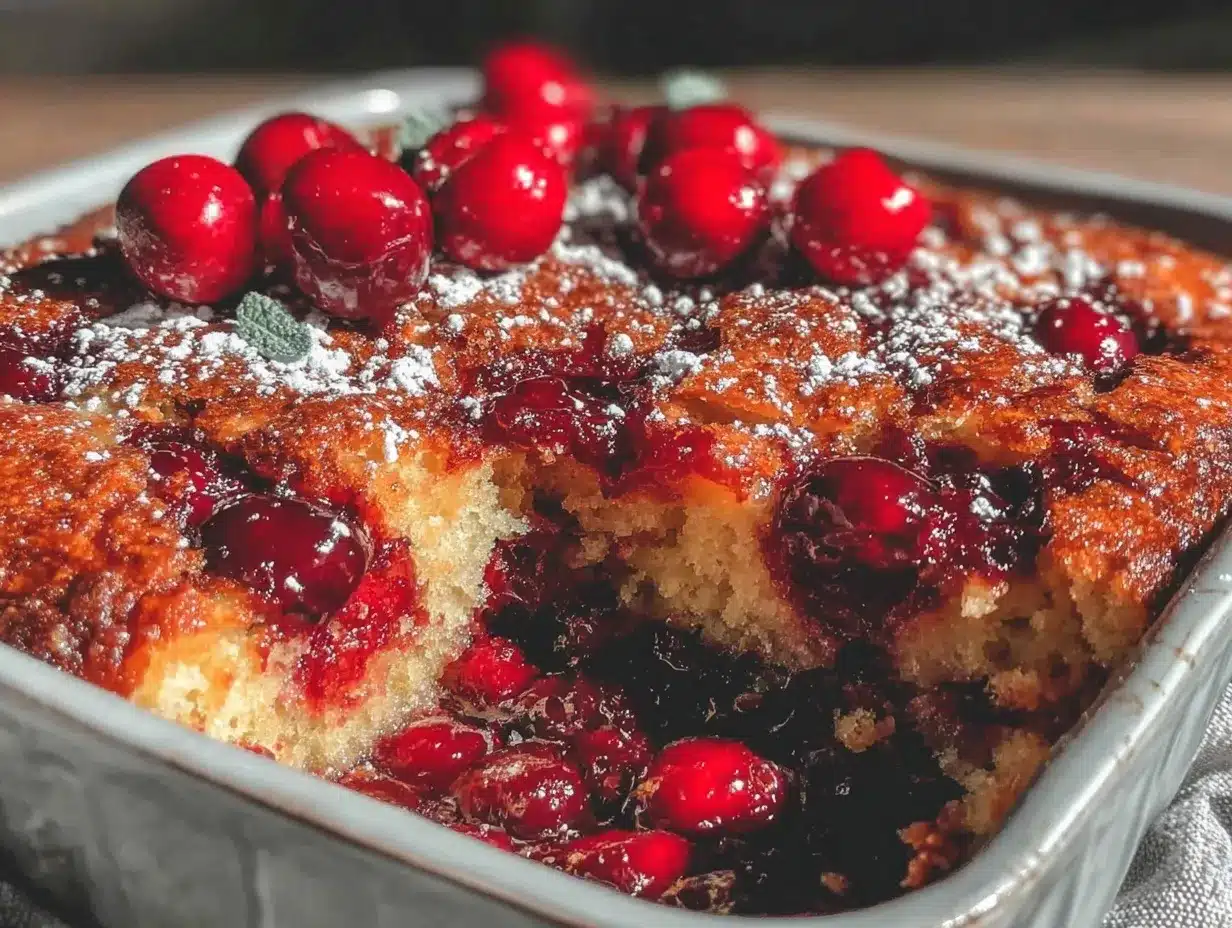
- 9×13-inch Baking Dish: Glass or metal works fine; I prefer glass because it heats evenly and lets you see the bubbling edges.
- Knife: For slicing the butter thinly—thin slices melt better and create that irresistible crust.
- Spoon or Spatula: To spread the cherry filling evenly.
- Oven Mitts: Essential, trust me, the pan gets hot fast!
If you don’t have a 9×13-inch dish, a slightly smaller or larger baking pan works too—just adjust the baking time slightly. I once used a cast-iron skillet in a pinch, and it gave the edges a nice caramelized crunch.
Preparation Method
- Preheat your oven to 350°F (175°C). This step is key because you want your oven fully heated for even baking.
- Spread the cherry pie filling evenly across the bottom of your baking dish. Use the back of a spoon to smooth it out gently—don’t stir it in, just a flat layer.
- Sprinkle the dry yellow cake mix evenly over the cherries. No need to mix; just cover the cherries completely. This is where the magic starts: the cake mix absorbs the cherry juices and creates that perfect texture.
- Layer the butter slices thinly and evenly over the cake mix. I learned the hard way that if the butter chunks are too big, the topping won’t crisp properly. If you want, add a sprinkle of cinnamon or nuts here.
- Bake uncovered for 40 to 45 minutes. You’re looking for a bubbly cherry filling around the edges and a golden, crispy top. If it starts browning too fast, tent with foil.
- Let the cake cool for 10 to 15 minutes before serving. This helps the filling thicken slightly, making it easier to serve.
If you notice the topping isn’t as crisp as you’d like after baking, a quick broil for 1–2 minutes (watch closely!) can add extra crunch. Also, don’t rush the cooling step—this dessert tastes best when the cherry juices have settled a bit.
Cooking Tips & Techniques
One of the coolest things about this cherry dump cake is how forgiving it is, but a few tips can make it even better:
- Butter Slices Matter: Thin, evenly sliced butter melts better and crisps that cake mix topping perfectly. I use a sharp knife and chill the butter beforehand to get nice, clean slices.
- Don’t Overmix: Remember, you’re literally dumping and layering—no stirring! That layering is what creates the distinct textures.
- Watch Your Bake Time: Oven temps vary, so start checking at 35 minutes. You want bubbly edges and a golden top without burning.
- Multitask Smartly: While the cake bakes, clean up your prep area or set the table—this dessert needs minimal attention once in the oven.
- Use Fresh Butter: Avoid margarine or low-fat butters; the fat content really impacts the crust quality.
I once forgot the butter and tried drizzling melted butter instead—big mistake! The topping was soggy and sad. So, trust me, slice it thin and cold for best results.
Variations & Adaptations
This cherry dump cake is a great base for experimentation. Here are a few ways I’ve tweaked it:
- Other Fruits: Swap cherry pie filling for peach, blueberry, or apple pie filling. I love using fresh peach slices with a sprinkle of nutmeg in late summer.
- Spice It Up: Add 1 teaspoon of vanilla extract to the cherry layer or mix in a pinch of almond extract for a subtle nutty flavor.
- Nutty Crunch: Toasted pecans or walnuts sprinkled on top before baking add a delightful texture contrast.
- Healthier Twist: Use a sugar-free cake mix and cherry filling with no added sugar to reduce sweetness.
- Gluten-Free Version: Swap the cake mix for a gluten-free blend. I tried this gluten-free yellow cake mix with great results.
One time, I experimented by mixing in a little shredded coconut on top for a tropical vibe—it was surprisingly good! So, don’t hesitate to get creative.
Serving & Storage Suggestions
Serve this cherry dump cake warm or at room temperature—it’s delightful either way. I like to pair it with a scoop of vanilla ice cream or a dollop of whipped cream for an extra creamy contrast.
This dessert holds up well for picnics since it’s sturdy and doesn’t require refrigeration immediately. If you’re storing leftovers, cover the dish tightly and refrigerate for up to 4 days.
To reheat, pop individual servings in the microwave for 20-30 seconds or warm the whole dish at 325°F (165°C) for about 10 minutes until heated through. The flavors actually develop more after resting overnight, so sometimes I make it the day before a picnic for the best taste.
Nutritional Information & Benefits
Per serving (based on 12 servings), this cherry dump cake contains approximately:
| Calories | 280 kcal |
|---|---|
| Fat | 14 g |
| Carbohydrates | 36 g |
| Protein | 2 g |
Cherries provide antioxidants and vitamins, while the butter and cake mix deliver that classic comfort. This recipe isn’t low-calorie, but it’s perfect for occasional treats and celebrations. For those with dietary restrictions, swapping in gluten-free or sugar-free ingredients can make it more suitable without sacrificing flavor.
Conclusion
Mom’s Cherry Dump Cake is proof that simple ingredients and a little love can create something truly special. It’s easy, fast, and incredibly comforting—the kind of dessert that feels like home no matter where you eat it. I love how it brings people together, whether at a picnic, a casual family dinner, or a last-minute get-together.
Feel free to tweak it to your taste—add nuts, spices, or try different fruits. I’d love to hear how your version turns out! Leave a comment below sharing your favorite twist or a story about your own comforting dessert moments.
Give this classic a try and enjoy a sweet slice of nostalgia that’s as easy as it is delicious.
FAQs
Can I use fresh cherries instead of canned pie filling?
Yes! Use about 4 cups of pitted fresh cherries mixed with ¾ cup sugar and 2 tablespoons cornstarch. Cook them on the stove until thickened before layering in the dish.
How do I make this recipe dairy-free?
Replace the butter with a vegan butter or coconut oil with a similar fat content. Make sure your cake mix is dairy-free as well.
Can I prepare this dessert ahead of time?
Absolutely! You can assemble it the night before and keep it covered in the fridge. Bake it fresh the next day for best texture.
What is the best way to serve cherry dump cake at a picnic?
Serve it at room temperature with a side of whipped cream or vanilla ice cream. Pack it in a sturdy container to avoid spills.
Can I double the recipe for a larger crowd?
Yes, just use a larger baking dish or two 9×13-inch pans. Adjust the baking time accordingly, checking for bubbly edges and a golden crust.
PrintMom’s Cherry Dump Cake
A quick and easy classic picnic dessert featuring a bubbly cherry filling topped with a buttery, crispy cake crust. Perfect for potlucks and family gatherings.
- Prep Time: 10 minutes
- Cook Time: 40-45 minutes
- Total Time: 50-55 minutes
- Yield: 12 servings 1x
- Category: Dessert
- Cuisine: American
Ingredients
- 2 cans (21 ounces each) sweetened cherry pie filling
- 1 box (15.25 ounces) dry yellow cake mix (avoid pudding-in-the-mix versions)
- 1 cup (2 sticks) unsalted butter, sliced thinly and chilled
- Optional: ½ teaspoon ground cinnamon
- Optional: ½ cup chopped pecans or walnuts
Instructions
- Preheat your oven to 350°F (175°C).
- Spread the cherry pie filling evenly across the bottom of a 9×13-inch baking dish.
- Sprinkle the dry yellow cake mix evenly over the cherries without stirring.
- Layer the thinly sliced butter evenly over the cake mix. Add cinnamon or nuts if desired.
- Bake uncovered for 40 to 45 minutes until bubbly around the edges and the top is golden and crispy. Tent with foil if browning too fast.
- Let the cake cool for 10 to 15 minutes before serving to allow the filling to thicken.
- Optional: Broil for 1–2 minutes for extra crispness if desired.
Notes
Use thin, evenly sliced cold butter for a crisp topping. Do not stir the layers; just layer them. Start checking for doneness at 35 minutes to avoid burning. Cooling before serving helps the filling thicken. For gluten-free, use a gluten-free yellow cake mix. For dairy-free, substitute vegan butter with high fat content.
Nutrition
- Serving Size: 1 slice (1/12th of t
- Calories: 280
- Fat: 14
- Carbohydrates: 36
- Protein: 2
Keywords: cherry dump cake, easy dessert, picnic dessert, cherry pie filling, yellow cake mix, quick dessert, potluck dessert



