“You won’t believe how simple it is,” my neighbor chuckled as she handed me a steaming ear of corn slathered with butter, the summer sun casting dappled shadows on her porch. It was a random Thursday afternoon, and honestly, I was just stopping by to borrow some sugar. But that moment—watching the way the golden kernels glistened and hearing the faint pop as I bit through—hooked me. Who knew that perfect old-fashioned corn on the cob with butter could taste like a little celebration on a stick?
I wasn’t expecting much, to be honest. Corn on the cob felt like a no-brainer, right? Just boil and butter. But this recipe? It’s different. There’s something about the way the butter melts slowly, soaking into every crevice of the kernels, combined with just the right pinch of salt—it transforms simple summer corn into a mouthwatering treat that makes you pause and savor. Maybe you’ve been there, eating a piece that’s too dry or overcooked, and it just doesn’t live up to that sweet, crunchy dream.
That day, I forgot to grab a bowl for the butter and ended up using an old cracked ramekin, which made the whole thing feel even more homey and real. Since then, I’ve been making this recipe almost every summer, sometimes adding a little twist, sometimes sticking to the classics. It’s comfort food, honestly, in the most straightforward, heartwarming way. Let me tell you, once you try this perfect old-fashioned corn on the cob with butter, summer will never feel quite the same.
Why You’ll Love This Recipe
After countless attempts and some happy kitchen accidents, this perfect old-fashioned corn on the cob with butter recipe has become my go-to for summer gatherings and solo snacking alike. It’s not just about boiling corn; it’s about creating that moment where every bite bursts with sweetness and buttery goodness.
- Quick & Easy: Ready in under 20 minutes, making it ideal for busy weeknights or impromptu cookouts.
- Simple Ingredients: No need for fancy or hard-to-find items; just fresh corn, butter, and a pinch of salt.
- Perfect for Summer: Whether it’s a backyard BBQ, picnic, or just a casual dinner, this recipe fits right in.
- Crowd-Pleaser: Kids and adults alike keep coming back for more—trust me, I’ve tested it at multiple family reunions!
- Unbelievably Delicious: The secret is in the butter melting just right, soaking into the sweet, tender kernels for maximum flavor.
What makes this recipe stand out is the balance—no overwhelming spices or complicated sauces, just pure, honest corn enhanced with butter and a sprinkle of salt. I’ve found that using unsalted butter and seasoning afterward gives you full control over the flavor. And honestly, it’s that simplicity that makes it so addictive. You’ll close your eyes after the first bite, remembering those sun-drenched afternoons and friendly chats that made this recipe so special.
What Ingredients You Will Need
This recipe uses simple, wholesome ingredients to deliver bold flavor and satisfying texture without the fuss. Most are pantry staples, and the fresh corn is the star, so try to pick the freshest ears you can find—local farmers markets are perfect for this.
- Fresh Corn on the Cob: 4 ears, husked and cleaned (look for bright green husks and plump kernels)
- Unsalted Butter: 4 tablespoons, softened (I prefer Plugrá for its creamy texture)
- Salt: 1 teaspoon kosher salt or to taste (sea salt flakes also work beautifully)
- Optional: Freshly ground black pepper or a pinch of smoked paprika for a subtle kick
Substitution tips: If you want a dairy-free version, swap the butter for a plant-based spread like Earth Balance. For a little extra zing, a squeeze of fresh lime juice right before serving adds a nice brightness. And if fresh corn isn’t in season, frozen corn on the cob works too—just make sure to thaw it properly before cooking.
Equipment Needed
- Large Pot: Big enough to hold all the corn ears comfortably with water for boiling.
- Tongs: Essential for safely handling the hot corn when removing from boiling water.
- Butter Knife or Small Spreader: For applying the softened butter evenly over the hot corn.
- Kitchen Towels or Paper Towels: To catch drips and keep things tidy—trust me, buttered corn can get messy!
If you don’t have a large pot, a deep skillet or even a steamer basket inside a saucepan can do the trick. I once used a wok in a pinch, and it worked surprisingly well. Just make sure your pot has a lid to speed up the boiling process. Also, keeping a small brush handy for butter application can be a neat alternative to knives, especially when serving guests.
Preparation Method
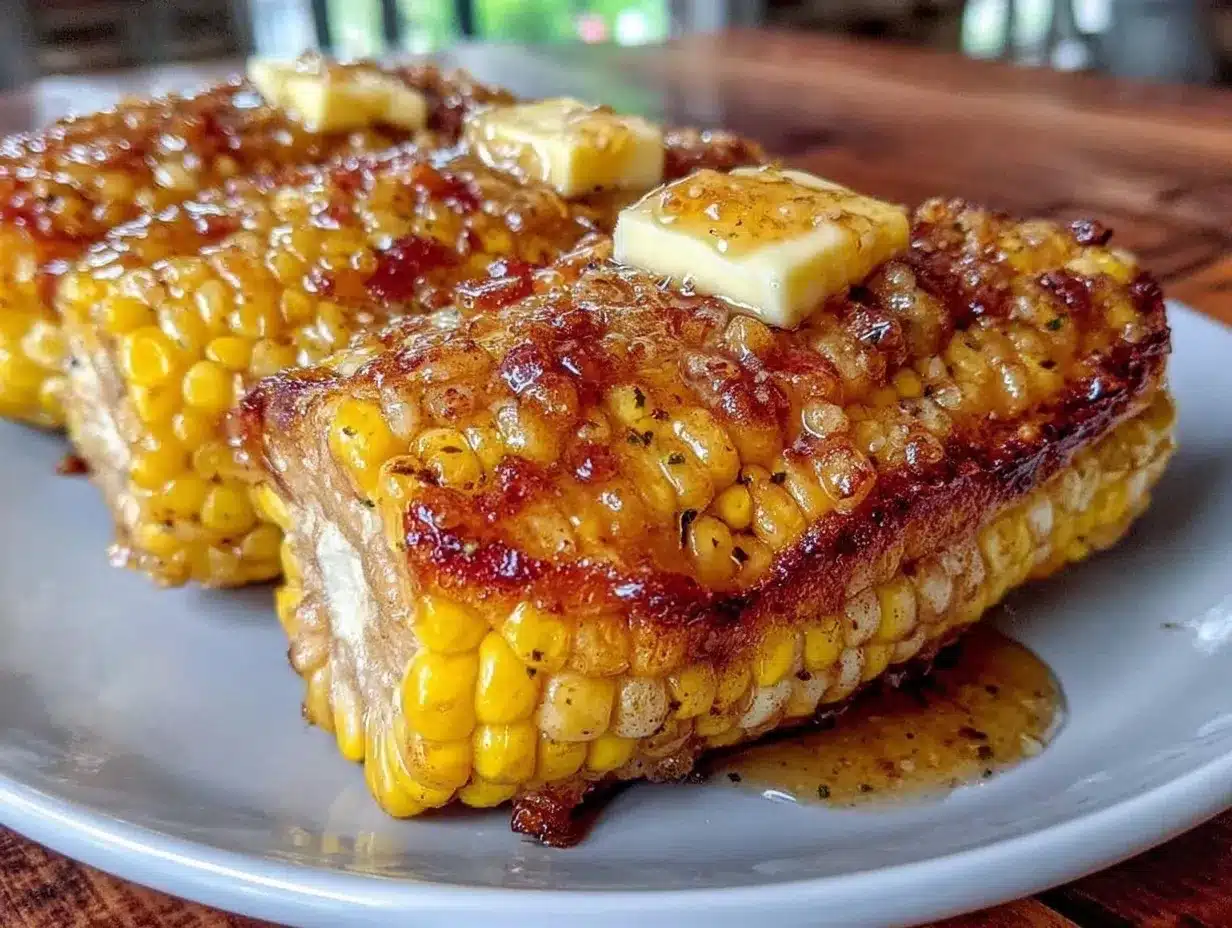
- Prepare the Corn: Husk the corn by peeling back the green leaves and removing the silky threads. Rinse the ears under cold water to remove any lingering silk. (About 5 minutes)
- Boil the Water: Fill a large pot with enough water to cover the corn, approximately 4 to 6 quarts (3.8 to 5.7 liters). Bring it to a rolling boil over high heat. (10 minutes)
- Add the Corn: Carefully place the ears of corn into the boiling water using tongs. Reduce heat slightly to maintain a gentle boil.
- Cook the Corn: Boil the corn for 7-10 minutes. You’ll know it’s done when the kernels are bright yellow and tender when pierced with a fork. Don’t overcook or the kernels get mushy. (Tip: Start checking at 7 minutes to avoid sogginess.)
- Drain and Butter: Remove the corn with tongs and let excess water drip off. While still hot, spread softened butter evenly over each ear. Sprinkle with salt to taste. (2-3 minutes)
- Serve Immediately: Serve the corn on warm plates to keep it cozy. Optionally, add a sprinkle of black pepper or smoked paprika for flair.
Pro tip: If you want a little extra flavor, add a teaspoon of sugar to the boiling water to enhance the corn’s natural sweetness. And honestly, don’t rush the butter step—the warmth of the corn should melt the butter slowly, soaking into every kernel.
Cooking Tips & Techniques
One thing I learned the hard way is that starting with cold water and corn together leads to uneven cooking. Always bring the water to a boil before adding corn for the best results. Also, resist the temptation to poke or pierce the kernels while cooking—that lets out precious juices and affects texture.
When it comes to butter, I’ve found that softened butter spreads much easier and melts better than cold. If you’re in a hurry, a quick zap in the microwave (about 15 seconds) softens it perfectly. And don’t forget to salt after buttering; it makes a noticeable difference in flavor balance.
Multitasking tip: While the corn boils, prep a fresh herb butter by mixing softened butter with chopped parsley or chives. This adds a fresh twist and impresses guests without much extra effort.
Variations & Adaptations
- Spicy Kick: Mix softened butter with cayenne pepper and a squeeze of lime juice for a zesty take.
- Grilled Corn: After boiling, grill the corn for 2-3 minutes on each side to add smoky char and texture.
- Garlic Herb Butter: Combine butter with minced garlic and fresh herbs like thyme or rosemary for a savory upgrade.
For a dairy-free option, you can substitute butter with olive oil or vegan margarine. If you’re avoiding salt, a squeeze of fresh lemon or lime can brighten the flavor without additional sodium.
Personally, I once tried adding a dusting of parmesan cheese right after buttering—it was a delightful surprise that added a salty, nutty layer.
Serving & Storage Suggestions
Serve your perfect old-fashioned corn on the cob with butter hot and fresh to enjoy that satisfying contrast of warm kernels and melting butter. Pair it with grilled meats, fresh salads, or even a chilled glass of iced tea for a classic summer feast.
If you have leftovers (rare, but it happens!), wrap the corn tightly in plastic wrap or place in an airtight container and refrigerate for up to 2 days. To reheat, either microwave briefly or warm in a 350°F (175°C) oven for 5-7 minutes, buttering again if desired.
Flavor improves slightly the day after as the butter seeps deeper into the kernels—though I won’t lie, fresh is always best!
Nutritional Information & Benefits
Each ear of this classic corn on the cob provides roughly 90-110 calories, mostly from natural carbohydrates in the corn and fats from the butter. Corn is a good source of fiber, vitamins B and C, and antioxidants like lutein, which supports eye health. Butter adds richness and vitamin A, but keep portions moderate if you’re watching saturated fat intake.
This recipe fits nicely into balanced diets and can be adapted for gluten-free and vegetarian lifestyles. Just watch the butter quantity if you’re aiming for lower calories, or swap with heart-healthy oils.
Conclusion
This perfect old-fashioned corn on the cob with butter recipe is a simple yet magical way to celebrate the sweet, crisp flavors of summer. It’s easy enough for weeknight dinners but special enough to steal the show at any cookout. I love how it brings people together—whether it’s a last-minute snack or the centerpiece of a meal.
Feel free to make it your own with the variations or keep it classic as I do. I’d love to hear how you enjoy it—drop a comment below with your twists or favorite ways to serve. Let’s keep the buttery corn love going strong!
FAQs
How do I know when corn on the cob is cooked perfectly?
Look for bright yellow kernels that are tender but still slightly crisp. Boil for 7-10 minutes and test by piercing a kernel with a fork; it should be juicy and soft without being mushy.
Can I make this recipe without butter?
Absolutely! Olive oil or dairy-free spreads work well, especially if you want a lighter or vegan-friendly version.
Is it better to boil or grill corn on the cob?
Both have their merits! Boiling gives tender, juicy kernels, while grilling adds smoky flavor and a bit of char. You can combine methods by boiling first, then grilling briefly.
How do I prevent corn silk from sticking to the kernels?
Peel the husks carefully and rinse the ears under cold water to remove silk strands. Using a vegetable brush gently helps too.
Can I prepare corn on the cob ahead of time?
You can cook it in advance and refrigerate, but it’s best served fresh and hot with butter for the tastiest experience. Reheat gently to avoid drying out.
PrintPerfect Old-Fashioned Corn on the Cob with Butter
A simple and classic recipe for sweet summer corn on the cob boiled to perfection and slathered with butter and a pinch of salt. Perfect for quick weeknight dinners or summer gatherings.
- Prep Time: 5 minutes
- Cook Time: 10 minutes
- Total Time: 15 minutes
- Yield: 4 servings 1x
- Category: Side Dish
- Cuisine: American
Ingredients
- 4 ears fresh corn on the cob, husked and cleaned
- 4 tablespoons unsalted butter, softened
- 1 teaspoon kosher salt or to taste
- Optional: freshly ground black pepper or a pinch of smoked paprika
- Optional: 1 teaspoon sugar (to add to boiling water)
- Optional dairy-free substitute: plant-based spread like Earth Balance
- Optional: squeeze of fresh lime juice
Instructions
- Husk the corn by peeling back the green leaves and removing the silky threads. Rinse the ears under cold water to remove any lingering silk. (About 5 minutes)
- Fill a large pot with enough water to cover the corn, approximately 4 to 6 quarts. Bring it to a rolling boil over high heat. (10 minutes)
- Carefully place the ears of corn into the boiling water using tongs. Reduce heat slightly to maintain a gentle boil.
- Boil the corn for 7-10 minutes. Check at 7 minutes to avoid overcooking. The kernels should be bright yellow and tender when pierced with a fork.
- Remove the corn with tongs and let excess water drip off. While still hot, spread softened butter evenly over each ear. Sprinkle with salt to taste. (2-3 minutes)
- Serve immediately on warm plates. Optionally, add a sprinkle of black pepper or smoked paprika.
Notes
Use unsalted butter and salt after buttering for better flavor control. Adding a teaspoon of sugar to the boiling water enhances natural sweetness. Avoid piercing kernels while cooking to retain juices. Softened butter spreads and melts better. For a twist, try herb butter or grilled corn after boiling.
Nutrition
- Serving Size: 1 ear of corn
- Calories: 150
- Sugar: 6
- Sodium: 400
- Fat: 9
- Saturated Fat: 5
- Carbohydrates: 18
- Fiber: 2
- Protein: 3
Keywords: corn on the cob, buttered corn, summer recipe, easy corn recipe, boiled corn, classic corn, side dish, quick recipe