“You gotta try this chicken,” my old neighbor, Mrs. Jenkins, said one humid Saturday afternoon as I was hauling boxes into my new apartment. She wasn’t the type to fuss over recipes, honestly—more of a ‘throw it all in and see what sticks’ gal. But that day, she handed me a crumpled note with her buttermilk brine recipe and insisted I make it exactly as she showed me. I wasn’t expecting much; fried chicken seemed straightforward enough. Yet, the crisp crust crackled like fireworks, and the juicy meat inside was beyond anything I’d cooked before. It was like biting into a memory I didn’t know I had.
That recipe has been my go-to ever since. I mean, let’s face it: everyone has a fried chicken recipe, but this one? It’s those few extra hours soaking in tangy buttermilk, the careful seasoning, and that golden crust that stays crispy even hours later. Maybe you’ve been there—looking for that perfect fried chicken that hits all the right notes without sending you running to the store for obscure ingredients. Well, this is it.
One afternoon, I even forgot to set the timer (classic me), and the chicken came out a little darker than planned. But guess what? That extra crunch made it even better. Life’s funny that way. You’ll find that this crispy classic fried chicken buttermilk brined like grandma’s isn’t just a recipe—it’s a darn good story on a plate. So, let me tell you how to make this magic happen in your own kitchen.
Why You’ll Love This Recipe
This crispy classic fried chicken buttermilk brined like grandma’s has been kitchen-tested more times than I can count, and it never disappoints. Whether you’re feeding a family of four or hosting a backyard get-together, it’s the kind of dish that brings people together without stress or fuss.
- Quick & Easy: While the brine needs a few hours, the active prep and cook time is under 40 minutes—perfect for busy weeknights or last-minute cravings.
- Simple Ingredients: You likely have everything on hand—no special trips for fancy spices or hidden extras.
- Perfect for Gatherings: Whether it’s a cozy Sunday dinner or a casual potluck, this chicken always shines.
- Crowd-Pleaser: Kids love the crispy crust, and adults admire that juicy, tender inside every single time.
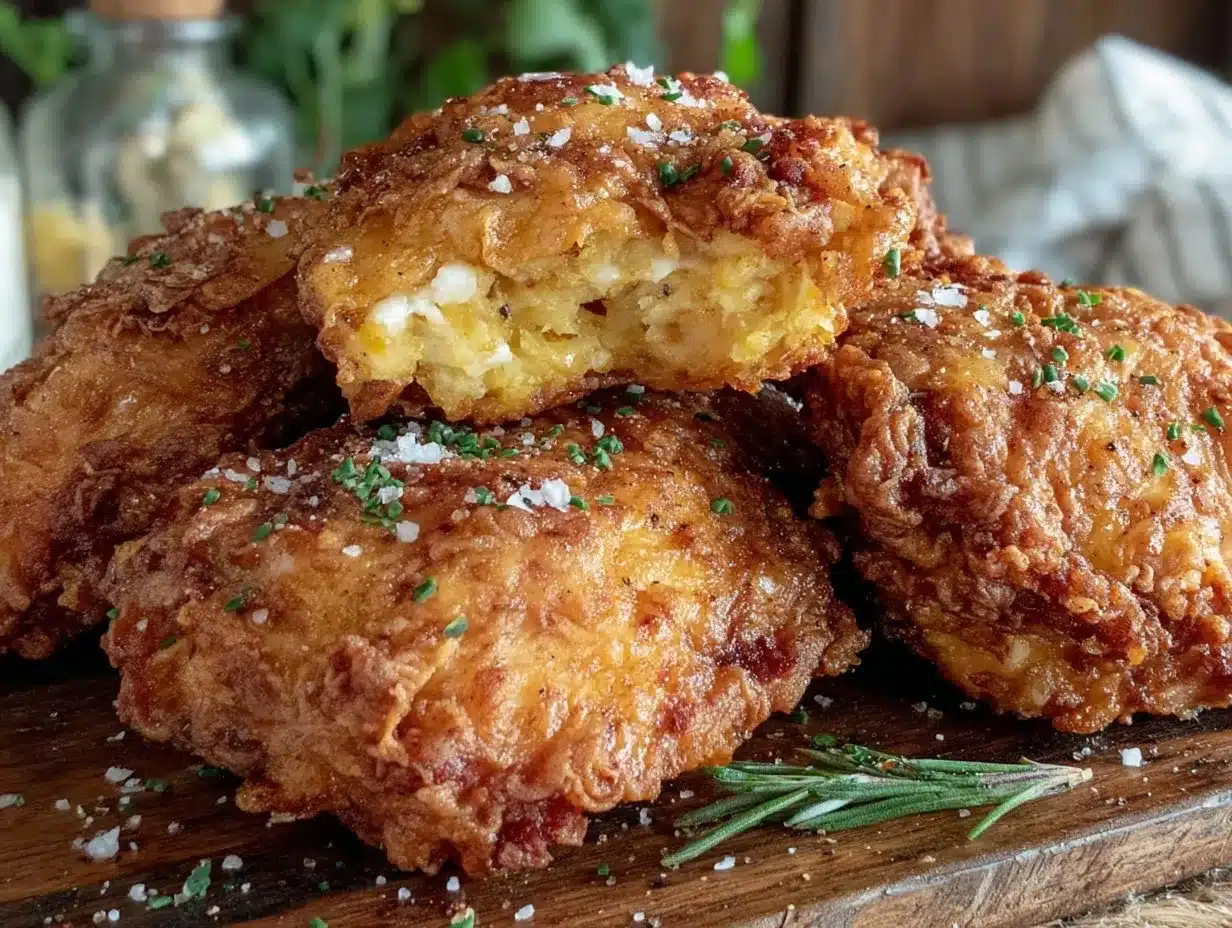
- Unbelievably Delicious: The buttermilk brine tenderizes the meat while adding a subtle tang, and the seasoned flour creates a golden crust that snaps with every bite.
What sets this recipe apart? It’s the balance—no greasy heaviness, no dry meat. Grandma’s trick of soaking the chicken in buttermilk overnight is the secret to that melt-in-your-mouth tenderness, and the double-dredge method locks in flavor and crunch. Honestly, this isn’t just another fried chicken recipe floating around; it’s the one I keep coming back to, especially when I want to impress without the usual stress.
What Ingredients You Will Need
This recipe uses simple, wholesome ingredients that come together to deliver bold flavor and satisfying texture without the fuss. Most are pantry staples, and the key is choosing quality chicken and fresh buttermilk.
- Chicken pieces: about 3-4 pounds (1.4-1.8 kg) of bone-in, skin-on thighs, drumsticks, and breasts (prefer dark meat for juiciness)
- Buttermilk: 4 cups (950 ml), preferably whole buttermilk for richness
- Salt: 2 tablespoons kosher salt (for the brine)
- Garlic powder: 1 teaspoon (adds subtle warmth)
- Onion powder: 1 teaspoon
- Smoked paprika: 1 teaspoon (for that smoky depth)
- Black pepper: 1 teaspoon freshly ground
- All-purpose flour: 2 cups (240 g) for dredging
- Cornstarch: ½ cup (60 g) mixed with flour to boost crispiness
- Cayenne pepper: ½ teaspoon (optional, for a gentle kick)
- Vegetable oil: for frying (about 4 cups or 1 liter), high smoke point like canola or peanut oil works best
If you want to switch it up, almond flour is a great gluten-free alternative for dredging, though the texture will be a bit different. For dairy-free buttermilk, mix 4 cups of your favorite plant milk with 2 tablespoons lemon juice and let it sit 10 minutes before using.
Equipment Needed
- Large mixing bowl: for brining the chicken comfortably
- Deep frying pan or cast iron skillet: at least 12 inches (30 cm) wide for even frying
- Thermometer: a reliable instant-read or deep-fry thermometer to keep oil at 350°F (175°C)
- Wire rack and baking sheet: for draining fried chicken to maintain crispness
- Tongs: for safely flipping the chicken pieces
- Shallow dish or pie plate: for dredging flour mixture
If you don’t have a thermometer, you can test oil temperature by dropping a pinch of flour into the oil—it should sizzle immediately but not burn. I usually prefer cast iron because it holds heat consistently, but a heavy-bottomed stainless pan works fine, too. For budget options, a deep saucepan and a wire cooling rack placed over a rimmed baking sheet will do just fine.
Preparation Method
- Prepare the buttermilk brine: In a large bowl, combine 4 cups (950 ml) of buttermilk with 2 tablespoons kosher salt, 1 teaspoon garlic powder, and 1 teaspoon onion powder. Stir well until the salt dissolves.
- Brine the chicken: Add the chicken pieces to the buttermilk mixture. Make sure all pieces are fully submerged. Cover the bowl with plastic wrap and refrigerate for 4 to 12 hours. I usually brine overnight for best flavor and tenderness.
- Mix the dredge: In a shallow dish, whisk together 2 cups (240 g) all-purpose flour, ½ cup (60 g) cornstarch, 1 teaspoon smoked paprika, 1 teaspoon black pepper, and ½ teaspoon cayenne pepper (optional). This blend gives that signature crispy crust.
- Drain the chicken: Remove chicken from the brine, allowing excess buttermilk to drip off. Don’t pat dry—you want some moisture to help the flour stick.
- Dredge the chicken: Coat each piece thoroughly in the flour mixture, pressing gently to adhere. For extra crunch, dip the coated piece back into the leftover buttermilk briefly, then dredge again in flour. Set the coated pieces on a wire rack for 15 minutes; this helps the crust set before frying.
- Heat the oil: Pour about 2 inches (5 cm) of vegetable oil into your skillet or deep fryer. Heat to 350°F (175°C). Use a thermometer to keep it steady—too hot and the crust burns, too cool and the chicken absorbs excess oil.
- Fry the chicken: Carefully place chicken pieces in the oil, skin-side down, making sure not to overcrowd the pan. Fry in batches if needed. Cook for 12-15 minutes, flipping halfway, until golden brown and internal temperature reaches 165°F (74°C).
- Drain and rest: Transfer fried chicken to a wire rack set over a baking sheet to drain excess oil. Let rest 10 minutes before serving—this locks in juiciness and keeps the crust crispy.
Pro tip: Keep an eye on the oil temperature throughout—adjust the heat as needed. If the crust browns too fast, lower the heat a bit. Also, don’t skip the resting step; it’s tempting to dig in immediately, but trust me, the chicken tastes way better after a short rest.
Cooking Tips & Techniques
Fried chicken might seem simple, but getting that perfect crispy crust with juicy meat inside requires a few tricks I’ve learned over time. For one, the buttermilk brine isn’t just for flavor—it tenderizes the meat, breaking down proteins so the chicken stays moist.
Another key is the double dredge. The first coating traps moisture; the second creates that irresistible crunch. I’ve tried single dredges before but honestly, it just doesn’t compare. Also, cornstarch mixed with flour is a game changer for crispiness—don’t leave it out.
One rookie mistake is crowding the pan. When you add too many pieces, the oil temperature drops quickly, leading to greasy chicken. Fry in batches and keep cooked pieces warm in a low oven (about 200°F/95°C) if you need to.
Timing is everything. I usually brine the chicken in the morning and fry it in the evening so I’m not rushing. If you’re pressed for time, even 4 hours of brining makes a noticeable difference. And don’t rush the frying process—low and steady heat yields the best texture.
Variations & Adaptations
This crispy classic fried chicken buttermilk brined like grandma’s is a canvas for plenty of tweaks. Here are a few ideas I’ve tried or toyed with:
- Spicy Southern Style: Add 1 teaspoon cayenne pepper and 1 teaspoon hot smoked paprika to the flour mix for a bolder heat.
- Herb-Infused: Mix fresh chopped thyme and rosemary into the dredge for a fragrant twist that pairs beautifully with lemon wedges.
- Gluten-Free: Substitute the all-purpose flour with almond flour or a gluten-free baking mix. The texture will be a little different but still tasty.
- Oven-Fried Alternative: After dredging, place chicken on a wire rack over a baking sheet and bake at 425°F (220°C) for about 35 minutes, flipping halfway for a less oily option.
My personal favorite variation involves adding a splash of hot sauce to the buttermilk brine—gives a subtle tang and mild heat that’s surprising but addictive. Try it if you like a little kick without overpowering the classic flavors.
Serving & Storage Suggestions
This fried chicken is best served warm and crispy straight from the pan, but hey, sometimes life gets in the way. If you need to hold it, keep it on a wire rack in a warm oven (about 200°F/95°C) for up to an hour without losing that crunch.
Pair it with classic sides like mashed potatoes, coleslaw, or even a fresh green salad. For drinks, a cold lemonade or iced tea cuts through the richness beautifully.
To store leftovers, let the chicken cool completely, then refrigerate in an airtight container for up to 3 days. Reheat in a 375°F (190°C) oven on a wire rack to regain the crispness—microwaving will make it soggy, so avoid that if you can.
Flavors actually deepen after a day, so if you can resist, the next-day chicken is pretty fantastic, too.
Nutritional Information & Benefits
Per serving (about 1 piece of chicken), this crispy fried chicken provides roughly:
| Nutrient | Amount |
|---|---|
| Calories | 350-400 kcal |
| Protein | 30 g |
| Fat | 20 g |
| Carbohydrates | 15 g |
Using skin-on chicken adds flavor and juiciness, but if you prefer leaner cuts, skinless can be used with a slight change in texture. The buttermilk brings beneficial probiotics and calcium, while the spices add antioxidants without extra calories.
This recipe is naturally gluten-containing unless you swap out the flour, and contains dairy in the buttermilk. For dairy-free or gluten-free diets, simple substitutions work well—just be mindful of how that affects texture.
Conclusion
This crispy classic fried chicken buttermilk brined like grandma’s is more than just a meal; it’s a little celebration of simple ingredients, patience, and a few time-tested tricks that make all the difference. I love how it brings back memories and how easy it is to make feel special. Honestly, it’s that kind of recipe that sticks with you—not just because it tastes amazing, but because it’s warm, comforting, and always hits the spot.
Feel free to make it your own—tweak the spices, try different sides, or experiment with cooking methods. And when you do, I’d love to hear how it turned out! Drop a comment below or share your version with friends and family. Let’s keep this crispy classic alive and well in kitchens everywhere.
FAQs About Crispy Classic Fried Chicken Buttermilk Brined Like Grandma’s
How long should I brine the chicken in buttermilk?
Ideally, 8 to 12 hours (overnight) for maximum tenderness and flavor, but 4 hours minimum still makes a big difference.
Can I use boneless chicken for this recipe?
You can, but bone-in pieces retain more juiciness and cook more evenly in this style of frying.
What oil is best for frying chicken?
Use oils with high smoke points like vegetable, canola, or peanut oil to avoid burning and off-flavors.
How do I keep the fried chicken crispy after cooking?
Drain on a wire rack instead of paper towels and keep warm in a low oven until serving to maintain crispness.
Is it possible to bake the chicken instead of frying it?
Yes! Bake at 425°F (220°C) on a wire rack for about 35 minutes, flipping halfway, for a less oily option that still has good crunch.
PrintCrispy Classic Fried Chicken Recipe Easy Buttermilk Brined Like Grandma

This crispy classic fried chicken is buttermilk brined for tenderness and double-dredged for a golden, crunchy crust that stays crispy for hours. A perfect crowd-pleaser with simple ingredients and a nostalgic flavor.
- Prep Time: 15 minutes
- Cook Time: 15 minutes
- Total Time: 4 hours 30 minutes to 12 hours 30 minutes
- Yield: 6-8 servings 1x
- Category: Main Course
- Cuisine: American Southern
Ingredients
- 3–4 pounds bone-in, skin-on chicken pieces (thighs, drumsticks, breasts; prefer dark meat)
- 4 cups buttermilk (preferably whole buttermilk)
- 2 tablespoons kosher salt
- 1 teaspoon garlic powder
- 1 teaspoon onion powder
- 1 teaspoon smoked paprika
- 1 teaspoon freshly ground black pepper
- 2 cups all-purpose flour
- ½ cup cornstarch
- ½ teaspoon cayenne pepper (optional)
- Vegetable oil for frying (about 4 cups)
Instructions
- In a large bowl, combine buttermilk, kosher salt, garlic powder, and onion powder. Stir until salt dissolves.
- Add chicken pieces to the buttermilk mixture, ensuring they are fully submerged. Cover and refrigerate for 4 to 12 hours (overnight preferred).
- In a shallow dish, whisk together flour, cornstarch, smoked paprika, black pepper, and cayenne pepper (if using).
- Remove chicken from brine, letting excess buttermilk drip off. Do not pat dry.
- Dredge each piece thoroughly in the flour mixture, pressing gently to adhere. For extra crunch, dip coated pieces briefly back into leftover buttermilk, then dredge again in flour. Place coated pieces on a wire rack for 15 minutes to set the crust.
- Pour about 2 inches of vegetable oil into a deep frying pan or cast iron skillet and heat to 350°F (175°C).
- Fry chicken pieces skin-side down in batches without overcrowding. Cook for 12-15 minutes, flipping halfway, until golden brown and internal temperature reaches 165°F (74°C).
- Transfer fried chicken to a wire rack over a baking sheet to drain excess oil. Let rest for 10 minutes before serving.
Notes
Keep oil temperature steady at 350°F to avoid burning or greasy chicken. Rest chicken on wire rack after frying to maintain crispness. For gluten-free, substitute all-purpose flour with almond flour. For dairy-free, use plant milk with lemon juice as buttermilk substitute. Avoid overcrowding pan to keep oil temperature stable. Rest chicken 10 minutes before serving for best texture.
Nutrition
- Serving Size: 1 piece of chicken
- Calories: 350400
- Fat: 20
- Carbohydrates: 15
- Protein: 30
Keywords: fried chicken, buttermilk brine, crispy chicken, classic fried chicken, southern fried chicken, easy fried chicken, double dredge, crispy crust