Introduction
Last Sunday afternoon, I found myself standing in the middle of my cluttered kitchen, a half-empty bag of onions rolling around on the counter and a loaf of crusty bread staring back at me. Honestly, I was just trying to whip up a quick snack before the evening game, but what happened next was pure magic. I wasn’t planning on reinventing the blooming onion (you know, that iconic appetizer from chain restaurants), but somehow, the idea of marrying that crispy, savory crunch with warm, fresh bread hit me like a lightning bolt. I grabbed a sharp knife, made some careful cuts into the bread like I’d seen with the blooming onion technique, and then went all in with garlic butter. Let me tell you, that first bite — the crunch, the buttery garlic hit, the soft bread underneath — it was a game changer.
Maybe you’ve been there, staring at your pantry, hunting for something fun yet simple to make. This crispy blooming onion bread with garlic butter dip isn’t just a recipe; it’s that happy accident you didn’t see coming. And honestly, it stuck with me because it’s perfect for those casual hangouts or last-minute cravings when you want something impressive but without the fuss. Plus, it’s a crowd-pleaser — my friends couldn’t stop reaching for it at the last barbecue. So, if you’re ready to try something that feels fancy but is totally doable, stick with me. This recipe will become your go-to for easy, crispy, garlicky goodness.
Why You’ll Love This Recipe
I’ve tested this crispy blooming onion bread recipe more times than I care to admit (and yes, sometimes I burned it—don’t judge). But after a few tweaks, it’s now a surefire winner every time. Here’s why I think you’ll love it as much as I do:
- Quick & Easy: Comes together in under 30 minutes, making it perfect for busy weeknights or last-minute guests.
- Simple Ingredients: You probably already have everything in your kitchen—bread, onions, butter, garlic—no fancy grocery runs needed.
- Perfect for Sharing: Great for casual dinners, game day snacks, or even a cozy movie night.
- Crowd-Pleaser: The crispy, golden edges and garlicky butter dip always get rave reviews from both kids and adults alike.
- Unique Twist: This isn’t just another garlic bread. Using the blooming onion cutting technique creates crispy, pull-apart layers that make every bite exciting.
- Comfort Food with a Kick: The buttery garlic dip adds that soul-soothing depth, turning simple bread into a crave-worthy treat.
What really sets this recipe apart is the balance of textures — crunchy edges meeting soft, tender bread inside — plus the garlic butter dip that’s just the right amount of rich and savory. Honestly, once you try this, you’ll wonder how you ever enjoyed garlic bread without it! Whether you’re impressing friends or just treating yourself, this recipe hits all the right notes.
What Ingredients You Will Need
This recipe uses simple, wholesome ingredients to deliver bold flavor and satisfying texture without any fuss. Most of these are pantry staples, and you can easily swap a few to suit your preferences or what you have on hand.
- Loaf of bread (preferably a round sourdough or boule, about 10–12 inches in diameter) – crusty on the outside, soft inside
- Large yellow onion – thinly sliced for maximum crispiness
- Unsalted butter, 6 tablespoons, softened (I like Kerrygold for its rich flavor)
- Garlic cloves, 3 large, minced (fresh garlic makes all the difference)
- Fresh parsley, 2 tablespoons finely chopped (adds a pop of color and freshness)
- Grated Parmesan cheese, 1/4 cup (optional, but highly recommended for a savory boost)
- Smoked paprika, 1/2 teaspoon (gives a subtle smoky warmth)
- Salt, 1/2 teaspoon
- Black pepper, 1/4 teaspoon, freshly ground
- Olive oil, 1 tablespoon (for brushing the bread before baking)
Substitution tips: If you prefer dairy-free options, swap butter for a plant-based spread and skip the Parmesan or use a vegan alternative. For a gluten-free twist, use your favorite gluten-free round bread or even a sturdy gluten-free baguette.
Equipment Needed

- A sharp serrated knife – essential for making clean, even cuts in the bread without squashing it
- Baking sheet or oven-safe pan – to catch any drips and hold your bread while it bakes
- Mixing bowl – for combining garlic butter and seasonings
- Small basting brush – handy for spreading butter and olive oil evenly on the bread
- Aluminum foil – useful for tenting the bread if it browns too quickly
If you don’t have a serrated knife, a very sharp chef’s knife will work but be extra careful with the cuts. I once tried using a dull knife, and the bread got mangled—lesson learned! You don’t need any fancy gadgets here, just the basics. Also, a good set of tongs comes in handy if you want to flip the bread halfway through baking for extra crispness.
Preparation Method
- Preheat your oven to 375°F (190°C). Line a baking sheet with parchment paper or lightly grease it to prevent sticking. This step ensures your bread cooks evenly and crisps up nicely.
- Prepare the onion butter: In a mixing bowl, combine the softened butter, minced garlic, chopped parsley, grated Parmesan (if using), smoked paprika, salt, and pepper. Mix well until smooth and fragrant. This garlic butter will be the flavor powerhouse of your dish.
- Cut the bread: Place the loaf on a cutting board. Using your serrated knife, make vertical cuts about 1 inch (2.5 cm) apart around the bread, stopping about 1 inch (2.5 cm) from the bottom crust so the loaf stays intact. Then make horizontal cuts to create a grid, again about 1 inch apart. You’re aiming to create “petals” like a blooming onion, but with bread.
- Spread the butter: Using your fingers or a small spoon, gently work the garlic butter between each cut section, making sure every layer gets a generous coating. Don’t be shy here — this is where the flavor really seeps in.
- Brush the top: Lightly brush the top crust with olive oil. This helps the bread achieve that extra golden, crispy finish without burning.
- Bake: Place the loaf on your baking sheet and bake for 20–25 minutes, or until the bread is golden brown and the edges are crispy. If the top browns too fast, tent loosely with foil to avoid burning while the inside finishes cooking.
- Prepare the garlic butter dip: While the bread bakes, melt 2 tablespoons of butter in a small saucepan over low heat. Add 1 minced garlic clove and cook gently until fragrant (about 1 minute). Remove from heat and set aside. This dip is perfect for dunking those crispy bread petals.
- Serve warm: Remove the bread from the oven and let it cool for 5 minutes. Transfer to a serving plate and serve alongside the warm garlic butter dip. Watch it disappear fast!
Tip: If you want an even crispier bread, pop it under the broiler for 1-2 minutes at the end, but keep a close eye to avoid burning. I once forgot and ended up with a slightly charred loaf—but hey, still tasty!
Cooking Tips & Techniques
Making crispy blooming onion bread is all about balancing texture and flavor, and here are some tips I picked up along the way:
- Use day-old bread: Slightly stale bread holds up better to the butter and baking, preventing it from turning soggy inside.
- Don’t skip the garlic butter: This is the heart of the flavor. Fresh garlic and softened butter make a huge difference compared to pre-minced or cold butter.
- Cut carefully: Take your time with the knife to avoid tearing the bread. A serrated knife with a gentle sawing motion works best.
- Watch the oven: Baking times vary depending on your bread type and oven. Start checking at 20 minutes to avoid overcooking.
- Layer flavors: Adding smoked paprika and Parmesan ups the savory factor, but you can tweak these based on your taste.
- Multitask: While the bread bakes, prepare the garlic butter dip to serve fresh and warm.
Honestly, my first few attempts were a bit underwhelming because I skimped on garlic or didn’t let the butter soften enough. Once I got those right, the recipe really shined. Also, I find that letting the bread rest a few minutes out of the oven helps the garlic butter soak in better without making it mushy.
Variations & Adaptations
This crispy blooming onion bread recipe is super flexible, so feel free to customize it to your liking or dietary needs.
- Cheesy variation: Sprinkle shredded mozzarella or cheddar between the layers before baking for a gooey, melty surprise.
- Vegan adaptation: Use vegan butter and skip the Parmesan or swap it with nutritional yeast for a cheesy flavor.
- Spicy twist: Add a pinch of cayenne pepper or red chili flakes to the garlic butter for a subtle heat that wakes up your taste buds.
- Herbal boost: Mix fresh thyme or rosemary into the butter for a fragrant, earthy note.
- Cooking method: For a smoky flavor, try grilling the bread wrapped in foil on a medium heat grill for 10 minutes, then unwrap and grill a few more minutes for crispiness.
Once, I added sun-dried tomatoes and basil into the butter mix, and it turned out to be a hit at a summer potluck. It’s fun to experiment, so don’t hesitate to make this recipe your own.
Serving & Storage Suggestions
Serve this crispy blooming onion bread warm for the best experience. The garlic butter dip should be fresh and hot, perfect for dunking each crispy petal. Pair it with a fresh green salad or a bowl of tomato soup for a cozy meal. For drinks, a chilled glass of white wine or a cold beer complements the rich garlic flavor beautifully.
If you have leftovers (which is rare), wrap the bread tightly in foil or store in an airtight container in the refrigerator for up to 2 days. To reheat, pop it in a 350°F (175°C) oven for 10 minutes to restore crispiness. Avoid microwaving as it makes the bread soggy. Flavors actually deepen after a day, so reheating can be surprisingly good.
Nutritional Information & Benefits
Estimated per serving (based on 8 servings):
| Calories | 210 |
|---|---|
| Total Fat | 12g |
| Saturated Fat | 7g |
| Carbohydrates | 22g |
| Protein | 5g |
| Fiber | 1.5g |
Key ingredients like garlic have known antioxidant and immune-boosting properties, while parsley adds vitamins A and C. Using whole grain or sourdough bread can increase fiber content, making this snack a bit more nourishing. This recipe is not gluten-free by default but can be adapted with gluten-free bread. Contains dairy and garlic, so keep that in mind for allergies or sensitivities.
Conclusion
Honestly, this crispy blooming onion bread with garlic butter dip is one of those recipes that turns simple ingredients into something unforgettable. It’s perfect if you want a snack that feels special without hours in the kitchen. Plus, it’s so easy to make your own tweaks and play with flavors. I love this recipe because it’s reliably delicious, fun to share, and always gets people talking — maybe even sneaking back for seconds (or thirds!).
Give it a try, and let me know how you customize it. I’m always curious about new twists and stories from your kitchen adventures. Happy baking!
Frequently Asked Questions
Can I use regular sandwich bread instead of a round loaf?
Regular sandwich bread won’t work well because it lacks the shape and crust needed to create the “blooming” effect. A round boule or sourdough loaf is best for this recipe.
How do I store leftover crispy blooming onion bread?
Wrap it tightly in foil or store in an airtight container in the fridge for up to 2 days. Reheat in the oven at 350°F (175°C) for 10 minutes to restore crispiness.
Can I prepare the garlic butter in advance?
Yes! You can mix the garlic butter up to 2 days ahead and keep it refrigerated. Bring it to room temperature before spreading on the bread for easier application.
Is there a gluten-free option for this recipe?
Absolutely. Use a sturdy gluten-free round loaf or gluten-free bread that holds its shape well. Adjust baking time as needed.
What can I serve with this crispy blooming onion bread?
A fresh salad, tomato soup, or even a dipping sauce like ranch or marinara complements this bread nicely. A cold drink like beer or white wine pairs beautifully too.
Pin This Recipe!
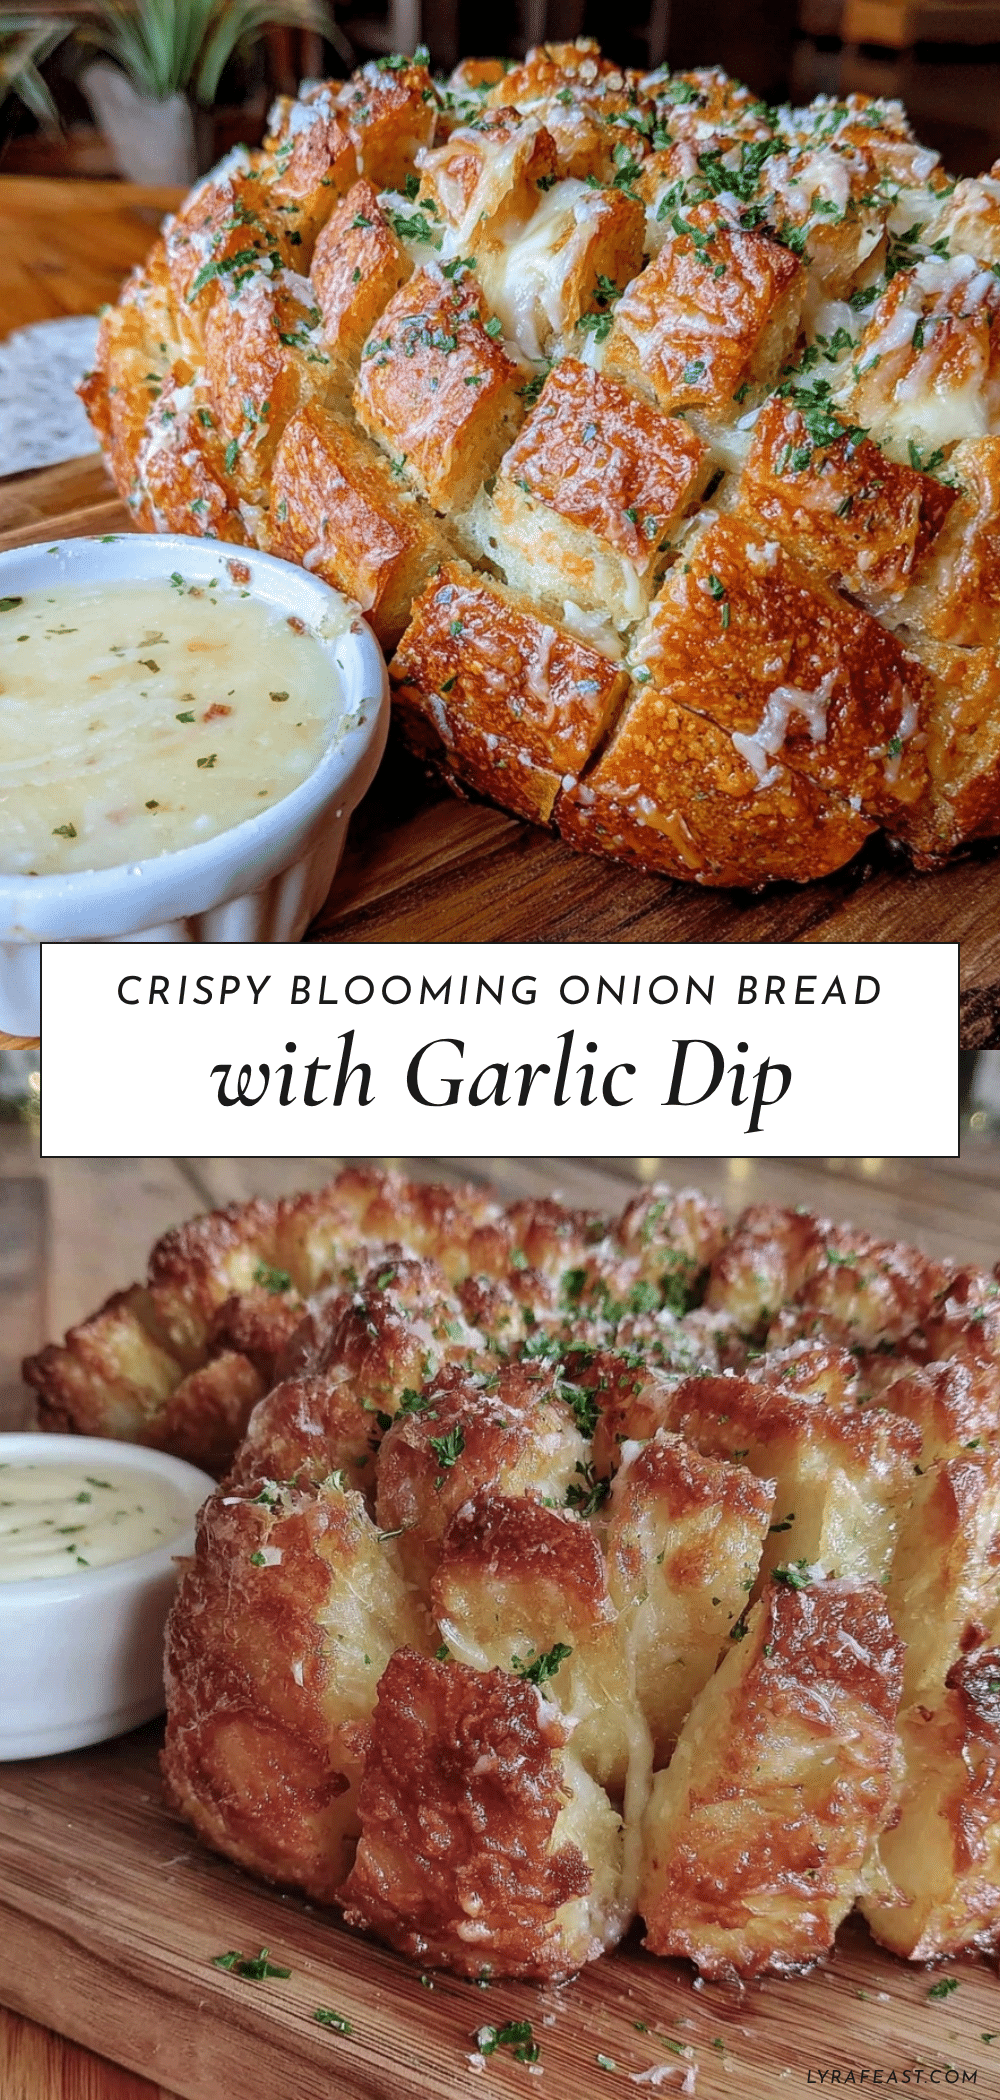
Crispy Blooming Onion Bread Recipe with Easy Garlic Butter Dip

A quick and easy snack combining the crispy, savory crunch of a blooming onion with warm, fresh bread, served with a rich garlic butter dip. Perfect for casual hangouts, game day snacks, or cozy movie nights.
- Prep Time: 10 minutes
- Cook Time: 25 minutes
- Total Time: 35 minutes
- Yield: 8 servings 1x
- Category: Snack
- Cuisine: American
Ingredients
- 1 loaf of bread (preferably a round sourdough or boule, about 10–12 inches in diameter)
- 1 large yellow onion, thinly sliced
- 6 tablespoons unsalted butter, softened
- 3 large garlic cloves, minced
- 2 tablespoons fresh parsley, finely chopped
- 1/4 cup grated Parmesan cheese (optional)
- 1/2 teaspoon smoked paprika
- 1/2 teaspoon salt
- 1/4 teaspoon freshly ground black pepper
- 1 tablespoon olive oil (for brushing the bread before baking)
Instructions
- Preheat your oven to 375°F (190°C). Line a baking sheet with parchment paper or lightly grease it.
- In a mixing bowl, combine softened butter, minced garlic, chopped parsley, grated Parmesan (if using), smoked paprika, salt, and pepper. Mix well until smooth.
- Place the loaf on a cutting board. Using a serrated knife, make vertical cuts about 1 inch apart around the bread, stopping about 1 inch from the bottom crust. Then make horizontal cuts about 1 inch apart to create a grid, forming ‘petals’ like a blooming onion.
- Gently work the garlic butter between each cut section, coating every layer generously.
- Lightly brush the top crust with olive oil.
- Place the loaf on the baking sheet and bake for 20–25 minutes, or until golden brown and crispy. Tent with foil if the top browns too quickly.
- While the bread bakes, melt 2 tablespoons of butter in a small saucepan over low heat. Add 1 minced garlic clove and cook gently until fragrant, about 1 minute. Remove from heat and set aside for dipping.
- Remove the bread from the oven and let cool for 5 minutes. Serve warm with the garlic butter dip.
Notes
Use day-old bread for better texture. If the bread browns too fast, tent with foil. For extra crispiness, broil for 1-2 minutes at the end but watch carefully to avoid burning. The garlic butter dip can be prepared up to 2 days in advance and refrigerated. Reheat leftovers in a 350°F oven for 10 minutes to restore crispiness; avoid microwaving.
Nutrition
- Serving Size: 1 slice or petal of
- Calories: 210
- Fat: 12
- Saturated Fat: 7
- Carbohydrates: 22
- Fiber: 1.5
- Protein: 5
Keywords: blooming onion bread, garlic butter dip, crispy bread, game day snack, easy appetizer, garlic bread, savory snack