My neighbor watched me fumble with a towering dessert of layered cake and frosting, clearly struggling to keep it from toppling over, and didn’t say anything at first. Then, she casually mentioned, “Have you ever tried an icebox cake with Oreos? It’s practically foolproof and perfect for summer.” That offhand remark came one bright Tuesday evening while we were both watering our tiny, shared garden patch. Honestly, I was skeptical — no-bake cakes seemed like a shortcut that couldn’t deliver on taste or wow factor. But she smiled and handed me a simple recipe scribbled on a slightly crumpled index card, saying, “Just wait—you’ll see.”
What I didn’t realize then was how this easy no-bake patriotic Oreo icebox cake would become my go-to for every 4th of July gathering. Maybe you know that feeling when a recipe sneakily becomes part of your tradition because it’s easy, looks stunning, and tastes like the holidays wrapped up in creamy layers and crunchy cookies. That cracked Pyrex dish I borrowed from my neighbor that day still sits in my cupboard, a little worse for wear but full of memories. I made a mess with whipped cream and got interrupted by my dog barking at fireworks, but the result? Pure magic. This cake stays with you—not just for its taste, but for the laughter, the summer heat, and the joy of sharing something simple yet special.
If you’re looking for a dessert that’s as effortless as it is festive, and that brings a little bit of that neighborly warmth to your table, this easy no-bake patriotic Oreo icebox cake is exactly what you want.
Why You’ll Love This Recipe
Having tested this easy no-bake patriotic Oreo icebox cake through several 4th of July parties and casual get-togethers, I can say it’s a winner every time. It’s not just about the looks—though the red, white, and blue layers do catch plenty of eyes—it’s about how it comes together without requiring hours of baking or complicated steps.
- Quick & Easy: Ready in under 20 minutes, letting the fridge do all the hard work.
- Simple Ingredients: Pantry staples like Oreos, whipped cream, and berries mean no special grocery runs.
- Perfect for Summer Celebrations: Whether it’s a backyard BBQ or a picnic, this cake feels festive and fresh.
- Crowd-Pleaser: Kids adore the creamy layers and cookie crunch, while adults appreciate the nostalgic twist.
- Unbelievably Delicious: The combo of cool cream, crisp Oreos, and juicy berries hits every craving spot.
What sets this recipe apart is its effortless layering technique that makes the Oreo cookies soften just enough to meld with the whipped cream, creating a mousse-like texture that’s dreamy without being heavy. I also love how the fresh strawberries and blueberries add a natural pop of color and a hint of tartness, balancing the sweetness perfectly. Honestly, this isn’t just another icebox cake—it’s the one I reach for when I want a dessert that impresses without stressing me out.
What Ingredients You Will Need
This recipe uses simple, wholesome ingredients to deliver bold flavor and satisfying texture without the fuss. Most of these are pantry staples or fresh seasonal picks, so you likely have many on hand already.
- Oreos: 24 full-size cookies, classic chocolate with creme filling (feel free to use a brand like Nabisco for the best texture)
- Heavy Whipping Cream: 2 cups (480 ml), cold (this is key for fluffy, stable whipped cream)
- Powdered Sugar: ¼ cup (30 g), sifted (for smooth sweetness)
- Vanilla Extract: 1 teaspoon (adds warmth and depth)
- Fresh Strawberries: 1 cup (150 g), hulled and sliced (choose ripe, firm berries)
- Fresh Blueberries: 1 cup (150 g), washed and dried
- Optional: A few sprigs of fresh mint for garnish (adds a refreshing aroma)
You can swap heavy cream with a stabilized whipped topping if dairy is an issue, but honestly, the real cream whipped fresh always wins for texture. If you want a gluten-free version, try gluten-free chocolate sandwich cookies, though keep in mind the flavor will shift slightly. Seasonal berry swaps work well too—raspberries or blackberries can add a lovely twist.
Equipment Needed
- Large mixing bowl (preferably metal or glass) for whipping cream
- Electric mixer or hand whisk (I recommend an electric mixer for ease and speed, but a strong arm works too!)
- 9×9 inch (23×23 cm) square dish or a similar-sized glass baking dish
- Spatula for folding and spreading the whipped cream
- Measuring cups and spoons for accuracy
- Knife and cutting board for prepping berries
If you don’t have an electric mixer, a sturdy balloon whisk can do the job, but be prepared for a workout! A glass dish is helpful so you can admire the layers as they set, but any shallow container will work.
Preparation Method
- Chill your equipment: Place your mixing bowl and beaters in the fridge for about 15 minutes before whipping the cream. Cold tools help the cream whip up better and faster.
- Whip the cream: In the chilled bowl, pour 2 cups (480 ml) of heavy whipping cream. Beat on medium-high speed until it starts to thicken (about 2 minutes). Add ¼ cup (30 g) powdered sugar and 1 teaspoon vanilla extract. Continue whipping until soft peaks form—when you lift the whisk, the cream should hold a peak but still look smooth. Be careful not to overwhip or it’ll turn grainy.
- Prep the cookies: Quickly separate the Oreos. For this recipe, leave them whole to keep a nice texture, but if you prefer, you can break them roughly in half. I find whole cookies soften nicely overnight in the fridge, giving a perfect balance of crunch and creaminess.
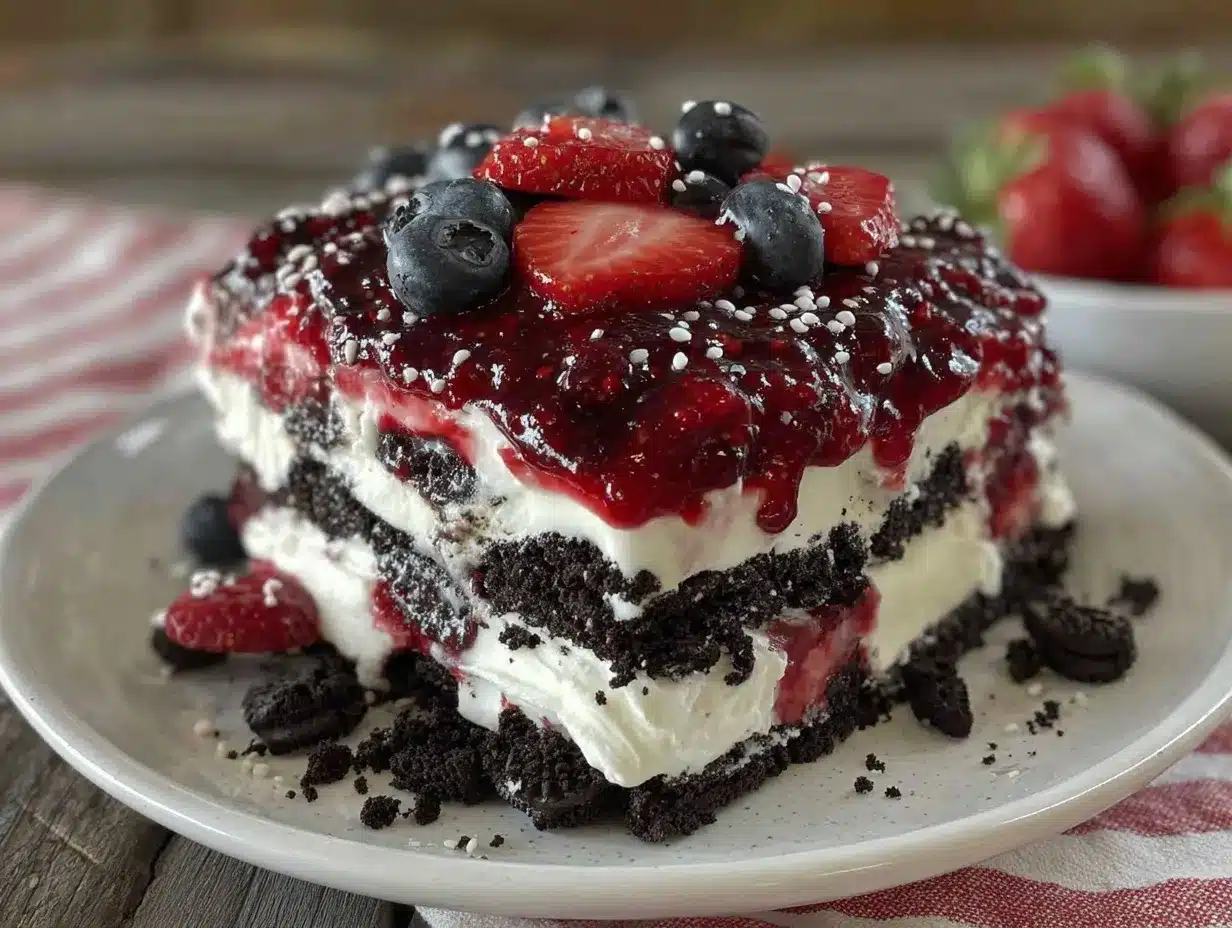
- Layer the cake: Spread a thin layer of whipped cream on the bottom of your dish (about ½ cup or 120 ml). Arrange a single layer of Oreos on top, fitting them snugly side by side. Spread another layer of whipped cream (about 1 cup or 240 ml) over the cookies, smoothing gently. Add a layer of sliced strawberries and blueberries evenly over the cream.
- Repeat layers: Add another layer of Oreos, followed by the remaining whipped cream. Top with the remaining berries, pressing down lightly to set the layers.
- Chill: Cover with plastic wrap and refrigerate for at least 4 hours, ideally overnight. This resting time lets the cookies soften and the flavors meld beautifully. You’ll notice the cream becomes luscious and cookie layers turn into a cake-like texture.
- Serve: Just before serving, garnish with fresh mint if using. Cut into squares with a sharp knife (dip it in hot water for cleaner cuts).
If your whipped cream starts to separate or looks watery, it probably got overmixed or was too warm—start fresh with colder cream and chilled tools. When layering, be gentle to avoid crushing the cookies, but firm enough to keep layers intact. The visual of the red, white, and blue layers peeking through the glass dish is part of the charm, so take your time arranging those berries.
Cooking Tips & Techniques
Whipping cream might seem straightforward, but a few tips from experience can save you frustration. Always use cold cream straight from the fridge, and chill your mixing bowl and beaters if you can. This simple step makes the difference between fluffy peaks and a soupy mess.
Don’t rush the chilling step. I’ve learned the hard way that cutting into the cake too soon leaves the Oreos hard and the cream loose. Overnight chilling is best, but if you’re in a pinch, 4 hours minimum will do.
When layering, try not to overcrowd the dish with too many Oreos in one layer—give the cream space to soften the cookies evenly. If you want a cleaner slice, run a sharp knife under hot water and wipe it dry before cutting. I often keep a cup of hot water nearby for this exact reason.
Timing-wise, this cake is forgiving. You can prepare it the day before and relax while it rests in the fridge. It’s great for multitasking during busy holiday prep, letting you focus on the main dishes or drinks.
Variations & Adaptations
- Dairy-Free Version: Use coconut whipped cream or a store-bought dairy-free alternative and gluten-free chocolate sandwich cookies for a similar effect.
- Flavor Twists: Add a drizzle of melted peanut butter between layers for a rich, nutty surprise, or swap vanilla extract for almond extract for a subtle twist.
- Seasonal Berries: Depending on the season, switch out strawberries and blueberries for raspberries, blackberries, or even sliced kiwi for a tropical note.
- Chocolate Lovers: Sprinkle mini chocolate chips between layers or dust cocoa powder on top before serving.
- Personal Favorite: One summer, I added a layer of crushed peppermint Oreos, which gave a refreshing pop that guests couldn’t stop talking about.
Serving & Storage Suggestions
This cake is best served chilled—straight from the fridge so the layers hold firm and the cream is cool and refreshing. I like to plate it with a small scoop of vanilla ice cream or a sprig of mint for a pop of color and added aroma. It pairs wonderfully with iced tea, lemonade, or even a sparkling rosé for adults.
Store leftovers tightly covered in the refrigerator for up to 3 days. The flavors actually deepen and soften further after a day, so if you can wait, it tastes even better. To reheat, just let it sit at room temperature for 10-15 minutes before serving—no microwave needed.
Nutritional Information & Benefits
Per serving, this dessert is moderately indulgent but balanced by the fresh fruit and portion size. Each slice contains approximately 300 calories, with around 20 grams of fat, 30 grams of carbohydrates, and 4 grams of protein. The fresh berries add antioxidants and vitamin C, while Oreos provide a nostalgic crunch that satisfies sweet cravings.
This recipe is easily adaptable for gluten-free or dairy-free diets, making it accessible to more people. I appreciate how it lets me enjoy a treat without fussing over complicated ingredients or long prep times, which keeps stress off the table during busy holidays.
Conclusion
If you’ve been looking for a dessert that’s as easy as it is festive, this easy no-bake patriotic Oreo icebox cake is a no-brainer. It’s forgiving, visually stunning, and tastes like summer on a plate—without hours in the kitchen. Honestly, it’s become a staple in my holiday lineup because it feels like a little celebration in every bite.
Feel free to make it your own—swap the berries, try different cookie brands, or add that special twist that speaks to your taste buds. I love how this recipe brings people together in the best way: sharing something simple, sweet, and made with a little heart. If you try it, I’d love to hear how yours turns out. Leave a comment or share your version!
Here’s to making dessert easy, joyful, and full of flavor.
FAQs
Can I use different cookies instead of Oreos?
Yes! Chocolate sandwich cookies work best for texture, but you can experiment with vanilla or gluten-free versions. Just keep in mind the flavor and softness will vary.
How long should I chill the icebox cake?
At least 4 hours, but overnight chilling is best for the creamiest texture and softened cookies.
Can I prepare this cake a day ahead?
Absolutely! It actually tastes better after resting, making it perfect for stress-free entertaining.
Is this recipe suitable for dairy-free diets?
Yes, swap heavy cream for coconut whipped cream and use dairy-free cookies to keep it allergy-friendly.
How do I get clean slices when serving?
Use a sharp knife warmed in hot water, then dried, for smooth, clean cuts through the creamy layers.
Pin This Recipe!
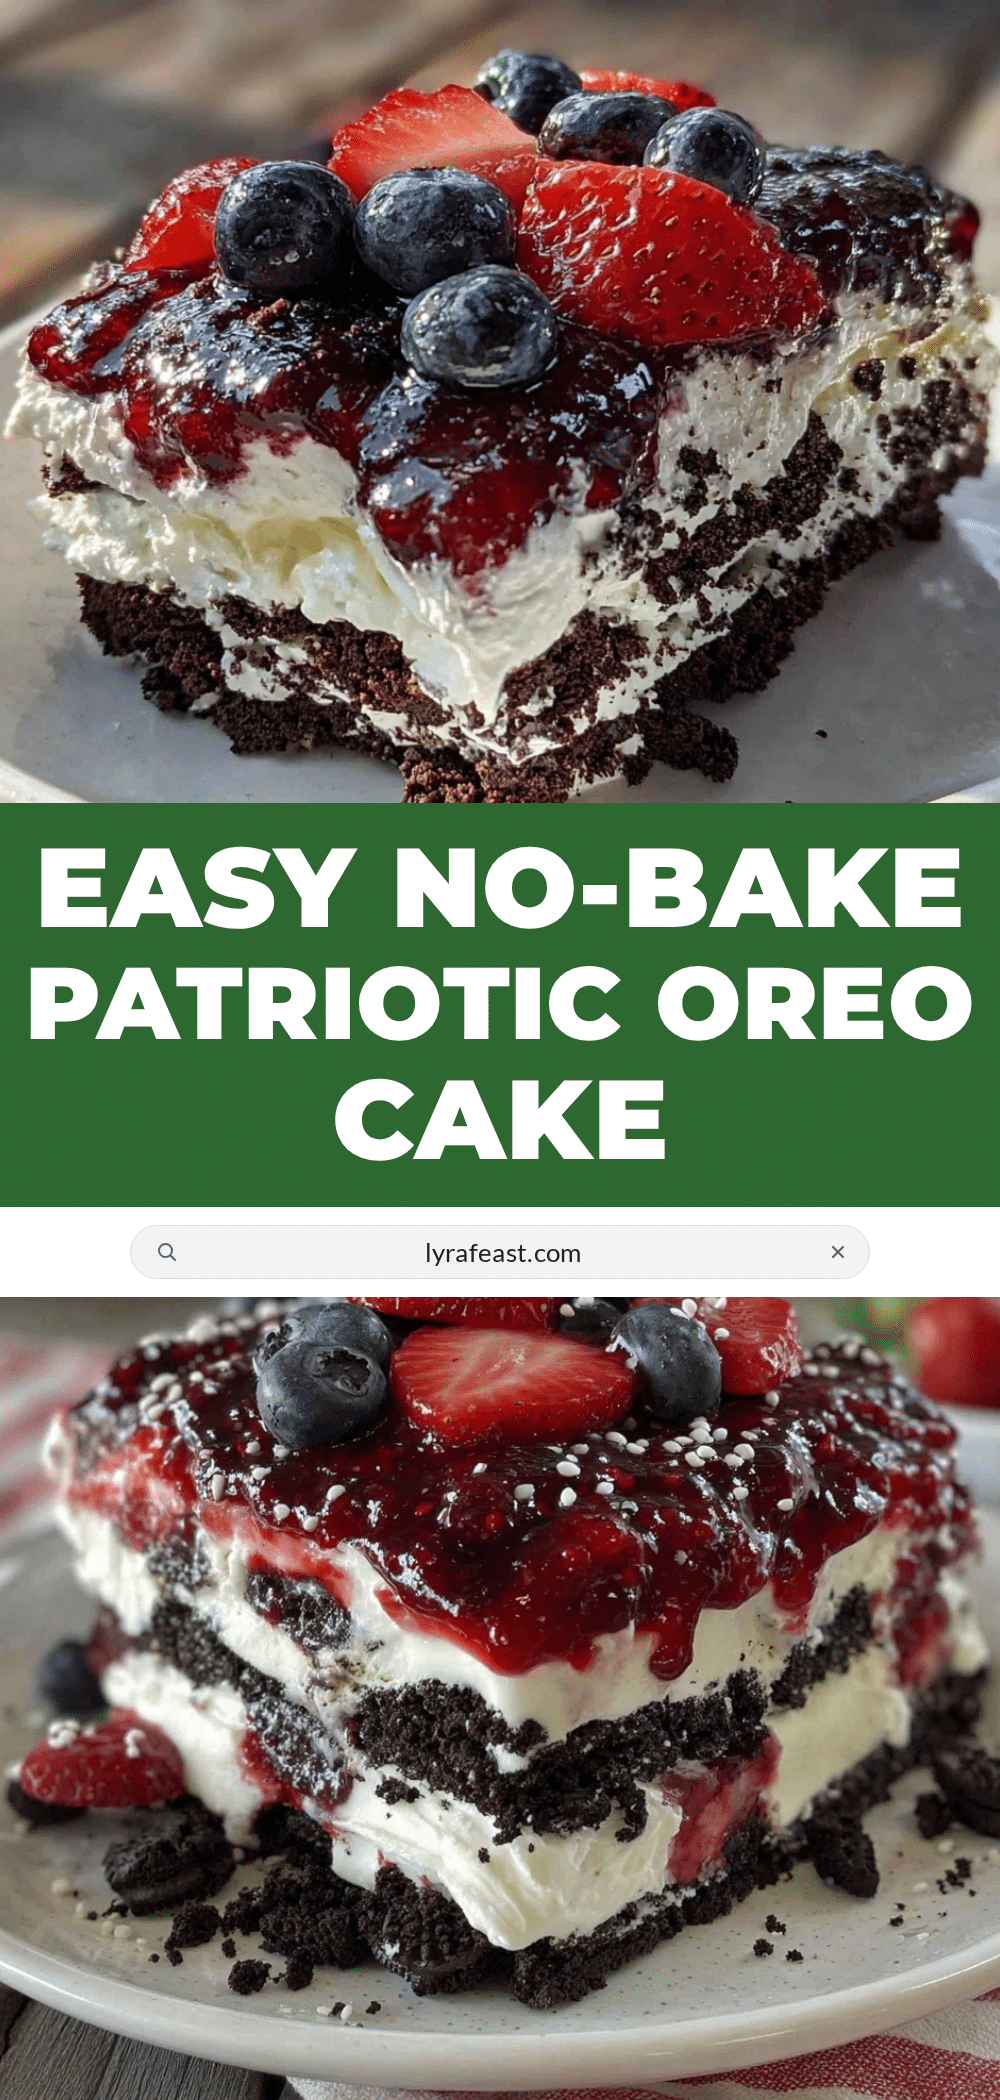
Easy No-Bake Patriotic Oreo Icebox Cake Recipe Perfect for 4th of July

A simple, no-bake icebox cake featuring layers of Oreos, whipped cream, and fresh berries, perfect for summer celebrations and 4th of July gatherings.
- Prep Time: 15 minutes
- Cook Time: 0 minutes
- Total Time: 4 hours 15 minutes
- Yield: 9 servings 1x
- Category: Dessert
- Cuisine: American
Ingredients
- 24 full-size Oreos, classic chocolate with creme filling
- 2 cups (480 ml) heavy whipping cream, cold
- ¼ cup (30 g) powdered sugar, sifted
- 1 teaspoon vanilla extract
- 1 cup (150 g) fresh strawberries, hulled and sliced
- 1 cup (150 g) fresh blueberries, washed and dried
- Optional: fresh mint sprigs for garnish
Instructions
- Chill your mixing bowl and beaters in the fridge for about 15 minutes before whipping the cream.
- In the chilled bowl, pour 2 cups (480 ml) of heavy whipping cream. Beat on medium-high speed until it starts to thicken (about 2 minutes).
- Add ¼ cup (30 g) powdered sugar and 1 teaspoon vanilla extract. Continue whipping until soft peaks form.
- Quickly separate the Oreos. Leave them whole or break roughly in half if preferred.
- Spread about ½ cup (120 ml) of whipped cream on the bottom of a 9×9 inch (23×23 cm) dish.
- Arrange a single layer of Oreos on top, fitting them snugly side by side.
- Spread about 1 cup (240 ml) of whipped cream over the Oreos, smoothing gently.
- Add a layer of sliced strawberries and blueberries evenly over the cream.
- Repeat with another layer of Oreos, followed by the remaining whipped cream.
- Top with the remaining berries, pressing down lightly to set the layers.
- Cover with plastic wrap and refrigerate for at least 4 hours, ideally overnight.
- Just before serving, garnish with fresh mint if using. Cut into squares with a sharp knife dipped in hot water for cleaner cuts.
Notes
Chill mixing bowl and beaters before whipping cream for best results. Do not overwhip cream to avoid grainy texture. Chill cake at least 4 hours or overnight for softened cookies and best flavor. Use a sharp knife warmed in hot water for clean slices. Variations include dairy-free and gluten-free substitutions, and seasonal berry swaps.
Nutrition
- Serving Size: 1 slice (approximate
- Calories: 300
- Fat: 20
- Carbohydrates: 30
- Protein: 4
Keywords: no-bake, Oreo, icebox cake, 4th of July, patriotic dessert, easy dessert, summer dessert, layered cake, whipped cream, berries