The summer I turned thirty, I was wandering through an old flea market on a blazing July afternoon, trying to kill time before meeting a friend. I wasn’t expecting dessert ideas from the dusty aisles of vintage goods, but there I was, leaning on a cracked wooden table, when a quiet woman selling handmade jewelry started chatting about her secret recipe for a red white and blue no-bake cheesecake flag cake. Honestly, she looked like someone who wouldn’t even care about baking—she was more the type to fix watches or organize paperwork—but there she was, passionately describing how to layer strawberries, blueberries, and creamy cheesecake to create a dessert that stole the show at every Fourth of July picnic she’d ever attended.
I remember the way her eyes lit up when she talked about the texture—the cool, smooth cheesecake contrasted with the juicy burst of fresh berries arranged into a star-spangled flag pattern. I was skeptical at first (I mean, no-bake cheesecakes can be tricky), but her enthusiasm was contagious. Maybe you’ve been there too—listening to someone who wouldn’t seem like a dessert guru, only to find yourself scribbling down a recipe on the back of a napkin while trying not to spill your lemonade.
That day, I left the flea market with more than just a handful of curious trinkets—I walked away with the recipe for the perfect red white and blue no-bake cheesecake flag cake. Since then, I’ve made it countless times, each batch reminding me of that unexpected moment and the joy of simple, stunning desserts. Let me tell you, this recipe isn’t just about looks; it’s about the celebration of flavor and the ease that makes it a go-to for holidays and casual gatherings alike.
Why You’ll Love This Recipe
This perfect red white and blue no-bake cheesecake flag cake is honestly a game changer, especially if you’re pressed for time but still want to impress. Here’s why it won’t leave your recipe box anytime soon:
- Quick & Easy: Ready in under 30 minutes, making it perfect for last-minute celebrations or summer cookouts.
- Simple Ingredients: No need for fancy or hard-to-find items—most are pantry staples or easy to grab from your local grocery store.
- Perfect for Patriotic Occasions: Whether it’s Independence Day, Memorial Day, or Labor Day, this cake fits right in with its festive flag design.
- Crowd-Pleaser: Kids adore the colorful layers, and adults keep coming back for more of that creamy texture.
- Unbelievably Delicious: The smooth cheesecake base paired with fresh, tart berries makes every bite a little celebration.
What sets this cheesecake apart isn’t just the no-bake convenience—it’s the attention to layering and presentation. The cheesecake filling is whipped to a silky dreaminess, and the berries form that iconic flag design that feels both nostalgic and fresh. I prefer using cream cheese from Philadelphia for the best texture, and I’ve found that balancing the sweetness with a touch of lemon zest makes all the difference. Honestly, after the first bite, you might find yourself closing your eyes for a moment, just savoring it. And trust me, that’s the kind of dessert that stays with you long after the last slice is gone.
What Ingredients You Will Need
This recipe uses simple, wholesome ingredients to deliver bold flavor and satisfying texture without the fuss. Most are pantry staples, and the fresh berries bring in that seasonal pop of color and taste.
- For the Crust:
- 1 ½ cups graham cracker crumbs (about 10 full sheets)
- 5 tablespoons unsalted butter, melted (adds richness and holds the crust together)
- 2 tablespoons granulated sugar
- For the Cheesecake Filling:
- 16 oz (450g) cream cheese, softened (I recommend Philadelphia brand for smooth texture)
- 1 cup powdered sugar, sifted (for that smooth sweetness)
- 1 teaspoon vanilla extract
- 1 tablespoon fresh lemon juice (brightens the flavor)
- 1 cup heavy whipping cream, chilled
- 1 teaspoon lemon zest (optional, but it adds a nice zing)
- For the Topping:
- 1 cup fresh strawberries, hulled and sliced (for the red stripes)
- 1 cup fresh blueberries (for the blue stars area)
- Whipped cream or additional heavy cream whipped, for white stripes
Feel free to swap out ingredients if needed: use almond flour mixed with butter for a gluten-free crust, or substitute coconut cream for heavy cream if you want a dairy-free twist. In summer, swapping fresh berries for frozen isn’t ideal, but if you do, thaw and drain well to avoid sogginess.
Equipment Needed
- 9×13-inch rectangular baking dish or pan (to create that flag shape)
- Mixing bowls (one large for filling, one for whipping cream)
- Electric mixer or stand mixer (whipping the cream and cream cheese smooth is key)
- Rubber spatula (for folding and smoothing the filling)
- Measuring cups and spoons
- Knife and cutting board (for slicing berries)
- Plastic wrap or foil (to cover the cake while chilling)
If you don’t have a stand mixer, a hand mixer works just fine—though I’ve definitely had some arm workouts whipping cream by hand! For budget-friendly options, the OXO Good Grips mixing bowls are durable and easy to clean. Keeping your cream very cold before whipping helps it thicken faster, something I learned the hard way after a few too-soft batches.
Preparation Method
- Make the Crust: In a medium bowl, combine 1 ½ cups graham cracker crumbs, 5 tablespoons melted unsalted butter, and 2 tablespoons sugar. Mix until the crumbs are evenly moistened. Press the mixture firmly into the bottom of your 9×13-inch pan to form an even layer. Chill in the fridge for 10–15 minutes to set.
- Prepare the Cheesecake Filling: In a large bowl, beat 16 oz softened cream cheese until smooth (about 2 minutes). Gradually add 1 cup powdered sugar, 1 teaspoon vanilla extract, and 1 tablespoon lemon juice. Beat until fully combined and creamy. Add lemon zest if using.
- Whip the Cream: In a separate chilled bowl, whip 1 cup heavy cream until stiff peaks form. This usually takes about 3–5 minutes on medium-high speed. Be careful not to overwhip or it will become grainy.
- Fold Cream into Cream Cheese Mixture: Using a rubber spatula, gently fold the whipped cream into the cream cheese mixture in batches. This keeps the filling light and airy. The texture should be smooth and fluffy, not dense.
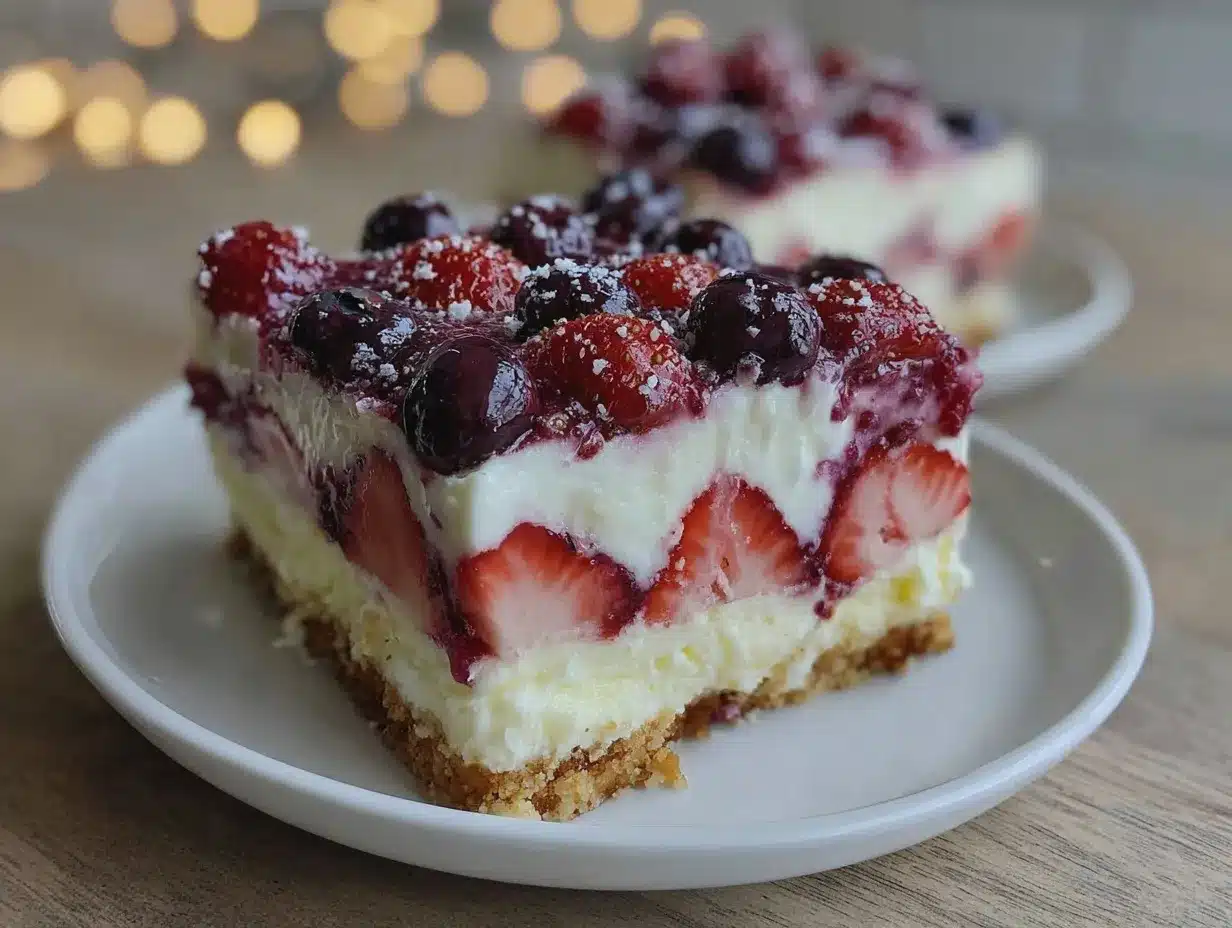
- Assemble the Cake: Spread half of the cheesecake filling evenly over the chilled crust. Smooth the surface with the spatula. Add a layer of sliced strawberries arranged in stripes for the red stripes of the flag. Next, add a thin layer of whipped cream for the white stripes. Repeat layering with the remaining cheesecake filling, then decorate the top with blueberries arranged in a rectangular cluster to mimic the stars area of the flag. Alternate the remaining strawberries and whipped cream stripes.
- Chill the Cake: Cover the cake with plastic wrap and refrigerate for at least 4 hours, preferably overnight. This helps the cheesecake set properly and the flavors meld.
- Serve: Before serving, let the cake sit at room temperature for about 10 minutes to soften slightly, making it easier to slice.
If your filling feels too soft, refrigerate longer. Also, if berries start leaking juices, pat them dry before arranging. I once forgot to chill the crust fully, and the base was crumbly—lesson learned to be patient!
Cooking Tips & Techniques
Whipping cream and folding it into a cream cheese mixture sounds easy, but there are some tricks that took me a few tries to figure out. First, always chill your mixing bowl and beaters for whipping cream—warm equipment makes the cream reluctant to thicken. When folding, use a gentle cutting and turning motion to preserve the airiness; vigorous stirring will deflate your mixture, resulting in a denser cake.
Another common mistake is not softening the cream cheese enough. If it’s still cold, lumps will form, and the texture won’t be silky. I usually leave mine out for about 30 minutes or soften it in short bursts in the microwave, careful not to melt it.
Timing is also key. You want the crust chilled and firm before adding the filling, and the cake itself needs plenty of time to set in the fridge. Rushing this step can lead to a runny mess. Multitasking helps here—I prep the crust while the cream cheese softens, whip the cream while mixing the filling, and then assemble everything in one go.
Lastly, fresh berries add the best flavor and texture, but if they’re a little watery, pat them dry. I learned this after one batch got soggy overnight. Keeping ingredients at the right temperature and handling them gently will guarantee a cheesecake that’s both stunning and satisfying.
Variations & Adaptations
You can customize this red white and blue no-bake cheesecake flag cake in several fun ways:
- Dietary-Friendly: Use a gluten-free crust by substituting graham crackers with gluten-free cookies or almond flour. Swap heavy cream for coconut cream and cream cheese for a dairy-free alternative to make it vegan-friendly.
- Seasonal Twist: Instead of strawberries and blueberries, try raspberries and blackberries for a slightly different flavor profile while keeping the red and blue theme intact.
- Flavor Variations: Add a teaspoon of almond extract to the cheesecake filling for a subtle nutty note or swirl in some crushed peppermint candies for a festive touch during winter holidays.
- Alternative Presentation: Make individual no-bake cheesecake parfaits using clear cups layered with crust crumbs, cheesecake filling, and berries for a portable, casual dessert.
I once swapped in a lemon curd layer beneath the cheesecake filling for a zesty surprise that my family couldn’t stop talking about. Feel free to experiment—this recipe is forgiving and welcoming to your kitchen creativity.
Serving & Storage Suggestions
This cheesecake is best served chilled but allowed to rest for about 10 minutes at room temperature so it slices cleanly without crumbling. For a festive touch, add a dollop of whipped cream on each slice or sprinkle with edible glitter for Fourth of July parties.
Pair it with light beverages like sparkling water with a splash of cranberry or a chilled rosé. It also complements classic summer dishes such as grilled chicken or fresh salads, making it a perfect finale for a backyard barbecue.
To store, cover tightly with plastic wrap and refrigerate for up to 3 days. The flavors actually deepen overnight, so it’s a recipe that rewards a bit of patience. You can also freeze individual slices wrapped well in foil and plastic wrap for up to 1 month—thaw in the fridge overnight before serving.
Nutritional Information & Benefits
Each serving of this red white and blue no-bake cheesecake flag cake (about 1/12th of the pan) contains approximately:
| Calories | 320 |
|---|---|
| Fat | 22g |
| Carbohydrates | 26g |
| Protein | 5g |
| Sugar | 18g |
While it’s a treat, the fresh berries provide antioxidants and vitamins C and K, adding a nutritional boost. Using real cream cheese and heavy cream offers calcium and some protein. For those watching carbs or dairy, the recipe can be adapted with low-carb crusts and dairy-free creams.
Personally, I like that this cheesecake feels indulgent but includes wholesome elements like fresh fruit and natural cream cheese, making it a balanced choice for celebrations without feeling overly heavy.
Conclusion
This perfect red white and blue no-bake cheesecake flag cake is one of those recipes that feels both special and approachable. It’s the kind of dessert you can whip up quickly, yet it looks like you spent all day on it. I love it because it brings a bit of festive fun to the table without the stress of baking, and the fresh berry layers remind me of that unexpected chat at the flea market that sparked it all.
Feel free to make it your own—switch up the berries, add a twist to the filling, or serve it in a new way. I’d love to hear how you put your spin on it! Drop a comment below or share your photos if you try it out. Here’s to simple, stunning desserts that bring people together!
FAQs
- Can I make this cheesecake ahead of time? Yes! It’s actually better when made a day ahead, allowing the flavors to meld and the filling to set perfectly.
- What if I don’t have graham crackers for the crust? You can use digestive biscuits, vanilla wafers, or even crushed pretzels for a salty twist.
- How do I prevent the berries from making the cheesecake soggy? Pat the berries dry with paper towels before placing them and add them just before serving if possible.
- Can I use frozen berries? It’s best to use fresh berries, but if using frozen, thaw and drain thoroughly to avoid excess moisture.
- Is this recipe suitable for children? Absolutely! It’s a kid-friendly dessert with simple flavors and a fun, colorful presentation.
Pin This Recipe!
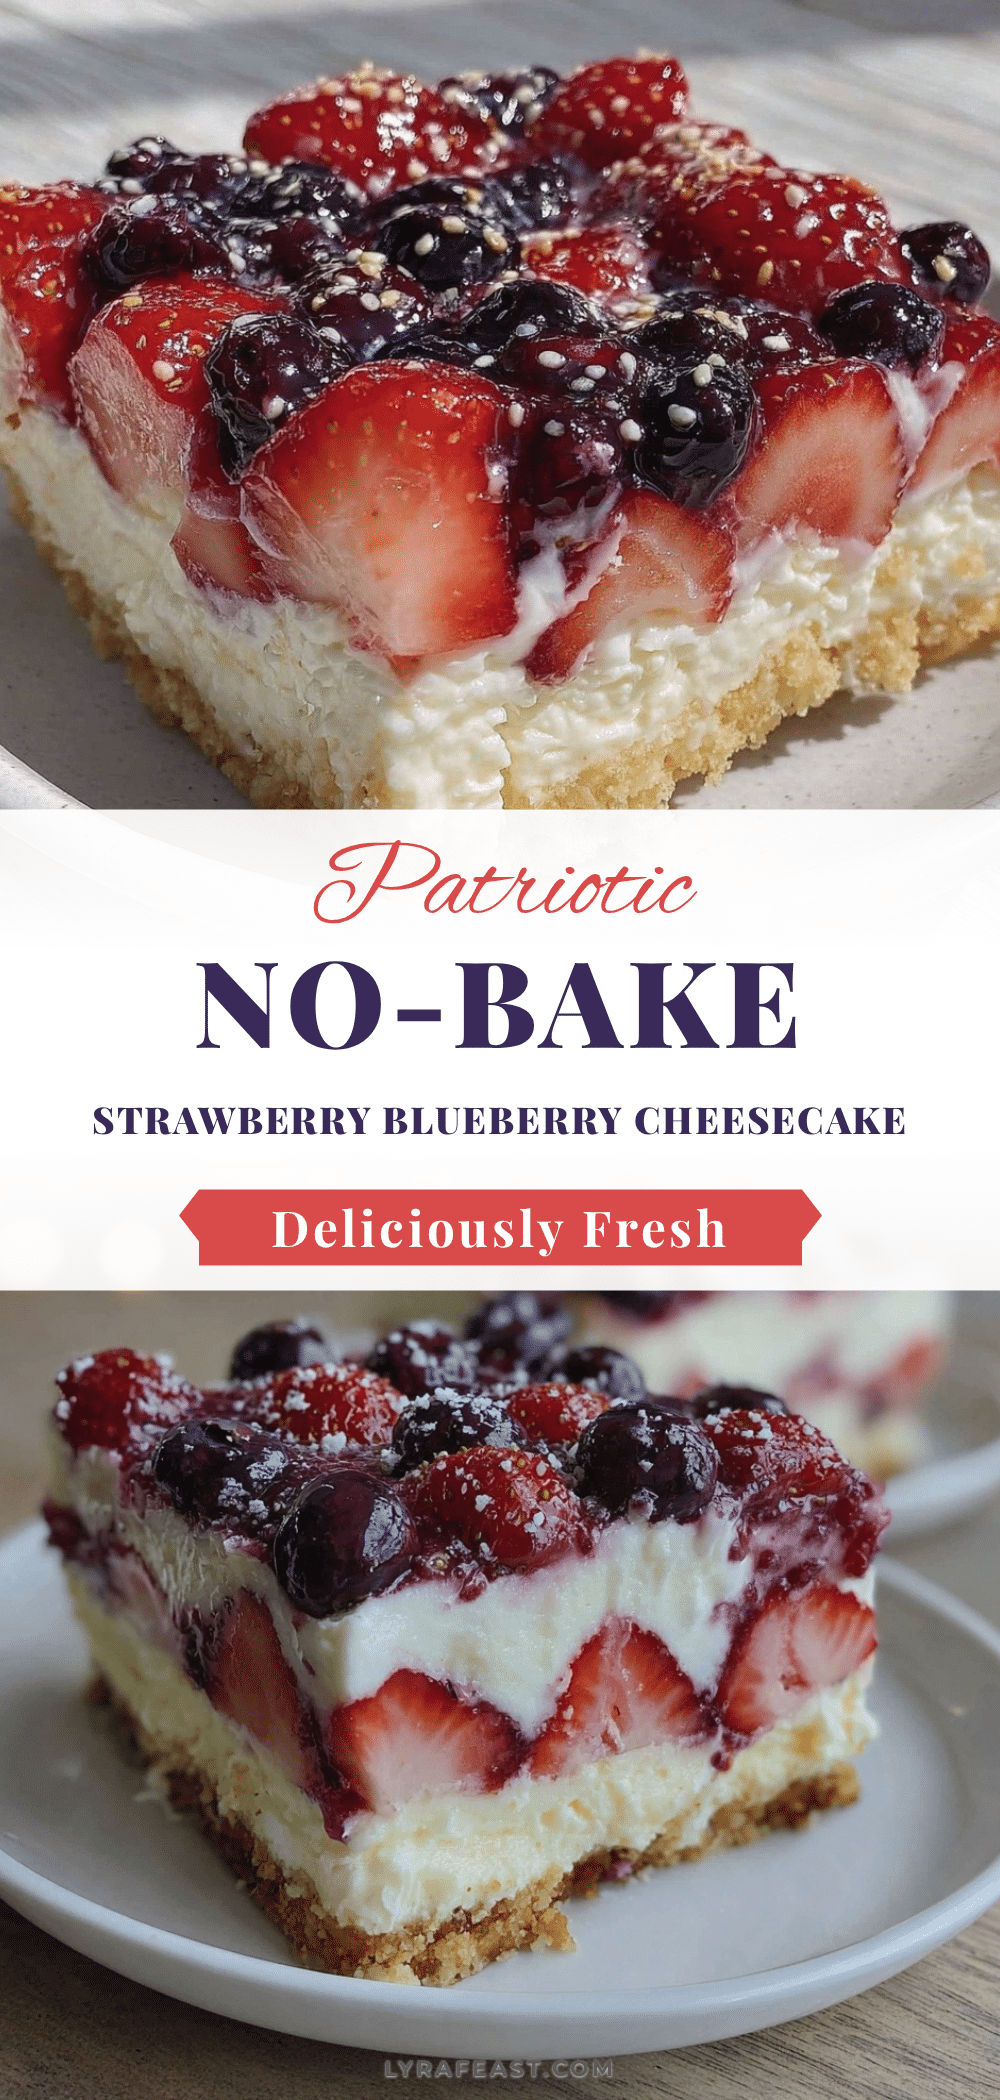
Perfect Red White and Blue No-Bake Cheesecake Flag Cake
A quick and easy no-bake cheesecake featuring a festive red, white, and blue flag design with layers of creamy cheesecake and fresh berries, perfect for patriotic occasions.
- Prep Time: 15 minutes
- Cook Time: 0 minutes
- Total Time: 4 hours 15 minutes
- Yield: 12 servings 1x
- Category: Dessert
- Cuisine: American
Ingredients
- 1 ½ cups graham cracker crumbs (about 10 full sheets)
- 5 tablespoons unsalted butter, melted
- 2 tablespoons granulated sugar
- 16 oz (450g) cream cheese, softened
- 1 cup powdered sugar, sifted
- 1 teaspoon vanilla extract
- 1 tablespoon fresh lemon juice
- 1 cup heavy whipping cream, chilled
- 1 teaspoon lemon zest (optional)
- 1 cup fresh strawberries, hulled and sliced
- 1 cup fresh blueberries
- Whipped cream or additional heavy cream whipped, for white stripes
Instructions
- Make the Crust: In a medium bowl, combine graham cracker crumbs, melted unsalted butter, and sugar. Mix until evenly moistened. Press firmly into the bottom of a 9×13-inch pan to form an even layer. Chill in the fridge for 10–15 minutes to set.
- Prepare the Cheesecake Filling: In a large bowl, beat softened cream cheese until smooth (about 2 minutes). Gradually add powdered sugar, vanilla extract, and lemon juice. Beat until fully combined and creamy. Add lemon zest if using.
- Whip the Cream: In a separate chilled bowl, whip heavy cream until stiff peaks form, about 3–5 minutes on medium-high speed. Avoid overwhipping.
- Fold Cream into Cream Cheese Mixture: Gently fold whipped cream into the cream cheese mixture in batches using a rubber spatula to keep the filling light and airy.
- Assemble the Cake: Spread half of the cheesecake filling evenly over the chilled crust. Smooth the surface. Add a layer of sliced strawberries arranged in stripes for the red stripes. Add a thin layer of whipped cream for the white stripes. Repeat layering with remaining cheesecake filling, then decorate the top with blueberries arranged in a rectangular cluster to mimic the stars area of the flag. Alternate remaining strawberries and whipped cream stripes.
- Chill the Cake: Cover with plastic wrap and refrigerate for at least 4 hours, preferably overnight, to set and meld flavors.
- Serve: Let the cake sit at room temperature for about 10 minutes before slicing to soften slightly.
Notes
Chill mixing bowl and beaters before whipping cream to help it thicken faster. Use gentle folding motions to keep filling airy. Soften cream cheese properly to avoid lumps. Pat berries dry before arranging to prevent sogginess. Refrigerate crust fully before adding filling for best texture. The cake is better when made a day ahead.
Nutrition
- Serving Size: 1 slice (1/12th of t
- Calories: 320
- Sugar: 18
- Fat: 22
- Carbohydrates: 26
- Protein: 5
Keywords: no-bake cheesecake, patriotic dessert, red white and blue cake, Fourth of July dessert, easy cheesecake, summer dessert