I had a rule for years. No cheese balls. They felt fussy, a little dated, and honestly, I couldn’t get past the mental image of a sad, store-bought log of processed cheese dusted in stale nuts. That was my hard line. Then my brother-in-law, Mark, showed up to a pre-game party at my house last October carrying a platter. On it sat what I can only describe as a glorious, speckled football-shaped mound of what looked like the most decadent cream cheese and cheddar situation I had ever seen. He caught me staring. “I know,” he said, grinning, “but just try it.” I was caught. He had me.
I grabbed a pretzel crisp, scooped a generous amount, and took a bite. The texture was impossibly smooth, studded with crunchy bits of bacon and sharp cheddar, with a subtle kick of heat that warmed the back of my throat. It was nothing like the cheese balls of my imagination. It was better. I mean, way better. I asked for the recipe on the spot, and after some friendly negotiation (I traded him a batch of my smoked brisket dip for it), he handed over a crumpled index card. This is that recipe, perfected over a few more game days in my own kitchen. It is the only cheese ball I will ever make, and maybe you’ve been there with a recipe you swore you’d never need. This one changed my mind for good.
Why You’ll Love This Recipe
This isn’t just another appetizer. This is the appetizer that disappears before the first quarter ends. I’ve tested this version at three different gatherings, and each time, someone asked for the recipe before they finished their first bite. Here is why this recipe works so well:
- Quick & Easy: Comes together in under 20 minutes of active prep time. No baking, no complicated steps. Just mix, shape, and chill.
- Simple Ingredients: You likely have most of these in your fridge and pantry right now. No weird specialty items required.
- Perfect for Game Day: It is the ultimate crowd-pleaser for Super Bowl parties, tailgates, or any football gathering. The football shape is a guaranteed conversation starter.
- Crowd-Pleaser: My picky nephew, who “doesn’t like cream cheese,” ate half of one side before anyone could stop him. It gets rave reviews from everyone.
- Unbelievably Delicious: The combination of creamy base, sharp cheddar, smoky bacon, and a surprising pop of heat is next-level comfort food. It is the kind of snack that makes you close your eyes after the first bite.
What makes this recipe different from the rest? It is the balance of flavors. Most cheese balls are either too plain or too heavy on one ingredient. This one uses a specific ratio of cream cheese to cheddar that keeps it spreadable but firm. The addition of a little Worcestershire sauce and cayenne pepper gives it a savory depth that keeps people coming back for more. It is comfort food reimagined—faster, simpler, but with the same soul-soothing satisfaction. Perfect for impressing guests without stress, or turning a simple snack into something memorable.
What Ingredients You Will Need
This recipe uses simple, wholesome ingredients to deliver bold flavor and satisfying texture without the fuss. Most of these are pantry staples, which makes this perfect for last-minute game day prep.
- 16 oz cream cheese, softened to room temperature (I recommend Philadelphia for the creamiest texture)
- 2 cups sharp cheddar cheese, shredded (freshly shredded melts better than pre-shredded, which has anti-caking agents)
- 1/2 cup cooked bacon, crumbled (about 6-8 strips; I prefer thick-cut for more texture)
- 1/4 cup green onions, thinly sliced (both white and green parts)
- 1 tablespoon Worcestershire sauce (adds that savory umami depth)
- 1/2 teaspoon garlic powder
- 1/4 teaspoon cayenne pepper (optional, but I highly recommend it for a subtle kick)
- 1/2 teaspoon salt
- 1/4 teaspoon black pepper
- 1 cup pecans, finely chopped (for coating; you can also use walnuts or sliced almonds)
For the decoration (to make it look like a football):
- 2 tablespoons sliced almonds (for the laces)
- Additional green onions or chives (for the “grass” on the serving platter)
I recommend using a block of cream cheese rather than the spreadable tub version. The block has a higher fat content and less water, which gives you a firmer, more stable cheese ball. For the cheddar, look for a good quality sharp cheddar—it makes a noticeable difference in flavor. If you want a milder taste, you can use medium cheddar instead. For a dairy-free option, you can swap the cream cheese with a plant-based version, but note that the texture will be slightly softer.
Equipment Needed
You don’t need much for this recipe, which is part of its charm. Here is what you will need:
- Large mixing bowl (I use a glass bowl, but any medium-large bowl works)
- Hand mixer or stand mixer (a sturdy spatula works too, but a mixer makes it much easier to get a smooth consistency)
- Plastic wrap (for shaping and chilling)
- Baking sheet (to hold the cheese ball while it chills in the fridge)
- Sharp knife (for slicing almonds if needed)
- Serving platter (a wooden board or a white platter works beautifully for presentation)
If you don’t have a hand mixer, you can absolutely do this by hand. Just make sure your cream cheese is very soft—leave it on the counter for at least an hour. I’ve made this with just a spatula before, and it turned out fine. It just takes a little more elbow grease. For the plastic wrap, I prefer the press-and-seal kind because it clings better to the cheese ball shape without slipping.
Preparation Method
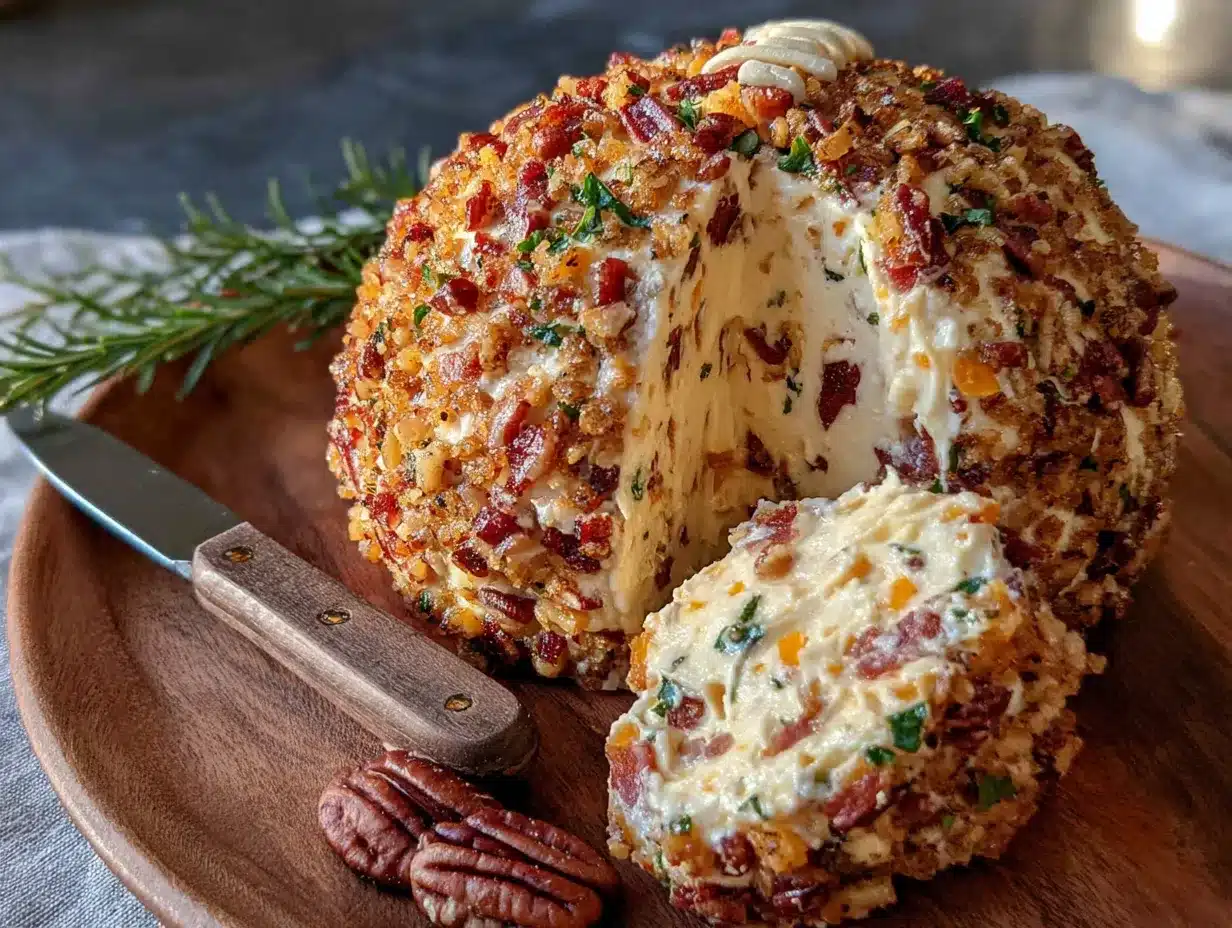
This recipe comes together quickly, but the chilling time is crucial. Plan for at least 2 hours of chill time before serving. Here is how to make the best game day loaded football cheese ball:
- Soften the cream cheese: Take the cream cheese out of the fridge about 1 hour before you start. It should be soft enough that you can easily press your finger into it. If you are short on time, you can microwave it in 10-second bursts, but be careful not to melt it. I’ve ruined a batch by getting impatient and nuking it for 30 seconds straight—it turned into a soupy mess.
- Mix the base: In a large mixing bowl, combine the softened cream cheese, shredded cheddar, crumbled bacon, sliced green onions, Worcestershire sauce, garlic powder, cayenne pepper, salt, and black pepper. Use your hand mixer on medium speed to combine everything until it is smooth and evenly mixed. Scrape down the sides of the bowl halfway through. The mixture should be thick and slightly sticky.
- Taste and adjust: This is the most important step. Take a small spoonful and taste it. Adjust the salt, pepper, or cayenne to your preference. I usually end up adding a little more Worcestershire sauce because I love that savory punch. Remember, the flavors will mellow slightly as it chills, so aim for a little stronger than you think you want.
- Shape the football: Lay a large piece of plastic wrap on your work surface. Scoop the cheese mixture onto the center of the plastic wrap. Use your hands to shape it into a rough football shape—a rounded oval with slightly pointed ends. Don’t worry about perfection at this stage. Wrap the plastic wrap tightly around the cheese ball, then use your hands to refine the shape through the plastic. It should look like a slightly flattened oval.
- Chill: Place the wrapped cheese ball on a baking sheet and refrigerate for at least 2 hours, or up to 24 hours. This step is non-negotiable. The cheese ball needs time to firm up so it holds its shape when you coat it and serve it. I once tried to rush this and ended up with a lopsided mess that fell apart when I tried to roll it in pecans.
- Prepare the coating: About 15 minutes before you are ready to serve, spread the finely chopped pecans on a flat plate or shallow dish. Unwrap the chilled cheese ball and place it on the pecans. Gently press the pecans into the surface, turning the cheese ball to coat it evenly. Don’t press too hard or you will break the shape. Use your hands to pat the pecans into any bare spots.
- Add the football details: To make it look like a real football, use the sliced almonds to create laces. Place 4-5 almond slices in a line down the center of the cheese ball, slightly off-center to mimic a real football’s laces. You can also add a small “stitching” line by pressing the tip of a knife gently into the cheese on either side of the almonds.
- Serve: Transfer the cheese ball to your serving platter. Sprinkle extra sliced green onions or chives around the base to look like grass. Serve immediately with your favorite dippers—pretzel crisps, crackers, celery sticks, or sliced baguette.
Cooking Tips & Techniques
I have made this cheese ball more times than I can count, and I have learned a few things the hard way. Here are my best tips:
Don’t overmix: When you use a hand mixer, stop as soon as everything is combined. Overmixing can make the cream cheese too soft and airy, which will make the cheese ball harder to shape. You want it dense and creamy, not fluffy.
Chill between steps: If the mixture feels too soft to shape, pop it in the fridge for 20 minutes before you try to form the football. I learned this trick after a particularly warm day when my kitchen was 80 degrees and the cheese ball kept sliding off my hands. A quick chill saved the day.
Toast the pecans: For extra flavor, toast the chopped pecans in a dry skillet over medium heat for 2-3 minutes until they are fragrant. Let them cool completely before using. This adds a nutty depth that takes the cheese ball from good to unforgettable. I forgot to toast them once, and while it was still good, it lacked that extra layer of flavor.
Use a scale for the laces: When placing the almond slices for the laces, step back and look at it from a distance. It is easy to make them crooked. I usually place the center almond first, then work my way out to each side. It keeps the laces symmetrical.
Keep it cold: If you are serving this at a party, place the platter on a bed of ice or return the cheese ball to the fridge between servings. It will soften quickly at room temperature, especially if your house is warm. A warm cheese ball is a sad cheese ball—it loses its shape and becomes a dip. Which, honestly, isn’t the worst thing in the world, but it defeats the purpose of the football shape.
Variations & Adaptations
This recipe is incredibly versatile. Here are some ways to make it your own:
Spicy Buffalo Version: Replace the cayenne pepper with 2 tablespoons of buffalo wing sauce and add 1/4 cup of crumbled blue cheese. The tangy, spicy flavor is incredible with celery sticks and carrot chips. I made this for a friend who loves buffalo wings, and she said it was better than the actual wings.
Veggie-Loaded Version: Add 1/4 cup of finely chopped red bell pepper, 1/4 cup of finely chopped sun-dried tomatoes, and 1/4 cup of chopped fresh parsley. This version is brighter and fresher, perfect for spring gatherings. You can skip the bacon to make it vegetarian-friendly.
Smoked Gouda Twist: Swap the sharp cheddar for 1 cup of smoked gouda and 1 cup of regular cheddar. The smoky flavor pairs beautifully with the bacon and adds a whole new dimension. I tried this for a tailgate last fall, and it was the first thing to disappear.
Nut-Free Option: Instead of pecans, coat the cheese ball in crushed pretzels or everything bagel seasoning. Both options add crunch and flavor without any nuts. My sister-in-law has a nut allergy, so I always make this version when she comes over.
Make It a Dip: If you don’t want to bother with shaping, simply transfer the mixture to a small baking dish, top with extra shredded cheese and bacon, and bake at 350°F for 15-20 minutes until bubbly. Serve warm with tortilla chips. It is a completely different dish, but equally delicious.
Serving & Storage Suggestions
This cheese ball is best served chilled, straight from the fridge. Let it sit at room temperature for about 10-15 minutes before serving to soften slightly for easier spreading, but don’t let it sit out longer than 2 hours total for food safety reasons.
What to serve with it: Pretzel crisps are my top recommendation—they are sturdy enough to hold a generous scoop and the saltiness complements the cheese perfectly. Other great options include buttery crackers, sliced baguette, celery sticks, carrot chips, bell pepper strips, or even apple slices for a sweet contrast. For a full game day spread, pair it with spicy jalapeno poppers or a bowl of chili.
Storage: Leftover cheese ball (if there is any!) can be wrapped tightly in plastic wrap and stored in the refrigerator for up to 5 days. The flavors actually meld and deepen over time, so it might taste even better the next day. I do not recommend freezing this cheese ball—the texture of the cream cheese becomes grainy when thawed.
Reheating: This is served cold, so no reheating needed. If you made the baked dip version, reheat it in the oven at 350°F for 10 minutes or in the microwave in 30-second bursts until warm.
Make-Ahead Tip: You can prepare the cheese ball up to 2 days in advance. Shape it, wrap it tightly, and keep it in the fridge. Add the pecan coating and almond laces right before serving to keep the coating crunchy. This is a lifesaver for busy game days when you have a million other things to prep.
Nutritional Information & Benefits
This loaded football cheese ball is indulgent, but it does have some redeeming qualities. Here is an approximate breakdown per serving (based on 12 servings):
- Calories: 285
- Fat: 24g
- Carbohydrates: 5g
- Protein: 12g
- Fiber: 1g
- Sugar: 2g
- Sodium: 480mg
The cream cheese and cheddar provide a good amount of calcium and protein, which helps keep you full longer. The pecans are rich in healthy fats, antioxidants, and magnesium. The green onions add a small amount of vitamin K and vitamin C. If you use the cayenne pepper, it contains capsaicin, which can boost metabolism slightly.
This recipe is naturally low-carb and gluten-free, making it suitable for keto and gluten-free diets. It is not dairy-free or low-fat, but for a game day treat, it fits perfectly into a balanced diet. I always tell myself that the protein and calcium balance out the indulgence—at least that is what I tell myself while I go back for a third scoop.
Conclusion
This best game day loaded football cheese ball is more than just a recipe. It is the appetizer that brings people together, the dish that gets talked about long after the game is over, and the thing that might just convert a cheese ball skeptic like me. It is easy enough for a beginner cook but impressive enough to steal the show at any gathering.
I encourage you to make this recipe your own. Adjust the spice level, swap the nuts, or add extra bacon (because when is extra bacon ever a bad idea?). The beauty of this recipe is its flexibility. It forgives mistakes and rewards creativity.
I love this recipe because it reminds me of that October afternoon when Mark showed up at my door with a platter and a grin. It reminds me that sometimes the things we think we hate are just waiting for the right version to come along. This is that version. I hope you make it, share it, and maybe even change someone’s mind about cheese balls. Let me know in the comments how it turned out for you—did you add your own twist? What dippers did you use? I can’t wait to hear about it!
Frequently Asked Questions
Can I make this cheese ball ahead of time?
Absolutely. You can prepare the cheese ball up to 2 days in advance. Shape it, wrap it tightly in plastic wrap, and store it in the refrigerator. Add the pecan coating and almond laces just before serving to keep the coating crunchy and fresh.
Can I use pre-shredded cheese?
You can, but I don’t recommend it. Pre-shredded cheese contains anti-caking agents like cellulose or potato starch, which can make the cheese ball slightly grainy in texture. Freshly shredded cheddar melts more smoothly and gives a better overall texture. It takes an extra 2 minutes to shred it yourself, and the difference is worth it.
How do I keep the cheese ball from falling apart?
The key is proper chilling. Make sure you chill the shaped cheese ball for at least 2 hours before coating it in pecans. If it still feels soft, give it another 30 minutes. Also, make sure your cream cheese is not too soft when you mix it—room temperature is perfect, but if it is too warm, the mixture will be too loose to hold its shape.
Can I make this dairy-free or vegan?
Yes, with some adjustments. Use a plant-based cream cheese alternative (I like Kite Hill or Violife) and a dairy-free shredded cheddar. The texture will be slightly softer, so you may need to chill it longer. For the bacon, use a vegan bacon alternative or simply omit it and add extra smoked paprika for a smoky flavor.
What are the best dippers for this cheese ball?
My top picks are pretzel crisps for their saltiness and sturdy texture, buttery crackers like Ritz or Club crackers, sliced baguette or crostini, celery sticks and carrot chips for a low-carb option, and apple slices for a sweet contrast. For a truly indulgent game day spread, serve it alongside tortilla chips and fresh veggies.
Pin This Recipe!
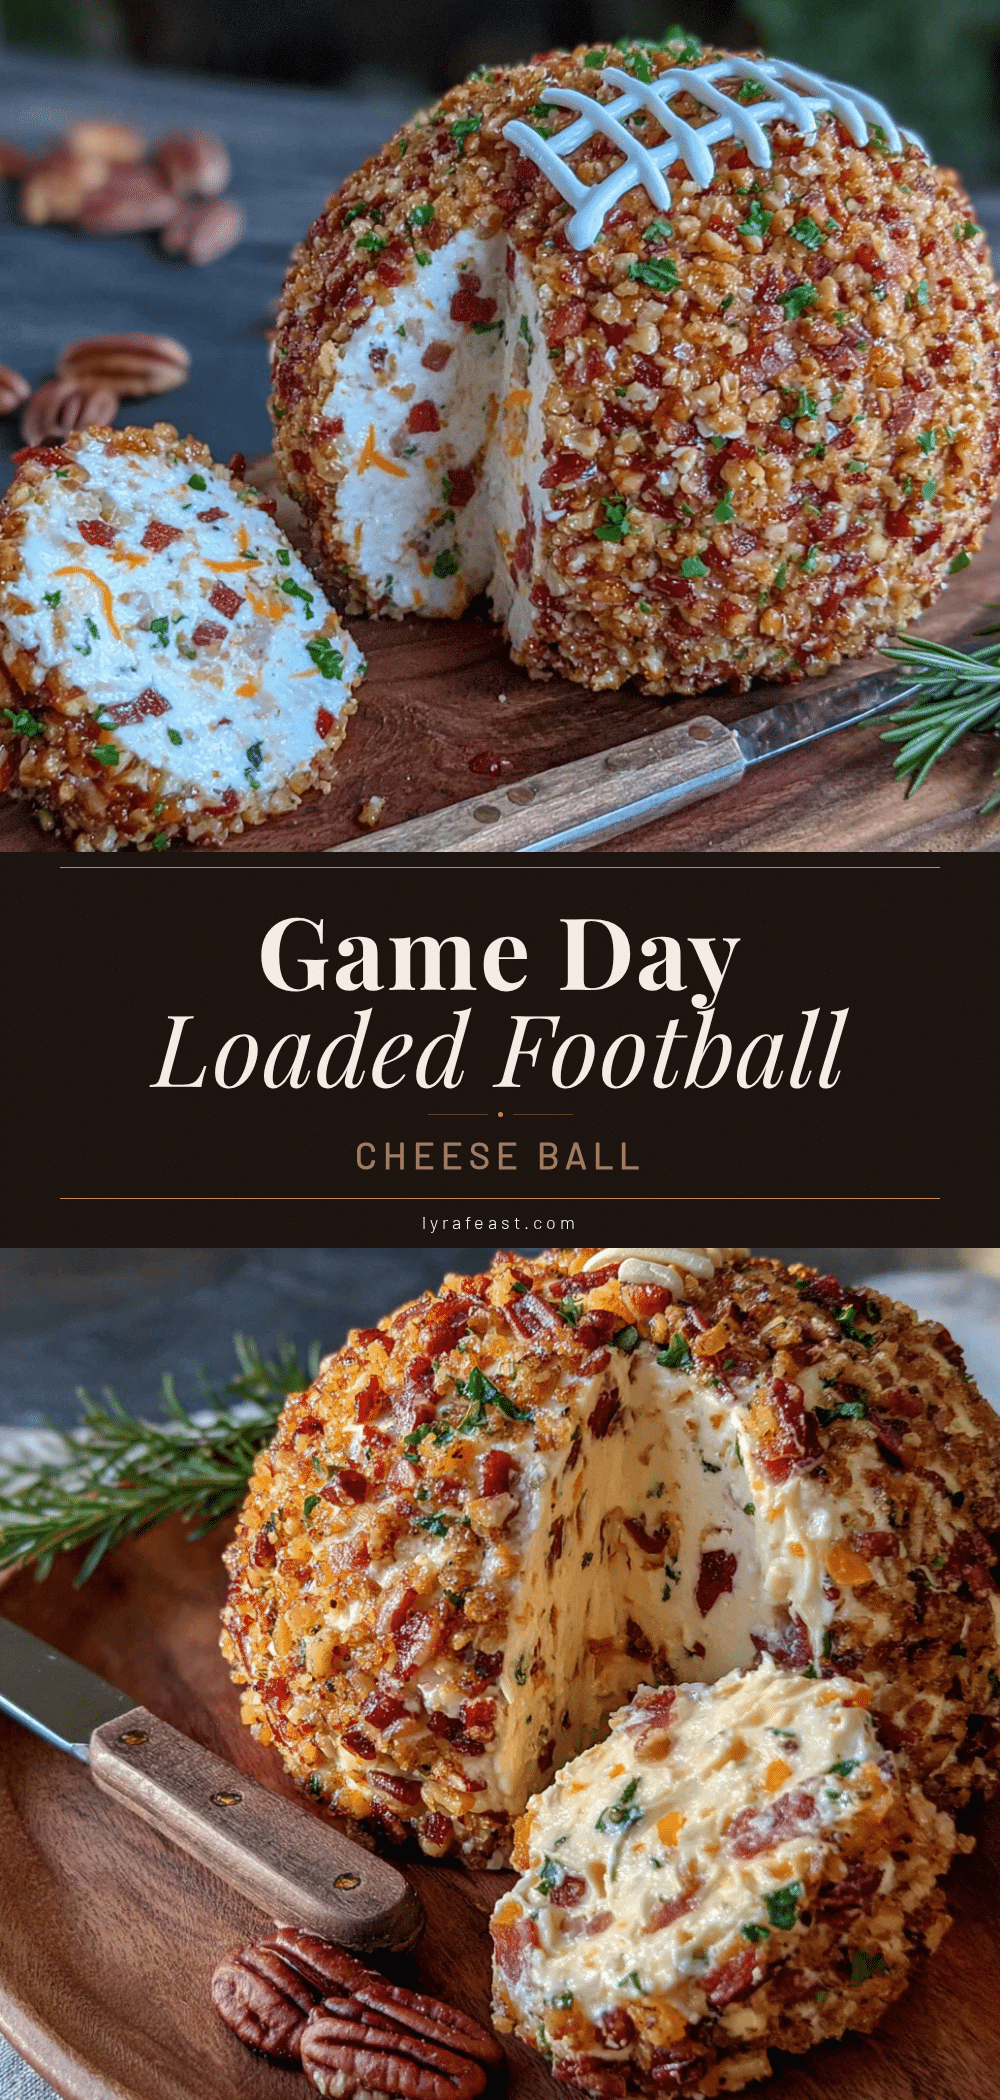
Best Game Day Loaded Football Cheese Ball Recipe
This loaded football cheese ball is the ultimate game day appetizer—creamy, savory, and shaped like a football. It’s quick to make, packed with sharp cheddar, smoky bacon, and a subtle kick of heat, and guaranteed to disappear before the first quarter ends.
- Prep Time: 20 minutes
- Cook Time: 0 minutes
- Total Time: 2 hours 20 minutes (includes 2 hours chilling)
- Yield: 12 servings 1x
- Category: Appetizer
- Cuisine: American
Ingredients
- 16 oz cream cheese, softened to room temperature
- 2 cups sharp cheddar cheese, shredded
- 1/2 cup cooked bacon, crumbled (about 6–8 strips)
- 1/4 cup green onions, thinly sliced
- 1 tablespoon Worcestershire sauce
- 1/2 teaspoon garlic powder
- 1/4 teaspoon cayenne pepper (optional)
- 1/2 teaspoon salt
- 1/4 teaspoon black pepper
- 1 cup pecans, finely chopped
- 2 tablespoons sliced almonds (for laces)
- Additional green onions or chives (for grass on platter)
Instructions
- Soften the cream cheese: Take the cream cheese out of the fridge about 1 hour before you start. It should be soft enough that you can easily press your finger into it. If short on time, microwave in 10-second bursts, but be careful not to melt it.
- Mix the base: In a large mixing bowl, combine the softened cream cheese, shredded cheddar, crumbled bacon, sliced green onions, Worcestershire sauce, garlic powder, cayenne pepper, salt, and black pepper. Use a hand mixer on medium speed to combine until smooth and evenly mixed. Scrape down the sides of the bowl halfway through.
- Taste and adjust: Take a small spoonful and taste it. Adjust the salt, pepper, or cayenne to your preference. Aim for a little stronger than you think you want, as flavors will mellow slightly as it chills.
- Shape the football: Lay a large piece of plastic wrap on your work surface. Scoop the cheese mixture onto the center of the plastic wrap. Use your hands to shape it into a rough football shape—a rounded oval with slightly pointed ends. Wrap the plastic wrap tightly around the cheese ball, then use your hands to refine the shape through the plastic.
- Chill: Place the wrapped cheese ball on a baking sheet and refrigerate for at least 2 hours, or up to 24 hours.
- Prepare the coating: About 15 minutes before serving, spread the finely chopped pecans on a flat plate or shallow dish. Unwrap the chilled cheese ball and place it on the pecans. Gently press the pecans into the surface, turning the cheese ball to coat it evenly. Use your hands to pat the pecans into any bare spots.
- Add the football details: Use the sliced almonds to create laces. Place 4-5 almond slices in a line down the center of the cheese ball, slightly off-center to mimic a real football’s laces. Optionally, add a small ‘stitching’ line by pressing the tip of a knife gently into the cheese on either side of the almonds.
- Serve: Transfer the cheese ball to your serving platter. Sprinkle extra sliced green onions or chives around the base to look like grass. Serve immediately with your favorite dippers.
Notes
For best results, use block cream cheese (not spreadable) and freshly shredded sharp cheddar. Toast the pecans in a dry skillet for 2-3 minutes for extra flavor. The cheese ball can be made up to 2 days in advance; add the pecan coating and almond laces just before serving. If the mixture feels too soft to shape, chill for 20 minutes before forming. Serve chilled, but let sit at room temperature for 10-15 minutes before serving for easier spreading. Leftovers can be stored wrapped in plastic wrap in the refrigerator for up to 5 days. Do not freeze.
Nutrition
- Serving Size: 1/12 of cheese ball
- Calories: 285
- Sugar: 2
- Sodium: 480
- Fat: 24
- Saturated Fat: 12
- Carbohydrates: 5
- Fiber: 1
- Protein: 12
Keywords: cheese ball, football cheese ball, game day appetizer, loaded cheese ball, bacon cheddar cheese ball, football shaped cheese ball, easy appetizer, party food, Super Bowl appetizer



