It was 11:47 PM on a random Thursday, and I had the sudden, undeniable urge for a fully loaded nacho situation. The kind with every single topping you can think of, not the sad, sparse kind you get at a gas station. I didn’t have a big platter or individual serving dishes, but I had a rimmed baking sheet and the idea that just hit me: why not build the entire party on one sheet pan?
Honestly, the whole thing started because I was craving something crunchy and cheesy, but I was too tired to make anything that required multiple pans. You know that feeling when you just want to dump everything together and have it work out magically? That was this night. I grabbed a bag of tortilla chips, some leftover ground beef from taco Tuesday, and a block of cheddar I was planning to use for sandwiches. The result was so ridiculously good and easy that I literally texted my friend Sarah at midnight a photo. She replied, “Are you having a party without me?”
The best part? I didn’t have to babysit a stovetop or wash a pile of dishes. Everything got piled onto the sheet pan, baked until bubbly, and then we just grabbed forks and dug in right from the pan. There’s something about eating straight from the baking sheet that makes the whole experience feel more fun and less formal. Maybe you’ve been there—standing over the counter, fork in hand, not even bothering with a plate. This recipe stayed with me because it solved the eternal party food problem: how to feed a crowd (or just a hungry self) something that feels special without the stress. It’s the ultimate sheet pan loaded nacho bar, and I keep making it because it always delivers.
Why You’ll Love This Recipe
This isn’t just another nacho recipe. I’ve tested this method at least a dozen times for everything from Super Bowl parties to quiet Friday nights, and it always wins. Here’s why this version is different and why you’ll come back to it again and again.
- Quick & Easy: From start to finish, this comes together in about 25 minutes. Perfect for those last-minute cravings or when guests show up unexpectedly.
- Simple Ingredients: You likely have most of these items in your pantry or fridge right now. No need for a special trip to a gourmet grocery store.
- Perfect for Parties: Great for game day, movie nights, birthday parties, or casual get-togethers. It’s a crowd-pleaser that you can set out and let people dig into.
- Crowd-Pleaser: Honestly, I’ve never met anyone who doesn’t love a good nacho bar. Kids devour it, adults fight over the crispy edge pieces, and everyone leaves happy.
- Unbelievably Delicious: The key is layering. You get a perfect balance of crispy chips, melted cheese, savory protein, and fresh toppings in every single bite. It’s comfort food at its finest.
What makes this the ultimate version is the technique of baking the chips directly on the sheet pan with the cheese and protein, then adding the cold toppings right at the end. This ensures the chips stay crunchy instead of getting soggy. It’s a small tweak that makes a huge difference. Plus, setting it up as a bar means everyone can customize their own plate with their favorite extras. This recipe isn’t just good—it’s the kind that makes you close your eyes after the first bite. It’s party food reimagined: faster, easier, but with the same soul-soothing satisfaction.
What Ingredients You Will Need
This recipe uses simple, wholesome ingredients to deliver bold flavor and satisfying texture without the fuss. Most of these are pantry staples or easy to find at any grocery store.
For the Base Nachos
- Tortilla chips – 1 large (13-16 oz) bag. I prefer restaurant-style chips for their sturdy texture. (They hold up better under the weight of toppings)
- Ground beef – 1 lb (450g). You can also use ground turkey or chicken.
- Taco seasoning – 1 packet (or 3 tablespoons homemade). My go-to is the Ortega brand for a classic flavor.
- Refried beans – 1 can (16 oz / 450g). Look for vegetarian refried beans if you prefer.
- Cheddar cheese – 2 cups (200g), shredded. Freshly shredded melts better than pre-shredded.
- Monterey Jack cheese – 1 cup (100g), shredded. Adds a great creamy melt.
- Black beans – 1 can (15 oz / 425g), drained and rinsed.
- Corn kernels – 1 cup (150g), frozen or canned, drained.
For the Fresh Toppings Bar
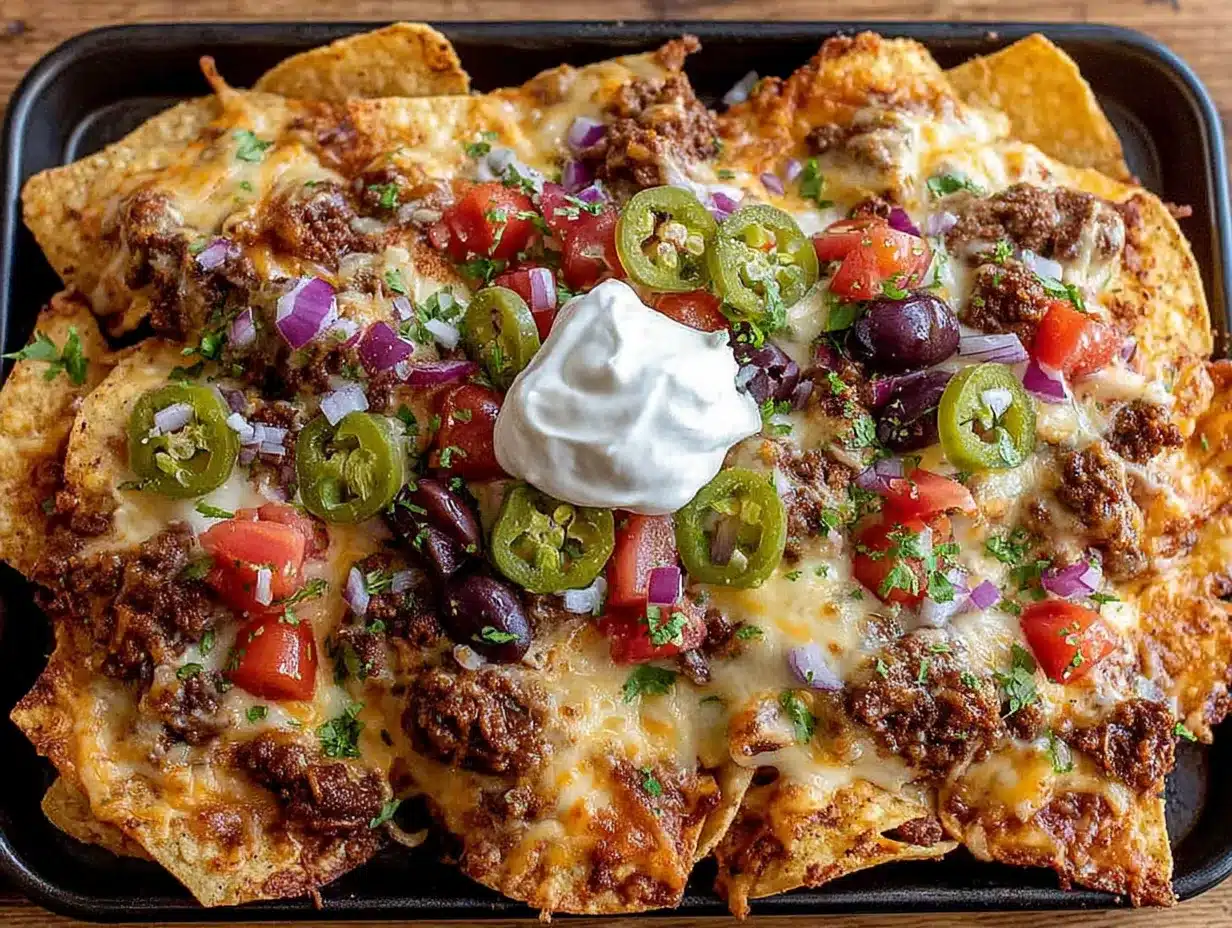
- Roma tomatoes – 2-3, diced.
- Red onion – 1/2 cup, finely diced.
- Jalapeños – 2-3, sliced (use pickled for less heat, fresh for more kick).
- Avocado – 2, diced or sliced.
- Sour cream – 1 cup (240ml).
- Fresh cilantro – 1/2 cup, roughly chopped.
- Limes – 2-3, cut into wedges.
- Black olives – 1/2 cup (60g), sliced (optional, but I love them).
Ingredient Tips and Substitutions
- Protein swaps: Use shredded rotisserie chicken, carnitas, or seasoned tofu for a vegetarian option. For a vegan version, try crumbled plant-based meat and vegan cheese shreds.
- Cheese: A mix of cheddar and Monterey Jack is my favorite, but pepper jack adds a nice spicy kick. If you’re dairy-free, use a good quality vegan shred that melts well.
- Beans: You can skip the refried beans if you’re not a fan, but they add a creamy layer that helps everything stick together. Pinto beans or kidney beans work too.
- Corn: Fire-roasted corn from a can adds a lovely smoky flavor. If using frozen, just thaw and pat dry before adding.
Equipment Needed
You don’t need a ton of fancy equipment for this recipe, which is part of the beauty. Here’s what you’ll need:
- Large rimmed baking sheet – A half-sheet pan (18×13 inches) works perfectly. The rim is crucial to catch any melting cheese or juices. I’ve used my Nordic Ware sheet pan for years, and it has never warped.
- Large skillet – For browning the ground beef. A 12-inch skillet gives you plenty of room.
- Chef’s knife and cutting board – For dicing the toppings.
- Mixing bowls – Small bowls for the toppings bar.
- Spatula or wooden spoon – For breaking up the meat.
- Measuring cups and spoons – For accurate seasoning.
If you don’t have a rimmed baking sheet, you can use a large oven-safe skillet or a 9×13 baking dish. The presentation won’t be as spread out, but it will still taste amazing. For a budget-friendly option, the Wilton brand sheet pans from the craft store are surprisingly good and very affordable. One tip: avoid dark, non-stick sheet pans if possible, as they can cause the chips to brown too quickly on the bottom.
Preparation Method
Let’s get to the fun part. Follow these steps, and you’ll have a nacho bar that will steal the show.
- Preheat your oven to 400°F (200°C). This high heat is key for getting the cheese bubbly and the chips perfectly crispy without burning them.
- Cook the ground beef. Place your large skillet over medium-high heat. Add the ground beef and cook, breaking it up with a spatula, until it’s browned and no longer pink—about 6-8 minutes. Drain off any excess fat (I usually leave about a tablespoon for flavor). Reduce the heat to low, add the taco seasoning and 1/2 cup (120ml) of water, and stir. Let it simmer for 2-3 minutes until the sauce thickens slightly. Set aside. Pro tip: If you use a higher fat ground beef, drain most of the fat to avoid soggy chips later.
- Warm the refried beans. In a small microwave-safe bowl, heat the refried beans for about 1 minute, stirring halfway through. You want them spreadable, not piping hot. Alternatively, you can warm them in a small saucepan over low heat. This step ensures they don’t cool down the other ingredients when you layer everything.
- Layer the base. Spread the tortilla chips evenly across your rimmed baking sheet. Try to create a single layer as much as possible, but a little overlapping is fine. You want every chip to get some love from the toppings.
- Add the beans and meat. Dollop spoonfuls of the warm refried beans all over the chips. Then, scatter the seasoned ground beef evenly across the chips. Don’t dump it all in one spot—distribute it so every handful of chips gets some protein.
- Add the veggies and cheese. Sprinkle the drained black beans and corn kernels over the meat. Then, generously cover everything with the shredded cheddar and Monterey Jack cheese. Make sure you get the cheese to the edges of the pan—those crispy, cheesy edge chips are the best part.
- Bake to perfection. Place the baking sheet in the preheated oven and bake for 10-12 minutes. You’ll know it’s ready when the cheese is fully melted and bubbly, and the edges of the chips are just starting to turn golden brown. Keep an eye on it after the 10-minute mark to prevent burning. Your kitchen will smell incredible at this point.
- Add fresh toppings. Remove the sheet pan from the oven and let it cool for about 2 minutes. Immediately top with the diced tomatoes, red onion, sliced jalapeños, and black olives (if using). Then, add the avocado, sour cream in dollops, and a generous sprinkle of fresh cilantro. Squeeze a few lime wedges over the top for brightness.
- Serve immediately. Place the sheet pan in the center of your table or serving area. Provide small bowls for the extra toppings so people can customize their portions. Grab forks or small plates and let everyone dig in while it’s hot and the chips are still crunchy.
Cooking Tips & Techniques
I’ve made this recipe more times than I can count, and I’ve learned a few things the hard way. Here are my best tips to ensure your nacho bar is a total success.
- The chip layer matters. Don’t pile the chips too high. A single layer (with slight overlapping) ensures every chip gets heat and toppings. If you stack them too thick, the chips in the middle will stay cold and the cheese won’t melt evenly. I learned this the first time I made it—the bottom chips were perfect, but the top ones were basically just warm.
- Shred your own cheese. Pre-shredded cheese contains anti-caking agents that prevent it from melting as smoothly. Taking two minutes to shred a block of cheddar makes a noticeable difference in the gooeyness factor. Trust me on this one.
- Don’t skip the bean layer. The warm refried beans act as an adhesive, helping the toppings stick to the chips. They also add a creamy texture that balances the crunch. If you’re not a bean fan, you can leave them out, but you might find the toppings slide off more easily.
- Timing is everything. Have all your fresh toppings prepped and ready before the sheet pan goes into the oven. Once it comes out, you want to add the cold toppings immediately while the cheese is still hot and bubbly. This creates a beautiful temperature contrast—warm, melty cheese with cool, fresh salsa and sour cream.
- Watch the edges. The chips around the perimeter of the pan will brown faster than the ones in the middle. If you notice them getting too dark before the cheese is fully melted, you can rotate the pan halfway through baking. I usually just keep an eye on it and pull it out a minute early if the edges look perfect.
Variations & Adaptations
One of the best things about this recipe is how easy it is to adapt. Here are some of my favorite variations.
1. The Vegetarian Fiesta
Skip the ground beef entirely and double up on the black beans and corn. Add a can of drained and rinsed pinto beans for extra protein. You can also throw in some sautéed bell peppers and onions for added texture and flavor. My sister-in-law makes this version for our family gatherings, and honestly, I don’t miss the meat at all.
2. The Spicy Southwest
If you like heat, this one’s for you. Use pepper jack cheese instead of Monterey Jack, add a can of diced green chiles to the meat mixture, and top with fresh serrano peppers instead of jalapeños. A drizzle of chipotle crema (mix sour cream with adobo sauce from canned chipotles) takes it over the top.
3. The Breakfast Nachos
Yes, this works for breakfast too! Swap the ground beef for crumbled breakfast sausage or chorizo. Add a layer of scrambled eggs after baking (so they don’t get rubbery). Top with pico de gallo, avocado, and a drizzle of hot sauce. It’s my go-to for lazy Sunday mornings when I want something fun.
4. The BBQ Chicken Version
Use shredded rotisserie chicken tossed in your favorite barbecue sauce instead of taco-seasoned beef. Swap the refried beans for canned black beans, and use smoked gouda or cheddar. Top with pickled red onions and a sprinkle of smoked paprika. It’s a completely different flavor profile but just as addictive.
Serving & Storage Suggestions
This recipe is best served fresh and hot, right from the oven. Here’s how to make the most of it.
Serving: Place the sheet pan on a trivet in the center of your table. Provide small bowls of extra toppings like extra jalapeños, hot sauce, and lime wedges so everyone can customize their plate. I like to serve it with cold Mexican beer or a pitcher of margaritas for a full fiesta vibe. For a non-alcoholic option, horchata or limeade pairs beautifully.
Storage: Nachos are really best eaten immediately because the chips will start to soften as they sit. However, if you have leftovers, you can store them in an airtight container in the refrigerator for up to 2 days. Keep in mind that the chips will lose their crunch.
Reheating: The best way to reheat leftover nachos is in the oven or an air fryer. Spread them on a baking sheet and warm at 350°F (175°C) for 5-7 minutes. Avoid the microwave, as it will turn the chips into a sad, soggy mess. The oven brings back some of the crunch, though it won’t be quite as good as fresh. I’ve also found that the flavors actually meld together overnight—the meat and beans get even more flavorful.
Flavor development: If you’re planning to make this for a party, you can prep all the components ahead of time. Cook the meat, shred the cheese, and chop all the fresh toppings. Store everything separately in the fridge. When you’re ready to serve, just assemble and bake. It takes less than 15 minutes to get it on the table.
Nutritional Information & Benefits
While this is definitely a treat-yourself kind of meal, it does have some redeeming nutritional qualities. Here’s a rough estimate per serving (based on 8 servings):
- Calories: Approximately 450-550 per serving
- Protein: 22-28g (from the beef, beans, and cheese)
- Carbohydrates: 35-45g
- Fat: 25-30g
- Fiber: 6-8g (thanks to the beans and veggies)
Health benefits: The black beans and refried beans are excellent sources of fiber and plant-based protein, which help keep you full and support digestive health. Tomatoes and avocados provide heart-healthy fats and antioxidants like lycopene and vitamin C. The cilantro and lime add a fresh burst of flavor without extra calories or sodium.
Dietary considerations: This recipe is naturally gluten-free (just check your taco seasoning packet for any wheat fillers). To make it dairy-free, use vegan cheese shreds and dairy-free sour cream. For a lower-carb option, you can use pork rinds or baked cheese chips instead of tortilla chips, but honestly, I think the real tortilla chips are worth the carbs for the texture.
Potential allergens: This recipe contains dairy (cheese, sour cream). It is also free from nuts and eggs, making it a safe option for many common allergies. Always double-check your ingredient labels to be sure.
Conclusion
This ultimate sheet pan loaded nacho bar is the kind of recipe that makes you wonder why you ever made nachos any other way. It’s quick, it’s forgiving, and it’s absolutely packed with flavor. Whether you’re feeding a crowd on game day, hosting a casual dinner party, or just treating yourself on a random Thursday night, this recipe delivers every single time.
I love this recipe because it reminds me that cooking doesn’t have to be complicated to be amazing. It’s about bringing people together around a single pan, sharing forks, and laughing over who got the chip with the most cheese. So go ahead—pile on your favorite toppings, make it your own, and don’t be shy with the lime juice. I’d love to hear how yours turns out! Drop a comment below and let me know your favorite topping combination, or tag me in your photos if you share them. Happy snacking!
Frequently Asked Questions
Can I make this nacho bar ahead of time for a party?
Yes, you can prep all the components up to a day in advance. Cook the meat, shred the cheese, and chop the fresh toppings. Store everything separately in the fridge. When you’re ready to serve, just assemble and bake. It takes about 15 minutes from fridge to table.
How do I keep the chips from getting soggy?
The key is to not overload the chips with wet ingredients before baking. Drain the black beans and corn well, and pat them dry with a paper towel if needed. Also, add the fresh toppings like tomatoes and sour cream after baking, not before. This keeps the chips crunchy.
Can I use a different protein instead of ground beef?
Absolutely! Shredded rotisserie chicken, carnitas, seasoned ground turkey, or even crumbled tofu work great. Just make sure whatever protein you use is fully cooked before you add it to the sheet pan, since it only bakes for 10-12 minutes.
What’s the best way to reheat leftover nachos?
The oven or air fryer is your best bet. Spread the leftovers on a baking sheet and warm at 350°F (175°C) for 5-7 minutes. Avoid the microwave, as it will make the chips soft and chewy. The texture won’t be as perfect as fresh, but it’s still delicious.
Can I make this recipe vegetarian or vegan?
Yes! For a vegetarian version, skip the meat and double up on the black beans and corn. Add some sautéed bell peppers and onions for extra texture. For a vegan version, use plant-based crumbles, vegan cheese shreds, and dairy-free sour cream. The rest of the ingredients are naturally vegan-friendly.
Pin This Recipe!
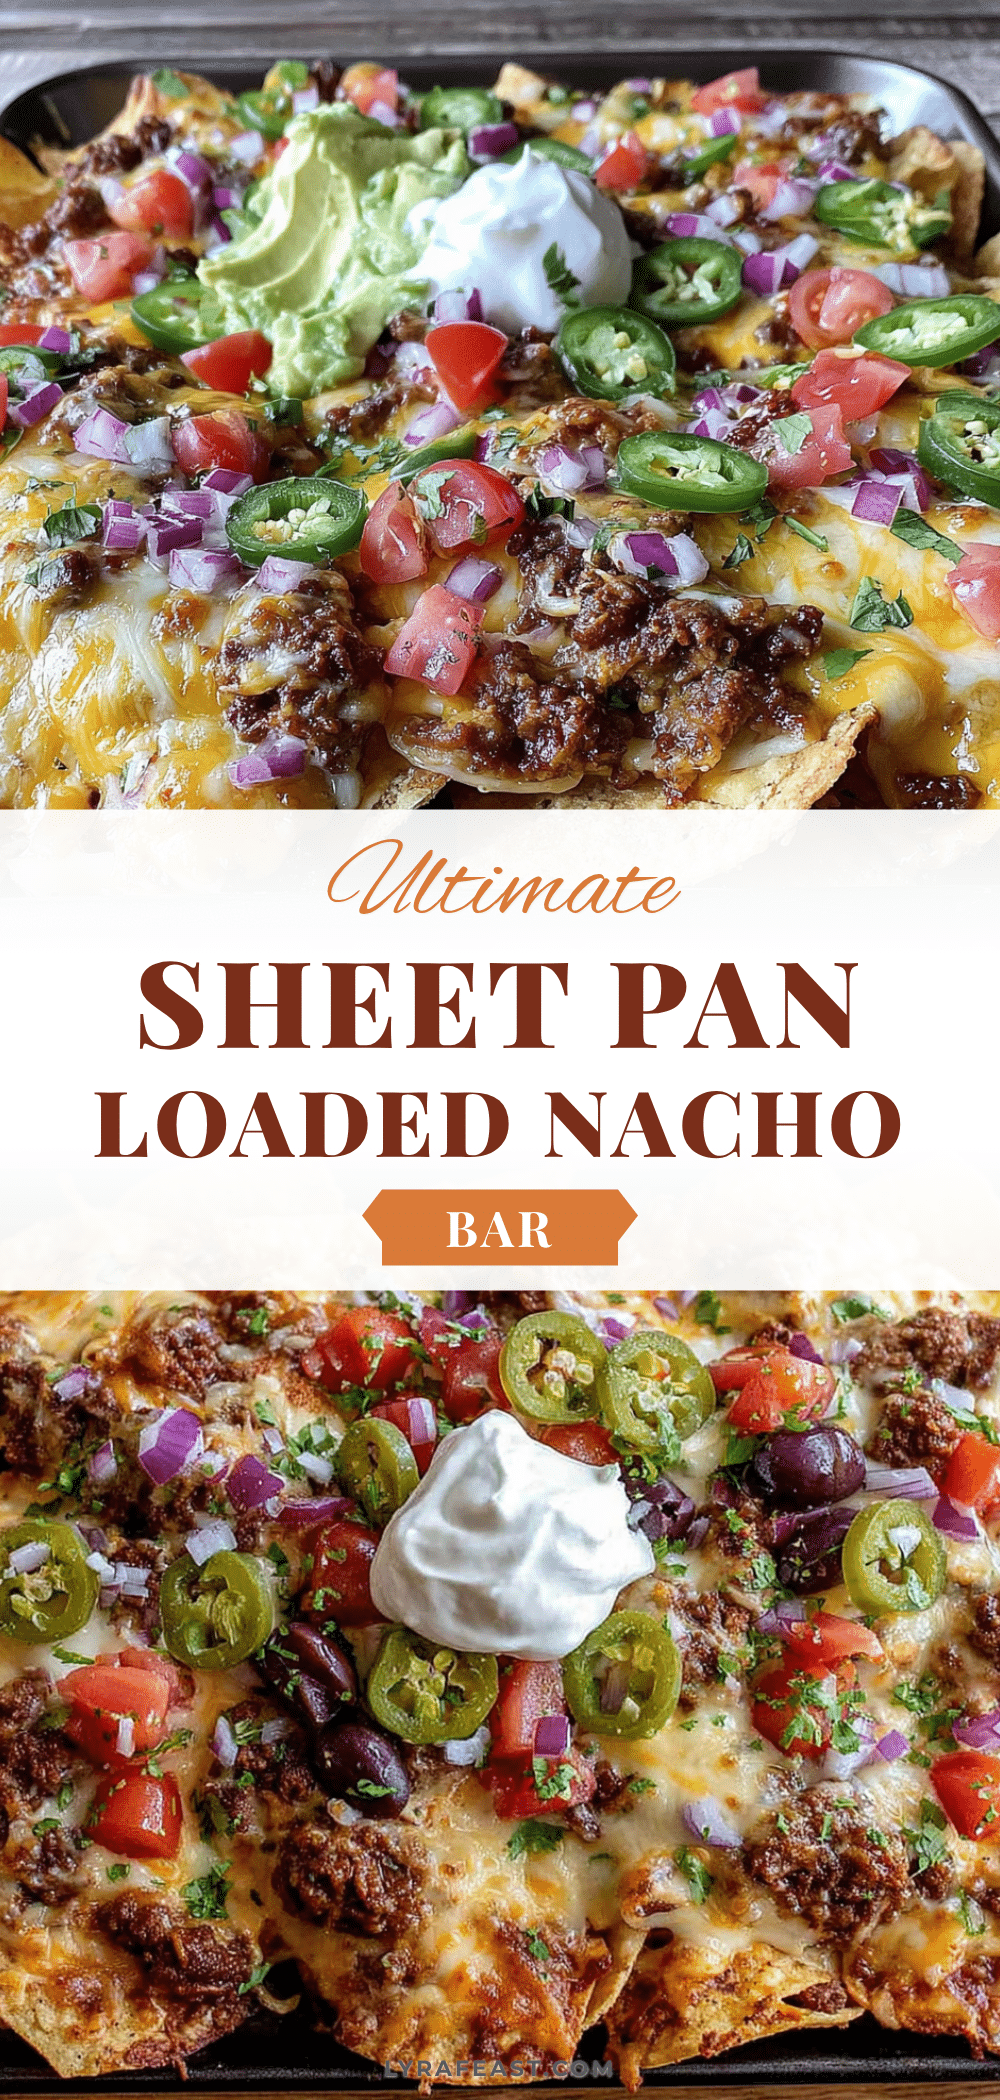
Ultimate Sheet Pan Loaded Nacho Bar – Easy Party Recipe

This ultimate sheet pan loaded nacho bar is the perfect party food: quick, easy, and packed with flavor. Layer crispy tortilla chips with seasoned ground beef, refried beans, black beans, corn, and plenty of cheese, then bake until bubbly and top with fresh ingredients for a customizable, crowd-pleasing meal.
- Prep Time: 15 minutes
- Cook Time: 12 minutes
- Total Time: 27 minutes
- Yield: 8 servings 1x
- Category: Main Course
- Cuisine: Mexican
Ingredients
- 1 large (13-16 oz) bag tortilla chips
- 1 lb (450g) ground beef
- 1 packet (or 3 tablespoons) taco seasoning
- 1 can (16 oz / 450g) refried beans
- 2 cups (200g) shredded cheddar cheese
- 1 cup (100g) shredded Monterey Jack cheese
- 1 can (15 oz / 425g) black beans, drained and rinsed
- 1 cup (150g) corn kernels (frozen or canned, drained)
- 2–3 Roma tomatoes, diced
- 1/2 cup finely diced red onion
- 2–3 jalapeños, sliced
- 2 avocados, diced or sliced
- 1 cup (240ml) sour cream
- 1/2 cup fresh cilantro, roughly chopped
- 2–3 limes, cut into wedges
- 1/2 cup (60g) sliced black olives (optional)
Instructions
- Preheat your oven to 400°F (200°C).
- Cook the ground beef: In a large skillet over medium-high heat, brown the ground beef, breaking it up with a spatula, until no longer pink (6-8 minutes). Drain excess fat. Reduce heat to low, add taco seasoning and 1/2 cup (120ml) water, and simmer for 2-3 minutes until thickened. Set aside.
- Warm the refried beans: In a microwave-safe bowl, heat the refried beans for about 1 minute, stirring halfway, until spreadable. Alternatively, warm in a small saucepan over low heat.
- Layer the base: Spread tortilla chips evenly across a large rimmed baking sheet (half-sheet pan, 18×13 inches), creating a single layer with slight overlapping.
- Add the beans and meat: Dollop spoonfuls of warm refried beans over the chips, then scatter the seasoned ground beef evenly across the chips.
- Add the veggies and cheese: Sprinkle drained black beans and corn kernels over the meat. Generously cover everything with shredded cheddar and Monterey Jack cheese, making sure to reach the edges of the pan.
- Bake: Place the baking sheet in the preheated oven and bake for 10-12 minutes, until cheese is fully melted and bubbly and edges of chips are golden brown.
- Add fresh toppings: Remove from oven and let cool for 2 minutes. Immediately top with diced tomatoes, red onion, sliced jalapeños, black olives (if using), avocado, dollops of sour cream, and a generous sprinkle of fresh cilantro. Squeeze lime wedges over the top.
- Serve immediately: Place the sheet pan in the center of the table. Provide small bowls for extra toppings and let everyone dig in with forks or small plates.
Notes
For best results, shred your own cheese (pre-shredded contains anti-caking agents that affect melting). Have all fresh toppings prepped before baking so you can add them immediately after the pan comes out of the oven. To keep chips crunchy, don’t overload with wet ingredients before baking; drain beans and corn well and add fresh toppings after baking. Leftovers can be stored in an airtight container in the refrigerator for up to 2 days; reheat in the oven or air fryer at 350°F (175°C) for 5-7 minutes.
Nutrition
- Serving Size: 1 serving (approxima
- Calories: 500
- Sugar: 4
- Sodium: 800
- Fat: 28
- Saturated Fat: 12
- Carbohydrates: 40
- Fiber: 7
- Protein: 25
Keywords: sheet pan nachos, loaded nachos, nacho bar, party food, game day, easy recipe, ground beef, tortilla chips, baked nachos



