There used to be a tiny diner off Highway 99 called Mel’s that made breakfast burritos so good you’d dream about them. When they closed suddenly three years ago—just a handwritten sign on the door saying “Thanks for the memories”—I honestly felt a little lost. Those burritos were my Sunday morning ritual. The scramble was always fluffy, the potatoes had that perfect crispy edge, and the whole thing wrapped in a warm tortilla was pure comfort. After about a dozen attempts in my own kitchen, I finally cracked the code. And then I got smart about it.
I started making them in bulk.
Let me tell you, the first batch was a disaster. I overstuffed the tortillas, they fell apart during reheating, and the texture was just… sad. But I kept tweaking. I learned that certain ingredients freeze better than others. I figured out the right way to wrap them so they don’t get soggy. I discovered that adding a tiny splash of pickle juice to the egg mixture (don’t knock it till you try it) gives them this incredible savory depth that lingers. Now, I’ve got a system, and it honestly saves my sanity on chaotic weekday mornings.
Maybe you’ve been there—staring into the fridge at 7 AM with no plan, grabbing a granola bar, and feeling that familiar pang of breakfast defeat. These freezer breakfast burritos are my answer to that problem. They’re the recipe that turned my rushed mornings into something I actually look forward to. And the best part? You can make a month’s worth in one afternoon.
Why You’ll Love This Recipe
I’ve tested this recipe more times than I care to count. I’ve made it for my neighbor who swears by her own version, for my sister who is notoriously picky, and for a group of tired parents at a playdate who needed real food fast. Every single time, people ask for the recipe. That tells me this one works.
- Quick & Easy: From freezer to plate in under 5 minutes. Seriously. That’s faster than waiting in line at a drive-through.
- Simple Ingredients: You probably already have most of these in your kitchen. No weird stuff, no expensive specialty items.
- Perfect for Busy Mornings: Whether you’re rushing out the door, feeding kids before school, or need a post-workout refuel, these burritos fit the bill.
- Crowd-Pleaser: Kids love them. Adults love them. Even my father-in-law, who claims he doesn’t like “frozen food,” asks for seconds.
- Unbelievably Delicious: The key is in the texture. The eggs stay fluffy, the potatoes stay crispy (yes, even after freezing), and the cheese melts perfectly every time.
What makes this version different? It’s the technique. Most freezer breakfast burritos turn into a sad, watery mess. But by cooking the ingredients separately and letting them cool completely before assembling, you avoid the dreaded soggy tortilla. Plus, I use a blend of sharp cheddar and pepper jack cheese for that extra kick. It’s not just another recipe—it’s the one that finally works.
This recipe is comfort food reimagined for real life. It’s the kind of meal that makes you feel like you’ve got your act together, even on days when you definitely don’t. And honestly, that feeling is priceless.
What Ingredients You Will Need
This recipe relies on simple, wholesome ingredients that work together to create a breakfast that’s both satisfying and freezer-friendly. Here’s what you’ll need to gather:
- Large eggs (12 count) – The backbone of the filling. I prefer farm-fresh eggs when I can get them, but standard grocery store eggs work just fine. Make sure they’re at room temperature for the fluffiest scramble.
- Whole milk (1/4 cup) – Adds richness to the eggs. You can substitute with half-and-half or even unsweetened almond milk, but whole milk gives the best texture.
- Frozen hash browns (3 cups, thawed) – The shortcut that makes this recipe weeknight-friendly. I use the shredded style, not the patties. Look for a brand like Ore-Ida for consistent results.
- Breakfast sausage (1 pound) – I prefer mild or spicy pork sausage, depending on my mood. Turkey sausage works great too if you’re watching the fat content. Just make sure to crumble it well as it cooks.
- Sharp cheddar cheese (2 cups, shredded) – Buy a block and shred it yourself. Pre-shredded cheese has anti-caking agents that don’t melt as smoothly. Trust me on this one.
- Pepper jack cheese (1 cup, shredded) – This adds a subtle heat that wakes up your taste buds. Feel free to skip it if you prefer a milder flavor, but I think it’s the secret ingredient.
- Large flour tortillas (10 count, 10-inch size) – You need the big ones for proper wrapping. Burrito-sized tortillas are non-negotiable here. I like Mission brand, but any sturdy brand will do.
- Unsalted butter (2 tablespoons) – For cooking the eggs and potatoes. It adds flavor and prevents sticking.
- Salt (1 teaspoon) – Divided use. I use fine sea salt for even distribution.
- Black pepper (1/2 teaspoon) – Freshly ground is best, but pre-ground works in a pinch.
- Garlic powder (1/2 teaspoon) – A little goes a long way. It adds savory depth without being overpowering.
- Onion powder (1/2 teaspoon) – Complements the garlic and enhances the overall flavor profile.
- Pickle juice (1 tablespoon) – I know it sounds weird, but trust me. A tiny splash in the eggs makes them taste richer and more complex. It’s a trick I learned from a chef friend.
Substitution Guidance: Need a vegetarian version? Swap the sausage for black beans or a plant-based crumble. Gluten-free? Use corn tortillas (just make sure they’re pliable enough to roll). Dairy-free? Use vegan cheese and a plant-based butter substitute. The recipe is forgiving, so feel free to play around.
Equipment Needed
You don’t need a fancy kitchen to pull this off. Here’s what I use:
- Large non-stick skillet (12-inch) – Essential for cooking the eggs and potatoes without sticking. I’ve had my trusty Calphalon for years, but any good non-stick pan will do.
- Medium skillet (10-inch) – For browning the sausage. Cast iron works beautifully here if you have one.
- Mixing bowls (various sizes) – You’ll need one for the eggs and one for the cheese mixture.
- Whisk – For beating the eggs until they’re light and frothy.
- Spatula – A silicone spatula is my favorite for scrambling eggs without scratching the pan.
- Baking sheet – For laying out the assembled burritos before freezing. This prevents them from sticking together.
- Parchment paper or wax paper – To line the baking sheet and wrap the burritos individually.
- Freezer-safe zip-top bags – For storing the frozen burritos. Quart-sized bags work perfectly for individual burritos.
- Sharp knife and cutting board – For any prep work, though honestly, there’s not much chopping here.
Budget-friendly tip: If you don’t have a non-stick skillet, a well-seasoned cast iron pan works great. Just use a little extra butter to prevent sticking. And if you’re short on freezer space, these burritos also keep in the fridge for up to 5 days—just don’t freeze them if you plan to eat them within the week.
Preparation Method
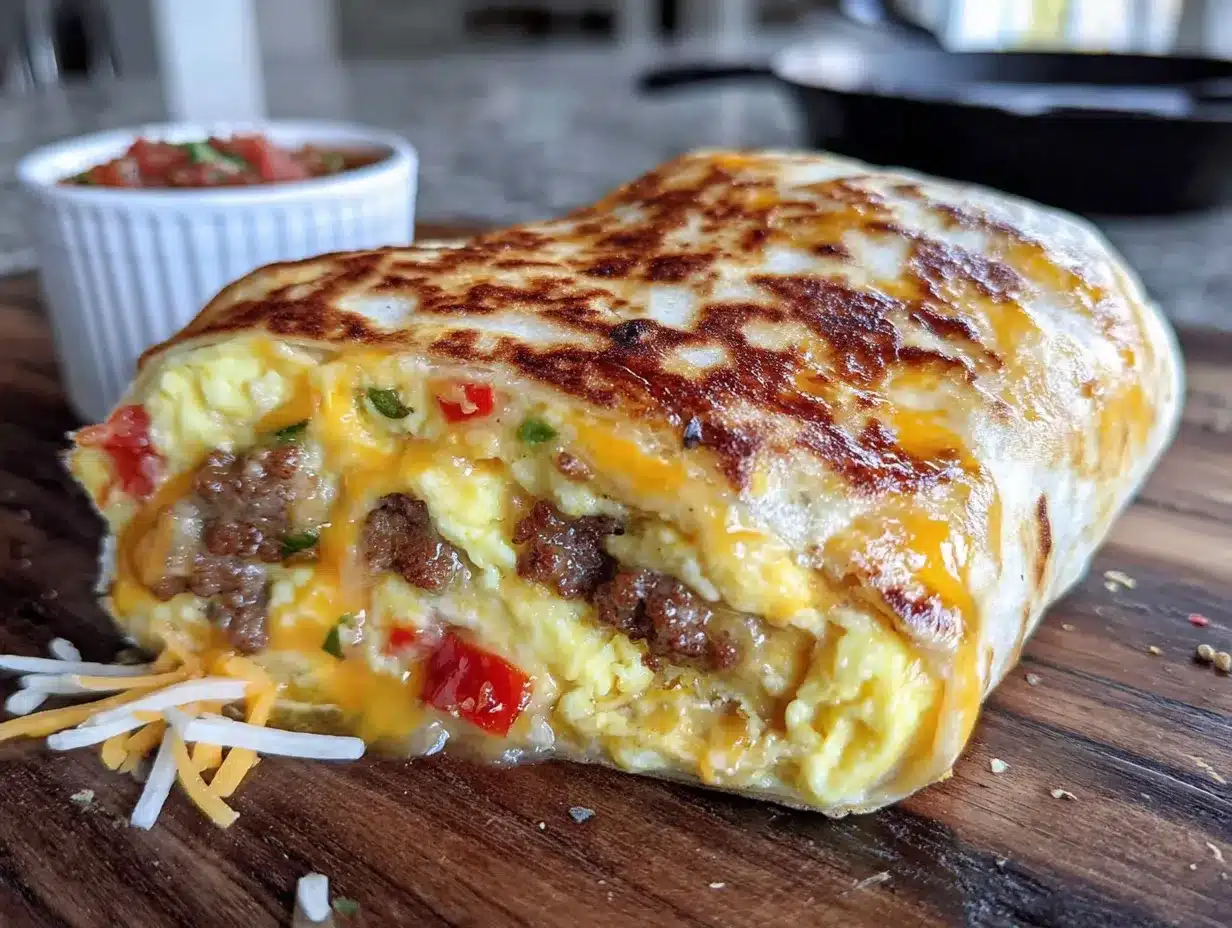
Let’s get cooking. I’ve broken this down into clear steps so you can follow along without any guesswork. The whole process takes about an hour, and you’ll end up with 10 breakfasts ready to go.
- Cook the breakfast sausage. Heat your medium skillet over medium-high heat. Add the sausage and break it apart with a spatula. Cook for 6-8 minutes, stirring occasionally, until it’s browned and cooked through. Use a slotted spoon to transfer the sausage to a paper towel-lined plate to drain. Let it cool completely—this is important for preventing soggy burritos later.
- Cook the hash browns. In the same skillet (don’t wipe it out—the leftover fat adds flavor), melt 1 tablespoon of butter over medium heat. Add the thawed hash browns and spread them into an even layer. Let them cook undisturbed for 4-5 minutes until the bottom is golden brown. Flip and cook for another 3-4 minutes. Season with 1/4 teaspoon salt and 1/4 teaspoon black pepper. Transfer to a bowl and let cool.
- Scramble the eggs. In a large mixing bowl, whisk together the eggs, milk, pickle juice, garlic powder, onion powder, and remaining 3/4 teaspoon salt until the mixture is pale yellow and slightly frothy. Melt the remaining 1 tablespoon of butter in your large non-stick skillet over medium-low heat. Pour in the egg mixture and let it sit for about 30 seconds. Using a silicone spatula, gently push the cooked eggs from the edges toward the center. Continue this motion, tilting the pan to let the uncooked eggs flow to the edges. Cook until the eggs are just set but still soft and glossy—about 4-5 minutes. Remove from heat immediately. Overcooked eggs turn rubbery after freezing, so err on the side of underdone.
- Combine the filling. In a large bowl, gently mix the cooled sausage, hash browns, and scrambled eggs. Fold in the shredded cheddar and pepper jack cheese. The residual heat from the other ingredients will start melting the cheese slightly, which is exactly what you want.
- Assemble the burritos. Lay a tortilla flat on your work surface. Spoon about 3/4 cup of the filling into the center, spreading it into a compact log shape. Fold the sides of the tortilla inward over the filling, then fold the bottom flap up and over the filling, tucking it tightly. Roll the burrito away from you, keeping the sides tucked in, until the seam is sealed. Repeat with the remaining tortillas and filling.
- Flash freeze the burritos. Line a baking sheet with parchment paper. Place the assembled burritos seam-side down on the sheet, making sure they’re not touching. Pop the sheet into the freezer for 2-3 hours, or until the burritos are completely frozen solid. This step prevents them from sticking together when you bag them.
- Package for storage. Once frozen, wrap each burrito individually in a piece of parchment or wax paper. Place the wrapped burritos in a freezer-safe zip-top bag. Squeeze out as much air as possible before sealing. Label the bag with the date and contents—you’ll thank yourself later.
Visual cue: When the eggs are done, they should look soft and custard-like, not dry or crumbly. The hash browns should be golden on both sides, with some crispy edges. If your tortillas crack when rolling, they’re too cold—warm them in the microwave for 10 seconds to make them pliable again.
Cooking Tips & Techniques
I’ve made plenty of mistakes so you don’t have to. Here are the lessons I learned the hard way:
The biggest mistake is rushing the cooling process. If you assemble the burritos while the filling is still warm, the steam will make the tortillas soggy. Then when you reheat them, you get a sad, wet mess. Let everything cool to room temperature before you start rolling. I usually cook the filling, spread it on a baking sheet to cool faster, and then assemble.
Don’t overstuff the tortillas. I know it’s tempting to pile on the filling, but you’ll end up with burritos that burst during reheating. Stick to about 3/4 cup per burrito. If you have leftover filling (which rarely happens in my house), just eat it with a fork—it’s delicious on its own.
Master the wrapping technique. A properly wrapped burrito is a thing of beauty. Start by folding the sides in, then roll from the bottom, tucking the filling tightly as you go. The goal is a snug, compact cylinder with no gaps. If you see any filling peeking out, add a little more cheese to seal the seam—cheese acts like edible glue.
Timing is everything. When you’re ready to reheat, remove the burrito from the freezer, unwrap it from the paper, and microwave it on a plate for 1 minute. Flip it over and microwave for another 30-60 seconds. Let it sit for 1 minute before eating—this allows the heat to distribute evenly. For a crispy exterior, finish it in a dry skillet over medium heat for 2 minutes per side after microwaving.
One more thing: If you’re making a double batch, work in assembly-line fashion. Lay out all the tortillas first, then portion the filling, then roll them all at once. It’s more efficient and keeps your rhythm going.
Variations & Adaptations
This recipe is a canvas. Here are some ways to make it your own:
- Southwest Style: Add 1/2 cup of canned black beans (rinsed and drained), 1/4 cup of diced green chiles, and a sprinkle of cumin to the filling. Top with a dollop of salsa before serving.
- Vegetarian Delight: Skip the sausage and use 1 cup of roasted sweet potatoes (diced) and 1 cup of sautéed mushrooms. The earthy flavors pair beautifully with the cheese and eggs.
- Spicy Kick: Add 1 diced jalapeño (seeds removed if you want less heat) and 1/4 cup of chopped cilantro to the filling. Use habanero cheddar if you’re feeling really brave.
- Low-Carb Version: Swap the tortillas for large lettuce leaves or low-carb wraps. Reduce the hash browns to 1 cup and add extra veggies like bell peppers and spinach.
- Allergen-Friendly: Use vegan sausage, dairy-free cheese, and egg substitute (like Just Egg) for a completely plant-based version. The texture will be slightly different, but it’s still delicious.
I once tried a version with crumbled bacon instead of sausage, and honestly, it was incredible. The smoky flavor added a whole new dimension. Just make sure to drain the bacon fat well so the burritos don’t get greasy.
Serving & Storage Suggestions
These burritos are best served hot, with a side of salsa, hot sauce, or sour cream if you’re feeling fancy. I like to pair mine with a handful of fresh fruit and a cup of strong coffee for a complete breakfast that feels like a treat.
Storage instructions: In the freezer, these burritos will keep for up to 3 months. Just make sure they’re tightly wrapped and sealed in an airtight bag. For fridge storage, they’ll last up to 5 days—perfect for meal prep if you’re eating them within the week.
Reheating methods:
- Microwave: Unwrap and place on a microwave-safe plate. Heat on high for 1 minute, flip, then heat for another 30-60 seconds. Let rest for 1 minute before eating.
- Oven: Preheat to 350°F. Wrap the frozen burrito in foil and bake for 20-25 minutes, or until heated through. Unwrap for the last 5 minutes for a crispy tortilla.
- Air fryer: Cook at 350°F for 8-10 minutes, flipping halfway through. This gives you the crispiest exterior.
Flavor development note: These burritos actually taste better after a day or two in the freezer. The flavors meld together, and the texture becomes more cohesive. So don’t be shy about making them well in advance.
Nutritional Information & Benefits
Here’s the approximate nutritional breakdown for one burrito (based on the recipe as written):
- Calories: 420
- Protein: 22g
- Fat: 24g
- Carbohydrates: 30g
- Fiber: 2g
- Sugar: 3g
These burritos are a solid source of protein, which keeps you full and focused throughout the morning. The eggs provide choline, which is great for brain health, while the cheese adds calcium for strong bones. If you’re watching your sodium, use low-sodium sausage and cheese, and skip the added salt in the eggs.
Dietary considerations: This recipe is naturally nut-free and can be made gluten-free with the right tortillas. For a lower-calorie option, use turkey sausage and reduce the cheese to 1 cup total. I personally love that these burritos give me a balanced start to my day without any of the mid-morning crash that comes from sugary cereals or pastries.
Conclusion
These easy freezer breakfast burritos have genuinely changed my mornings. No more scrambling (pun intended) to figure out breakfast. No more settling for something that doesn’t satisfy. Just grab, heat, and enjoy a meal that tastes like you put in way more effort than you actually did.
I hope you give this recipe a try and make it your own. Maybe you’ll add extra spice, or swap in your favorite cheese, or discover a new combination that becomes your go-to. That’s the beauty of cooking—it’s always evolving. I’d love to hear how your burritos turn out. Drop a comment below or tag me in your photos. Honestly, there’s nothing better than seeing someone else enjoy a recipe that started as a personal obsession.
Now go make some breakfast magic. You’ve got this.
Frequently Asked Questions
Can I use fresh potatoes instead of frozen hash browns?
Absolutely. Just shred 2 medium potatoes, rinse them well to remove excess starch, and squeeze them dry in a clean kitchen towel. Cook them the same way you would frozen hash browns—they might take a minute or two longer.
Why did my burritos turn out soggy after reheating?
This usually happens if the filling was too warm when you assembled the burritos, or if you didn’t drain the sausage well enough. Make sure everything is completely cool before rolling, and pat the sausage dry with paper towels after cooking.
Can I make these burritos without eggs?
Yes! Use a plant-based egg substitute like Just Egg, or try a filling of seasoned tofu scramble. The texture will be different, but the concept works just as well.
How long do these burritos last in the freezer?
Properly stored, they’ll stay fresh for up to 3 months. After that, they’re still safe to eat, but the texture might start to decline. I recommend labeling your bags with the date so you know which batch to use first.
Can I cook these burritos in an air fryer from frozen?
Yes! Preheat your air fryer to 350°F, place the frozen burrito (unwrap it first) in the basket, and cook for 8-10 minutes, flipping halfway through. The tortilla gets beautifully crispy, and the filling heats through perfectly.
Pin This Recipe!
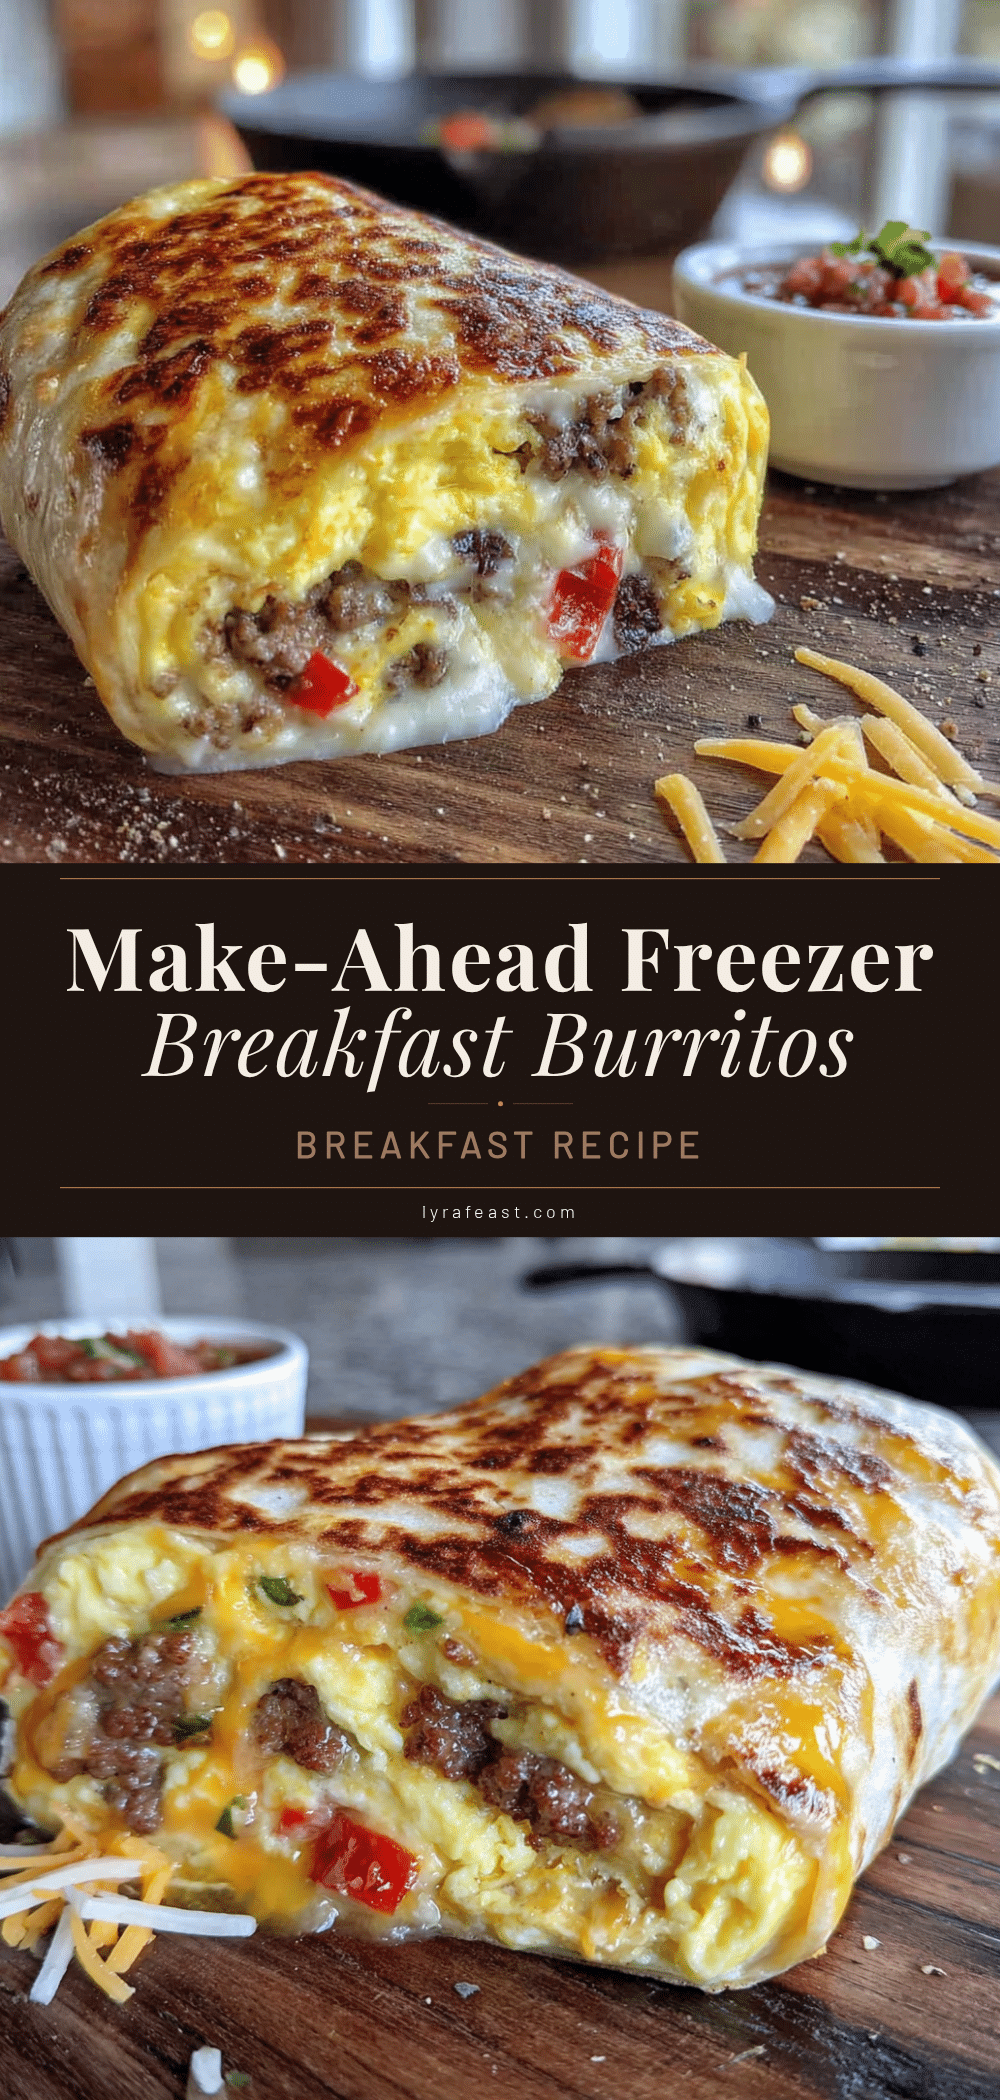
Easy Freezer Breakfast Burritos: Best Make-Ahead Meal

These freezer breakfast burritos are the ultimate make-ahead meal, featuring fluffy scrambled eggs, crispy hash browns, savory sausage, and melted cheese wrapped in a warm tortilla. Perfect for busy mornings, they reheat in under 5 minutes and taste just as good as fresh.
- Prep Time: 20 minutes
- Cook Time: 30 minutes
- Total Time: 50 minutes
- Yield: 10 servings 1x
- Category: Breakfast
- Cuisine: American
Ingredients
- 12 large eggs
- 1/4 cup whole milk
- 3 cups frozen hash browns, thawed
- 1 pound breakfast sausage (mild or spicy)
- 2 cups sharp cheddar cheese, shredded
- 1 cup pepper jack cheese, shredded
- 10 large flour tortillas (10-inch)
- 2 tablespoons unsalted butter
- 1 teaspoon salt, divided
- 1/2 teaspoon black pepper
- 1/2 teaspoon garlic powder
- 1/2 teaspoon onion powder
- 1 tablespoon pickle juice
Instructions
- Cook the breakfast sausage: Heat a medium skillet over medium-high heat. Add the sausage and break it apart with a spatula. Cook for 6-8 minutes, stirring occasionally, until browned and cooked through. Use a slotted spoon to transfer to a paper towel-lined plate to drain. Let cool completely.
- Cook the hash browns: In the same skillet, melt 1 tablespoon butter over medium heat. Add the thawed hash browns and spread into an even layer. Cook undisturbed for 4-5 minutes until golden brown on the bottom. Flip and cook for another 3-4 minutes. Season with 1/4 teaspoon salt and 1/4 teaspoon black pepper. Transfer to a bowl and let cool.
- Scramble the eggs: In a large mixing bowl, whisk together the eggs, milk, pickle juice, garlic powder, onion powder, and remaining 3/4 teaspoon salt until pale yellow and slightly frothy. Melt the remaining 1 tablespoon butter in a large non-stick skillet over medium-low heat. Pour in the egg mixture and let sit for 30 seconds. Gently push cooked eggs from edges toward center using a silicone spatula, tilting the pan to let uncooked eggs flow to edges. Cook until just set but still soft and glos…
- Combine the filling: In a large bowl, gently mix the cooled sausage, hash browns, and scrambled eggs. Fold in the shredded cheddar and pepper jack cheese.
- Assemble the burritos: Lay a tortilla flat. Spoon about 3/4 cup of filling into the center, spreading into a compact log shape. Fold the sides inward over the filling, then fold the bottom flap up and over, tucking tightly. Roll the burrito away from you, keeping sides tucked in, until the seam is sealed. Repeat with remaining tortillas and filling.
- Flash freeze the burritos: Line a baking sheet with parchment paper. Place assembled burritos seam-side down on the sheet, not touching. Freeze for 2-3 hours until completely solid.
- Package for storage: Once frozen, wrap each burrito individually in parchment or wax paper. Place wrapped burritos in a freezer-safe zip-top bag, squeeze out air, and seal. Label with date and contents.
Notes
Let all filling ingredients cool completely before assembling to prevent soggy tortillas. Don’t overstuff; use about 3/4 cup filling per burrito. For best texture, microwave frozen burrito for 1 minute, flip, then 30-60 seconds more. Let rest 1 minute before eating. For crispy exterior, finish in a dry skillet over medium heat for 2 minutes per side after microwaving. Burritos keep in freezer for up to 3 months.
Nutrition
- Serving Size: 1 burrito
- Calories: 420
- Sugar: 3
- Sodium: 800
- Fat: 24
- Saturated Fat: 10
- Carbohydrates: 30
- Fiber: 2
- Protein: 22
Keywords: freezer breakfast burritos, make-ahead breakfast, breakfast burritos, meal prep, freezer meals, easy breakfast



