It was 10:47 PM on a rainy Tuesday, and I was staring into the fridge like it owed me money. The craving hit out of nowhere—crispy, juicy, salty chicken with that golden crust that shatters when you bite into it. I didn’t have the energy for deep frying, and honestly, I didn’t have the patience for a complicated marinade either. But I had chicken thighs, a block of Parmesan that was getting lonely, and a wild idea that maybe—just maybe—I could get that crunch without a vat of oil.
I pulled out a baking sheet, cranked the oven, and started experimenting. The first batch came out okay. The second batch? Let me tell you, it was the kind of success that makes you text your foodie friend at midnight with a photo and a shaky “you have to try this.” The breading was a glorious mess of panko, cheese, and spices, and the chicken stayed so tender it practically fell apart. I might have burned my tongue on the first piece because I couldn’t wait. Worth it.
That night changed how I think about weeknight dinners. This recipe for crispy baked Parmesan chicken thighs became my go-to for those evenings when you want something that feels indulgent but doesn’t take all evening. It’s the kind of meal that makes you feel like you pulled off something fancy, even though you barely tried. Maybe you’ve been there—standing in your kitchen, tired, hungry, and hoping for a miracle. This recipe is that miracle, and I promise it delivers every single time.
Why You’ll Love This Recipe
I’ve tested this recipe more times than I care to admit, tweaking the breading ratio and the oven temperature until it was absolutely foolproof. Here’s why I think it deserves a permanent spot in your dinner rotation:
- Quick & Easy: From fridge to table in under 40 minutes. No marinating, no complicated steps—just mix, coat, and bake. Perfect for those nights when you’re short on time but big on hunger.
- Simple Ingredients: You probably have most of these in your kitchen right now. Chicken thighs, Parmesan, panko breadcrumbs, and a few pantry spices. No fancy grocery trips required.
- Perfect for Busy Weeknights: This is the dinner you make when you’re tired but still want something that feels like a real meal. It’s impressive enough for guests but easy enough for a Tuesday.
- Crowd-Pleaser: I’ve served these to picky kids, skeptical in-laws, and hungry neighbors. Every single person went back for seconds. The crunchy coating and juicy meat are universally loved.
- Unbelievably Delicious: The texture is what gets me every time—crispy on the outside, tender and flavorful on the inside. It’s comfort food that doesn’t weigh you down.
What makes this recipe different from all the other baked chicken recipes out there? It’s the technique. Instead of a wet batter that gets soggy, we use a clever two-step coating method that locks in moisture while creating that shatteringly crisp crust. The Parmesan doesn’t just add flavor—it creates a golden, cheesy shell that browns perfectly in the oven. I’ve tried dozens of versions, and this is the one that finally worked without fail. It’s not just another recipe; it’s the best version I’ve ever made.
This isn’t just good chicken—it’s the kind that makes you close your eyes after the first bite. It’s comfort food reimagined: healthier than fried, faster than braised, but with the same soul-soothing satisfaction. Perfect for impressing guests without stress, or turning a simple Tuesday night into something memorable.
What Ingredients You Will Need
This recipe relies on a handful of everyday ingredients that work together to create something extraordinary. The magic is in the coating—a mix of crunchy panko, salty Parmesan, and warm spices that transforms plain chicken into a crispy masterpiece.
For the Chicken:
- 4 bone-in, skin-on chicken thighs (about 1.5 lbs or 680g total) — The skin adds extra crispiness, but you can use boneless thighs too. Just reduce the cooking time by about 10 minutes.
- 1 tablespoon olive oil (15ml) — Helps the coating stick and promotes browning.
- 1/2 teaspoon salt (3g) — I use kosher salt for better seasoning control.
- 1/4 teaspoon black pepper (0.5g) — Freshly ground is best.
For the Crispy Coating:
- 1/2 cup panko breadcrumbs (45g) — Regular breadcrumbs work, but panko gives that extra-crunchy texture. I prefer Kikkoman brand for consistent results.
- 1/2 cup freshly grated Parmesan cheese (50g) — Please, please grate it yourself. The pre-shredded stuff has anti-caking agents that prevent melting and browning. A microplane makes quick work of this.
- 1 teaspoon garlic powder (3g) — Not garlic salt; we’re controlling the salt separately.
- 1/2 teaspoon paprika (1g) — Smoked paprika adds a lovely depth, but sweet paprika works great too.
- 1/2 teaspoon dried oregano (1g) — Optional, but I love the Italian twist it adds.
- 1/4 teaspoon red pepper flakes (0.5g) — For a tiny kick. Skip if you’re serving kids.
For Serving (optional but recommended):
- Fresh parsley, chopped — For color and freshness.
- Lemon wedges — A squeeze of lemon brightens everything up.
- Extra grated Parmesan — Because why not?
Ingredient Tips: If you’re using a different brand of Parmesan, taste it first. Some are saltier than others, so adjust your added salt accordingly. For a dairy-free version, use nutritional yeast in place of Parmesan—it won’t be exactly the same, but it adds a cheesy, umami flavor that’s surprisingly good. And if you only have boneless, skinless chicken breasts, go for it—just pound them to even thickness and reduce the baking time to 20-25 minutes.
Equipment Needed
You don’t need a fancy kitchen to pull this off. Here’s what you’ll need:
- Baking sheet — A rimmed baking sheet works best to catch any drips. I use a half-sheet pan (18×13 inches) for even heat distribution.
- Wire rack — This is a game-changer. Placing the chicken on a wire rack set inside the baking sheet allows hot air to circulate underneath, making the bottom crispy too. If you don’t have one, just flip the chicken halfway through cooking.
- Mixing bowls — Two medium bowls: one for the coating mixture, one for tossing the chicken in oil and seasonings.
- Tongs — For handling the chicken without getting your hands messy.
- Microplane or fine grater — For grating that Parmesan fresh. A box grater works too.
- Instant-read thermometer — Not strictly necessary, but it takes the guesswork out of doneness. Chicken thighs are safe at 165°F (74°C), but I prefer them at 175°F (80°C) for more tender meat.
Budget-Friendly Alternatives: No wire rack? No problem. Just place the chicken directly on the baking sheet and flip it halfway through. You’ll lose a bit of bottom crispiness, but it’ll still be delicious. A cooling rack from your cookie baking works perfectly too.
Personal Note: I bought a cheap wire rack from the dollar store years ago, and it’s still going strong. Don’t overthink the equipment—use what you have.
Preparation Method
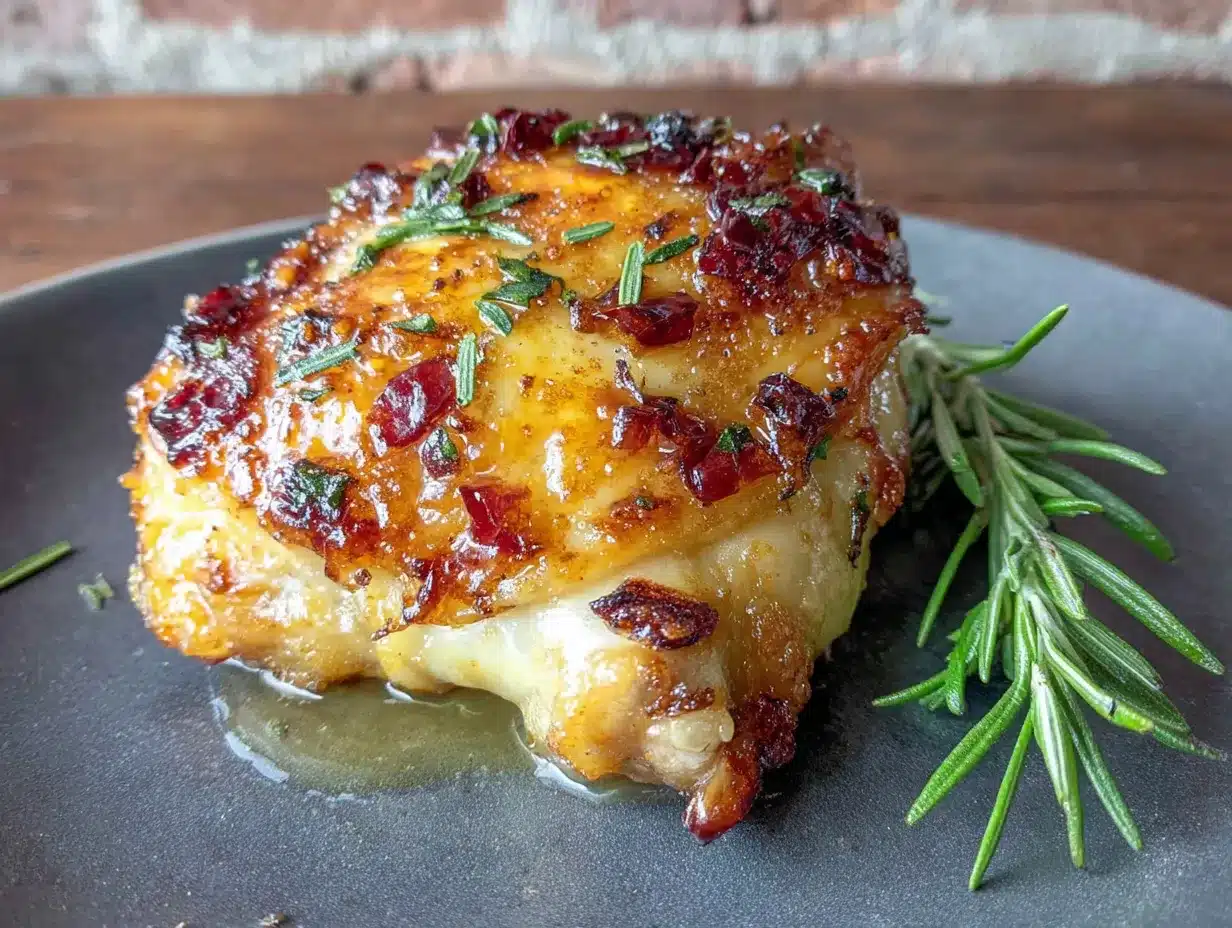
Let’s get cooking. This recipe comes together fast, so have everything ready before you start.
- Preheat your oven to 400°F (200°C). Place a wire rack on a rimmed baking sheet and set aside. Preheating thoroughly is crucial—a hot oven ensures the coating starts crisping immediately.
- Pat the chicken thighs dry with paper towels. This is the most important step. Excess moisture steams the coating instead of crisping it. Take your time here—really get them dry. I usually use three or four paper towels per batch.
- Season the chicken. In a large bowl, toss the chicken thighs with olive oil, salt, and pepper. Make sure every surface is lightly coated. The oil helps the breading stick and promotes golden browning.
- Prepare the coating mixture. In a separate shallow bowl, combine the panko breadcrumbs, grated Parmesan, garlic powder, paprika, oregano, and red pepper flakes. Mix with a fork until everything is evenly distributed. The Parmesan should be in small, fluffy shreds—if it’s clumpy, break it up with your fingers.
- Coat the chicken. Working one thigh at a time, press the chicken into the breadcrumb mixture, turning to coat all sides. Use your hands to really press the coating on—it should adhere firmly. Don’t shake off the excess; you want a thick, generous crust. Place the coated thigh on the wire rack, skin side up.
- Bake for 30-35 minutes. Place the baking sheet in the preheated oven and bake until the chicken is golden brown and crispy. The internal temperature should reach 165°F (74°C) at minimum. I usually pull mine at 175°F (80°C) for the juiciest results. If the coating isn’t as brown as you’d like, broil for 1-2 minutes at the end—watch it carefully so it doesn’t burn.
- Rest for 5 minutes. This is hard, I know. But letting the chicken rest allows the juices to redistribute, keeping the meat tender. If you cut into it immediately, all those lovely juices will run out onto the plate.
- Serve immediately. Sprinkle with fresh parsley and serve with lemon wedges for squeezing. The crust stays crispy for about 15-20 minutes, so eat up while it’s hot!
Troubleshooting Tips: If your coating isn’t sticking, the chicken might be too wet. Pat it dry again and try a second coat. If the Parmesan is browning too quickly but the chicken isn’t done, tent loosely with foil for the last 10 minutes of baking. And if you’re using boneless thighs, start checking for doneness at 20 minutes—they cook faster than bone-in.
Cooking Tips & Techniques
I’ve made this recipe at least two dozen times, and I’ve learned a few things the hard way. Let me save you some trouble.
The Drying Secret: I cannot stress this enough—dry chicken is crispy chicken. After patting with paper towels, let the chicken sit uncovered in the fridge for 15 minutes. This dries the surface even more, creating a better bond for the coating. It’s a trick I learned from a restaurant chef, and it makes a noticeable difference.
Don’t Skip the Wire Rack: The first time I made this, I placed the chicken directly on the baking sheet. The bottoms came out soggy and sad. A wire rack allows hot air to circulate underneath, crisping the entire surface. If you don’t have one, flip the chicken halfway through baking—it helps, but it’s not quite the same.
The Parmesan Mistake: I once used pre-shredded Parmesan because I was in a hurry. The coating was clumpy, the cheese didn’t melt properly, and the crust was more greasy than crispy. Freshly grated Parmesan melts evenly and creates that beautiful golden crust. It takes two extra minutes, and it’s absolutely worth it.
Timing Strategy: While the chicken bakes, I usually throw together a quick side dish—roasted vegetables or a simple salad. The 30-minute bake time is perfect for multitasking. Just don’t forget to set a timer; I’ve definitely gotten distracted and ended up with over-baked chicken.
Consistency Tip: For the most even coating, use one hand for the wet chicken and the other hand for the dry coating. This keeps the breadcrumb mixture from getting clumpy and ensures every piece gets an even crust. It’s a small habit that makes a big difference.
Variations & Adaptations
One of the best things about this recipe is how flexible it is. Here are some variations I’ve tried and loved:
Spicy Buffalo Version: Add 2 tablespoons of hot sauce to the olive oil mixture before coating, and mix 1 teaspoon of cayenne pepper into the breadcrumb mixture. Serve with blue cheese dressing for dipping. I made this for a game day party, and it disappeared in minutes.
Herb & Lemon Twist: Add the zest of one lemon and 2 tablespoons of fresh chopped herbs (thyme, rosemary, or parsley) to the coating mixture. The lemon brightens the richness of the chicken, and the herbs add a fresh, aromatic quality. This version is perfect for spring dinners.
Gluten-Free Option: Substitute the panko breadcrumbs with crushed pork rinds or gluten-free panko. The pork rinds create an incredibly crispy, almost fried texture. I’ve tested this with a gluten-free friend, and she said it was better than the original.
Air Fryer Adaptation: Cook at 375°F (190°C) for 15-18 minutes, flipping halfway through. The air fryer creates an even crispier crust with less oil. Just make sure not to overcrowd the basket—work in batches if needed.
Cheese Variation: Swap half the Parmesan for finely grated Pecorino Romano or Asiago. Each cheese brings a different flavor profile—Pecorino is saltier and sharper, while Asiago is nuttier and milder. I’ve even used a mix of all three when I was cleaning out my cheese drawer. It was accidental, but it worked beautifully.
Personal Favorite: My go-to variation is adding a tablespoon of everything bagel seasoning to the coating. The sesame seeds, garlic, and onion flakes add an incredible crunch and flavor. It’s become my signature version, and I always get requests for the recipe.
Serving & Storage Suggestions
This chicken is best served hot and fresh, but it’s still pretty amazing the next day.
Serving Temperature & Presentation: Serve the chicken straight from the oven while the coating is still shatteringly crisp. Arrange on a platter with lemon wedges and a sprinkle of fresh parsley. For a complete meal, pair with roasted asparagus, garlic green beans, or a simple arugula salad with lemon vinaigrette. The brightness of the greens balances the richness of the chicken perfectly.
Complementary Dishes: These chicken thighs are incredibly versatile. Serve them over pasta with marinara sauce, slice them over a Caesar salad, or tuck them into sandwiches with provolone and roasted peppers. For a low-carb option, serve with cauliflower mash and sautéed spinach.
Beverage Pairings: A crisp Pinot Grigio or a light lager complements the cheesy, savory flavors. For non-alcoholic options, try sparkling water with lemon or an iced tea with a hint of mint.
Storage Instructions: Store leftover chicken in an airtight container in the refrigerator for up to 4 days. The coating will soften over time, but it’s still delicious. To reheat and restore crispiness, place the chicken on a wire rack in a 375°F (190°C) oven for 8-10 minutes. Avoid the microwave—it turns the coating rubbery.
Freezer Tips: You can freeze the baked chicken for up to 3 months. Let it cool completely, then wrap individually in plastic wrap and place in a freezer bag. To reheat, bake from frozen at 375°F (190°C) for 20-25 minutes, or until heated through. The texture won’t be quite as crispy as fresh, but it’s still a solid weeknight shortcut.
Flavor Development: Here’s a secret: the chicken actually tastes even better the next day. The flavors meld together, and the Parmesan becomes more pronounced. I often make a double batch just for leftovers—they’re perfect for lunch salads or quick dinners.
Nutritional Information & Benefits
Here’s the approximate nutritional breakdown for one serving (one chicken thigh, based on the recipe as written):
| Nutrient | Amount per Serving |
|---|---|
| Calories | 385 |
| Protein | 32g |
| Fat | 24g |
| Saturated Fat | 9g |
| Carbohydrates | 8g |
| Fiber | 1g |
| Sugar | 1g |
| Sodium | 620mg |
Health Benefits: Chicken thighs are an excellent source of high-quality protein, which supports muscle health and keeps you feeling full. They’re also rich in B vitamins, particularly B6 and B12, which are essential for energy metabolism and brain function. The Parmesan adds calcium and phosphorus for bone health, while the olive oil provides heart-healthy monounsaturated fats.
Dietary Considerations: This recipe is naturally low-carb and keto-friendly (just 8g of carbs per serving). For a gluten-free version, use gluten-free panko or crushed pork rinds. It’s also nut-free and egg-free, making it suitable for many common allergies. If you’re watching sodium, reduce the added salt and use low-sodium Parmesan.
Personal Wellness Perspective: I love that this recipe feels indulgent but is actually quite balanced. It’s satisfying enough to curb cravings for fried food, but it’s baked with minimal oil. For me, that’s the sweet spot—food that tastes like a treat but supports my health goals. It’s proof that you don’t have to sacrifice flavor to eat well.
Frequently Asked Questions
Can I use chicken breasts instead of thighs?
Absolutely. Boneless, skinless chicken breasts work well, but they cook faster and can dry out more easily. Pound them to even thickness (about 1 inch) and reduce the baking time to 20-25 minutes. Check for doneness at 165°F (74°C). I recommend brining the breasts for 30 minutes beforehand for extra juiciness.
Why is my coating not crispy?
The most common culprit is moisture. Make sure your chicken is thoroughly patted dry before coating. Another factor is overcrowding the pan—if the chicken thighs are too close together, they’ll steam instead of bake. Leave at least an inch of space between each piece. Finally, using a wire rack makes a huge difference by allowing air to circulate underneath.
Can I make this recipe dairy-free?
Yes! Substitute the Parmesan with nutritional yeast (use about 1/4 cup) or a dairy-free Parmesan alternative. The texture won’t be exactly the same, but the nutritional yeast adds a cheesy, umami flavor that’s surprisingly good. I’ve also used finely ground almonds mixed with nutritional yeast for a nutty, crispy coating.
How do I prevent the Parmesan from burning?
Freshly grated Parmesan browns faster than pre-shredded. If you notice the coating browning too quickly, tent the chicken loosely with foil for the last 10 minutes of baking. You can also lower the oven temperature to 375°F (190°C) and bake for an additional 5-10 minutes. The key is to watch it closely during the last 5 minutes of baking.
Can I prep this recipe ahead of time?
You can coat the chicken up to 4 hours ahead and keep it refrigerated on the wire rack. Let it sit at room temperature for 15 minutes before baking. I don’t recommend freezing the coated raw chicken—the breading gets soggy during thawing. However, you can freeze the baked chicken for up to 3 months and reheat in the oven for a quick meal.
Conclusion
This crispy baked Parmesan chicken thighs recipe has become a staple in my kitchen for good reason. It’s the perfect answer to those nights when you want something delicious without spending hours cooking. The combination of juicy chicken, crispy coating, and savory Parmesan is simply irresistible—and it comes together in under 40 minutes.
I hope you give this recipe a try and make it your own. Add your favorite spices, experiment with different cheeses, or serve it with your go-to sides. The beauty of this dish is how adaptable it is—it works for busy weeknights, casual dinners with friends, or even meal prep for the week ahead.
I’d love to hear how it turns out for you. Did you try a variation? Did your family go back for seconds? Drop a comment below and share your experience. And if you loved this recipe, don’t forget to pin it for later or share it with someone who needs an easy, delicious dinner idea. Happy cooking, friend—you’ve got this!
Pin This Recipe!
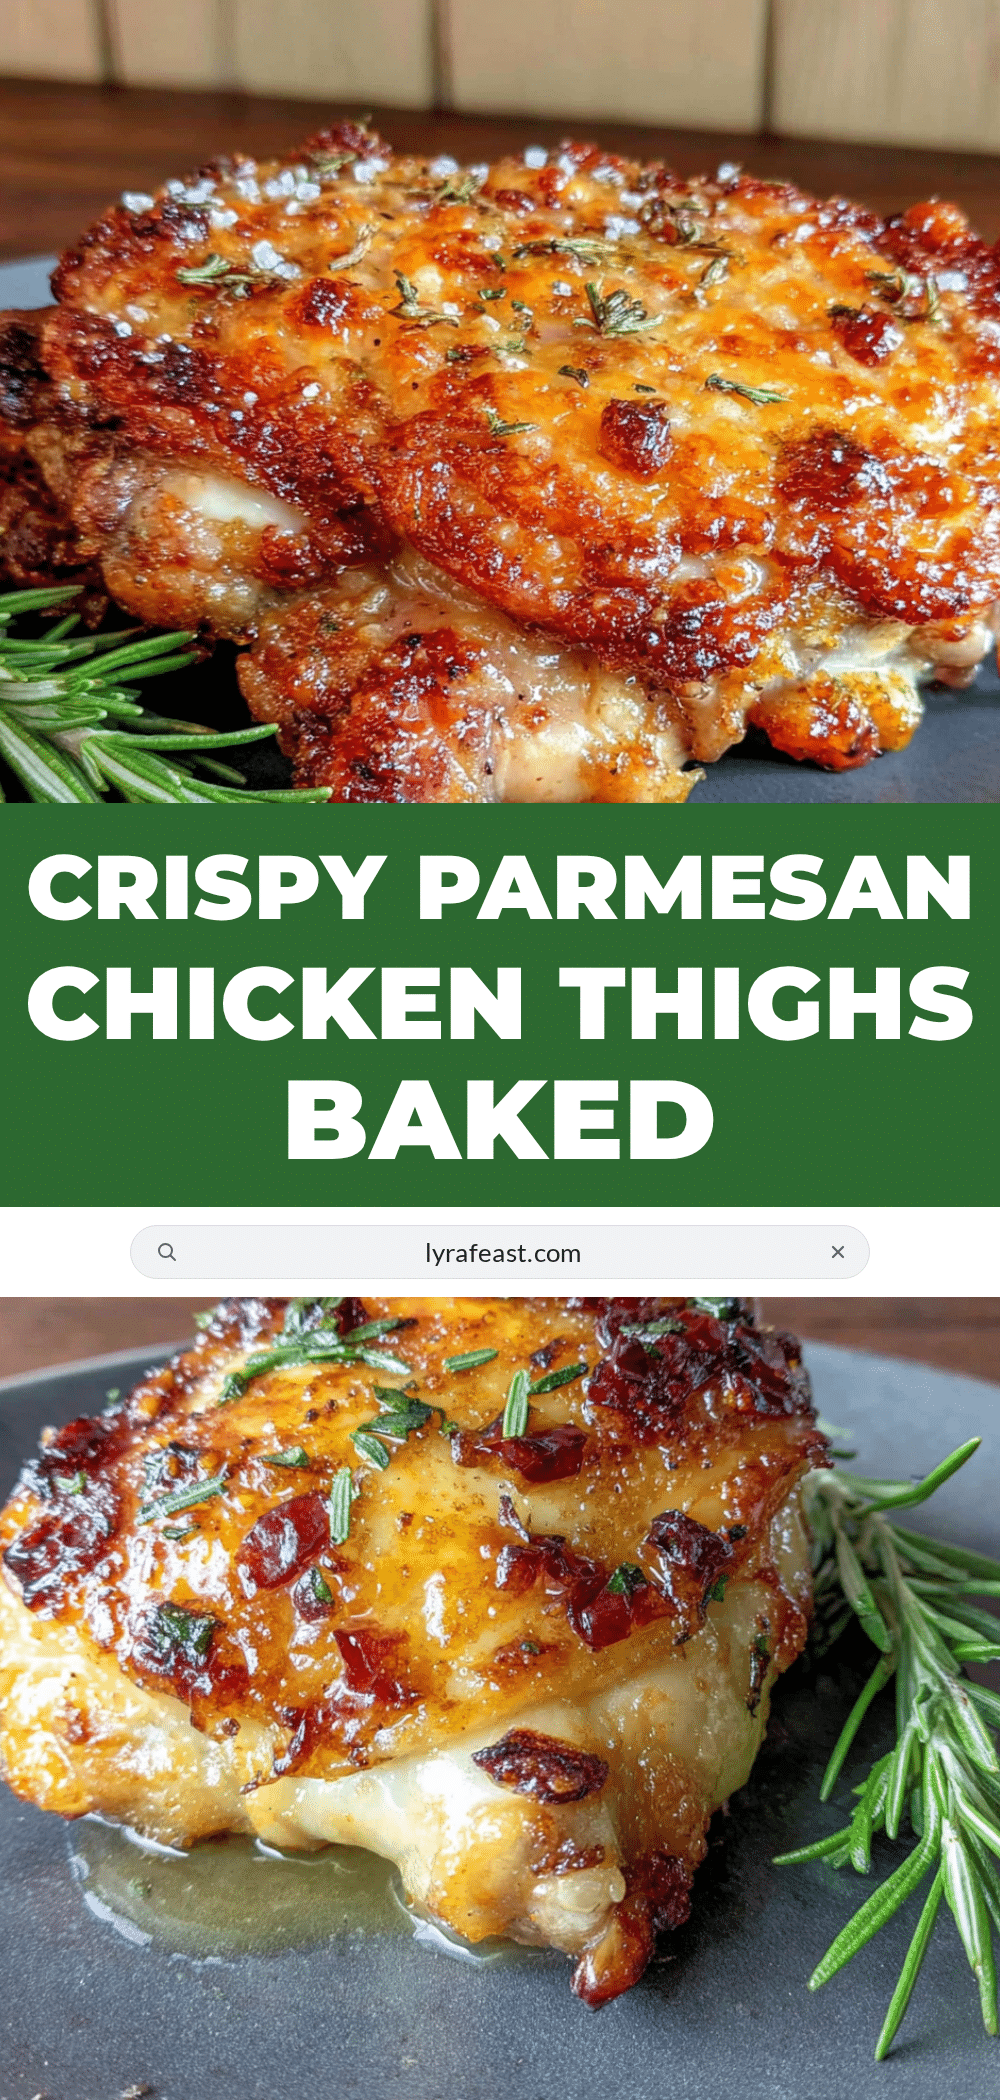
Crispy Baked Parmesan Chicken Thighs: Easy Weeknight Dinner
Juicy, crispy baked chicken thighs with a golden Parmesan-panko crust that comes together in under 40 minutes. Perfect for busy weeknights when you want something indulgent without the fuss of deep frying.
- Prep Time: 10 minutes
- Cook Time: 30 minutes
- Total Time: 40 minutes
- Yield: 4 servings 1x
- Category: Main Course
- Cuisine: American
Ingredients
- 4 bone-in, skin-on chicken thighs (about 1.5 lbs or 680g total)
- 1 tablespoon olive oil (15ml)
- 1/2 teaspoon salt (3g)
- 1/4 teaspoon black pepper (0.5g)
- 1/2 cup panko breadcrumbs (45g)
- 1/2 cup freshly grated Parmesan cheese (50g)
- 1 teaspoon garlic powder (3g)
- 1/2 teaspoon paprika (1g)
- 1/2 teaspoon dried oregano (1g)
- 1/4 teaspoon red pepper flakes (0.5g)
- Fresh parsley, chopped (for serving)
- Lemon wedges (for serving)
- Extra grated Parmesan (for serving)
Instructions
- Preheat your oven to 400°F (200°C). Place a wire rack on a rimmed baking sheet and set aside.
- Pat the chicken thighs dry with paper towels. This is crucial for crispiness.
- In a large bowl, toss the chicken thighs with olive oil, salt, and pepper until evenly coated.
- In a separate shallow bowl, combine panko breadcrumbs, grated Parmesan, garlic powder, paprika, oregano, and red pepper flakes. Mix well.
- Working one thigh at a time, press the chicken into the breadcrumb mixture, turning to coat all sides. Press firmly so the coating adheres. Place coated thighs on the wire rack, skin side up.
- Bake for 30-35 minutes, until golden brown and crispy. Internal temperature should reach at least 165°F (74°C); for juiciest results, aim for 175°F (80°C). If desired, broil for 1-2 minutes at the end for extra browning.
- Let the chicken rest for 5 minutes before serving to allow juices to redistribute.
- Serve immediately, sprinkled with fresh parsley and with lemon wedges on the side.
Notes
Pat chicken very dry for maximum crispiness. Use a wire rack for even air circulation. Freshly grate Parmesan for best melting and browning. For boneless thighs, reduce baking time by about 10 minutes. If coating browns too quickly, tent with foil for last 10 minutes.
Nutrition
- Serving Size: 1 chicken thigh
- Calories: 385
- Sugar: 1
- Sodium: 620
- Fat: 24
- Saturated Fat: 9
- Carbohydrates: 8
- Fiber: 1
- Protein: 32
Keywords: crispy baked chicken thighs, Parmesan chicken, easy weeknight dinner, baked chicken recipe, chicken thighs



