“I didn’t expect to be measuring flour by the cup at midnight,” I confessed to my roommate while juggling a cracked mixing bowl and a half-empty bag of sugar. It was the night before my niece’s graduation party, and honestly, I was pressed for time and cash. The local bakery’s fancy cakes? Way out of budget. So, I improvised, armed with pantry staples and a stubborn determination to make something special.
The idea of a two-tier cake sounded intimidating at first—like something reserved for professional bakers or extravagant weddings. But as I sifted through recipes, I realized I could whip up a simple layer cake that looked impressive without breaking the bank. The real kicker? This cake cost me less than seven dollars to make, and it stole the show at the party.
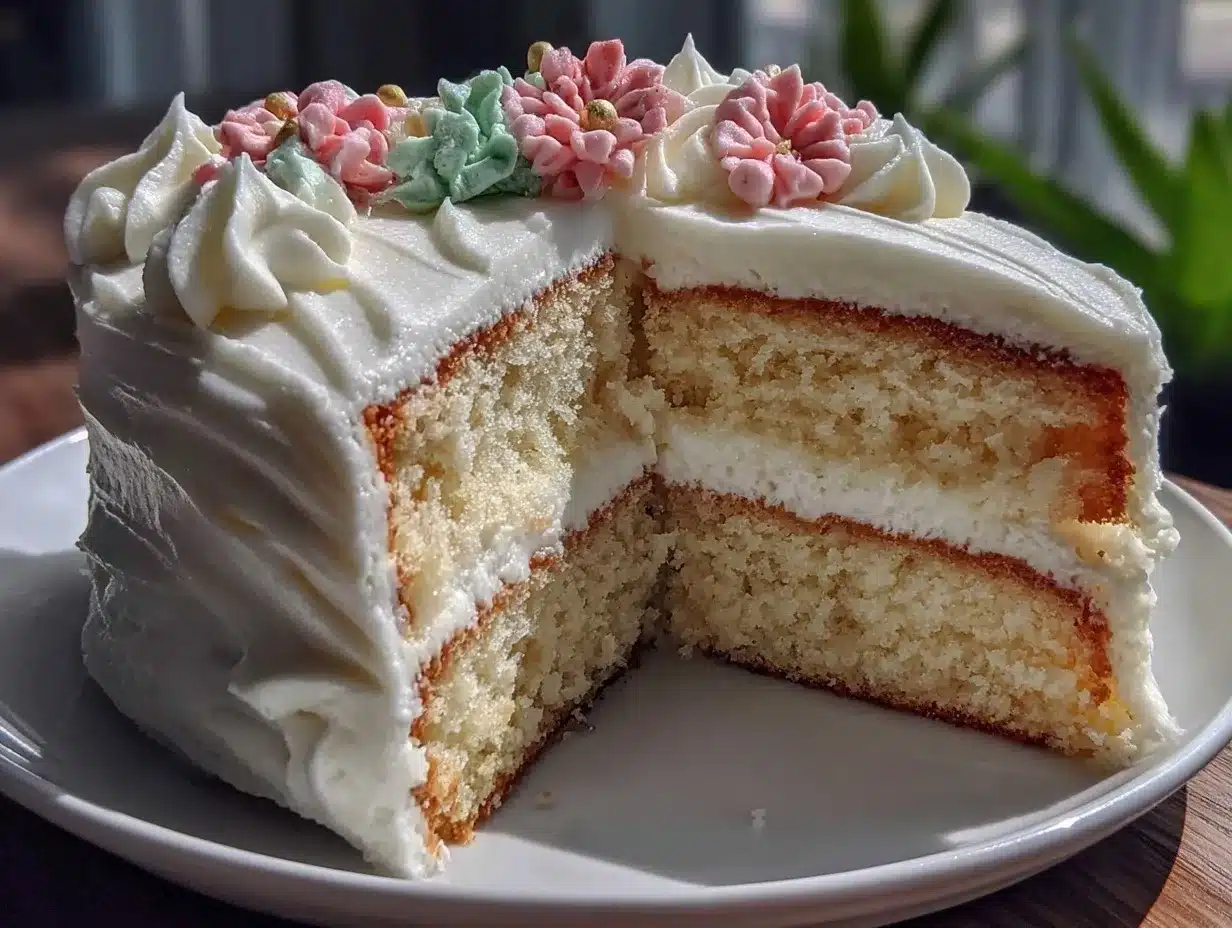
Maybe you’ve been there too—needing a celebratory dessert that’s both budget-friendly and eye-catching. This easy two-tier graduation cake is the answer, whether you’re a kitchen novice or just short on time. The sponge’s light texture, paired with creamy frosting, brought genuine smiles and a few surprised “You made this?” comments. And, well, that little mess I made while stacking the layers? Let’s just say it made the whole experience feel a bit more real—and fun.
This recipe stuck with me because it proves you don’t need fancy ingredients or hours of prep to create a cake that feels like a celebration centerpiece. So, let me walk you through my go-to easy two-tier graduation cake recipe under $7—perfect for marking milestones without the stress.
Why You’ll Love This Easy Two-Tier Graduation Cake Recipe Under 7 Dollars
Having tested this recipe multiple times, sometimes under the gun and other times with a bit more leisure, I can say it’s a keeper for anyone looking to impress without the fuss. Here’s why it stands out:
- Quick & Easy: Comes together in about 90 minutes, perfect for last-minute celebrations or spontaneous baking urges.
- Simple Ingredients: Uses pantry staples you probably already have—no need for specialty stores or pricey items.
- Perfect for Graduations and More: Whether it’s for a graduation, birthday, or casual get-together, it fits the bill beautifully.
- Crowd-Pleaser: The light, fluffy cake with smooth frosting wins over both kids and adults alike every time.
- Unbelievably Delicious: The balance of sweetness and texture feels like comfort food with a celebratory twist.
What makes this cake different is the layering technique I settled on after a few trials—using simple parchment rounds and toothpicks to stabilize the tiers (no fancy dowels needed). Plus, the frosting is whipped just right to avoid being overly sweet or heavy. Honestly, it’s the kind of cake that makes you want to close your eyes after the first bite, savoring that homemade goodness.
It’s also a reminder that celebrations don’t have to mean splurging. This recipe lets you create a memorable centerpiece that feels thoughtful and festive, without the stress of complicated baking or high costs.
What Ingredients You Will Need
This easy two-tier graduation cake uses simple, wholesome ingredients that come together to deliver a deliciously moist and fluffy cake with a creamy frosting. Most of these are pantry staples, making it easy to gather everything without a trip to specialty shops.
- For the Cake Layers:
- All-purpose flour – 2 ½ cups (315g), sifted for a light texture
- Granulated sugar – 1 ¾ cups (350g), for balanced sweetness
- Baking powder – 2 ½ teaspoons, to help the cake rise nicely
- Salt – ½ teaspoon, enhances flavor
- Unsalted butter – ½ cup (115g), softened (I prefer Land O’Lakes for creaminess)
- Large eggs – 3, at room temperature (helps with even mixing)
- Whole milk – 1 cup (240ml), room temperature (use almond milk for a dairy-free option)
- Pure vanilla extract – 2 teaspoons (adds warm flavor)
- For the Frosting:
- Powdered sugar – 3 cups (360g), sifted to avoid lumps
- Unsalted butter – 1 cup (230g), softened
- Heavy cream – 2 tablespoons (30ml), to achieve smooth consistency
- Pure vanilla extract – 1 teaspoon
- Pinch of salt, to balance sweetness
- Decoration (Optional):
- Food coloring (for frosting tint), or edible glitter for a festive touch
- Graduation-themed toppers or fresh berries for garnish
One tip: I like to buy my baking essentials from trusted brands like King Arthur Flour and C&H Sugar for consistent results. Also, if it’s summertime, fresh berries or edible flowers can add a seasonal flair without extra cost.
Equipment Needed
For this easy two-tier graduation cake, the equipment list is pretty straightforward—but a few tools make your life easier:
- Two round cake pans: 6-inch and 8-inch sizes are ideal for the tiers. If you only have one size, you can bake the layers in batches.
- Mixing bowls: At least two, one for dry ingredients and one for wet.
- Electric hand mixer or stand mixer: Makes creaming butter and mixing batter a breeze. I started with a hand mixer and it still works great.
- Measuring cups and spoons: Accurate measurements are key for baking success.
- Spatula and whisk: For folding and smoothing batter and frosting.
- Parchment paper: To line cake pans, preventing sticking and making cleanup easier.
- Cooling racks: Helps cakes cool evenly and quickly.
- Offset spatula or butter knife: For smoothing the frosting layers.
If you don’t have a stand mixer, no worries—an electric hand mixer works perfectly. Parchment paper is a small luxury that really pays off here—keeps the cake intact and your sanity intact. When stacking the tiers, I use simple toothpicks to secure the upper layer, which you can remove before serving. Budget-friendly and effective!
Preparation Method
- Preheat your oven: Set to 350°F (175°C). Line two round cake pans (6-inch and 8-inch) with parchment paper and lightly grease the sides. This prevents sticking and helps the cake release easily. (Prep time: 10 minutes)
- Mix dry ingredients: In a large bowl, sift together 2 ½ cups (315g) all-purpose flour, 1 ¾ cups (350g) granulated sugar, 2 ½ teaspoons baking powder, and ½ teaspoon salt. Whisk to combine evenly. This ensures your cake will rise uniformly and have a tender crumb. (Prep time: 5 minutes)
- Cream butter and eggs: In a separate bowl, beat ½ cup (115g) softened unsalted butter until creamy using a mixer. Add in 3 large eggs one at a time, beating well after each addition. This step builds the cake’s structure. (Prep time: 5 minutes)
- Add wet ingredients: Mix in 1 cup (240ml) room-temperature whole milk and 2 teaspoons pure vanilla extract to the butter-egg mixture. Slowly add the dry ingredients to the wet, mixing on low speed until just combined. Avoid overmixing to keep the cake light and fluffy. (Prep time: 5 minutes)
- Divide batter: Evenly pour batter into the prepared pans. Use a spatula to smooth the tops. (Prep time: 5 minutes)
- Bake: Place pans in the oven and bake for 25–30 minutes or until a toothpick inserted comes out clean. Keep an eye from 20 minutes onwards to prevent overbaking. (Cook time: 25-30 minutes)
- Cool the cakes: Remove pans from the oven. Let cakes cool in the pans for 10 minutes, then turn out onto cooling racks to cool completely before frosting. This prevents frosting from melting. (Cooling time: 30-40 minutes)
- Prepare frosting: Beat 1 cup (230g) softened unsalted butter until fluffy. Gradually add 3 cups (360g) powdered sugar, alternating with 2 tablespoons (30ml) heavy cream, and 1 teaspoon vanilla extract. Beat until smooth and spreadable. Add a pinch of salt to balance sweetness. (Prep time: 10 minutes)
- Assemble the cake: Place the 8-inch cake layer on your serving plate. Spread a generous layer of frosting on top. Carefully set the 6-inch cake layer on top. Use an offset spatula to frost the entire cake smoothly. Insert toothpicks around the smaller tier for stability if needed. (Assembly time: 15 minutes)
- Decorate: Add any graduation-themed toppers, sprinkles, or fresh berries. Refrigerate the cake for at least 30 minutes to set the frosting before serving. (Decoration time: 10 minutes)
Pro tip: If your kitchen is warm, chilling the cake layers before frosting helps prevent crumb mixing. Also, don’t rush the cooling step—it makes a huge difference in final texture and frosting application. I once skipped cooling fully and ended up with frosting melting off the sides—a lesson learned the hard way!
Cooking Tips & Techniques
Making a two-tier cake at home sounds fancy, but a few handy tricks keep it manageable and fun:
- Room temperature ingredients matter: Butter, eggs, and milk at room temp mix better, giving a smoother batter and fluffier cake.
- Don’t overmix the batter: After adding flour, mix just until combined. Overmixing develops gluten, making the cake dense.
- Use parchment paper in pans: This simple step saves you from stuck cake disasters and makes cleanup easier.
- Stacking stability: Toothpicks around the smaller cake tier keep layers steady. Remove before slicing.
- Chill frosting slightly: If frosting feels too soft, pop it in the fridge for 10 minutes. It helps when smoothing the cake.
- Multitasking tip: Bake the larger layer first, then quickly prep and bake the smaller one while the big one cools. Saves time!
- Personal lesson: I once tried adding color gel to frosting straight from the start; it turned the texture too runny. Instead, add color gradually and mix gently.
Variations & Adaptations
This easy two-tier graduation cake is versatile and adapts well to your preferences or dietary needs. Here are some ideas I’ve tried or recommend:
- Flavor twists: Swap vanilla extract for almond or lemon extract for a subtle flavor change.
- Gluten-free option: Use a 1:1 gluten-free baking flour blend instead of all-purpose flour. I’ve had success with Bob’s Red Mill brand.
- Dairy-free adaptation: Substitute butter with vegan margarine and use coconut or almond milk instead of whole milk.
- Frosting alternatives: Cream cheese frosting adds a tangy richness, perfect if you want a richer taste.
- Decor ideas: Fresh seasonal fruit or edible flowers give a natural, elegant look without extra cost.
Personally, for a spring graduation, I swapped classic vanilla for lemon zest and blueberry frosting—turned out refreshing and colorful! Feel free to customize the layers and frosting to match your celebration vibe.
Serving & Storage Suggestions
For best taste and presentation, serve this two-tier graduation cake at room temperature. Take it out of the fridge about 30 minutes before slicing to let the frosting soften slightly.
This cake pairs wonderfully with a light, fruity punch or a cup of coffee to balance the sweetness. For gatherings, slicing into neat wedges makes serving easier and keeps the layers intact.
To store, wrap leftover cake tightly with plastic wrap and keep refrigerated for up to 3 days. For longer storage, freeze individual slices wrapped in foil and plastic wrap—thaw overnight in the fridge before enjoying.
Reheating in the microwave for 10-15 seconds can revive softness if the cake feels a bit dense. Flavors actually develop and meld beautifully after a day, so don’t be surprised if it tastes even better the next day!
Nutritional Information & Benefits
This cake recipe is a treat best enjoyed in moderation, but it does include some beneficial aspects:
- Provides quick energy from carbohydrates in the flour and sugar.
- Contains protein from eggs and butter.
- Using real butter and whole milk adds richness and depth of flavor compared to margarine or low-fat substitutes.
- Customizable to be gluten-free or dairy-free for dietary needs.
- Homemade means no preservatives or artificial additives, unlike many store-bought cakes.
From a wellness perspective, I see this cake as a joyful reward for hard work—perfect for a graduation celebration where memories and happiness take center stage alongside nutrition.
Conclusion
This easy two-tier graduation cake under $7 is proof that you don’t need elaborate ingredients or fancy tools to create something memorable and delicious. It’s simple, affordable, and genuinely impressive, making it a go-to for celebrations that matter.
Feel free to tweak the flavors and decorations to suit your style or dietary needs—this recipe welcomes your creativity. Honestly, I keep coming back to it because it brings people together with smiles and sweet moments.
If you try making it, I’d love to hear how it turned out or any fun twists you added. Sharing your experience keeps the spirit of celebration alive—so drop a comment or share your photos!
Here’s to sweet celebrations that don’t break the bank but fill the heart.
Frequently Asked Questions
Can I make this cake in advance?
Absolutely! You can bake the layers a day ahead and store them wrapped tightly in the fridge. Assemble and frost the cake the day of your event for the freshest look and taste.
What if I don’t have two different-sized pans?
No problem! Bake all layers in the same size pans and stack them with a bit of frosting in between. You can trim the top layer slightly to create the tiered effect or keep it as a single large cake.
How do I keep the tiers from sliding?
Using toothpicks inserted around the smaller top tier helps stabilize the cake. Also, chilling the assembled cake for 30 minutes before moving it makes a big difference.
Can I use box cake mix instead of scratch?
Yes, if you’re short on time, a quality box mix works. Just bake two different sizes and stack with homemade or store-bought frosting. I prefer scratch baking for flavor, but this shortcut is totally fine.
How do I store leftover cake?
Wrap leftover cake tightly in plastic wrap and refrigerate for up to 3 days. For longer storage, freeze individual slices wrapped well and thaw in the fridge before eating.
By the way, if you enjoy baking layered cakes, you might appreciate the techniques shared in my classic vanilla layer cake recipe or find inspiration from the flavor combinations in my lemon blueberry cake. Both offer great tips for foolproof cake baking!
Pin This Recipe!
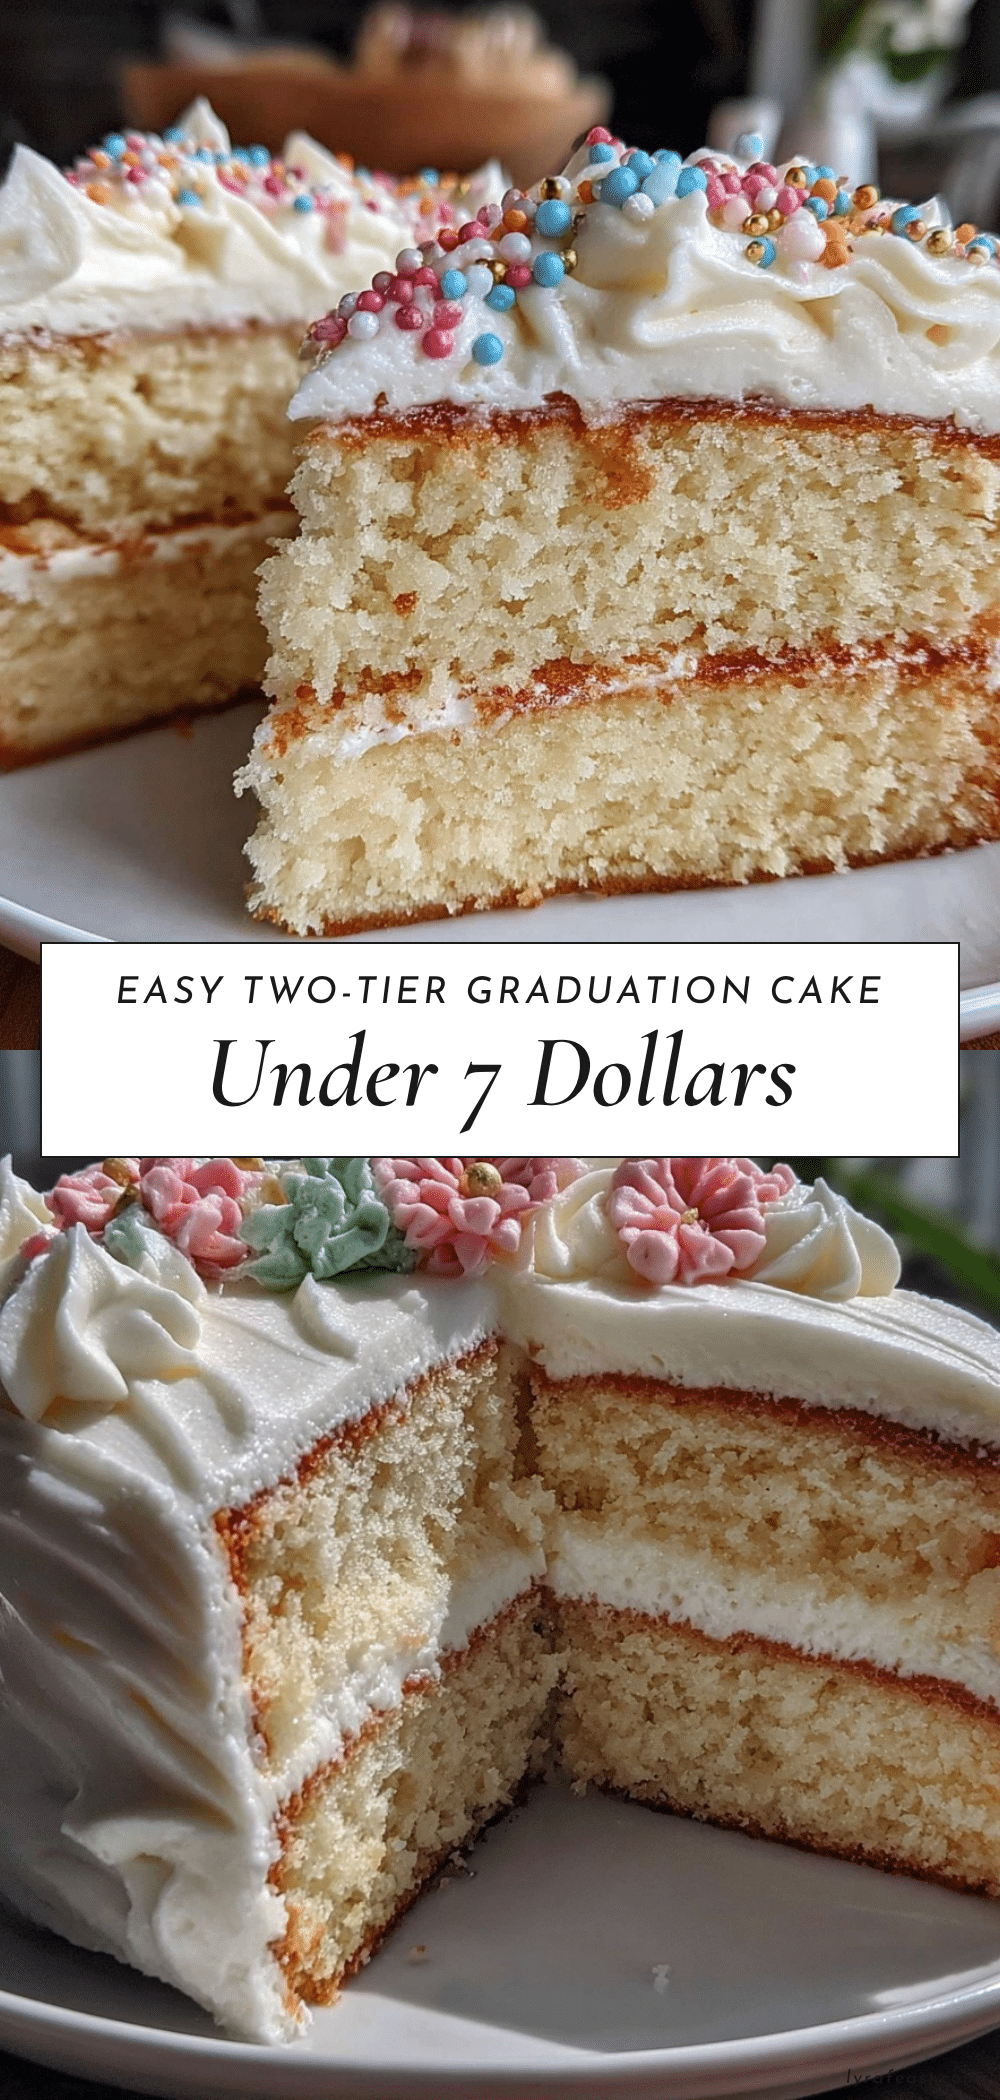
Easy Two-Tier Graduation Cake Recipe Under 7 Dollars Perfect for Celebrations
A budget-friendly, simple two-tier cake recipe perfect for graduations and celebrations, featuring light sponge layers and creamy frosting made from pantry staples.
- Prep Time: 45 minutes
- Cook Time: 25-30 minutes
- Total Time: 90 minutes
- Yield: 12 servings 1x
- Category: Dessert
- Cuisine: American
Ingredients
- 2 ½ cups (315g) all-purpose flour, sifted
- 1 ¾ cups (350g) granulated sugar
- 2 ½ teaspoons baking powder
- ½ teaspoon salt
- ½ cup (115g) unsalted butter, softened
- 3 large eggs, room temperature
- 1 cup (240ml) whole milk, room temperature (or almond milk for dairy-free)
- 2 teaspoons pure vanilla extract
- 3 cups (360g) powdered sugar, sifted
- 1 cup (230g) unsalted butter, softened
- 2 tablespoons (30ml) heavy cream
- 1 teaspoon pure vanilla extract
- Pinch of salt
- Optional decorations: food coloring, edible glitter, graduation-themed toppers, fresh berries
Instructions
- Preheat oven to 350°F (175°C). Line two round cake pans (6-inch and 8-inch) with parchment paper and lightly grease the sides.
- In a large bowl, sift together flour, granulated sugar, baking powder, and salt. Whisk to combine.
- In a separate bowl, beat softened butter until creamy. Add eggs one at a time, beating well after each addition.
- Mix in milk and vanilla extract to the butter-egg mixture. Slowly add dry ingredients to wet, mixing on low speed until just combined.
- Divide batter evenly into prepared pans and smooth tops with a spatula.
- Bake for 25–30 minutes or until a toothpick inserted comes out clean. Start checking at 20 minutes to avoid overbaking.
- Let cakes cool in pans for 10 minutes, then turn out onto cooling racks to cool completely.
- Prepare frosting by beating softened butter until fluffy. Gradually add powdered sugar alternating with heavy cream and vanilla extract. Beat until smooth and spreadable. Add a pinch of salt.
- Place the 8-inch cake layer on a serving plate. Spread a generous layer of frosting on top.
- Carefully set the 6-inch cake layer on top. Frost the entire cake smoothly with an offset spatula. Insert toothpicks around the smaller tier for stability if needed.
- Decorate with graduation-themed toppers, sprinkles, or fresh berries. Refrigerate for at least 30 minutes to set the frosting before serving.
Notes
Use room temperature ingredients for best results. Avoid overmixing the batter to keep the cake light and fluffy. Use parchment paper to prevent sticking. Stabilize tiers with toothpicks and remove before serving. Chill frosting if too soft before applying. Bake larger layer first, then smaller while cooling to save time. Add food coloring gradually to frosting to avoid runny texture.
Nutrition
- Serving Size: 1 slice (1/12 of cak
- Calories: 350
- Sugar: 32
- Sodium: 220
- Fat: 18
- Saturated Fat: 11
- Carbohydrates: 45
- Fiber: 1
- Protein: 4
Keywords: two-tier cake, graduation cake, budget-friendly cake, easy cake recipe, celebration cake, homemade cake, layered cake