I was at the hardware store last November—buying weather stripping, of all things—when the cashier, a guy named Leo with a impressive handlebar mustache, started telling me about how he makes his own “medicine.” I wasn’t expecting wellness advice from a man selling me caulk, but there I was, holding a receipt, listening to him describe exactly how to make a concoction called fire cider. He told me it kept him from getting sick all winter, swore by it for years. I kind of laughed it off, paid for my stuff, and left. But the idea stuck. A few days later, I got that first scratchy feeling in my throat—you know the one—and I thought about Leo and his mustache and his mysterious red-brown tonic.
So I looked it up. Turns out, fire cider is this old-school folk remedy, a spicy, sour, and sweet infusion of raw apple cider vinegar, garlic, ginger, horseradish, hot peppers, and honey. It’s basically a punch-you-in-the-sinuses kind of health shot. I made my first batch that weekend, and honestly, I thought I’d messed up. The kitchen smelled like a pickling operation crossed with a cold remedy factory. My eyes were watering from grating the horseradish. I spilled turmeric powder all over my white countertop and it’s still slightly yellow to this day. But after letting it sit for a few weeks, I strained it, took a tiny sip, and felt a warmth spread from my chest to my toes. It was potent, sure, but it was also kind of… delicious? In a weird, fiery way.
That was three winters ago. Now, I make a batch of these Immune-Boosting Fire Cider Shots every single fall. It’s become my yearly ritual—a little bit of kitchen alchemy that makes me feel prepared for whatever germs come my way. This isn’t just a recipe; it’s a shield. And the best part? It’s incredibly easy to make. You just chop, shake, and wait. Maybe you’ve been looking for a natural way to support your immune system that doesn’t taste like a chore. Let me tell you, this is it. This recipe has kept me healthy through travel, stressful work weeks, and the dreaded back-to-school season. And it all started with a random conversation at the hardware store. You never know where you’ll find a good recipe.
Why You’ll Love This Immune-Boosting Fire Cider Shots Recipe
Let’s be real for a second. There are a lot of wellness trends out there, and not all of them are worth the hype. But fire cider? This one has been around for centuries for a reason. Here’s why this particular version has earned a permanent spot in my fridge:
- Incredibly Simple to Make: There is no cooking involved. None. You are literally just chopping up some produce, covering it with vinegar, and letting time do the work. It takes about 15 minutes of active prep time, and then you just forget about it for a month.
- Packed with Immune-Supporting Ingredients: This isn’t just a trendy drink. Each ingredient—garlic, ginger, horseradish, turmeric, hot peppers, and raw honey—has been studied for its antimicrobial and anti-inflammatory properties. You’re putting a whole pharmacy of natural goodness into your body.
- Cost-Effective and Customizable: You can buy a small bottle of fire cider at a fancy health food store for like, fifteen bucks. Or, you can make a huge batch at home for a fraction of the price. Plus, you control what goes in it. Don’t like it too spicy? Use fewer peppers. Want more ginger? Go for it.
- A True Crowd-Pleaser (Seriously): I know, I know. It sounds intense. But when you mix this with a little sparkling water, or just take it as a shot, it’s genuinely bracing and refreshing. I’ve given bottles to friends and family who swore they’d never drink it, and they came back asking for more.
- Feels Like a Secret Weapon: There is a deep, primal satisfaction in having a jar of this stuff in your fridge during cold and flu season. You feel prepared. It’s like having a homemade shield against the sniffling, sneezing world. This recipe isn’t just another wellness fad—it’s my best version of a time-tested tonic that actually works.
This isn’t just a drink; it’s a feeling. It’s the feeling of taking control of your health with simple, real ingredients. The first time you feel that kick of ginger and garlic warming you up, you’ll know exactly why people have been making this for generations.
What Ingredients You Will Need
This recipe is built on a foundation of powerful, aromatic roots, spices, and alliums. The magic happens when they all meld together in the apple cider vinegar. Here is exactly what you need to gather for a batch of Immune-Boosting Fire Cider Shots. Most of these are pantry staples, but a few you might need to seek out at a well-stocked grocery store or farmers market.
- 1 cup raw, unfiltered apple cider vinegar (with the “mother”): This is the base of the whole operation. The “mother” is that cloudy, stringy stuff floating in the bottle—it’s full of beneficial bacteria and enzymes. I always use Bragg’s or Vermont Village for the best results. Don’t use white vinegar; you need the complexity of apple cider vinegar.
- 1/2 cup fresh ginger root, thinly sliced or chopped (no need to peel!): Ginger is the star of the show for warmth and digestion. It brings a zesty, slightly sweet heat. I leave the skin on because it has extra nutrients, and it all gets strained out anyway. Look for firm, smooth-skinned ginger.
- 1/2 cup fresh turmeric root, thinly sliced or chopped (or 2 tablespoons dried turmeric): Turmeric gives the fire cider its beautiful golden color and a powerful anti-inflammatory boost. Fresh turmeric is amazing if you can find it (it stains everything yellow!), but dried turmeric works perfectly well in a pinch. Just make sure it’s good quality.
- 1/2 cup fresh horseradish root, peeled and chopped: This is the “fire” in fire cider. Horseradish is a potent decongestant and antimicrobial. Be warned: grating or chopping it will make your eyes water and your nose clear up instantly. It’s a powerful experience.
- 1 medium onion, chopped: Onion adds a savory depth and is another classic immune-supporting allium. It mellows out significantly during the infusion. Any color of onion works—yellow, white, or red.
- 10-12 cloves of garlic, smashed or sliced: Garlic is the king of immune boosters. Allicin, the compound that gives garlic its pungent smell, is a powerful antimicrobial. Smashing the cloves helps release more of those beneficial compounds. Don’t skip this.
- 1-2 fresh hot peppers (jalapeño, habanero, or serrano), sliced: These add a kick of capsaicin, which can help with circulation and congestion. Use one for a mild heat, or two for a serious punch. You can also use 1 teaspoon of red pepper flakes as a substitute.
- 1/4 cup raw, local honey: The honey is crucial. It balances out all the spicy, sour, and pungent flavors with a natural sweetness. More importantly, raw honey has its own antimicrobial and soothing properties. Local honey is great for seasonal allergies, but any raw honey will do. If you’re vegan, you can use maple syrup, but the flavor will be different.
- Optional add-ins: The beauty of this recipe is how flexible it is. I often add a cinnamon stick, a few star anise pods, a teaspoon of whole black peppercorns (which helps with turmeric absorption), and a sprig of fresh rosemary. These aren’t required, but they add lovely layers of flavor and extra health benefits.
That’s it. Eleven simple ingredients that transform into something truly potent. The key is using the best quality you can find, especially the apple cider vinegar and the honey, as they are the backbone of the flavor.
Equipment Needed
One of the best things about this recipe is that you don’t need any fancy kitchen gadgets. You probably own everything you need already. Here’s the list, along with a few tips from my own trial and error.
- A large glass jar with a tight-fitting lid: A 1-quart (32-ounce) wide-mouth mason jar is perfect. The wide mouth makes it easy to pack in all the ingredients. Avoid using plastic, as the acidity of the vinegar can leach chemicals into your fire cider.
- A sharp chef’s knife and a cutting board: You’ll be doing a fair amount of chopping. A sharp knife makes the job safer and quicker. A sturdy cutting board is essential.
- A vegetable peeler (optional): You might want this for the horseradish root, though a sharp knife works just as well. I usually just scrape the skin off with a spoon.
- A fine-mesh strainer or cheesecloth: After the infusion period, you need to strain out all the solids. A fine-mesh strainer works great. If you want a super clear final product, you can line it with a double layer of cheesecloth or a nut milk bag.
- A funnel: This is a lifesaver for pouring the strained liquid into smaller bottles without making a huge mess. Trust me on this one.
- Small glass bottles for storage: I use 4-ounce or 8-ounce swing-top glass bottles. They look nice and they seal well. You can also use small mason jars or any clean glass bottle with a tight lid.
If you don’t have a cheesecloth, a clean, thin kitchen towel or a coffee filter works in a pinch. I once used a clean pair of tights (only for the fire cider, I swear!) when I was desperate. It worked, but I don’t recommend it. Stick to the strainer and cheesecloth for the best, least-weird experience.
Preparation Method
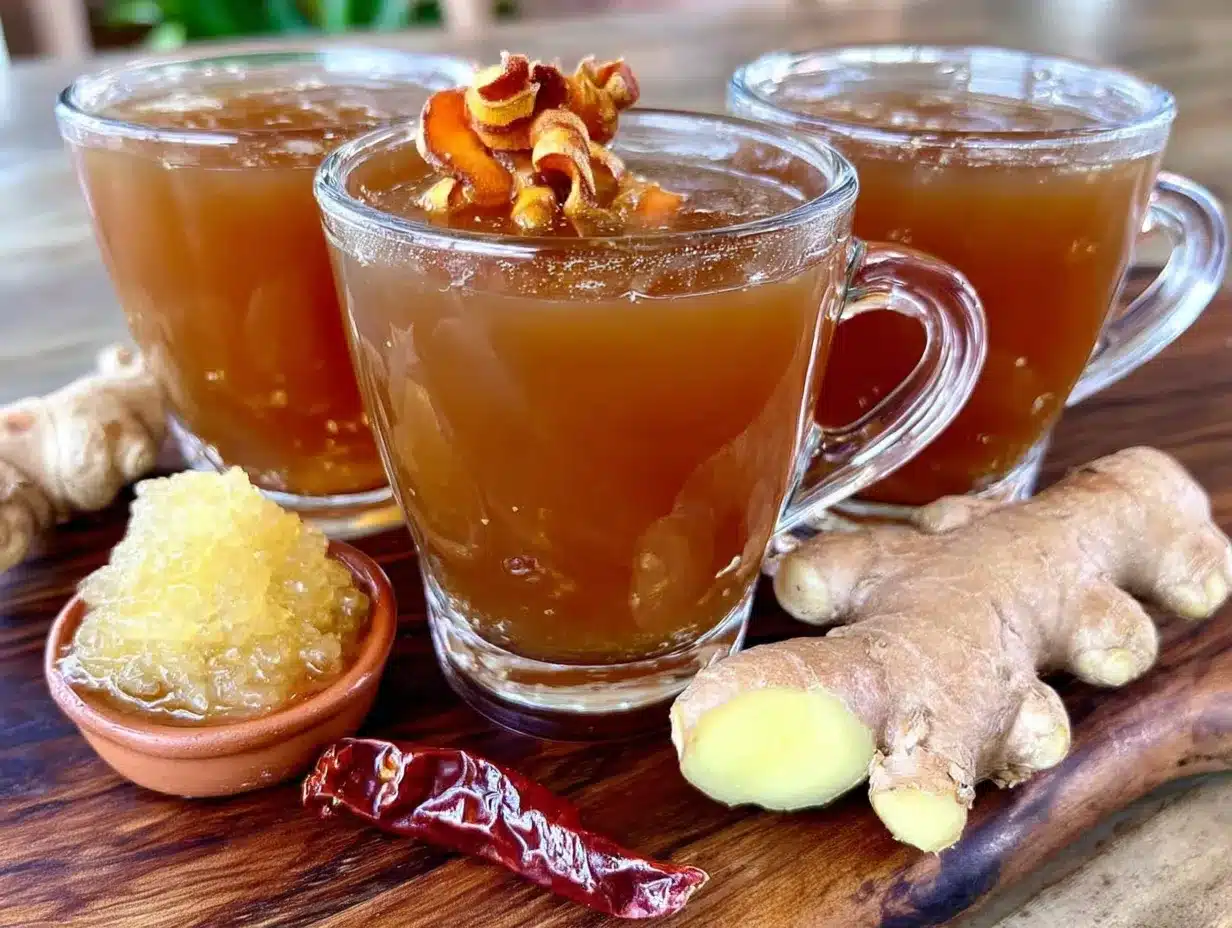
Making these Immune-Boosting Fire Cider Shots is more about patience than skill. The actual work takes about 15 minutes. The waiting takes four weeks. Here’s the step-by-step process, with all the little details I’ve learned along the way.
- Prepare your ingredients (10 minutes): Give all your produce a good scrub. You don’t need to peel the ginger or turmeric—just give them a good wash. Peel the horseradish root with a vegetable peeler or a knife. Roughly chop the onion. Smash the garlic cloves with the flat side of your knife to release their oils. Slice the ginger, turmeric, and horseradish into thin rounds or small chunks. Slice the hot peppers. The smaller you chop everything, the more surface area the vinegar has to work with, resulting in a more potent infusion.
- Layer ingredients in the jar (5 minutes): Grab your clean 1-quart mason jar. Start layering in your chopped ingredients. I usually put the garlic and ginger on the bottom, then the turmeric, horseradish, onion, and peppers. Tuck in any optional spices like the cinnamon stick or star anise. Don’t pack it down too tight—you want the vinegar to be able to flow around everything. Fill the jar about halfway to two-thirds full with the solids.
- Add the apple cider vinegar: Pour the raw, unfiltered apple cider vinegar over the solids until they are completely submerged. You want about an inch of vinegar covering the top layer of ingredients. Use a chopstick or a butter knife to poke around and release any air bubbles that might be trapped. This is important! Any ingredients exposed to air can spoil.
- Seal and shake: Screw the lid on the jar tightly. Give it a good, vigorous shake to mix everything together. You’ll see the colors start to bleed into the vinegar immediately—it’s pretty cool. Label the jar with the date. I also write “FIRE CIDER – DO NOT DRINK YET!” on mine so no one accidentally takes a swig.
- The Waiting Game (4 weeks): Place the jar in a cool, dark place, like a cupboard or a pantry. For the next four weeks, you’ll need to give it a good shake once a day. This helps agitate the ingredients and ensures even extraction. I keep mine on my kitchen counter for the first few days so I remember to shake it, then I move it to the pantry. The smell will be strong, but it’s a good, healthy smell.
- Taste and adjust (after 4 weeks): After four weeks, it’s time to check on your creation. Open the jar (carefully! the smell is potent) and use a clean spoon to take a tiny sip. It should be intensely sour, spicy, and pungent. If you want it stronger, you can let it infuse for another week or two. If you think it’s ready, move on to the next step.
- Strain the solids: Place your fine-mesh strainer over a large bowl or a large measuring cup. Pour the contents of the jar into the strainer. Let it drain for a few minutes. Then, using a spatula or a spoon, press down on the solids to extract as much liquid as possible. Don’t throw away the infused solids! They are amazing in salad dressings, marinades, or even blended into a savory spread.
- Add the honey: This is the final, crucial step. While the liquid is still in the bowl, add your 1/4 cup of raw honey. Whisk it vigorously until it’s completely dissolved. The honey not only adds sweetness but also helps preserve the final product. Taste it again. Does it need more honey? More kick? Adjust it to your liking.
- Bottle it up: Place your funnel into a clean glass bottle. Pour the finished fire cider into the bottle. Seal it with a tight-fitting lid. I like to use small 4-ounce or 8-ounce bottles so I can grab one and keep it in the fridge, and give the rest away as gifts.
- Store and enjoy: Store your finished Immune-Boosting Fire Cider Shots in the refrigerator. It will keep for up to a year, though it rarely lasts that long in my house. The flavors will continue to mellow and meld over time.
Cooking Tips & Techniques
I’ve made this recipe about a dozen times now, and I’ve definitely learned a few things the hard way. Here are my best tips to make sure your first batch is a success.
- Don’t be shy with the garlic and ginger. I know the amounts look generous, but you need that much to get a real immune-boosting effect. The vinegar mellows them out significantly. I once halved the garlic because I thought it would be too strong, and the final product was bland. Don’t make my mistake.
- Wear gloves when handling hot peppers and turmeric. The capsaicin from peppers can burn your skin for hours. And turmeric stains everything it touches a brilliant yellow—your hands, your cutting board, your countertops. I learned this lesson when I had yellow fingers for three days straight. Gloves are your friend.
- Use a wide-mouth jar. I can’t stress this enough. Trying to cram all those chunky roots and garlic cloves into a narrow-neck bottle is a recipe for frustration. A wide-mouth quart jar makes the whole process so much easier.
- Patience is a virtue. I know you’ll be tempted to taste it after a week. Don’t. It needs a full four weeks to develop its full complexity and potency. The flavor changes dramatically over time—it goes from harsh and disjointed to smooth and well-rounded. Trust the process.
- Label everything. This stuff looks like a lot of other things in your fridge. You don’t want to accidentally drink this when you’re reaching for apple juice. I use a piece of masking tape and a permanent marker to clearly label the jar and the final bottles with the date and contents.
- Save the pulp! After you strain the fire cider, don’t throw away the soggy garlic, ginger, and horseradish. It’s full of flavor and goodness. I like to pulse it in a food processor with a little olive oil and a splash of the fire cider to make a delicious, spicy relish. It’s amazing on sandwiches, tacos, or roasted vegetables.
Variations & Adaptations
One of the best things about fire cider is how adaptable it is. Once you get the basic formula down (roots + alliums + vinegar + honey + time), you can experiment all you want. Here are a few of my favorite variations.
- Milder, Kid-Friendly Version: If you’re making this for someone who’s sensitive to spice, simply leave out the hot peppers and reduce the horseradish by half. You’ll still get all the immune benefits from the garlic, ginger, and turmeric, but without the intense burn. My nephew calls this “magic juice” and takes a spoonful every morning.
- Supercharged “Immune Bomb”: For when you feel something coming on, I like to add a few extra immune-boosting ingredients. I’ll throw in the zest of a whole lemon, a few slices of fresh echinacea root (if I can find it), and a teaspoon of astragalus powder. This version is seriously potent. Take it at the first sign of a sniffle.
- Warming Winter Spice Version: This is my go-to for the cold months. I add a cinnamon stick, 3-4 whole cloves, a star anise pod, and a piece of whole nutmeg (cracked open) to the jar. The spices infuse the vinegar with a warm, holiday-like flavor. It’s almost like a spicy, savory chai. So good in a mug of hot water.
- Low-Sugar / Keto-Friendly Version: Since honey is a natural sugar, this recipe isn’t ideal for strict keto. But you can easily swap the honey for a few drops of liquid stevia or monk fruit extract to taste. The flavor profile will be more sour and spicy, but it still works great as a health tonic.
- Cold-Brew Method (For a Quicker Batch): If you need fire cider in a week and not a month, you can try the “cold brew” method. Finely mince or grate all the ingredients. This increases the surface area dramatically. Let it infuse for 5-7 days, shaking daily. It won’t be as deep or complex as the long infusion, but it’s a great option when you’re in a pinch. I’ve done this and it still works wonderfully.
Serving & Storage Suggestions
So you’ve got a beautiful bottle of golden-red fire cider. Now what? Here’s how I like to use it and keep it fresh.
- As a daily shot: The most common way to take it is as a 1-ounce shot (about 2 tablespoons) first thing in the morning. It’s like a wake-up call for your entire digestive and immune system. It’s bracing, so be prepared. I usually chase it with a glass of water.
- In hot water or tea: This is my absolute favorite way to enjoy it, especially in the winter. Add 1-2 tablespoons to a mug of hot water. It makes a soothing, spicy, and sour tea that’s incredible for a sore throat or congestion. You can add a squeeze of lemon and an extra drizzle of honey.
- In salad dressings: Replace the vinegar in your favorite salad dressing with fire cider. It adds an incredible depth of flavor. I like to whisk 2 tablespoons of fire cider with 1/4 cup of olive oil, a pinch of salt, and some fresh herbs. It’s amazing on a simple green salad or a grain bowl.
- As a marinade: The acidity in the fire cider makes it a fantastic meat tenderizer. Use it as a base for a marinade for chicken, pork, or tofu. The garlic and ginger flavors pair beautifully with soy sauce and sesame oil for an Asian-inspired marinade.
- Storage: Always store your fire cider in the refrigerator. The vinegar and honey act as natural preservatives, but keeping it cold ensures it stays fresh and potent for up to a year. The flavor will actually continue to mellow and improve over the first few months. I’ve had bottles last over a year with no issues, as long as they were kept sealed and cold.
Nutritional Information & Benefits
While I’m not a doctor and this isn’t medical advice, it’s worth understanding why this recipe is so good for you. The benefits come from the synergy of the whole ingredients.
Per 1-ounce shot (approximate):
- Calories: 15-25
- Carbohydrates: 4-6g (mostly from honey)
- Sugar: 4-5g
- Vitamin C: 1% DV (from the peppers and onion)
- Iron: 1% DV (from the horseradish and turmeric)
Key Health Highlights:
- Garlic contains allicin, a compound with potent antimicrobial and immune-boosting properties.
- Ginger is a powerful anti-inflammatory and can help soothe nausea and improve digestion.
- Turmeric is renowned for its anti-inflammatory effects, thanks to the compound curcumin.
- Horseradish acts as a natural decongestant and has antimicrobial properties.
- Raw Apple Cider Vinegar is a prebiotic, supporting gut health, which is directly linked to immune function.
- Raw Honey is a natural antibacterial and soothes a sore throat.
This recipe is naturally gluten-free, dairy-free, and can be made vegan by swapping the honey for maple syrup. It’s a powerhouse of natural wellness in a tiny, potent bottle.
Conclusion
So there you have it. My go-to recipe for Immune-Boosting Fire Cider Shots, born from a random conversation with a mustachioed cashier at a hardware store. It’s one of those recipes that feels like a secret—a little bit of kitchen magic that makes you feel stronger and more prepared for whatever the season throws at you. It’s not just a drink; it’s a ritual, a connection to old-fashioned wisdom, and a delicious way to take care of yourself.
I really hope you give this a try. Don’t be intimidated by the long list of ingredients or the four-week waiting period. The active work is minimal, and the payoff is huge. You can customize it to be as spicy, as sweet, or as mild as you want. That’s the beauty of it—it’s your shield, made your way.
I’d love to hear how your batch turns out! Did you add any secret ingredients? Did it help you survive the winter? Drop a comment below and let me know. And if you found this helpful, please share it with a friend who could use a little immune boost. Now go make some fire cider—your future self will thank you. Happy brewing!
Frequently Asked Questions
Can I drink fire cider every day?
Yes, many people take a small daily shot (about 1 ounce) as a general immune tonic. It’s safe for most people, but start with a smaller amount to see how your body reacts, as it is very potent. If you have a sensitive stomach or are on medication, it’s always a good idea to check with your doctor first.
How long does homemade fire cider last?
When stored properly in a sealed glass jar in the refrigerator, homemade fire cider can last for up to a year. The combination of acidic vinegar and honey acts as a natural preservative. The flavor will continue to mellow and deepen over time. Always use a clean, dry spoon to take some out to prevent contamination.
Can I use dried herbs instead of fresh?
Absolutely. While fresh roots and alliums are traditional and provide a stronger, brighter flavor, dried herbs work perfectly well. If using dried turmeric or ginger, use about 1-2 tablespoons of each. You can also add dried herbs like thyme, oregano, or rosemary for extra immune support and flavor.
What can I do with the leftover fruit and vegetable pulp?
Don’t throw it away! The pulp is still full of flavor and beneficial compounds. My favorite thing to do is blend it in a food processor with a little olive oil and a splash of the fire cider to make a chunky relish. It’s amazing on roasted vegetables, sandwiches, tacos, or mixed into rice or quinoa.
Is fire cider safe for children or pregnant women?
For children, you can make a milder version by reducing or omitting the hot peppers and horseradish. A small dose (1/2 to 1 teaspoon) in water or juice is generally considered safe. Pregnant and nursing women should consult with their healthcare provider before taking fire cider, as some ingredients like large amounts of herbal infusions aren’t recommended during pregnancy. When in doubt, always ask a professional.
Pin This Recipe!
Immune-Boosting Fire Cider Shots: Easy Garlic Ginger Honey Recipe

A potent, homemade immune tonic made with raw apple cider vinegar, garlic, ginger, horseradish, turmeric, hot peppers, and honey. This easy, no-cook recipe requires just 15 minutes of prep and a month of infusing to create a fiery, health-boosting shot.
- Prep Time: 15 minutes
- Cook Time: 0 minutes
- Total Time: 4 weeks (active: 15 minutes)
- Yield: Approximately 16 servings (1-ounce shots) 1x
- Category: Beverage / Wellness Tonic
- Cuisine: American / Folk Remedy
Ingredients
- 1 cup raw, unfiltered apple cider vinegar (with the mother)
- 1/2 cup fresh ginger root, thinly sliced or chopped (no need to peel)
- 1/2 cup fresh turmeric root, thinly sliced or chopped (or 2 tablespoons dried turmeric)
- 1/2 cup fresh horseradish root, peeled and chopped
- 1 medium onion, chopped
- 10–12 cloves of garlic, smashed or sliced
- 1–2 fresh hot peppers (jalapeño, habanero, or serrano), sliced
- 1/4 cup raw, local honey
- Optional: 1 cinnamon stick, a few star anise pods, 1 teaspoon whole black peppercorns, 1 sprig fresh rosemary
Instructions
- Prepare your ingredients: Scrub all produce. Peel horseradish. Roughly chop onion. Smash garlic cloves. Slice ginger, turmeric, and horseradish into thin rounds or small chunks. Slice hot peppers.
- Layer ingredients in a clean 1-quart wide-mouth mason jar. Start with garlic and ginger, then turmeric, horseradish, onion, and peppers. Tuck in any optional spices. Fill jar about halfway to two-thirds full.
- Pour raw apple cider vinegar over the solids until completely submerged, leaving about an inch of vinegar above the top layer. Use a chopstick to release air bubbles.
- Seal the jar tightly and shake vigorously. Label with the date.
- Store in a cool, dark place for 4 weeks, shaking once daily.
- After 4 weeks, taste a small sip. If desired, let infuse another 1-2 weeks for stronger flavor.
- Strain the solids using a fine-mesh strainer over a bowl. Press on solids to extract as much liquid as possible. Reserve the pulp for another use.
- Add 1/4 cup raw honey to the strained liquid and whisk until dissolved. Adjust sweetness to taste.
- Pour finished fire cider into clean glass bottles using a funnel. Seal tightly.
- Store in the refrigerator for up to a year.
Notes
Wear gloves when handling hot peppers and turmeric to avoid skin irritation and staining. Use a wide-mouth jar for easy packing. Patience is key—the full 4-week infusion develops the best flavor. Save the strained pulp to make a spicy relish or add to dressings. Always use a clean, dry spoon when taking from the jar to prevent contamination.
Nutrition
- Serving Size: 1 ounce (about 2 tab
- Calories: 1525
- Sugar: 45
- Carbohydrates: 46
Keywords: fire cider, immune booster, garlic, ginger, honey, apple cider vinegar, wellness shot, natural remedy, cold and flu, homemade tonic



