This was supposed to be a simple batch of cough syrup. I mean, that was the plan. My youngest had come home from preschool with that telltale sniffle, the kind that creeps up on you mid-afternoon and settles in for a week. I was rummaging through my spice cabinet, convinced I had a box of dried elderberries somewhere from the farmers market last fall. I found them, all right—tucked behind a jar of star anise I’d bought for a recipe I never made. But in my rush to get the water boiling, I grabbed the wrong measuring spoon. Instead of a teaspoon of cinnamon, I dumped in a whole tablespoon. And then, because the universe was apparently testing me, I knocked over the clove jar. Half of it went into the pot. I stood there, staring at the dark, bubbling liquid, thinking, “Well, I’ve ruined it.”
I almost poured it out. Honestly, I was that close. But I was tired, the kids were getting hangry, and I figured I’d just let it simmer and see what happened. Maybe I could salvage it with some honey. The smell that started filling the kitchen was… unexpected. It wasn’t just medicinal. It was warm, spicy, almost like mulled cider. When I finally strained it and took a sip, I let out a laugh. It was better than any batch I’d made before. The extra cinnamon and cloves hadn’t ruined it—they had fixed something I didn’t know was broken. That happy accident turned into the recipe I’ve been making every fall since. You know that feeling when a mistake turns into your new favorite thing? This was that moment.
This homemade elderberry syrup with cinnamon and cloves is now my go-to immune booster for the whole family. It’s not just about fighting off colds—though it does that brilliantly. It’s about having a warm, comforting ritual when the air gets crisp and the days get short. I keep a jar in the fridge from October through March, and I swear it’s the reason we make it through flu season without total disaster. Maybe you’ve been there, staring at a pot of something you messed up, wondering if it’s worth saving. Let me tell you—sometimes the best recipes come from the messiest moments.
Why You’ll Love This Recipe
I’ve tested a lot of elderberry syrup recipes over the years. Some are too watery. Some taste like cough medicine from your childhood—the kind you had to hold your nose to swallow. Others are so complicated they require a trip to three different specialty stores. This homemade elderberry syrup with cinnamon and cloves is the one I keep coming back to, and here’s why it stands out.
- Quick & Easy: This comes together in about 45 minutes, most of which is hands-off simmering time. It’s perfect for a Sunday afternoon when you want to feel productive without spending hours in the kitchen.
- Simple Ingredients: You probably have most of these in your pantry right now. Dried elderberries are easy to find online or at health food stores, and the cinnamon sticks and whole cloves are basic spice cabinet staples.
- Perfect for Cold Season: This syrup is a lifesaver when the sniffles hit. A tablespoon a day keeps the bugs at bay, and it’s gentle enough for the whole family (just check with your pediatrician for little ones under one).
- Crowd-Pleaser: Even my picky eater, who refuses anything that looks “healthy,” asks for this on his pancakes. The cinnamon and cloves make it taste like a cozy dessert, not a medicine.
- Unbelievably Delicious: The texture is silky, the flavor is deep and spiced, and it has just enough sweetness from the honey to make it feel like a treat. You’ll actually look forward to taking it.
What makes this recipe different from the rest? It’s the balance. Most recipes are heavy on the elderberries and light on the spices, which leaves a flat, slightly bitter taste. By bumping up the cinnamon and cloves, you get a syrup that’s complex and warming—almost like a tea you’d sip by the fire. Plus, I’ve perfected the simmer time so you get maximum immune-boosting goodness without boiling off all the beneficial compounds. This isn’t just another version. It’s the best version.
This syrup is the kind that makes you close your eyes after the first bite. It’s comfort food reimagined—healthier, faster, but with the same soul-soothing satisfaction. Perfect for impressing guests when you pull it out for holiday brunch, or just turning a rainy Tuesday into something a little more special.
What Ingredients You Will Need
This homemade elderberry syrup with cinnamon and cloves uses simple, wholesome ingredients to deliver bold flavor and immune support without the fuss. Most of these are pantry staples, and the ones that aren’t are easy to find and last forever.
- Dried elderberries (1 cup): These are the star of the show. Look for organic, whole dried elderberries from a trusted source. I prefer the brand Starwest Botanicals for consistent quality. Avoid fresh elderberries—they’re toxic raw and need special handling.
- Cinnamon sticks (3 sticks): Don’t use ground cinnamon here. The sticks release their flavor slowly and give you a cleaner syrup without that gritty texture. I like Saigon cinnamon for its extra warmth.
- Whole cloves (1 tablespoon): Fresh cloves are key. If they don’t smell intensely aromatic when you open the jar, they’re too old. Whole cloves are easier to strain out than ground.
- Fresh ginger (1-inch piece, sliced): This adds a gentle heat and extra anti-inflammatory power. No need to peel it—just slice it into coins. (Adds a subtle zing that cuts through the sweetness.)
- Raw honey (1 cup): Use local raw honey if you can. It has natural enzymes and local pollen that can help with seasonal allergies. Wait to add it until the syrup has cooled to preserve those benefits. (Use maple syrup for a vegan option.)
- Filtered water (4 cups): Tap water can have chlorine that affects the flavor. Filtered or spring water gives you a cleaner taste.
Substitution Guidance: If you don’t have cinnamon sticks, you can use 2 teaspoons of ground cinnamon, but the syrup will be cloudier. For the cloves, 1 teaspoon of ground cloves works in a pinch. If you’re avoiding sugar entirely, you can skip the honey and use monk fruit sweetener, though the flavor won’t be as rich. For a stronger immune boost, add a tablespoon of dried rose hips or a slice of fresh turmeric root alongside the ginger.
Equipment Needed
You don’t need a fancy kitchen to make this homemade elderberry syrup with cinnamon and cloves. Here’s what I use, along with some alternatives if you’re improvising.
- Medium saucepan (2-3 quart): A heavy-bottomed pot works best for even simmering. I use my old Le Creuset, but any non-reactive pot (stainless steel or enameled) will do. Avoid aluminum—it can react with the berries.
- Fine-mesh strainer: This is crucial for catching all the tiny elderberry seeds and clove bits. If you don’t have one, you can use cheesecloth or a clean nut milk bag. I’ve also used a coffee filter in a pinch, but it takes forever.
- Glass jar (16-ounce) with a tight-fitting lid: Mason jars work perfectly. Make sure it’s thoroughly cleaned and dried before you pour in the syrup. I keep a few spare jars just for this recipe.
- Wooden spoon: For stirring. Metal spoons can get too hot and scratch your pot. A silicone spatula also works.
- Measuring cups and spoons: Accuracy matters here, especially with the spices. I use my stainless steel set—they’re cheap and last forever.
Budget-Friendly Tip: You don’t need to buy a fancy strainer. A clean, thin kitchen towel (not terry cloth) works beautifully to strain the syrup. Just be careful—it gets hot!
Preparation Method
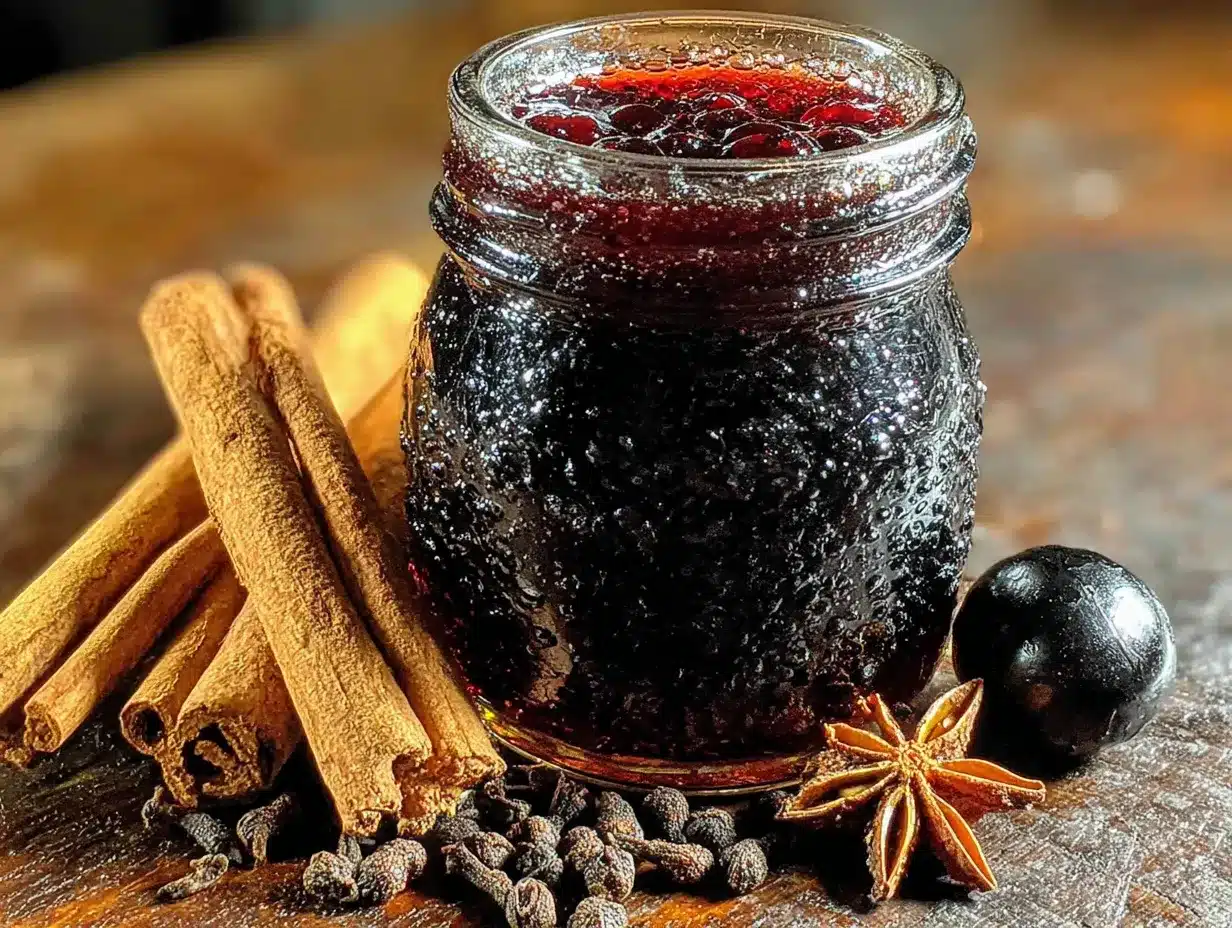
Making this homemade elderberry syrup with cinnamon and cloves is incredibly straightforward. Here’s how I do it, step by step, with all the little details I’ve learned from making it dozens of times.
- Combine the berries and spices. In your medium saucepan, add the dried elderberries, cinnamon sticks, whole cloves, and sliced ginger. Pour in the 4 cups of filtered water. Don’t stir yet—just let everything settle. The berries will float at first, and that’s totally normal.
- Bring to a boil. Place the pot over high heat and bring the mixture to a rolling boil. This usually takes about 5-7 minutes. You’ll see the water start to turn a deep purple, and the smell will hit you—earthy and spicy all at once. Keep an eye on it so it doesn’t boil over. (Ask me how I learned that lesson.)
- Reduce to a simmer. Once it’s boiling, turn the heat down to low. You want a gentle simmer—little bubbles breaking the surface, not a violent rolling boil. Cover the pot partially with a lid. Let it simmer for 30 minutes. Set a timer! I’ve gotten distracted and let it go 45 minutes, and the syrup gets too concentrated and bitter.
- Check the color and volume. After 30 minutes, the liquid should be a deep, inky purple, and it should have reduced by about half. If it looks too watery, let it go another 5-10 minutes. If it’s too thick, add a splash more water. The berries will have swelled up and look almost like raisins.
- Strain the syrup. Place your fine-mesh strainer over a large bowl or a glass measuring cup. Carefully pour the hot mixture through the strainer. Use the back of a wooden spoon to press down on the berries and extract every last drop of liquid. This is the messy part—wear an apron! Let it drain for a few minutes, then discard the solids.
- Cool the syrup. Let the strained liquid cool completely at room temperature. This takes about 30-45 minutes. Don’t rush this step. If you add honey while the liquid is still hot, you’ll destroy the beneficial enzymes. I usually set my timer and walk away.
- Add the honey. Once the syrup is completely cool (test it with your finger—it should feel neutral, not warm), pour in the 1 cup of raw honey. Stir gently with your wooden spoon until the honey is fully dissolved. The syrup will become glossy and slightly thicker.
- Bottle it up. Pour the finished syrup into your clean glass jar. Seal it tight and give it a gentle shake. Pop it in the refrigerator. It will keep for up to 3 months—if it lasts that long.
Sensory Cues: At step 3, your kitchen should smell like a holiday market—warm, spicy, and sweet. At step 5, the syrup should look like dark garnet and feel silky, not sticky. At step 7, the honey should swirl in like ribbons before disappearing.
Cooking Tips & Techniques
I’ve made this homemade elderberry syrup with cinnamon and cloves enough times to have a few tricks up my sleeve. Here’s what I’ve learned the hard way so you don’t have to.
- Don’t over-simmer. I once let the pot go for an hour because I was on the phone with my sister. The syrup was so thick it was almost jelly, and the flavor was aggressively bitter. Stick to 30 minutes. If you want a thicker syrup, add a little more honey at the end, not more cooking time.
- Use whole spices. I made the mistake of using ground cinnamon and cloves once because I was out of whole. The syrup was cloudy, and I spent forever trying to strain out the fine powder. Whole spices are easier to strain and give a cleaner flavor. Trust me on this one.
- Let it cool completely. I know you’re eager to taste it, but adding honey to hot syrup kills the good stuff. I learned this the hard way when I made a batch for my neighbor and she said it didn’t help her cold at all. The heat had destroyed the beneficial enzymes in the honey. Patience pays off.
- Double the batch. This syrup freezes beautifully. I always make a double batch and pour half into a silicone ice cube tray. Once frozen, I pop the cubes into a freezer bag. They thaw perfectly for smoothies or tea all winter long.
- Label your jar. I can’t tell you how many times I’ve found a mysterious purple jar in the back of my fridge and had no idea how old it was. Write the date on the lid with a permanent marker. You’ll thank yourself later.
Variations & Adaptations
This homemade elderberry syrup with cinnamon and cloves is pretty perfect as is, but I love playing around with it. Here are a few variations I’ve tried and loved.
- Citrus Boost: Add the zest and juice of one orange and one lemon to the pot during the simmer. It adds a bright, tangy note that cuts through the spice. I do this when I feel a cold coming on strong—it’s like a vitamin C bomb.
- Extra Warming Spices: Toss in a star anise and a cardamom pod (cracked open) with the other spices. It gives the syrup a chai-like complexity. My husband loves this version in his tea on cold mornings.
- Vegan Version: Swap the honey for maple syrup or agave. The flavor will be a little different—maple adds a woodsy sweetness—but it’s still delicious. Just add it the same way, after cooling.
- Alcohol-Based Tincture: If you want a shelf-stable version that doesn’t need refrigeration, replace the water with vodka or brandy. Skip the honey and let the berries steep for 4-6 weeks in a dark cabinet. Strain and use by the dropperful. This is my go-to for travel.
- Low-Sugar Version: Use only 1/2 cup of honey and add a few drops of stevia to taste. The texture will be thinner, but the immune benefits are still there. I make this for my mom, who watches her sugar intake.
Serving & Storage Suggestions
This homemade elderberry syrup with cinnamon and cloves is versatile. Here’s how I serve and store it.
- Serving Temperature: I take mine straight from the fridge—it’s thick and soothing cold. But on a chilly morning, I’ll stir a tablespoon into hot water for an instant tea. The cinnamon and cloves bloom in the heat, and it’s incredibly comforting.
- How to Take It: Adults: 1 tablespoon daily for maintenance, 2-3 tablespoons daily if you’re fighting something off. Kids (over 1 year): 1 teaspoon daily. I mix it into yogurt, drizzle it over pancakes, or just take it off a spoon.
- Storage: Keep the jar in the refrigerator at all times. It will stay good for up to 3 months. If you see any mold or fermentation bubbles, toss it. I’ve never had that happen, but better safe than sorry.
- Freezing: As I mentioned, pour the syrup into ice cube trays and freeze. Once solid, transfer the cubes to a freezer bag. They’ll keep for up to 6 months. Thaw a cube in the fridge overnight or drop it directly into hot tea.
- Flavor Development: The flavors actually get better after a few days in the fridge. The spices meld with the honey, and the syrup becomes smoother. I try to make it at least a day before I plan to use it regularly.
Nutritional Information & Benefits
This homemade elderberry syrup with cinnamon and cloves isn’t just tasty—it’s packed with good-for-you stuff. Here’s the breakdown.
Estimated Nutritional Values (per 1 tablespoon serving):
- Calories: 45
- Carbohydrates: 12g
- Sugars: 11g (from honey)
- Vitamin C: 4mg (from elderberries)
- Antioxidants: High (from elderberries, cinnamon, and cloves)
Health Benefits:
- Elderberries are rich in flavonoids and antioxidants that support the immune system. Studies suggest they can reduce the duration and severity of colds and flu.
- Cinnamon has anti-inflammatory properties and can help regulate blood sugar. It also adds that warming, comforting flavor.
- Cloves are packed with eugenol, a compound with antibacterial and pain-relieving properties. They’re great for soothing sore throats.
- Ginger is a natural anti-inflammatory and can help with nausea and digestion.
- Raw honey has antibacterial enzymes and can soothe coughs. Local honey may also help with seasonal allergies.
Dietary Considerations: This recipe is gluten-free, dairy-free, and soy-free. For a vegan option, use maple syrup. It’s not suitable for infants under 1 year due to the honey. If you have diabetes, be mindful of the sugar content—the low-sugar variation above is a better option.
Conclusion
This homemade elderberry syrup with cinnamon and cloves is one of those recipes that proves the best things in life come from happy accidents. What started as a measuring mistake turned into my family’s favorite immune booster, and I honestly can’t imagine cold season without it now. The deep, spiced flavor, the silky texture, the way it makes you feel like you’re taking care of yourself—it’s all worth the tiny bit of effort.
I hope you give this recipe a try, and I hope you make it your own. Maybe you’ll add a little extra ginger, or swap the honey for maple, or double the cinnamon like I did that first time. That’s the beauty of cooking—you get to play. If you make it, I’d love to hear how it turned out. Drop a comment below and let me know if your family loves it as much as mine does. And if you have a happy accident of your own, share that too. Sometimes the messiest moments make the best stories.
Frequently Asked Questions
Can I use fresh elderberries instead of dried?
No, I wouldn’t recommend it. Fresh elderberries are toxic when raw and need to be cooked very carefully to neutralize the compounds. Dried elderberries are safer, easier to find, and give consistent results every time.
How long does this syrup last in the fridge?
Up to 3 months if stored in a clean, airtight jar. I always label mine with the date. If you see any mold or off smells, toss it and make a fresh batch.
Can I give this to my toddler?
Yes, for children over 1 year old. Give 1 teaspoon daily for maintenance. For kids under 1, skip the honey (risk of botulism) and use maple syrup instead. Always check with your pediatrician first.
Do I have to use raw honey?
It’s best for the immune benefits, but you can use regular honey if that’s all you have. Just make sure to add it after the syrup has cooled to preserve any beneficial properties.
Can I make this in a slow cooker?
Absolutely. Combine the berries, spices, and water in a slow cooker. Cook on low for 3-4 hours. Strain, cool, and add the honey. It’s a great hands-off method if you’re busy.
Pin This Recipe!
Best Homemade Elderberry Syrup with Cinnamon and Cloves
This homemade elderberry syrup with cinnamon and cloves is a warm, spiced immune booster that turns a happy accident into a family favorite. Quick to make with simple ingredients, it’s perfect for cold season and tastes like a cozy dessert.
- Prep Time: 10 minutes
- Cook Time: 30 minutes
- Total Time: 45 minutes
- Yield: 16 servings 1x
- Category: Condiment
- Cuisine: American
Ingredients
- 1 cup dried elderberries
- 3 cinnamon sticks
- 1 tablespoon whole cloves
- 1-inch piece fresh ginger, sliced
- 1 cup raw honey
- 4 cups filtered water
Instructions
- Combine the dried elderberries, cinnamon sticks, whole cloves, and sliced ginger in a medium saucepan. Pour in the 4 cups of filtered water.
- Place the pot over high heat and bring the mixture to a rolling boil, about 5-7 minutes.
- Reduce the heat to low, cover partially, and let it simmer gently for 30 minutes. The liquid should reduce by about half and turn a deep purple.
- Place a fine-mesh strainer over a large bowl or glass measuring cup. Carefully pour the hot mixture through the strainer, pressing on the berries with a wooden spoon to extract all the liquid. Discard the solids.
- Let the strained liquid cool completely at room temperature, about 30-45 minutes.
- Once the syrup is completely cool, stir in the 1 cup of raw honey until fully dissolved.
- Pour the finished syrup into a clean glass jar, seal tightly, and refrigerate.
Notes
Don’t over-simmer—stick to 30 minutes to avoid bitterness. Use whole spices for a cleaner syrup. Let the syrup cool completely before adding honey to preserve beneficial enzymes. Double the batch and freeze in ice cube trays for up to 6 months. Label your jar with the date.
Nutrition
- Serving Size: 1 tablespoon
- Calories: 45
- Sugar: 11
- Carbohydrates: 12
Keywords: elderberry syrup, immune booster, homemade syrup, cinnamon, cloves, cold remedy, natural remedy



