There used to be a little meal prep place on Grand Avenue—just a hole-in-the-wall with a chalkboard menu and a freezer full of these perfectly balanced bowls. When they closed two years ago, I honestly felt a little lost. I mean, who knew you could get attached to a frozen lunch? But those bowls were my Wednesday ritual—the one thing I could count on when the week got chaotic and my meal planning fell apart. After maybe twelve tries—some were disasters, let me tell you—I finally cracked the code.
The first attempt was a sad, watery mess. The chicken was dry, the veggies were mushy, and the whole thing tasted like a freezer burn apology. My husband took one bite and just looked at me. You know that look. But I was determined. I kept tweaking things—the roasting time, the cooling process, the way I packed the containers. And then one Tuesday, I pulled a bowl out of the freezer, microwaved it, and took a bite. And there it was. That exact flavor from Grand Avenue. I actually texted my sister a photo with like twelve exclamation points.
These Easy Freezer Chicken and Veggie Meal Prep Bowls aren’t just convenient—they’re genuinely delicious. The secret is in the prep technique and the way the flavors lock in during freezing. Honestly, they taste better than most fresh lunches I’ve made. Whether you’re a meal prep pro or someone who’s never frozen a single vegetable in your life, these bowls will change your lunch game. I keep making them because they save my sanity every single week.
Why You’ll Love These Easy Freezer Chicken and Veggie Meal Prep Bowls
Let me tell you why these bowls have become my meal prep MVP. After months of testing, I can confidently say this recipe delivers on every front.
- Quick & Easy : Comes together in under an hour for a whole week of lunches. That’s five meals prepped in the time it takes to watch one movie.
- Simple Ingredients : No fancy grocery trips needed. You likely already have olive oil, salt, pepper, and garlic powder in your kitchen. Just grab some chicken breasts and whatever veggies look good at the store.
- Perfect for Busy Weeks : Great for chaotic Tuesdays, lazy Sundays, or those days when you forget to pack lunch until you’re already running late.
- Crowd-Pleaser : My kids actually ask for these. My picky eater neighbor tried one and asked for the recipe. That never happens.
- Unbelievably Delicious : The texture and flavor combo is next-level comfort food. The chicken stays juicy, the veggies keep their bite, and everything tastes fresh even after a month in the freezer.
What makes these bowls different from the rest? It’s the pre-freeze cooling technique. Most recipes tell you to just throw hot food into containers and freeze it. That leads to soggy veggies and dry chicken. I figured out that spreading everything on a baking sheet to cool completely before packing makes all the difference. The steam escapes, the texture stays perfect, and you don’t get that weird icy coating on everything.
This recipe isn’t just good—it is the kind that makes you close your eyes after the first bite. It’s comfort food reimagined—healthier, faster, but with the same soul-soothing satisfaction. Perfect for impressing yourself on a busy Wednesday, or turning a simple lunch into something you actually look forward to.
What Ingredients You Will Need
This recipe uses simple, wholesome ingredients to deliver bold flavor and satisfying texture without the fuss. Most of these are pantry staples, and you can easily swap things based on what you have on hand.
For the Chicken
- 2 pounds boneless, skinless chicken breasts (about 3-4 breasts) — I prefer organic chicken from Costco for consistent size and tenderness
- 3 tablespoons olive oil (adds richness and helps the seasoning stick)
- 1 teaspoon garlic powder
- 1 teaspoon onion powder
- 1 teaspoon smoked paprika (regular paprika works too, but smoked adds depth)
- ½ teaspoon black pepper
- 1 teaspoon salt (I use kosher salt for better flavor distribution)
For the Veggies
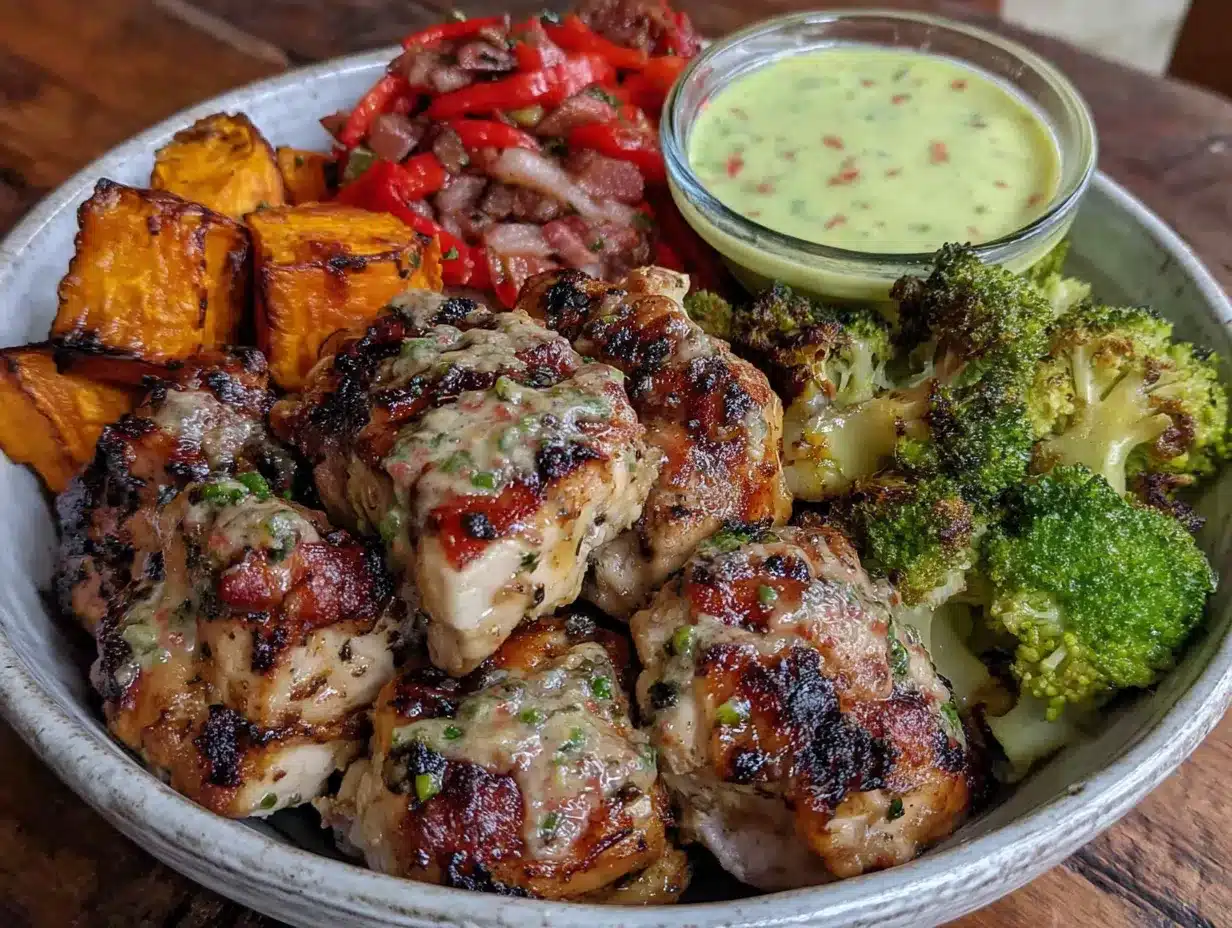
- 2 medium bell peppers, any color (red and yellow add sweetness) — diced into 1-inch pieces
- 1 medium zucchini, diced into ½-inch pieces (don’t cut too small or they’ll get mushy)
- 1 medium red onion, diced into 1-inch pieces
- 2 cups broccoli florets (fresh works best — frozen broccoli gets too watery when reheated)
- 2 tablespoons olive oil
- ½ teaspoon salt
- ¼ teaspoon black pepper
- ½ teaspoon dried oregano (adds an herby brightness that holds up well to freezing)
For Serving (Optional but Recommended)
- Cooked rice, quinoa, or cauliflower rice — about ½ cup per bowl
- Fresh lemon wedges (add a squeeze after reheating for brightness)
- Fresh parsley or cilantro for garnish
I recommend using bell peppers from the farmers market when they’re in season—they’re sweeter and hold up better to freezing. For zucchini, look for firm ones without soft spots. If you’re using frozen broccoli anyway (I get it, sometimes fresh isn’t available), add it directly to the baking sheet frozen—don’t thaw it first or it’ll turn to mush.
For substitutions: Use boneless chicken thighs if you prefer darker meat—they actually stay even juicier. Swap sweet potatoes for zucchini if you want something heartier. Use avocado oil instead of olive oil if you need a higher smoke point. The beauty of these bowls is their flexibility.
Equipment Needed
You don’t need fancy equipment for these bowls, which is part of why I love this recipe. Here’s what you’ll need:
- Large baking sheet (half-sheet size works perfectly) — I use my Nordic Ware aluminum sheet pan because it distributes heat evenly
- Parchment paper (makes cleanup so much easier — trust me, I learned the hard way)
- Mixing bowls (one for chicken, one for veggies)
- Sharp knife and cutting board
- Measuring spoons
- Meat thermometer (optional but highly recommended for perfectly cooked chicken)
- Freezer-safe meal prep containers (I use glass containers from Pyrex — they don’t stain and stack beautifully)
- Permanent marker for labeling containers with dates
If you don’t have a meat thermometer, you can cut into the thickest piece of chicken to check for doneness. No pink, clear juices — that’s your sign. For containers, any airtight freezer-safe container works. I’ve used plastic meal prep containers from Amazon in the past, and they work fine, but glass lasts longer and doesn’t absorb smells. Budget-friendly option: use freezer-safe ziplock bags and lay them flat to freeze — they take up less space.
Preparation Method
Let me walk you through this step by step. I’ve made these bowls dozens of times, so I’ve got all the little tricks figured out.
- Preheat your oven to 400°F (200°C). Line a large baking sheet with parchment paper. This isn’t just for easy cleanup — the parchment helps the veggies roast instead of steam.
- Prep the chicken. Pat the chicken breasts dry with paper towels. This is crucial — wet chicken won’t brown properly. Cut any visible fat off. In a small bowl, mix together the garlic powder, onion powder, smoked paprika, salt, and pepper. Drizzle the olive oil over the chicken, then rub the seasoning mixture all over. Don’t be shy — really work it in. I like to do this step first so the seasoning sits on the chicken while I prep the veggies.
- Prep the veggies. Dice all your veggies into roughly the same size pieces — about 1-inch chunks. This ensures even cooking. In a separate bowl, toss the diced peppers, zucchini, red onion, and broccoli with olive oil, salt, pepper, and oregano. Use your hands to mix — it’s faster and more thorough than a spoon.
- Arrange on the baking sheet. Place the seasoned chicken breasts on one side of the baking sheet. Spread the veggies on the other side in a single layer. Don’t overcrowd — if things are piled on top of each other, they’ll steam instead of roast. If your baking sheet is too small, use two sheets.
- Roast for 25-30 minutes. Place the baking sheet in the preheated oven. After 15 minutes, pull the sheet out and give the veggies a quick stir. Return to the oven. The chicken is done when it reaches 165°F (74°C) internally. The veggies should be tender with slightly charred edges — that’s where the flavor lives.
- Cool completely. This is the most important step. Remove the baking sheet from the oven. Let the chicken rest for 5 minutes on the sheet, then transfer to a cutting board. Let the veggies cool on the baking sheet. Everything needs to come to room temperature before you pack it — about 30-45 minutes. If you pack hot food into containers, condensation forms and creates ice crystals. Ice crystals = soggy reheated food. I learned this after my third failed batch.
- Dice the chicken. Once the chicken is cool enough to handle (but still slightly warm), dice it into bite-sized cubes. About ½-inch pieces work well. You want them small enough to reheat evenly but big enough to feel substantial.
- Assemble the bowls. Divide the diced chicken and roasted veggies evenly among your meal prep containers. If you’re adding rice or quinoa, put it in first as a base layer. Aim for about 4-5 ounces of chicken and 1 cup of veggies per bowl. I usually get 5 bowls from this recipe.
- Cool completely before sealing. Let the assembled bowls sit open on the counter for another 10-15 minutes. You want no warmth at all before you put the lids on. Patience here pays off big time.
- Label and freeze. Write the date and contents on each container with a permanent marker. “Chicken Veggie Bowl 3/15” — simple. Stack them in your freezer. They’ll keep for up to 3 months, but honestly, they’re best within the first month.
Cooking Tips & Techniques
After making these bowls more times than I can count, I’ve picked up some tricks that make a real difference.
The cooling trick is everything. I cannot stress this enough. The first few times I made these, I rushed the cooling process and ended up with watery, sad bowls. Now I spread everything out on the baking sheet and let it sit for a full 45 minutes. If I’m in a hurry, I’ll pop the baking sheet in the fridge for 15 minutes, uncovered. This stops the cooking process and lets steam escape.
Don’t skip the parchment paper. I tried making these without it once because I was out. Big mistake. The veggies stuck to the pan, the chicken lost its seasoning, and cleanup took forever. Parchment paper is your friend here.
Cut veggies uniformly. I know it seems fussy, but when your broccoli pieces are twice the size of your zucchini pieces, they won’t cook evenly. Take the extra 30 seconds to make everything roughly the same size. Your future self will thank you.
Use a meat thermometer. I used to cut into chicken to check doneness, which released all the juices. Now I use my Thermapen and it’s a game changer. Plus, you don’t end up with accidental shredded chicken from poking it too much.
Multitask strategically. While the chicken and veggies roast, wash your cutting board and knife. While they cool, label your containers. I set a timer for everything — 15 minutes for the first stir, 30 minutes for cooling, 10 minutes for assembly. It keeps me from wandering off and forgetting about things.
One mistake I still make sometimes: overloading the baking sheet. When I try to cram everything onto one sheet, nothing browns properly. Use two sheets if you need to. The caramelization is worth the extra pan.
Variations & Adaptations
One of the best things about these bowls is how adaptable they are. Here are some variations I’ve tried and loved.
Mediterranean Twist : Swap the smoked paprika for za’atar seasoning. Add diced eggplant and cherry tomatoes instead of zucchini and broccoli. After reheating, drizzle with tahini sauce. This version reminds me of a trip to Greece I took a few years back — the flavors transport me every time.
Low-Carb Version : Skip the rice or quinoa entirely. Double up on the veggies instead. I add cauliflower florets and asparagus when I’m watching my carbs. The chicken provides plenty of protein to keep you full. This is my go-to when I’m doing a low-carb month.
Spicy Southwest Style : Add 1 teaspoon of chili powder and ½ teaspoon of cumin to the chicken seasoning. Swap the zucchini for black beans (canned, drained and rinsed). After reheating, top with fresh salsa and a dollop of Greek yogurt. My husband requests this version weekly.
Sheet Pan Swap : If you’re short on time, skip the separate cooling step and just portion everything directly from the baking sheet into containers. Let them cool in the containers with the lids off. It works in a pinch, though the texture isn’t quite as good.
Allergen-Friendly Options : For dairy-free, these bowls are already dairy-free. For gluten-free, just make sure your seasonings are certified gluten-free (most are, but double-check). For nut-free, these bowls are naturally nut-free. If you’re avoiding nightshades, swap bell peppers for extra zucchini and broccoli.
Serving & Storage Suggestions
These bowls are designed for convenience, but a few serving tips make them even better.
How to Reheat : Remove the container from the freezer the night before and let it thaw in the fridge. In the morning, microwave for 2-3 minutes, stirring halfway through. If you’re reheating from frozen, microwave for 4-5 minutes, stirring every minute. The chicken stays juicy, and the veggies retain their texture beautifully.
Serving Temperature : These bowls are best served hot, straight from the microwave. But I’ve also eaten them cold straight from the fridge on a hot day — like a chopped salad situation. Both work.
What to Serve With : A squeeze of fresh lemon juice over the top makes everything sing. I also love adding a drizzle of hot sauce or a sprinkle of fresh herbs. A side of fresh fruit or a small salad rounds out the meal nicely.
Storage Instructions : Store in airtight containers in the freezer for up to 3 months. For best quality, eat within 1 month. If you’re storing in the fridge, they’ll keep for 4-5 days. The flavors actually get better after a day or two — the seasonings meld together beautifully.
Flavor Development : I’ve noticed that these bowls taste even better after a week in the freezer. The flavors marry together somehow. It’s like the freezer does a little magic. Don’t ask me the science — I just know it works.
Nutritional Information & Benefits
Here’s the estimated nutritional breakdown for one bowl (without rice or quinoa):
| Nutrient | Amount Per Serving |
|---|---|
| Calories | 320-350 |
| Protein | 35-40g |
| Carbohydrates | 12-15g |
| Fiber | 4-5g |
| Fat | 14-16g |
| Vitamin C | 80% DV |
| Vitamin A | 60% DV |
These bowls are packed with lean protein from the chicken, which keeps you full and supports muscle health. The colorful veggies provide a wide range of vitamins and antioxidants — bell peppers are loaded with vitamin C, broccoli offers vitamin K and fiber, and zucchini provides potassium. This is a balanced meal that supports energy levels without the afternoon crash.
If you’re watching sodium, reduce the salt in the seasoning mix or use a salt-free seasoning blend. The bowls are naturally gluten-free and dairy-free. For anyone managing blood sugar, the protein and fiber combo helps stabilize glucose levels.
I personally love that these bowls make healthy eating effortless. When I have them in the freezer, I’m way less likely to grab takeout on a busy day. They’re my little insurance policy against bad food decisions.
Conclusion
These Easy Freezer Chicken and Veggie Meal Prep Bowls are the kind of recipe that changes your routine. They’re not just convenient — they’re genuinely delicious, nutritionally balanced, and surprisingly simple to make. Whether you’re meal prepping for a busy work week, trying to eat healthier without spending hours in the kitchen, or just looking for a reliable lunch option that won’t let you down, these bowls deliver every single time.
I encourage you to make them your own. Swap in your favorite veggies, adjust the seasonings to your taste, or try one of the variations I shared. The beauty of this recipe is its flexibility. And honestly, there’s something deeply satisfying about opening your freezer and seeing a week’s worth of healthy lunches waiting for you. It feels like a win before the week even starts.
I’d love to hear how these turn out for you! Drop a comment below with your favorite veggie combination or any twists you tried. Share this recipe with a friend who needs better lunch options. And if you make these bowls, tag me in your photos — I love seeing your creations. Happy prepping!
Frequently Asked Questions
Can I use frozen chicken breasts instead of fresh?
Yes, but you’ll need to thaw them completely first. Pat them very dry before seasoning — frozen chicken releases a lot of water as it thaws, and you don’t want that extra moisture. I recommend thawing in the fridge overnight for best results.
How long do these bowls last in the freezer?
They’ll keep for up to 3 months in an airtight container. For best quality and texture, I recommend eating them within the first month. After that, the veggies can start to lose their texture slightly, but they’re still perfectly safe to eat.
Can I add rice or quinoa directly to the bowl before freezing?
Absolutely! Cook your rice or quinoa, let it cool completely, then add about ½ cup to each container before layering the chicken and veggies on top. The grains freeze beautifully and reheat perfectly right along with everything else.
What’s the best way to reheat these bowls without a microwave?
If you don’t have a microwave, transfer the contents to a skillet or pan. Add a tablespoon of water, cover with a lid, and heat over medium for 5-7 minutes, stirring occasionally. You can also reheat in the oven at 350°F for 15-20 minutes in an oven-safe container.
Can I meal prep these bowls for the fridge instead of the freezer?
Yes! If you’re planning to eat them within 4-5 days, you can store them in the fridge instead. The texture will be even better since there’s no freezing involved. Just make sure everything is completely cool before sealing the containers to prevent condensation.
Pin This Recipe!
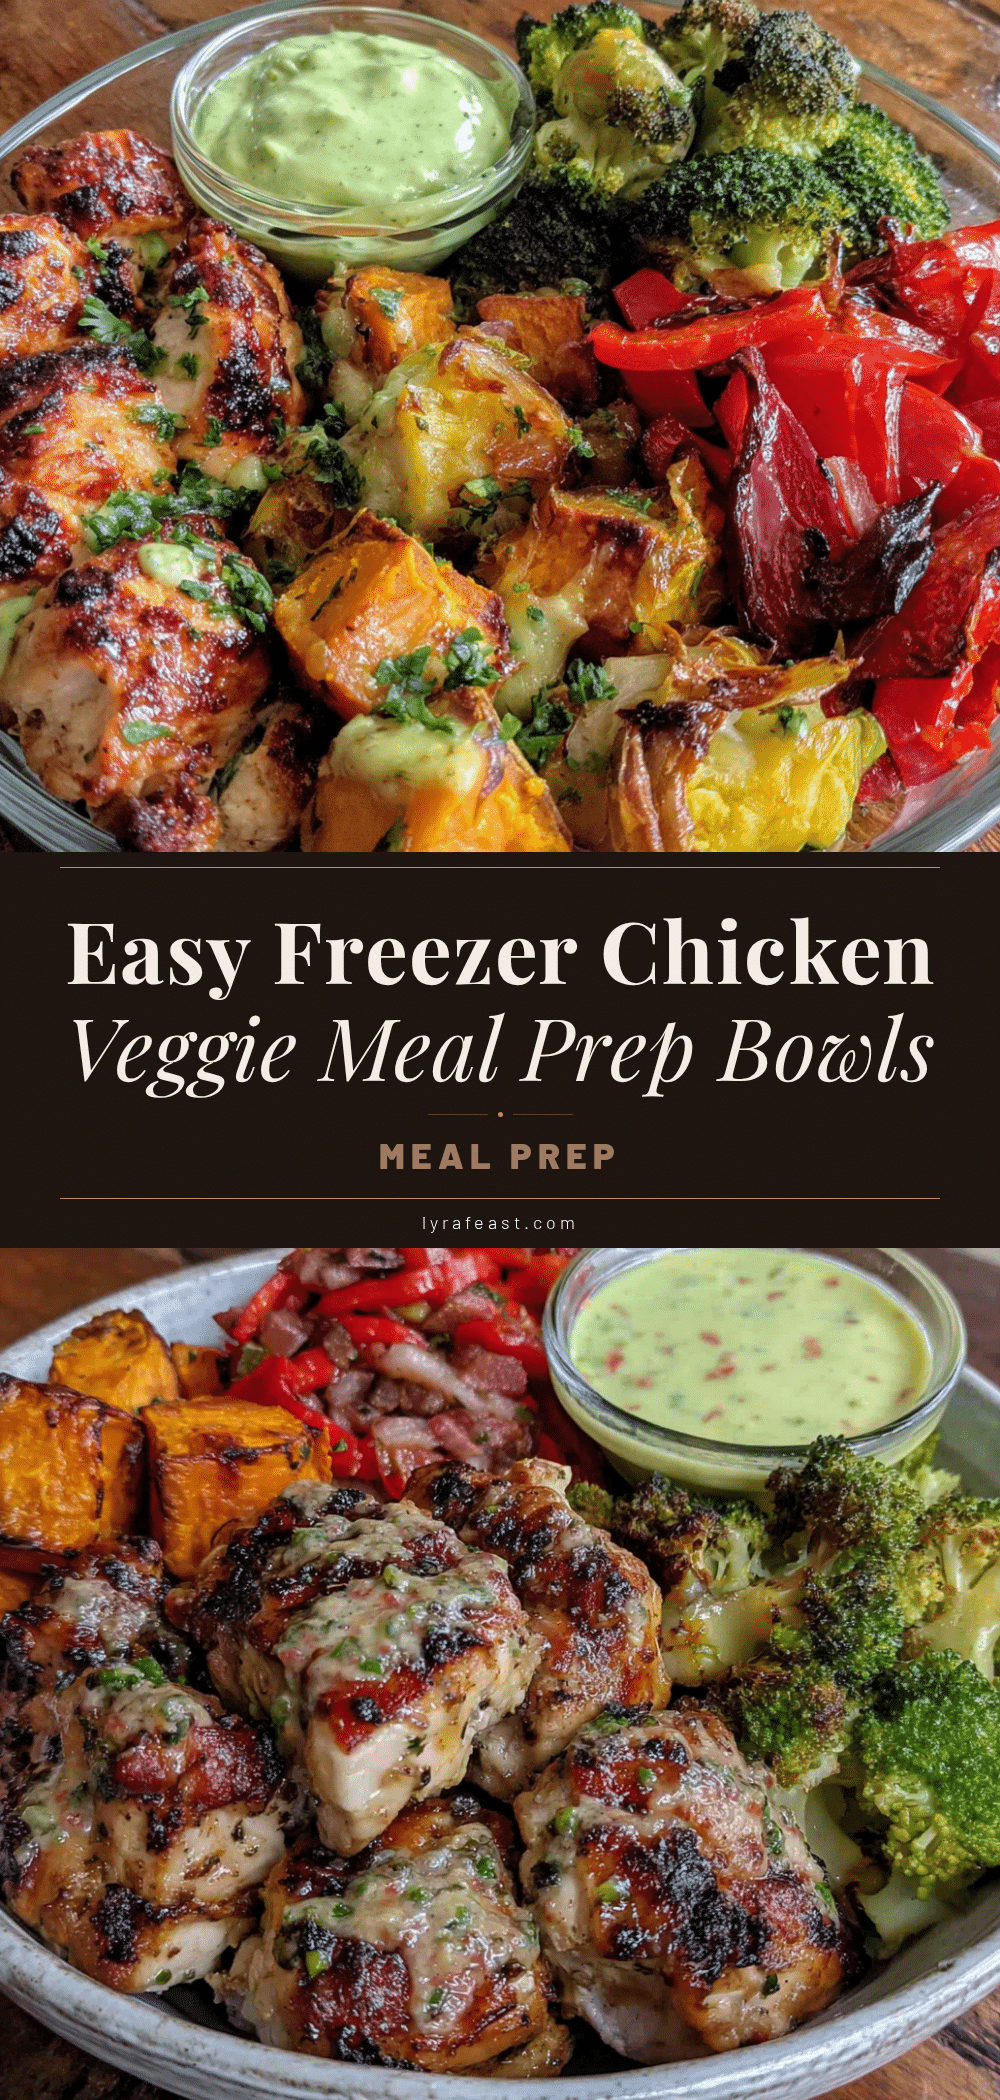
Best Easy Freezer Chicken and Veggie Meal Prep Bowls
These Easy Freezer Chicken and Veggie Meal Prep Bowls are genuinely delicious and convenient. The secret is in the prep technique and the way the flavors lock in during freezing, making them taste better than most fresh lunches.
- Prep Time: 15 minutes
- Cook Time: 30 minutes
- Total Time: 45 minutes
- Yield: 5 servings 1x
- Category: Main Course
- Cuisine: American
Ingredients
- 2 pounds boneless, skinless chicken breasts (about 3–4 breasts)
- 3 tablespoons olive oil
- 1 teaspoon garlic powder
- 1 teaspoon onion powder
- 1 teaspoon smoked paprika
- ½ teaspoon black pepper
- 1 teaspoon salt
- 2 medium bell peppers, any color, diced into 1-inch pieces
- 1 medium zucchini, diced into ½-inch pieces
- 1 medium red onion, diced into 1-inch pieces
- 2 cups broccoli florets
- 2 tablespoons olive oil
- ½ teaspoon salt
- ¼ teaspoon black pepper
- ½ teaspoon dried oregano
- Cooked rice, quinoa, or cauliflower rice (about ½ cup per bowl, optional)
- Fresh lemon wedges (optional)
- Fresh parsley or cilantro for garnish (optional)
Instructions
- Preheat your oven to 400°F (200°C). Line a large baking sheet with parchment paper.
- Pat the chicken breasts dry with paper towels. Cut any visible fat off. In a small bowl, mix together the garlic powder, onion powder, smoked paprika, salt, and pepper. Drizzle the olive oil over the chicken, then rub the seasoning mixture all over.
- Dice all your veggies into roughly the same size pieces — about 1-inch chunks. In a separate bowl, toss the diced peppers, zucchini, red onion, and broccoli with olive oil, salt, pepper, and oregano. Use your hands to mix.
- Place the seasoned chicken breasts on one side of the baking sheet. Spread the veggies on the other side in a single layer. Don’t overcrowd.
- Roast for 25-30 minutes. After 15 minutes, pull the sheet out and give the veggies a quick stir. Return to the oven. The chicken is done when it reaches 165°F (74°C) internally.
- Cool completely. Remove the baking sheet from the oven. Let the chicken rest for 5 minutes on the sheet, then transfer to a cutting board. Let the veggies cool on the baking sheet. Everything needs to come to room temperature before you pack it — about 30-45 minutes.
- Once the chicken is cool enough to handle (but still slightly warm), dice it into bite-sized cubes. About ½-inch pieces work well.
- Divide the diced chicken and roasted veggies evenly among your meal prep containers. If you’re adding rice or quinoa, put it in first as a base layer. Aim for about 4-5 ounces of chicken and 1 cup of veggies per bowl.
- Let the assembled bowls sit open on the counter for another 10-15 minutes. You want no warmth at all before you put the lids on.
- Write the date and contents on each container with a permanent marker. Stack them in your freezer. They’ll keep for up to 3 months, but best within the first month.
Notes
The cooling trick is everything. Spread everything out on the baking sheet and let it sit for a full 45 minutes. If in a hurry, pop the baking sheet in the fridge for 15 minutes, uncovered. Don’t skip the parchment paper. Cut veggies uniformly. Use a meat thermometer. Multitask strategically. One mistake: overloading the baking sheet. Use two sheets if needed.
Nutrition
- Serving Size: 1 bowl (without rice
- Calories: 320350
- Sugar: 57
- Sodium: 500600
- Fat: 1416
- Saturated Fat: 23
- Carbohydrates: 1215
- Fiber: 45
- Protein: 3540
Keywords: freezer meals, meal prep, chicken and veggies, healthy lunch, easy recipe, freezer bowls



