The neighborhood cookie swap was in twelve hours and I’d completely forgotten. Everyone else would be bringing those elaborate, three-day projects—you know, the ones with hand-piped royal icing and layers that need to chill overnight. I had a half-empty carton of eggnog in my fridge, some butter that was finally softening on the counter, and a mild sense of panic setting in. Let me tell you, I was not feeling like a prize-winning baker that Tuesday night.
I stared at my pantry for a solid five minutes, hoping something magical would happen. And then I saw the cinnamon and nutmeg sitting there, and I remembered my grandma’s snickerdoodle recipe. The one that always disappeared first at family dinners. I figured, why not? Eggnog is basically liquid Christmas spices anyway. I mean, honestly, it was a desperate move. I threw the dough together in under ten minutes, rolled it in a cinnamon-sugar mixture, and popped the trays in the oven while I cleaned up the mess I’d made.
The next day, I walked into that cookie swap with a simple tin of what I called “desperation cookies.” And you know that feeling when you’re bracing for polite pity? Yeah, that was me. But then people started grabbing them. And then they were gone. Completely gone, before half the other cookies had even been touched. Someone actually asked me for the recipe while I was still holding my coat. That’s when I knew this wasn’t just a happy accident—it was something I’d be making every single December from then on.
Why You’ll Love This Recipe
Look, I’ve tested a lot of cookie recipes over the years. Some are finicky, some are forgettable, and some just don’t deliver on their promises. These Chewy Eggnog Snickerdoodle Cookies are none of those things. They’re the real deal, and here’s why you’ll fall for them too:
- Quick & Easy: From start to finish, you’re looking at about 30 minutes. No chilling the dough, no fancy equipment, no stress. Perfect for those last-minute holiday cravings or unexpected guests.
- Simple Ingredients: You probably have most of this stuff already. Butter, sugar, flour, eggs. The only special addition is the eggnog and a little nutmeg, and honestly, if you’re reading this in December, you’ve got eggnog somewhere in your fridge.
- Perfect for Holiday Gatherings: Cookie swaps, office parties, family dinners, or just a cozy night by the fire with a mug of something warm. These cookies fit every occasion without trying too hard.
- Crowd-Pleaser: I’ve brought these to three different events this season alone, and every single time, someone asks for the recipe. Kids love them, adults love them, and even the picky eaters go back for seconds.
- Unbelievably Delicious: The texture is where these shine. They’re soft and chewy in the center with that signature snickerdoodle crackle on top. The eggnog adds a subtle richness and warmth that regular snickerdoodles just don’t have.
What makes these different from the other eggnog cookie recipes out there? It’s the technique. Most recipes end up with a cakey, puffy cookie that dries out by day two. I tweaked the butter-to-sugar ratio and added a touch of cornstarch to keep them tender and chewy for days. Plus, I use both cinnamon and nutmeg in the coating, which gives them that unmistakable holiday flavor without being overpowering. This isn’t just another version of a snickerdoodle—it’s the version you’ll come back to year after year.
What Ingredients You Will Need
This recipe uses simple, wholesome ingredients that come together to create something genuinely special. Most of these are pantry staples, and the eggnog is the only thing you might need to grab from the store. Here’s what you’ll need and why each one matters:
For the Cookie Dough
- Unsalted butter, softened (1 cup / 226g) — I use unsalted so I can control the salt level. Let it sit out for about 30 minutes before you start. You want it soft but not melty.
- Granulated sugar (1 cup / 200g) — Regular white sugar gives these cookies their structure and that slightly crispy edge. Don’t substitute brown sugar here; it changes the texture too much.
- Large egg (1, room temperature) — The egg adds richness and helps bind everything together. If you forget to take it out of the fridge, just set it in a bowl of warm water for five minutes.
- Eggnog (1/4 cup / 60ml) — This is the star of the show. Use full-fat eggnog for the best flavor and texture. I’ve tried low-fat versions, and honestly, they just don’t deliver the same richness. (adds moisture and subtle spice flavor)
- Vanilla extract (1 teaspoon) — A good quality vanilla rounds out the flavors. I prefer Nielsen-Massey, but any pure vanilla extract works fine.
- All-purpose flour (2 1/4 cups / 280g) — Spoon and level your flour for the most accurate measurement. Scooping directly from the bag packs in too much flour and makes dry cookies.
- Cornstarch (1 tablespoon) — This is my secret weapon for chewy cookies. It tenderizes the gluten and keeps the centers soft even after a few days.
- Cream of tartar (1 teaspoon) — Essential for that classic snickerdoodle tang. If you don’t have it, you can substitute with 2 teaspoons of lemon juice or white vinegar, but the flavor won’t be quite the same.
- Baking soda (1/2 teaspoon) — Helps the cookies spread just enough without turning into pancakes.
- Salt (1/2 teaspoon) — Balances the sweetness and enhances all the other flavors. I use fine sea salt.
- Ground nutmeg (1/2 teaspoon) — Freshly grated nutmeg makes a huge difference here. Pre-ground works in a pinch, but if you have whole nutmeg, grate it yourself. You’ll taste the difference.
- Ground cinnamon (1/2 teaspoon) — Adds warmth and depth. Don’t skip it; it works beautifully with the eggnog.
For the Cinnamon-Nutmeg Coating

- Granulated sugar (1/4 cup / 50g) — Creates that sparkly, slightly crunchy exterior.
- Ground cinnamon (1 tablespoon) — The classic snickerdoodle coating. I use Saigon cinnamon for a stronger flavor.
- Ground nutmeg (1/2 teaspoon) — This is what makes it taste like eggnog. Don’t be shy with it.
Equipment Needed
You don’t need a fancy kitchen to make these cookies. Here’s what I use and some alternatives if you’re working with limited tools:
- Mixing bowls (one large, one medium) — I have a set of glass bowls I’ve been using for years. Stainless steel works just as well. You just need something that won’t slide around while you’re mixing.
- Electric hand mixer or stand mixer — A hand mixer is perfectly fine. I actually prefer it for cookie dough because it’s easier to scrape down the sides. If you want to mix by hand, go for it, but make sure your butter is very soft and you’re ready for a little arm workout.
- Whisk — For combining the dry ingredients. A fork works in a pinch, but a whisk is faster and more even.
- Rubber spatula — For scraping down the bowl and folding in the final bits of flour. I have a silicone one that doesn’t scratch my bowls.
- Cookie scoop or tablespoon — A 1.5-tablespoon cookie scoop gives you perfectly uniform cookies. If you don’t have one, just use a regular tablespoon and roll the dough into balls by hand.
- Baking sheets (2) — I use light-colored aluminum sheets. Dark sheets can cause the bottoms to brown too quickly. If that’s all you have, reduce your oven temperature by 25°F.
- Parchment paper or silicone baking mat — Parchment paper is cheap and makes cleanup a breeze. Silicone mats work great too, but they can sometimes prevent cookies from spreading as much.
- Cooling rack — Essential for getting those perfectly set cookies. If you don’t have one, you can transfer the cookies to a plate, but they might get a little soggy on the bottom.
Preparation Method
Alright, let’s get baking. I’ve made these cookies more times than I can count, so I’m going to walk you through every step with the little tricks I’ve picked up along the way.
- Preheat your oven to 350°F (175°C). Do this first so it’s ready when you are. Line two baking sheets with parchment paper. Don’t skip the parchment—it really does make a difference for even baking and easy cleanup.
- In a medium bowl, whisk together the flour, cornstarch, cream of tartar, baking soda, salt, nutmeg, and cinnamon. Give it a good 20 seconds of whisking to make sure everything is evenly distributed. I used to skip this step and just dump everything into the wet ingredients, but trust me, you’ll end up with pockets of baking soda that taste bitter. Not worth it.
- In a large bowl, beat the softened butter and granulated sugar together until light and fluffy. This takes about 2-3 minutes with a hand mixer on medium speed. You’re looking for a pale, creamy mixture that looks almost like frosting. Scrape down the sides and bottom of the bowl halfway through. I’ve forgotten to do this and ended up with streaks of butter in my dough—annoying, but the cookies still tasted fine.
- Add the egg, eggnog, and vanilla extract. Beat on low speed until just combined. The mixture might look a little curdled at this point, especially if your eggnog was cold. Don’t panic—that’s normal. It will come together once you add the flour.
- Gradually add the dry ingredients to the wet ingredients, mixing on low speed. I add mine in three additions, mixing for about 10 seconds after each one. Stop as soon as the flour disappears. Overmixing at this stage develops too much gluten and makes tough cookies. If you see a few tiny streaks of flour, that’s actually better than overmixing. Just fold them in gently with your spatula.
- In a small bowl, mix together the coating ingredients: sugar, cinnamon, and nutmeg. Use a fork to break up any clumps. This takes about 30 seconds.
- Scoop the dough into 1.5-tablespoon portions. I use a cookie scoop for this, but you can also use a regular tablespoon and roll the dough into balls with your hands. The dough will be slightly sticky, so lightly grease your hands with a little butter or cooking spray if needed.
- Roll each dough ball in the cinnamon-nutmeg mixture until fully coated. Don’t be shy here—really press the coating into the dough. The more coating you get on there, the better the crackle effect will be. Place the coated dough balls about 2 inches apart on the prepared baking sheets. I fit 12 cookies per sheet.
- Bake for 10-12 minutes, or until the edges are set and the centers look slightly underdone. This is the most important part. The cookies will continue to bake on the hot sheet after you take them out. If you wait until the centers look fully baked, they’ll be overdone and dry. I pull mine at exactly 11 minutes. The tops should be cracked and the kitchen should smell like Christmas.
- Let the cookies cool on the baking sheet for 5 minutes. This allows them to set up properly. If you try to move them too soon, they’ll fall apart. After 5 minutes, transfer them to a wire rack to cool completely. Or, you know, eat one while it’s still warm. I won’t tell anyone.
Cooking Tips & Techniques
I’ve made every mistake in the book with these cookies, so you don’t have to. Here are the things I wish someone had told me the first time around:
Don’t overbake. I cannot stress this enough. The difference between a chewy cookie and a dry one is about 60 seconds. When the edges are golden but the center still looks a little puffy and soft, that’s your cue. Take them out. The residual heat from the baking sheet will finish the job. I learned this the hard way when I left a batch in for 13 minutes and ended up with cookies that crumbled like sand.
Use room temperature ingredients. Cold butter doesn’t cream properly, and cold eggnog can make the mixture seize up. I set my butter and egg out on the counter about 30 minutes before I start. If I’m in a hurry, I cut the butter into small cubes and let it sit for 15 minutes. Works like a charm.
Chill the dough if you have time. The recipe works perfectly without chilling, but if you want even thicker, chewier cookies, pop the shaped dough balls in the fridge for 30 minutes before baking. The cold butter takes longer to melt, which means less spreading. I do this when I’m making cookies for a special occasion and want them to look picture-perfect.
Rotate your baking sheets halfway through. Most ovens have hot spots. Halfway through baking, swap the top sheet to the bottom rack and vice versa. This ensures even browning. I forgot to do this once and ended up with a tray of perfectly baked cookies and another tray of pale, underdone ones.
Use a cookie scoop for uniform sizes. This isn’t just about looks—it’s about even baking. If some cookies are bigger than others, the small ones will burn while the big ones are still raw. A 1.5-tablespoon scoop gives you consistent results every time.
Variations & Adaptations
One of the best things about this recipe is how flexible it is. Here are some variations I’ve tried and loved:
Dairy-Free Version: Substitute the butter with a high-quality vegan butter (I like Earth Balance) and use a dairy-free eggnog. The texture will be slightly different—a little less tender—but the flavor is still spot-on. I made these for a friend with a dairy allergy and she couldn’t tell the difference.
Gluten-Free Option: Swap the all-purpose flour with a 1:1 gluten-free baking flour blend. I’ve tested this with Bob’s Red Mill and King Arthur Measure for Measure, and both work well. Add an extra tablespoon of cornstarch to help with tenderness. The cookies won’t spread quite as much, so flatten them slightly with the bottom of a glass before baking.
Spiced-Up Version: Add 1/4 teaspoon of ground cloves and 1/4 teaspoon of ground ginger to the dough. This gives the cookies a gingerbread-eggnog hybrid flavor that’s absolutely addictive. I did this on a whim one December afternoon and ended up making three batches in one week.
Eggnog Glaze: Mix 1 cup of powdered sugar with 2-3 tablespoons of eggnog and a pinch of nutmeg. Drizzle it over the cooled cookies for an extra layer of sweetness. This turns them into more of a dessert cookie, perfect for holiday parties. Just be aware they’ll be a little messier to store.
White Chocolate Chips: Fold in 1/2 cup of white chocolate chips at the end of mixing. The sweetness of the white chocolate pairs beautifully with the spiced eggnog flavor. My kids go crazy for this version.
Serving & Storage Suggestions
These cookies are best served slightly warm, when the centers are still soft and the edges have that perfect snap. If you’re serving them at a party, arrange them on a festive platter and dust with a little extra powdered sugar and nutmeg for a pretty presentation. They pair beautifully with a hot cup of coffee, spiced tea, or—you guessed it—a glass of cold eggnog.
For storage, let the cookies cool completely before putting them in an airtight container. They’ll stay fresh at room temperature for up to 5 days. I like to layer them between sheets of parchment paper to prevent them from sticking together. The flavor actually improves after a day or two as the spices meld together.
To freeze, place the cooled cookies in a single layer on a baking sheet and freeze until solid. Transfer them to a freezer-safe bag or container, and they’ll keep for up to 3 months. When you’re ready to enjoy them, let them thaw at room temperature for about 30 minutes. You can also freeze the unbaked dough balls—just roll them in the coating, place them on a baking sheet, freeze until solid, then transfer to a bag. Bake straight from frozen, adding 1-2 minutes to the baking time.
One thing I’ve noticed: these cookies stay chewy longer than most snickerdoodle recipes. The cornstarch and the eggnog both help retain moisture, so even on day four, they’re still soft and delicious. Not that they usually last that long in my house.
Nutritional Information & Benefits
Let’s be real—these are cookies, not health food. But here’s the estimated nutritional breakdown per cookie (based on 24 cookies):
- Calories: 165
- Fat: 8g
- Carbohydrates: 22g
- Protein: 2g
- Sugar: 14g
- Sodium: 95mg
That said, there are a few redeeming qualities. Eggnog is a good source of calcium and vitamin D, and the cinnamon and nutmeg both have anti-inflammatory properties. Plus, there’s something to be said for the mental health benefits of baking and sharing homemade treats with the people you love. I firmly believe that food made with care and shared with joy is good for the soul, even if it’s not technically a superfood.
If you’re watching your sugar intake, you can reduce the sugar in the dough to 3/4 cup without affecting the texture too much. The coating sugar is harder to reduce because it’s what gives the cookies that signature crackle, but you can use a lighter coating if needed.
Conclusion
I know I’m biased, but these Chewy Eggnog Snickerdoodle Cookies have become my go-to holiday recipe for a reason. They’re simple enough for a busy weeknight, special enough for a cookie swap, and delicious enough that people will ask you for the recipe every single time. The combination of warm spices, tender texture, and that classic snickerdoodle tang is just unbeatable.
I’d love for you to try this recipe and make it your own. Maybe you’ll add white chocolate chips like my kids prefer, or maybe you’ll go for the spiced-up version with cloves and ginger. Whatever you do, don’t be afraid to experiment. That’s how this recipe was born in the first place—from a moment of panic and a half-empty carton of eggnog.
If you make these, come back and let me know how they turned out. Leave a comment below, share a photo, or tell me about your own happy accidents in the kitchen. I read every single comment, and nothing makes me happier than hearing that a recipe brought someone joy. Happy baking, friends!
Frequently Asked Questions
Can I use low-fat eggnog?
You can, but the cookies won’t be as rich or tender. Full-fat eggnog has more fat and sugar, which contributes to the texture and flavor. If you only have low-fat, add an extra tablespoon of butter to compensate.
Why did my cookies turn out flat?
This usually happens when the butter is too soft or the dough is too warm. Make sure your butter is softened but not melted, and if your kitchen is warm, pop the shaped dough balls in the fridge for 15 minutes before baking. Also, check that your baking soda is fresh—old baking soda loses its leavening power.
Can I make these cookies without cream of tartar?
Yes, but the texture will be different. Cream of tartar gives snickerdoodles their distinctive tang and helps with the chewy texture. You can substitute with 2 teaspoons of lemon juice or white vinegar, but the flavor won’t be quite the same. Alternatively, you can just leave it out and add an extra 1/2 teaspoon of baking powder.
How do I get that perfect crackle on top?
The key is rolling the dough balls generously in the cinnamon-sugar mixture and not overbaking. The cracks form as the cookies rise and spread in the oven. If you want even more crackle, let the coated dough balls sit at room temperature for 10 minutes before baking—this allows the sugar to start dissolving and creates more surface cracks.
Can I double this recipe?
Absolutely. This recipe doubles beautifully. Just make sure you’re using a large enough bowl for the dough, and bake in batches rather than trying to fit too many cookies on one sheet. You might need to add an extra minute or two to the baking time if you’re using a larger mixer and the dough is warmer from extended mixing.
Pin This Recipe!
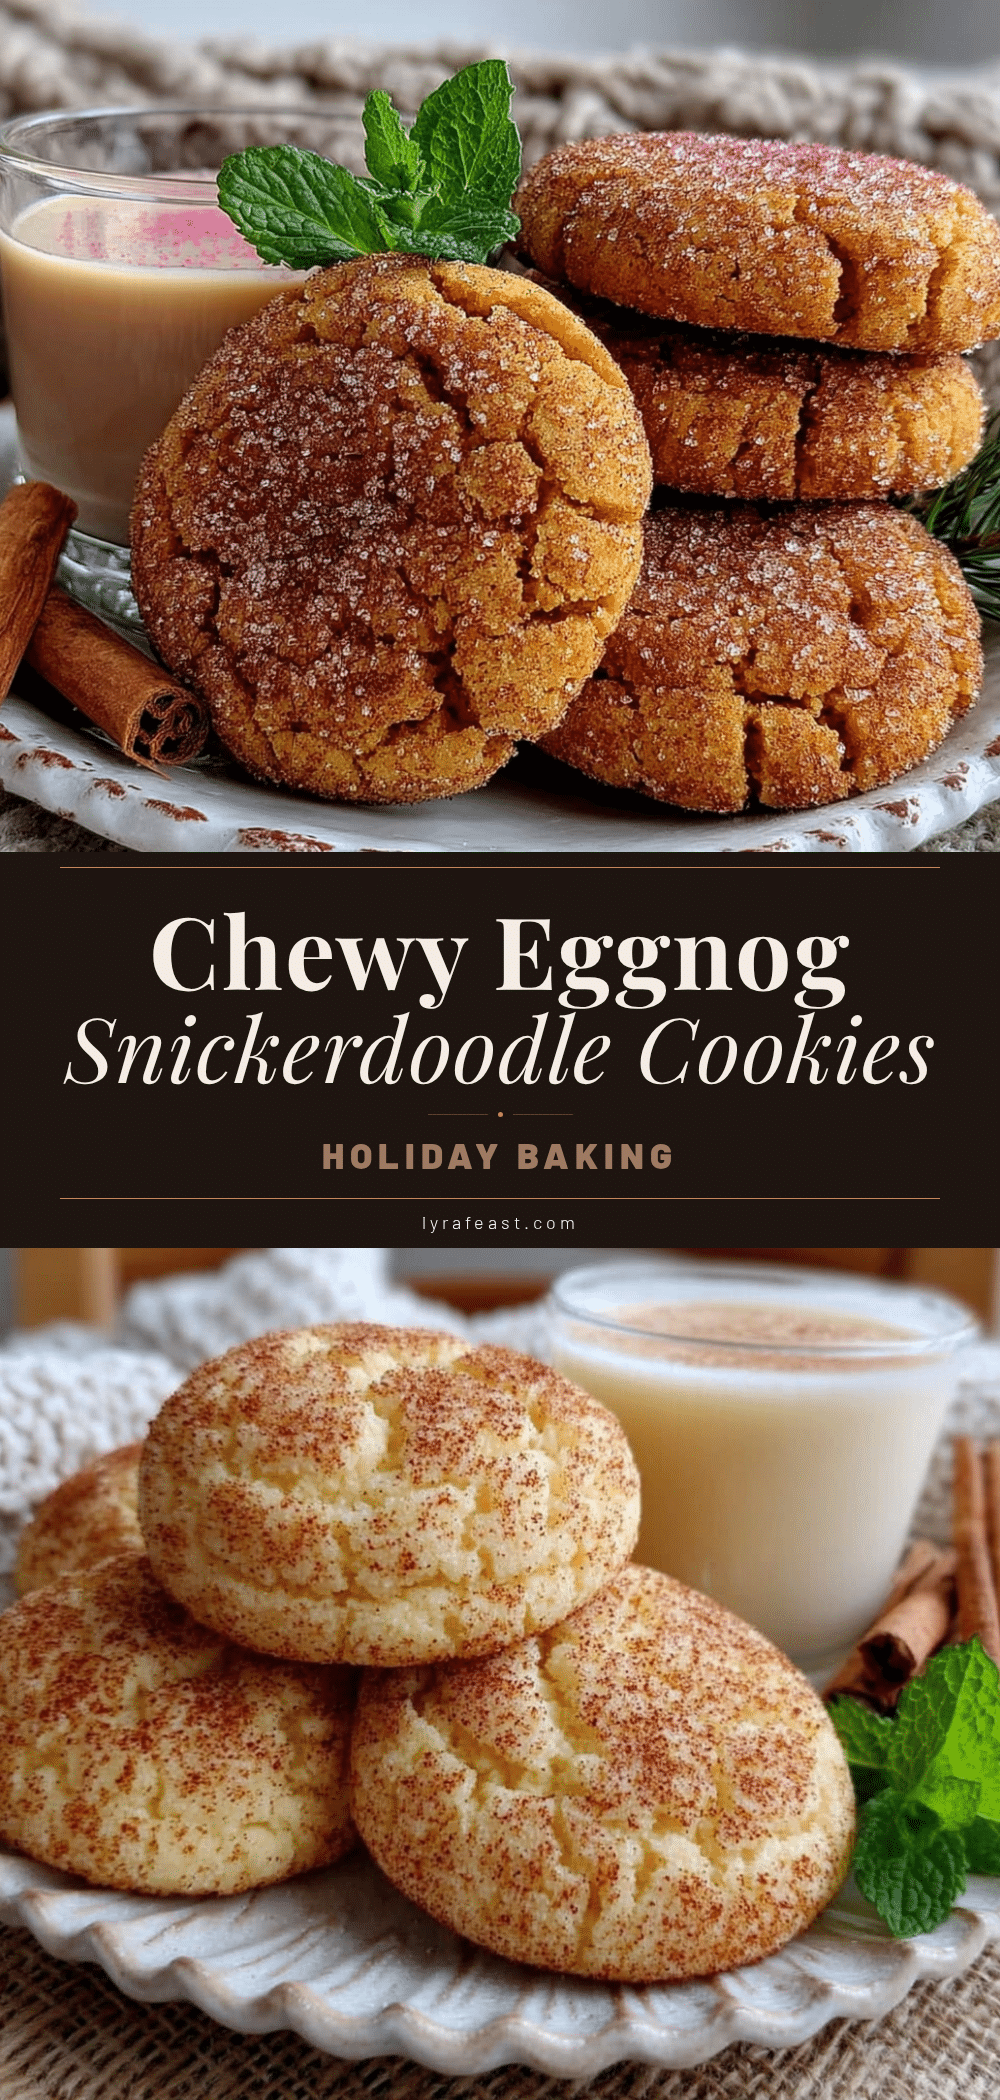
Chewy Eggnog Snickerdoodle Cookies: Easy 30-Min Recipe

These soft and chewy eggnog snickerdoodle cookies are a quick and easy holiday treat, made in just 30 minutes with simple ingredients. Perfect for cookie swaps, parties, or cozy nights by the fire.
- Prep Time: 15 minutes
- Cook Time: 12 minutes
- Total Time: 27 minutes
- Yield: 24 cookies 1x
- Category: Dessert
- Cuisine: American
Ingredients
- 1 cup (226g) unsalted butter, softened
- 1 cup (200g) granulated sugar
- 1 large egg, room temperature
- 1/4 cup (60ml) full-fat eggnog
- 1 teaspoon vanilla extract
- 2 1/4 cups (280g) all-purpose flour
- 1 tablespoon cornstarch
- 1 teaspoon cream of tartar
- 1/2 teaspoon baking soda
- 1/2 teaspoon salt
- 1/2 teaspoon ground nutmeg
- 1/2 teaspoon ground cinnamon
- For the coating:
- 1/4 cup (50g) granulated sugar
- 1 tablespoon ground cinnamon
- 1/2 teaspoon ground nutmeg
Instructions
- Preheat oven to 350°F (175°C). Line two baking sheets with parchment paper.
- In a medium bowl, whisk together flour, cornstarch, cream of tartar, baking soda, salt, nutmeg, and cinnamon.
- In a large bowl, beat softened butter and granulated sugar together until light and fluffy, about 2-3 minutes.
- Add egg, eggnog, and vanilla extract; beat on low until just combined.
- Gradually add dry ingredients to wet ingredients, mixing on low until just combined. Do not overmix.
- In a small bowl, mix together coating ingredients: sugar, cinnamon, and nutmeg.
- Scoop dough into 1.5-tablespoon portions. Roll each ball in the cinnamon-nutmeg mixture until fully coated.
- Place coated dough balls 2 inches apart on prepared baking sheets.
- Bake for 10-12 minutes, until edges are set and centers look slightly underdone.
- Let cookies cool on baking sheet for 5 minutes, then transfer to a wire rack to cool completely.
Notes
For thicker, chewier cookies, chill shaped dough balls for 30 minutes before baking. Rotate baking sheets halfway through for even browning. Use room temperature ingredients for best results. Cookies stay fresh in an airtight container for up to 5 days.
Nutrition
- Serving Size: 1 cookie
- Calories: 165
- Sugar: 14
- Sodium: 95
- Fat: 8
- Saturated Fat: 5
- Carbohydrates: 22
- Fiber: 1
- Protein: 2
Keywords: eggnog snickerdoodle cookies, chewy snickerdoodle, easy holiday cookies, 30-minute cookies, eggnog cookies



