“You know,” my neighbor Ruth once said while handing me a jar of her homemade pickles, “these pickles are what got me through many a long winter.” I wasn’t much of a pickle person back then—always thought they were too sour or too salty. But Ruth’s pickles? They had this perfect balance, like a gentle tug on memory strings. It wasn’t until I tried to make my own batch that I realized what made her classic old-fashioned dill pickles stand apart.
One slow Sunday, I found myself digging through my grandmother’s handwritten recipe box. Tucked between faded index cards was a note with a few scribbles—simple ingredients but a promise of big flavor. Honestly, it felt like holding a secret handed down with care. I gave it a shot, even though I forgot to sterilize the jars on my first try (classic me), and the result was surprisingly close to Ruth’s and my grandma’s versions.
Maybe you’ve been there—craving that crisp, tangy bite that takes you back to a kitchen filled with laughter and the smell of vinegar and dill. This recipe is for those moments. It’s a little bit of the past, bottled up and ready to brighten your sandwiches, snack time, or whatever way you love your pickles. So let me tell you how to make classic old-fashioned dill pickles like grandma made them—no fuss, just honest, satisfying flavor that sticks with you.
Why You’ll Love This Recipe
This classic old-fashioned dill pickles recipe has been tested and tweaked until it hits that nostalgic note every single time. Whether you’re a pickle purist or just looking for an easy homemade treat, this recipe is a keeper.
- Quick & Easy: Ready to enjoy in just a few days, perfect when you want fresh pickles without waiting weeks.
- Simple Ingredients: Pantry staples like cucumbers, garlic, and dill—no fancy or hard-to-find items required.
- Perfect for Snacking & Sandwiches: Adds that perfect crunch and tang to burgers, deli sandwiches, or just on their own.
- Crowd-Pleaser: Family-tested and friend-approved, these pickles never last long at any gathering.
- Unbelievably Delicious: The balance of sour, salty, and herbal notes makes these pickles irresistible.
What sets this recipe apart is the careful layering of flavors—fresh dill and garlic mingle with a vinegar brine that’s just tangy enough without overpowering the cucumber’s crispness. I’ve found that letting the pickles sit at room temperature for a day before refrigerating really brings out the best flavor. Honestly, it’s the kind of pickle you’ll find yourself reaching for again and again, each bite sparking a little bit of that warm, comforting feeling only grandma’s cooking can inspire.
What Ingredients You Will Need
This recipe uses simple, wholesome ingredients to deliver bold flavor and satisfying crunch without fuss. Most of these you probably have on hand, and if you don’t, they’re easy to find at any grocery store or farmer’s market.
- Pickling Cucumbers: About 2 pounds (900g), preferably small to medium-sized and firm (look for Kirby cucumbers if you can, as they hold up well).
- Fresh Dill: 3-4 large sprigs or about 1/4 cup of dill heads (adds that signature flavor).
- Garlic Cloves: 4-5 cloves, peeled and lightly crushed (brings aromatic depth).
- White Vinegar: 2 cups (480ml), use 5% acidity for proper pickling.
- Water: 2 cups (480ml), filtered or distilled works best for clean taste.
- Pickling Salt: 2 tablespoons (use kosher or canning salt—avoid iodized salts that can cloud the brine).
- Whole Black Peppercorns: 1 tablespoon (adds subtle spice).
- Mustard Seeds: 1 teaspoon (optional, for a slight tangy warmth).
- Dried Red Pepper Flakes: 1/2 teaspoon (optional, if you like a little heat).
For best results, I recommend Morton’s kosher salt and Bragg’s apple cider vinegar if you want a slight twist on the vinegar’s sharpness. If you want gluten-free pickles, double-check your spices to avoid any additives. In summer, you might swap fresh garlic with roasted garlic for a mellower flavor, but honestly, the classic raw garlic punch is hard to beat.
Equipment Needed
- Glass Mason Jars: 2 pint (500ml) jars with lids and bands work perfectly. I prefer Ball jars because of their reliable seal.
- Large Pot: For boiling the brine and sterilizing jars.
- Tongs: Handy for handling hot jars safely.
- Mixing Bowl: To soak and rinse cucumbers, if needed.
- Measuring Cups and Spoons: For precise brine measurements.
- Sharp Knife or Mandoline: If you like sliced pickles, otherwise, whole or spears work fine.
If you don’t have a mandoline, a sharp kitchen knife works just fine—take your time slicing evenly. For a budget-friendly option, reuse jars from store-bought pickles, but be sure to sterilize them well first. I once tried using plastic containers and honestly, the flavor just wasn’t the same, so glass is really the way to go here.
Preparation Method
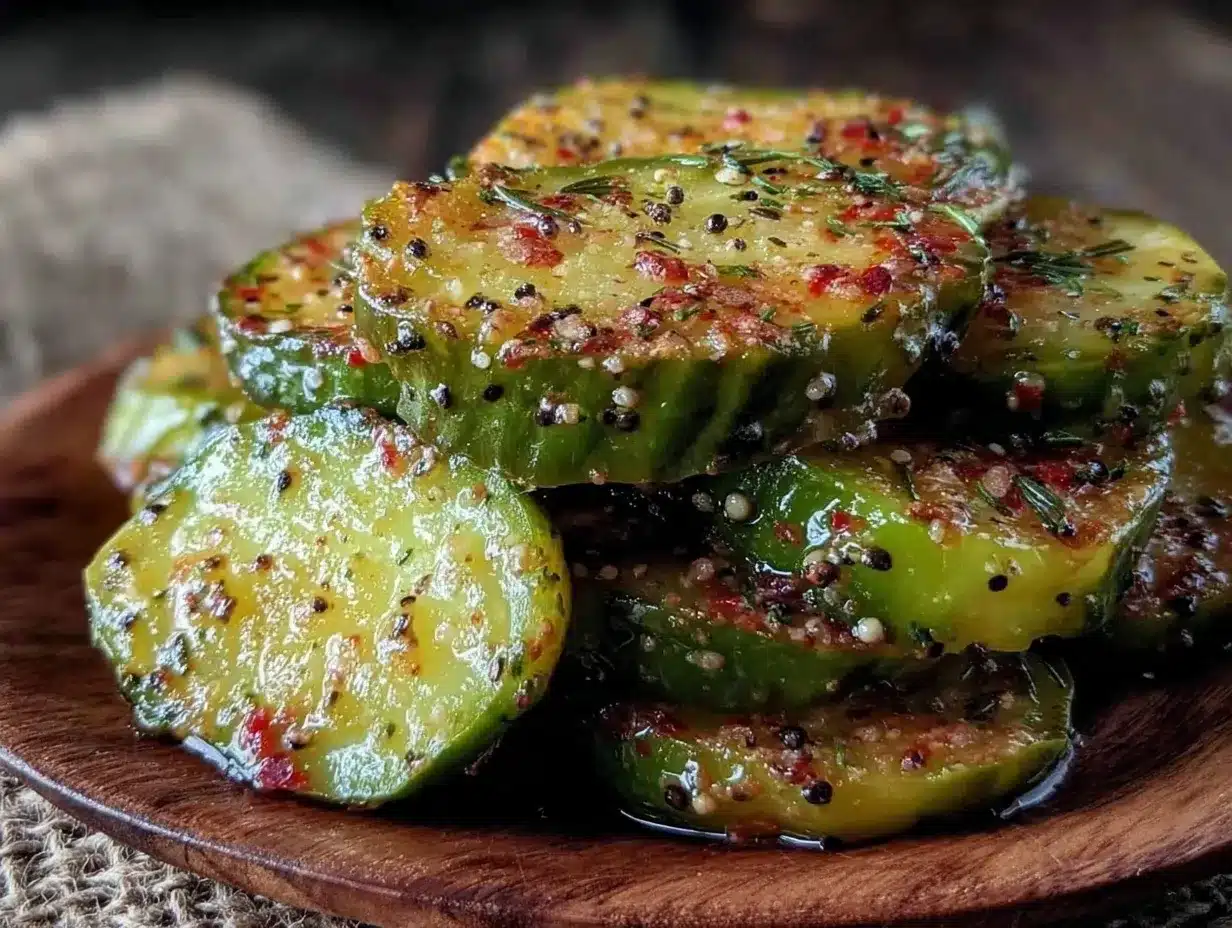
- Prepare the Cucumbers: Wash 2 pounds (900g) of pickling cucumbers thoroughly. Trim off the blossom end (the opposite of the stem) to prevent softening. For whole pickles, leave them as is; for spears, slice lengthwise into quarters. This step usually takes about 5-10 minutes.
- Sterilize the Jars: Place your glass mason jars and lids into a large pot filled with water. Bring to a boil and let simmer for 10 minutes to sterilize. Use tongs to carefully remove and place jars upside down on a clean towel. This ensures your pickles stay fresh longer.
- Make the Brine: In a saucepan, combine 2 cups (480ml) white vinegar, 2 cups (480ml) water, and 2 tablespoons pickling salt. Bring to a gentle boil, stirring until the salt dissolves. Remove from heat.
- Pack the Jars: Into each sterilized jar, place 1-2 sprigs of fresh dill, 2-3 crushed garlic cloves, 1/2 tablespoon whole black peppercorns, and a pinch of mustard seeds and red pepper flakes if using. Then pack the cucumbers tightly but without crushing.
- Pour the Brine: Carefully pour the hot brine over the cucumbers, leaving about 1/2 inch (1.3cm) headspace at the top. Use a clean utensil to release any trapped air bubbles by gently pressing around the cucumbers.
- Seal the Jars: Wipe rims with a clean cloth, place lids on top, and screw on bands until fingertip tight (don’t overtighten). Let jars cool to room temperature, then refrigerate.
- Wait & Enjoy: For best flavor, wait at least 3 days before tasting. They’ll keep well in the fridge for up to 2 months, but honestly, they rarely last that long.
Pro tip: If you want crispier pickles, soak the cucumbers in ice water for an hour before packing. I once skipped this step in a rush, and the pickles were… a little softer than I wanted. Lesson learned. Also, avoid using table salt—iodized salt can cloud your brine and affect flavor.
Cooking Tips & Techniques
Making classic old-fashioned dill pickles might sound simple, but a few tricks can make all the difference.
- Keep Cucumbers Crisp: Always use fresh, firm cucumbers. Older or overly ripe ones tend to get mushy. Removing the blossom end helps prevent enzymes from softening your pickles.
- Salt Matters: Use pickling or kosher salt, never table salt. It dissolves properly and won’t cloud your brine.
- Brine Temperature: Pour hot brine over the cucumbers to help flavors meld quickly, but don’t boil the cucumbers themselves—this keeps them crunchy.
- Jar Sealing: Don’t overtighten the lids—just finger-tight is enough. Over-tightening can prevent air from escaping and cause off flavors.
- Patience is Key: While it’s tempting to taste right away, at least three days in the fridge will give the flavors time to marry beautifully.
Once, I tried quick pickling without crushing the garlic cloves. The flavor was a bit flat. Crushing the garlic releases essential oils that make a world of difference. Also, if you see any cloudy brine or scum forming, that’s usually harmless yeast—just skim it off and keep going. It’s part of the charm of homemade pickling.
Variations & Adaptations
This classic recipe is a great base to make your own by switching up flavors or methods.
- Spicy Dill Pickles: Add extra crushed red pepper flakes or a sliced jalapeño to the jar for a kick.
- Garlic Lover’s Pickles: Increase the garlic cloves to 8-10 for a bolder punch.
- Refrigerator Bread-and-Butter Style: Add 1/4 cup sugar and 1 teaspoon mustard seeds for a sweeter, tangier pickle (not quite old-fashioned but a fun twist).
- Fermented Pickles: Skip the vinegar and use a saltwater brine to ferment cucumbers over 1-2 weeks at room temp for a probiotic boost and complex flavor.
- Dill Pickles with Fresh Herbs: Toss in fresh thyme or oregano sprigs for a herby twist.
One time I tried substituting apple cider vinegar for white vinegar, and the pickles took on a milder, fruitier note that was surprisingly good. If you’re gluten-free or avoiding additives, stick with pure vinegars and check your spices carefully. For a crunch boost, adding a few grape leaves or horseradish leaves to the jar is an old trick that works wonders.
Serving & Storage Suggestions
These pickles are best served cold straight from the fridge. They brighten up any sandwich, burger, or charcuterie board and are fantastic as a snack on their own. For a classic touch, serve them alongside homemade potato salad or with a side of creamy ranch dip.
Store your pickles in the refrigerator for up to 2 months. The flavor will deepen over time, so if you can wait, the pickles only get better. Just make sure to use a clean fork when serving to keep everything fresh. Reheating isn’t needed here—these are best enjoyed crisp and chilled.
One trick: if you want to pack a picnic or take pickles on the go, pack them in a sealed container with some of the brine to keep them moist and flavorful. They’re a great way to add zest to simple meals outdoors.
Nutritional Information & Benefits
One serving (about 2 ounces or 56g) of these classic old-fashioned dill pickles contains approximately:
| Calories | 10 |
|---|---|
| Carbohydrates | 2g |
| Fiber | 1g |
| Sodium | 500mg (varies depending on salt) |
Pickles are low in calories and provide some vitamin K from the cucumbers and dill. The vinegar may help with digestion, and homemade pickles avoid preservatives and artificial ingredients often found in store-bought versions. Just watch your sodium intake if you’re sensitive to salt.
For those watching carbs, these are a great low-carb snack. If you want probiotic benefits, try fermenting instead of vinegar pickling. Personally, I find these pickles a satisfying and wholesome treat that fits well into a balanced diet.
Conclusion
Making classic old-fashioned dill pickles like grandma made is both rewarding and delicious. It’s a simple recipe that brings a touch of nostalgia and real flavor to your kitchen. I love how these pickles are easy to make, don’t require fancy ingredients, and always impress friends and family whether at a barbecue or a casual lunch.
Feel free to adjust the garlic, spice level, or brine to suit your taste—this recipe is a wonderful starting point that welcomes your creativity. Honestly, there’s nothing quite like cracking open a jar of homemade pickles and tasting a little piece of the past.
If you give this recipe a try, I’d love to hear how your batch turns out or any unique spins you add. Drop a comment below and share your pickle adventures—let’s keep this delicious tradition alive!
Frequently Asked Questions
How long do homemade dill pickles last in the fridge?
They typically last up to 2 months when kept refrigerated in a sealed jar with brine. Always check for off smells or mold before eating.
Can I use regular cucumbers instead of pickling cucumbers?
Pickling cucumbers are best for crunch and size, but regular cucumbers can work if you slice them thinly and pickle quickly.
Do I need to sterilize jars if I’m refrigerating the pickles?
While refrigeration slows spoilage, sterilizing jars helps prevent bacteria and prolongs shelf life, so it’s recommended.
Can I make these pickles without garlic?
Yes, but garlic is key to the classic flavor. You can omit or substitute with shallots or onion slices for a milder taste.
What’s the difference between quick pickles and fermented pickles?
Quick pickles use vinegar brine and are ready in days, while fermented pickles rely on natural bacteria and saltwater brine, taking weeks and offering probiotic benefits.
For more classic recipes with homemade charm, you might enjoy my crispy garlic chicken or the ever-popular homemade apple pie recipes that bring that same comforting feeling to your table.
PrintClassic Old-Fashioned Dill Pickles Recipe Easy Homemade Pickles Like Grandma Made
This classic old-fashioned dill pickles recipe delivers a perfect balance of sour, salty, and herbal notes with a satisfying crunch. Easy to make with simple ingredients, these pickles are ready in just a few days and bring nostalgic flavor to any meal.
- Prep Time: 15 minutes
- Cook Time: 10 minutes
- Total Time: 3 days and 25 minutes
- Yield: 2 pint jars (about 8 servings) 1x
- Category: Condiment
- Cuisine: American
Ingredients
- 2 pounds (900g) pickling cucumbers, preferably small to medium-sized and firm (Kirby cucumbers recommended)
- 3–4 large sprigs fresh dill or about 1/4 cup dill heads
- 4–5 garlic cloves, peeled and lightly crushed
- 2 cups (480ml) white vinegar (5% acidity)
- 2 cups (480ml) water, filtered or distilled
- 2 tablespoons pickling salt (kosher or canning salt, avoid iodized salt)
- 1 tablespoon whole black peppercorns
- 1 teaspoon mustard seeds (optional)
- 1/2 teaspoon dried red pepper flakes (optional)
Instructions
- Wash 2 pounds (900g) of pickling cucumbers thoroughly. Trim off the blossom end to prevent softening. For whole pickles, leave as is; for spears, slice lengthwise into quarters. This takes about 5-10 minutes.
- Sterilize glass mason jars and lids by placing them in a large pot of boiling water. Simmer for 10 minutes, then remove with tongs and place upside down on a clean towel.
- In a saucepan, combine 2 cups white vinegar, 2 cups water, and 2 tablespoons pickling salt. Bring to a gentle boil, stirring until salt dissolves. Remove from heat.
- Place 1-2 sprigs of fresh dill, 2-3 crushed garlic cloves, 1/2 tablespoon whole black peppercorns, and a pinch of mustard seeds and red pepper flakes (if using) into each sterilized jar. Pack cucumbers tightly but without crushing.
- Pour the hot brine over the cucumbers, leaving about 1/2 inch headspace. Use a clean utensil to release trapped air bubbles by gently pressing around the cucumbers.
- Wipe jar rims with a clean cloth, place lids on top, and screw on bands until fingertip tight. Let jars cool to room temperature, then refrigerate.
- Wait at least 3 days before tasting. Pickles keep well in the fridge for up to 2 months.
Notes
For crispier pickles, soak cucumbers in ice water for an hour before packing. Avoid iodized salt to prevent cloudy brine. Do not overtighten jar lids; finger-tight is sufficient. Let pickles sit at room temperature before refrigerating to enhance flavor. Crushing garlic cloves releases essential oils for better flavor. Use fresh, firm cucumbers and remove blossom ends to prevent softening.
Nutrition
- Serving Size: About 2 ounces (56g)
- Calories: 10
- Sodium: 500
- Carbohydrates: 2
- Fiber: 1
Keywords: dill pickles, homemade pickles, old-fashioned pickles, easy pickles, quick pickles, refrigerator pickles, crunchy pickles, garlic pickles



