My neighbor, Mrs. Gable, wasn’t making a big deal of it. I’d stopped by to return her measuring cup—the one I’d borrowed three weeks prior and felt terrible about keeping—and the smell hit me before I even got to her screen door. It was this cool, sweet, vanilla-tinged cloud that smelled like summer afternoons and the kind of dessert you close your eyes for. She was standing at her counter, casually layering vanilla wafers into a glass dish like she was stacking poker chips, not building what I would later learn was the most dangerously addictive dessert on the planet. “Oh, it’s just banana pudding,” she said when I asked, waving her hand like it was nothing. Just banana pudding. Sure. And the Grand Canyon is just a hole in the ground.
I stood there, honestly, a little starstruck. She wasn’t measuring anything. She wasn’t following a recipe taped to a cabinet. She was just… doing it. Pouring sweetened condensed milk straight from the can, folding in cool whipped topping, layering bananas that were perfectly ripe—not too green, not too mushy. I asked her how she knew when it was done, and she laughed. “Honey, you just feel it.” That stuck with me. I mean, maybe you’ve been there—watching someone cook without a net, completely in their element, and realizing that’s the kind of cook you want to be. That day, I decided I was going to learn how to make this creamy no-bake banana pudding icebox cake for a crowd, and I was going to make it just like she did: effortless, perfect, and without a single second of stress.
This isn’t your grandmother’s banana pudding, though I bet she’d approve. This is a no-bake banana pudding icebox cake that feeds a crowd without breaking a sweat. It’s layered, it’s creamy, it’s got that perfect crunch from the wafers that soften just enough overnight to taste like cake. And the best part? You don’t turn on the oven. Not once. I’ve been making this for every potluck, every family reunion, every “I need to bring dessert for 20 people” moment for the last five years, and it never, ever fails. Let me tell you why this recipe became my go-to.
Why You’ll Love This Recipe
Let’s be real for a second. Desserts that feed a crowd usually come with a side of stress. You’ve got to bake multiple layers, worry about timing, and pray the cake doesn’t collapse on the drive over. This creamy no-bake banana pudding icebox cake laughs in the face of all that. It’s the dessert equivalent of a deep breath.
- No-Bake Wonder: The oven stays off. Seriously. This is a game-changer in the summer or when you’re already juggling a million other dishes.
- Feeds a Crowd Easily: Made in a 9×13 dish, this recipe easily serves 12-16 people. It’s the perfect potluck, picnic, or holiday dessert.
- Simple, Honest Ingredients: You probably have most of these in your pantry right now. No complicated extracts or hard-to-find items. Just real, recognizable food.
- Make-Ahead Magic: This cake needs to chill for at least 4 hours, but overnight is best. That means you can make it the day before your event and cross “dessert” off your list completely.
- Always a Crowd-Pleaser: I have never, and I mean never, brought this somewhere and brought home leftovers. It’s the first thing to disappear. Kids love it, adults fight over the last spoonful.
What makes this recipe different from the dozens of other banana pudding recipes out there? It’s the texture. The combination of instant pudding mix, sweetened condensed milk, and cream cheese creates a filling that’s unbelievably rich and stable. It doesn’t get runny or weepy overnight. It slices like a dream. It’s a no-bake banana pudding icebox cake that actually holds its shape, which is a miracle in the dessert world. This isn’t just another version—it’s the best version. It’s the one you’ll text your friends about.
What Ingredients You Will Need
This recipe uses simple, wholesome ingredients to deliver a dessert that tastes like you spent hours in the kitchen. The magic is in how they layer together. Here’s your shopping list, broken down so you know exactly what each part does.
- For the Creamy Filling:
- 1 (8-ounce) package cream cheese, softened: This is the secret to the structure. It gives the filling body and a slight tang that balances the sweetness. Make sure it’s really soft, or you’ll end up with lumps. (I’ve been there. It’s not the end of the world, but smooth is better.)
- 1 (14-ounce) can sweetened condensed milk: This is your sweetener and your texture hero. It makes the filling silky and rich. Don’t skip it.
- 1 (5.1-ounce) box instant vanilla pudding mix: Use the instant kind, not cook-and-serve. Jell-O brand is my go-to, but store brands work just fine. This thickens everything up and adds that classic pudding flavor.
- 3 cups cold whole milk: Whole milk gives the best creamy result, but 2% works in a pinch. Skim milk will make the pudding a little thinner.
- 1 (8-ounce) tub frozen whipped topping (like Cool Whip), thawed: This lightens the filling and makes it fluffy. You’ll use some in the filling and save the rest for the top.
- For the Layers:
- 1 (12-ounce) box vanilla wafers: Nilla Wafers are the classic choice. You’ll use almost the whole box. Don’t crush them—you want whole cookies for that iconic texture.
- 4-5 large ripe bananas: The riper the banana, the more flavor. You want them yellow with a few brown spots, but not mushy. Slice them into ¼-inch rounds just before layering so they don’t brown.
- For the Topping (Optional but Recommended):
- Remaining whipped topping: From the tub you bought.
- Crushed vanilla wafers: For a pretty garnish.
- Extra banana slices: For the top, but add them right before serving so they don’t turn brown.
Ingredient Tips from My Kitchen: I’ve tested this with different brands, and I really do recommend the Jell-O instant pudding for the most reliable set. Also, don’t be tempted to use low-fat cream cheese. The full-fat version is what gives this no-bake banana pudding icebox cake its luxurious, stable texture. If you need a dairy-free option, you can try a vegan cream cheese and a plant-based milk, but I can’t guarantee the same structure—it’s a bit of a science project.
Equipment Needed
You don’t need a fancy kitchen to pull this off. Here’s what you’ll need:
- A 9×13-inch baking dish: This is the standard size for feeding a crowd. Glass is great because you can see the layers.
- Two large mixing bowls: One for the pudding, one for the cream cheese mixture. Stainless steel or glass works best.
- An electric hand mixer or stand mixer: You can whisk by hand, but an electric mixer makes getting the cream cheese smooth a million times easier. Trust me on this one.
- A rubber spatula: For folding the whipped topping and scraping every last bit of filling into the dish.
- A sharp knife and cutting board: For slicing the bananas.
- Measuring cups and spoons: For the milk.
- Plastic wrap: Essential for covering the dish while it chills.
Budget-Friendly Tip: Don’t have a 9×13 dish? You can use two 8×8 square pans or even a large trifle bowl. The layers will just be different, but the taste is the same. I once made this in a disposable aluminum pan for a camping trip, and it worked perfectly. No fancy equipment required.
Preparation Method
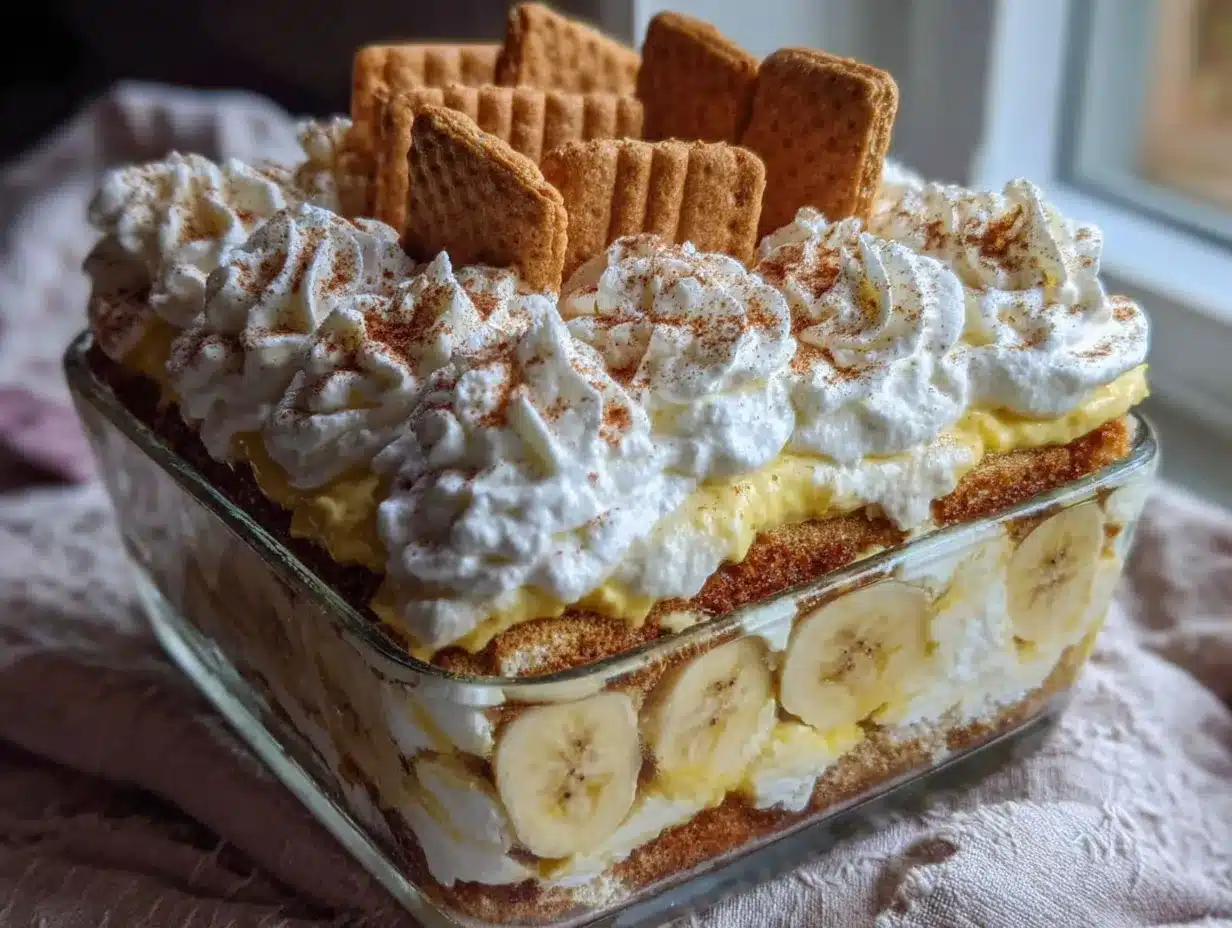
Alright, let’s get to it. This is where the magic happens. Follow these steps, and you’ll have a dessert that looks like you fussed for hours.
- Make the Pudding Base: In your first large mixing bowl, whisk together the instant vanilla pudding mix and the 3 cups of cold milk. Whisk for about 2 minutes until it starts to thicken. It will be loose at first, then it will firm up. Set it aside to rest for 5 minutes. This gives the pudding time to set up properly.
- Whip the Cream Cheese: In your second mixing bowl, beat the softened cream cheese with an electric mixer on medium speed until it’s completely smooth and fluffy—about 2-3 minutes. Scrape down the sides of the bowl with your spatula. This step is crucial. If your cream cheese is lumpy, your filling will be lumpy. Make sure it’s at room temperature!
- Add the Sweetened Condensed Milk: Pour the sweetened condensed milk into the bowl with the cream cheese. Beat on low speed until combined, then increase to medium and beat for another minute until the mixture is light and airy. It should look like a thick, creamy frosting.
- Combine the Mixtures: Pour the prepared pudding into the cream cheese mixture. Beat on low speed until just combined. Don’t overmix, or you’ll deflate the air you just whipped in.
- Fold in the Whipped Topping: Gently fold in about 1 ½ cups of the thawed whipped topping into the pudding-cream cheese mixture. Use your rubber spatula and a gentle hand. Fold until you don’t see any white streaks. This makes the filling light and luscious. The remaining whipped topping will go on top later.
- Layer the Bottom: Spread a thin layer (about 1 cup) of the filling mixture on the bottom of your 9×13 dish. This creates a “glue” for the first layer of cookies.
- First Cookie Layer: Arrange a single layer of vanilla wafers over the filling. Cover the bottom completely. Don’t be shy—you want a solid layer. It’s okay if they touch.
- Banana Time: Slice 2 of the bananas into ¼-inch rounds. Arrange half of the banana slices evenly over the cookie layer.
- Second Filling Layer: Spread half of the remaining filling mixture over the bananas. Use your spatula to spread it gently to the edges.
- Repeat the Layers: Add another layer of vanilla wafers, followed by the remaining banana slices, and then the rest of the filling mixture. Spread it smooth.
- Top with Whipped Topping: Spread the remaining whipped topping over the top of the cake. Use the back of a spoon to create little swirls and peaks for a pretty finish.
- Crush and Garnish: Crush a handful of extra vanilla wafers (about 10-12 cookies) and sprinkle them over the top. This adds a lovely crunch.
- The Hardest Part—Chill: Cover the dish tightly with plastic wrap. Refrigerate for at least 4 hours, but 8 hours or overnight is best. This is non-negotiable. The cookies need time to soften and absorb the moisture from the filling, turning into a cake-like texture. If you serve it too soon, the wafers will be crunchy and the cake won’t hold together.
- Serve Cold: When you’re ready to serve, slice the bananas for the top garnish (if using) and arrange them on the cake. Scoop or slice and serve cold.
Visual Cue: When you’re layering, the filling should be thick enough to hold the cookies in place. If it looks runny, give the pudding a few more minutes to set before you start layering. The final cake, after chilling, should slice cleanly and hold its shape beautifully.
Cooking Tips & Techniques
I’ve made this creamy no-bake banana pudding icebox cake more times than I can count, and I’ve learned a few things the hard way. Here’s how to nail it every time.
- Room Temperature Cream Cheese is a Must: I cannot stress this enough. Cold cream cheese will leave you with lumpy filling. Take it out of the fridge at least 30 minutes before you start. If you forget, you can microwave it in 10-second bursts, but be careful not to melt it.
- Don’t Skip the Rest: Let the pudding mix rest for the full 5 minutes after whisking. This gives the starches time to hydrate and thicken. If you rush it, your filling will be too thin.
- Slice Bananas Evenly: Try to slice your bananas into uniform rounds. This ensures every bite has a consistent banana flavor. If some slices are too thick, they can be a bit overwhelming.
- Work Quickly with Bananas: Bananas brown fast once sliced. Slice them just before you’re ready to add them to the layers. You can toss them in a little lemon juice to prevent browning, but I find it changes the flavor slightly.
- Press Down Gently: When you add the second layer of wafers, press them down ever so slightly into the filling. This helps them absorb the moisture and soften evenly.
- The Overnight Chill is Magic: If you can, let it sit overnight. The texture transforms completely. The wafers become soft and cake-like, and the flavors meld together into something truly special. It’s the difference between good and unforgettable.
Common Mistake to Avoid: Don’t overmix the whipped topping into the filling. You want to keep it light and airy. Overmixing will deflate it, making your filling dense instead of fluffy.
Variations & Adaptations
This recipe is a beautiful blank canvas. Here are a few ways to make it your own.
- Chocolate Lover’s Twist: Swap the vanilla pudding mix for a 5.1-ounce box of instant chocolate pudding. Use chocolate wafers instead of vanilla. It’s a bananas foster-meets-chocolate cake situation, and it’s incredible.
- Peanut Butter Dream: Add ½ cup of creamy peanut butter to the cream cheese mixture before adding the sweetened condensed milk. Beat until smooth. The peanut butter and banana combo is a classic for a reason.
- Berry Banana Version: Add a layer of fresh strawberries or blueberries between the banana layers. The tartness of the berries cuts through the sweetness beautifully. This is my go-to summer variation.
- Gluten-Free Adaptation: Use gluten-free vanilla wafers. Most brands are available in a gluten-free version now, and they work perfectly. The texture is identical.
- Make it a Trifle: Instead of a 9×13 dish, layer everything in a large trifle bowl. You’ll get beautiful, visible layers. This is a showstopper for parties.
I once made a version with crushed toffee bits sprinkled between the layers for a holiday party. It was gone in 20 minutes. The toffee adds a buttery crunch that’s just divine.
Serving & Storage Suggestions
This no-bake banana pudding icebox cake is best served cold, straight from the fridge. Here’s how to make it shine.
- Serving Temperature: Serve it well-chilled. It slices much cleaner when it’s cold. If it sits out for more than 30 minutes, the filling can start to soften.
- Presentation: For a pretty presentation, garnish the top with fresh banana slices and a few whole vanilla wafers just before serving. A dusting of cinnamon or cocoa powder is also lovely.
- What to Serve With It: A dollop of fresh whipped cream on top is never a bad idea. It pairs beautifully with a cup of strong coffee or a tall glass of cold milk.
- Storage: Cover the dish tightly with plastic wrap or a lid. Store in the refrigerator for up to 3 days. The texture will continue to soften over time, but it’s still delicious.
- Freezing: You can freeze this cake! Assemble it completely, but don’t add the banana garnish on top. Wrap the dish tightly in plastic wrap, then a layer of aluminum foil. Freeze for up to 2 months. Thaw overnight in the refrigerator before serving. The texture might be slightly different (a bit icier), but it’s still a fantastic make-ahead option.
Flavor Development Note: Honestly, this cake tastes even better on day two. The flavors have a chance to meld and deepen. The banana flavor becomes more pronounced, and the cookies are perfectly soft. Don’t be afraid to make it a day ahead.
Nutritional Information & Benefits
Let’s be honest: this is a treat. It’s not health food, and it shouldn’t be. But here’s a rough estimate for one serving (based on 16 servings).
| Nutrient | Amount per Serving |
|---|---|
| Calories | ~380-420 |
| Fat | 18g |
| Carbohydrates | 55g |
| Protein | 6g |
| Sugar | 38g |
Health Highlights: Bananas are a good source of potassium and vitamin B6. They also provide a bit of fiber. The milk and cream cheese add calcium and protein. Is it a superfood? No. But it’s a dessert that uses real ingredients, and there’s something to be said for that.
Dietary Considerations: This recipe contains dairy and gluten (from the wafers). It can be made gluten-free with a simple swap. It is not suitable for a vegan diet without significant modifications.
I believe in balance. This isn’t an everyday dessert, but when you’re feeding a crowd, it’s the kind of indulgence that brings people together. And that has its own kind of nutritional value.
Frequently Asked Questions
Can I use homemade whipped cream instead of Cool Whip?
Absolutely! Whip 1 ½ cups of heavy cream with 2 tablespoons of powdered sugar until stiff peaks form. Use it in place of the frozen whipped topping. It will be a bit less stable, but it’s delicious.
Why did my pudding turn out runny?
This usually happens if the pudding mix didn’t have enough time to set, or if you used a different milk fat percentage. Make sure you use whole milk and let the pudding rest for the full 5 minutes. Also, ensure your cream cheese is fully softened.
Can I use sugar-free pudding mix?
Yes, you can. The texture will be slightly different—sometimes a bit softer—but it works in a pinch. The sweetened condensed milk adds plenty of sweetness anyway.
How do I keep the bananas from turning brown?
Slice them right before layering. You can also toss them in a tablespoon of lemon juice or pineapple juice, but I find that changes the flavor. The best strategy is to work quickly and cover the cake tightly with plastic wrap so no air gets to the top layer of bananas.
Can I make this in a different size dish?
Yes! For an 8×8 pan, halve the recipe. For a larger crowd, you can double it and use a 10×15 or a large roasting pan. Just adjust the layering to fit the dish.
Conclusion
This creamy no-bake banana pudding icebox cake is more than just a dessert. It’s a solution. It’s the thing you bring when you want to impress without the stress. It’s the recipe that gets passed around at family gatherings, the one people ask for year after year. It’s the taste of summer, of potlucks, of sitting on a porch with a plate in your lap and a smile on your face.
I love this recipe because it’s forgiving. It’s simple. And it makes everyone around the table happy. Whether you stick to the classic version or try one of the variations, I hope you make it your own. Don’t be afraid to add a little extra of something you love—that’s what cooking is all about.
Now, I’d love to hear from you! Have you tried this recipe? Did you add a twist? Let me know in the comments below. And if you loved it, please share it with a friend who needs a little dessert magic in their life. Happy layering!
Pin This Recipe!
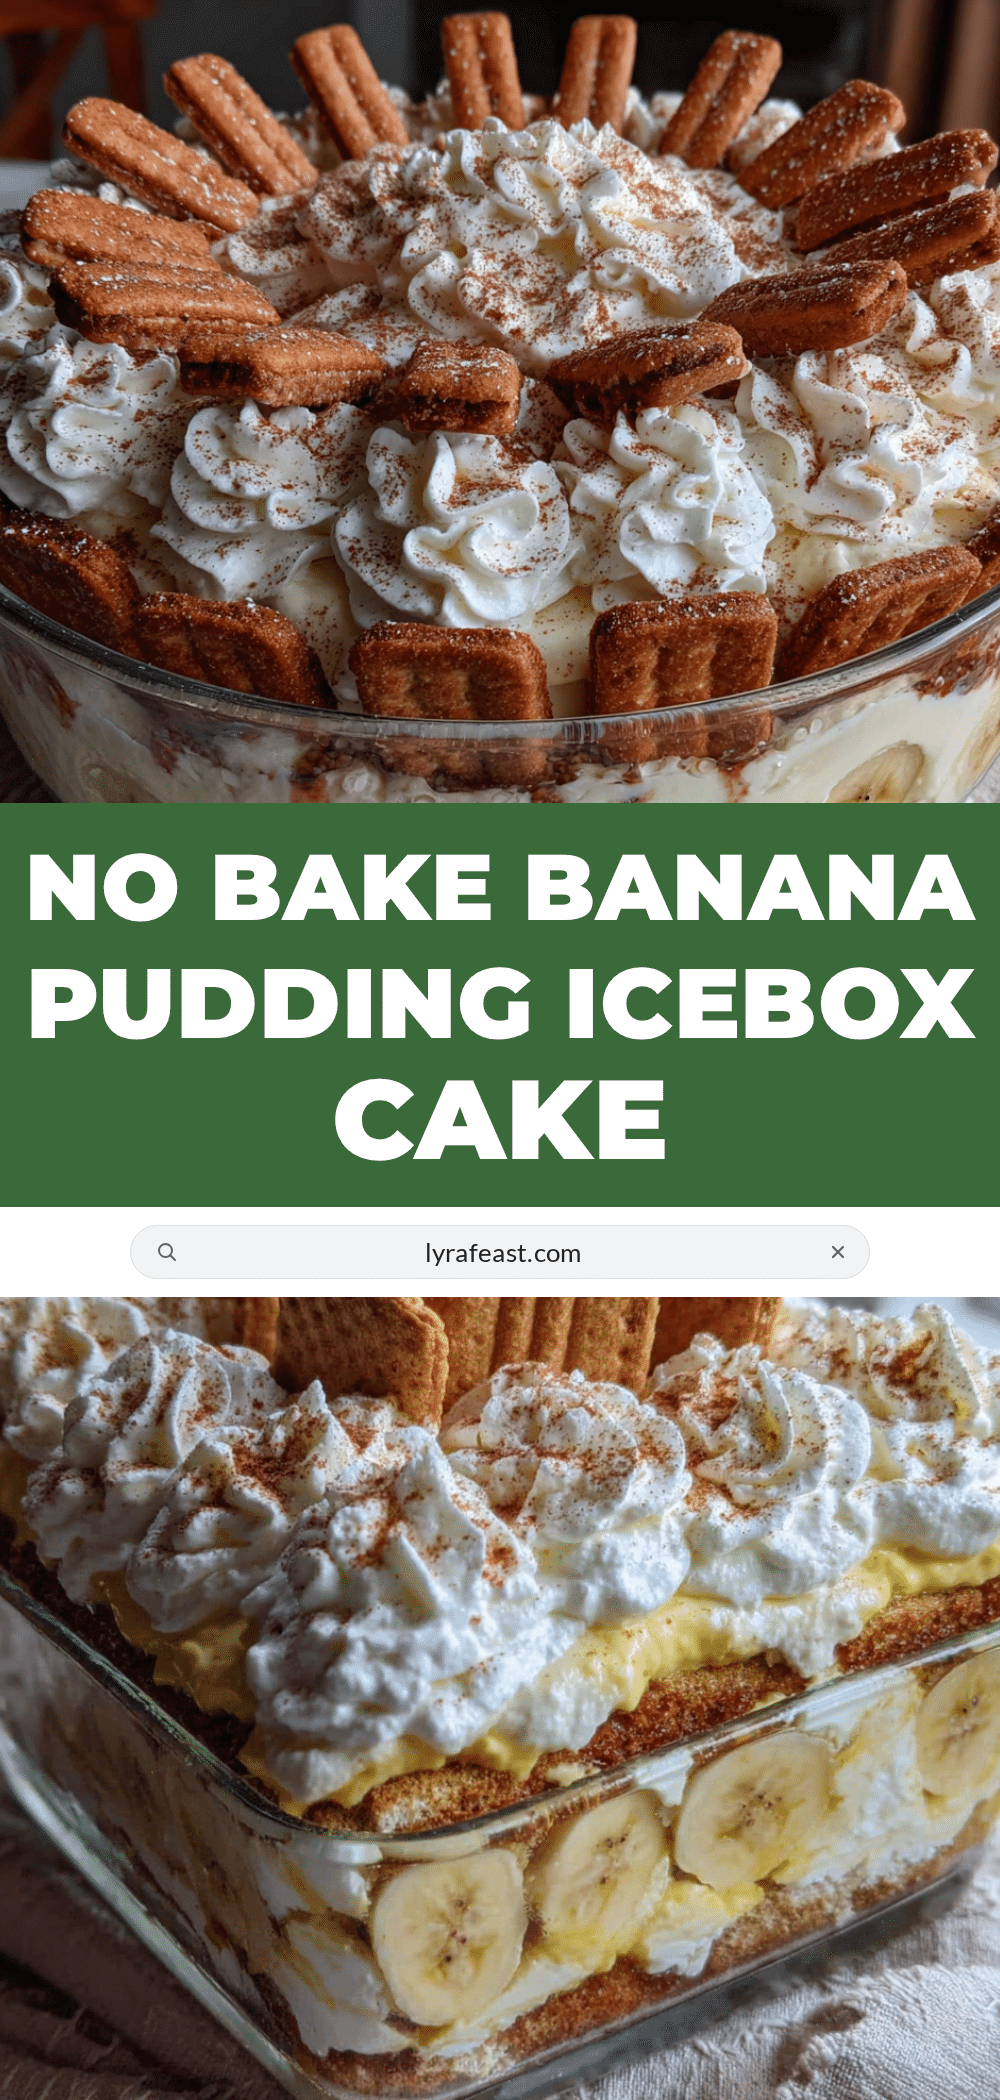
Creamy No-Bake Banana Pudding Icebox Cake for a Crowd
This no-bake banana pudding icebox cake is a creamy, layered dessert that feeds a crowd without turning on the oven. Made with simple ingredients like vanilla wafers, bananas, and a rich pudding-cream cheese filling, it’s the perfect make-ahead treat for potlucks and family gatherings.
- Prep Time: 20 minutes
- Cook Time: 0 minutes
- Total Time: 4 hours 20 minutes (includes chilling)
- Yield: 12-16 servings 1x
- Category: Dessert
- Cuisine: American
Ingredients
- 1 (8-ounce) package cream cheese, softened
- 1 (14-ounce) can sweetened condensed milk
- 1 (5.1-ounce) box instant vanilla pudding mix
- 3 cups cold whole milk
- 1 (8-ounce) tub frozen whipped topping (like Cool Whip), thawed
- 1 (12-ounce) box vanilla wafers
- 4–5 large ripe bananas
- Crushed vanilla wafers (for garnish, optional)
- Extra banana slices (for garnish, optional)
Instructions
- Make the Pudding Base: In a large mixing bowl, whisk together the instant vanilla pudding mix and 3 cups of cold milk. Whisk for about 2 minutes until it starts to thicken. Set aside to rest for 5 minutes.
- Whip the Cream Cheese: In another large mixing bowl, beat the softened cream cheese with an electric mixer on medium speed until smooth and fluffy, about 2-3 minutes. Scrape down the sides.
- Add the Sweetened Condensed Milk: Pour the sweetened condensed milk into the cream cheese. Beat on low until combined, then increase to medium and beat for another minute until light and airy.
- Combine the Mixtures: Pour the prepared pudding into the cream cheese mixture. Beat on low until just combined. Do not overmix.
- Fold in the Whipped Topping: Gently fold in about 1 ½ cups of the thawed whipped topping into the pudding-cream cheese mixture until no white streaks remain. Reserve the remaining whipped topping for the top.
- Layer the Bottom: Spread a thin layer (about 1 cup) of the filling mixture on the bottom of a 9×13-inch baking dish.
- First Cookie Layer: Arrange a single layer of vanilla wafers over the filling, covering the bottom completely.
- Banana Time: Slice 2 of the bananas into ¼-inch rounds. Arrange half of the banana slices evenly over the cookie layer.
- Second Filling Layer: Spread half of the remaining filling mixture over the bananas, spreading gently to the edges.
- Repeat the Layers: Add another layer of vanilla wafers, followed by the remaining banana slices, and then the rest of the filling mixture. Spread smooth.
- Top with Whipped Topping: Spread the remaining whipped topping over the top of the cake. Use the back of a spoon to create swirls and peaks.
- Crush and Garnish: Crush a handful of extra vanilla wafers (about 10-12 cookies) and sprinkle over the top.
- Chill: Cover the dish tightly with plastic wrap. Refrigerate for at least 4 hours, but 8 hours or overnight is best.
- Serve Cold: When ready to serve, garnish with fresh banana slices if desired. Scoop or slice and serve cold.
Notes
For best results, use full-fat cream cheese and whole milk. Let the cake chill overnight for the best texture. Bananas brown quickly, so slice them just before layering. The cake can be frozen for up to 2 months (without banana garnish).
Nutrition
- Serving Size: 1 slice (based on 16
- Calories: 400
- Sugar: 38
- Sodium: 320
- Fat: 18
- Saturated Fat: 10
- Carbohydrates: 55
- Fiber: 2
- Protein: 6
Keywords: no-bake banana pudding, icebox cake, banana pudding, crowd dessert, potluck dessert, no-bake dessert



