My neighbor across the hall, a quiet woman named Carol who always smelled faintly of cinnamon, watched me wrestling with a wobbly springform pan one October afternoon. I was trying—and failing—to make a traditional pumpkin cheesecake, and the thing had cracked right down the middle. She didn’t say anything at first. She just disappeared into her apartment and came back ten minutes later with a small glass dish lined with what looked like crushed-up gingersnaps. “Try this,” she said, handing it over. “The crust is easier. And honestly, it tastes better.”
I was skeptical, I won’t lie. I mean, I had this whole vision of a tall, stately cheesecake with a perfect graham cracker crust. But Carol’s bars—because that’s what they were, not a towering cake but humble, perfect bars—changed everything for me. That first bite had this unexpected warmth from the ginger and cloves, paired with a creamy pumpkin filling that wasn’t too sweet. The crust was snappy and buttery, not crumbly and sad. I asked her for the recipe, and she just shrugged and said, “It’s not really a recipe. It’s more of a feeling.” Which, honestly, is the most Carol thing she’s ever said.
Over the years, I’ve tweaked her original method—added a little more cream cheese, swapped in fresh pumpkin puree when I can get it, and figured out the trick to keeping the top from cracking. These Creamy Pumpkin Cheesecake Bars with Gingersnap Crust have become my go-to fall dessert. They’re the thing I bring to Friendsgiving, the thing I make on a rainy Sunday just because. And maybe you’ve been there too—standing in your kitchen, wanting something that tastes like autumn but doesn’t require a pastry degree. These bars are that. They’re forgiving, they’re gorgeous, and they taste like the best kind of memory.
Why You’ll Love This Recipe
Let me tell you, after making these bars at least three dozen times (I stopped counting after year two), I’ve learned a thing or two about what makes them special. They’re not just another pumpkin dessert—they’re the one that disappears first at every gathering.
- Quick & Easy: No water bath, no fussy crust rolling. These come together in about 30 minutes of active prep, then the oven does the rest.
- Simple Ingredients: You probably have most of this in your pantry right now. No weird extracts or hard-to-find spices.
- Perfect for Fall Gatherings: Thanksgiving, potlucks, cozy dinner parties—these bars fit right in without stealing the show from the turkey.
- Crowd-Pleaser: I’ve served these to kids, grandparents, and that one friend who “doesn’t like pumpkin.” Every single one of them asked for the recipe.
- Unbelievably Delicious: The texture is what gets me. The creamy, almost mousse-like filling against that crunchy, spiced crust? It’s next-level comfort food.
What makes this recipe different from the dozens of other pumpkin cheesecake bars out there? It’s the crust, honestly. Most recipes use graham crackers, which get soggy. Gingersnaps hold their crunch, and the molasses in them plays beautifully with the pumpkin spice. Plus, I’ve perfected the cream cheese-to-pumpkin ratio so the filling stays firm but silky—not rubbery, not runny. This isn’t just another version. It’s my best version.
This recipe is the kind that makes you close your eyes after the first bite. It’s comfort food reimagined—faster and simpler, but with the same soul-soothing satisfaction. Perfect for impressing guests without stress, or turning a simple Tuesday into something memorable.
What Ingredients You Will Need
This recipe uses simple, wholesome ingredients to deliver that bold pumpkin flavor and satisfying texture without any fuss. Most of these are pantry staples, especially if you’re a fall baking enthusiast.
For the Gingersnap Crust
- 2 cups (about 200g) crushed gingersnap cookies – I prefer Nabisco or a bakery brand for the best spice kick. You can pulse them in a food processor or crush them in a bag with a rolling pin.
- 1/4 cup (50g) granulated sugar – Just a touch to balance the ginger’s bite.
- 6 tablespoons (85g) unsalted butter, melted – Use real butter here, not margarine. It makes the crust hold together better.
- Pinch of salt – Trust me, it makes the sweetness pop.
For the Creamy Pumpkin Filling
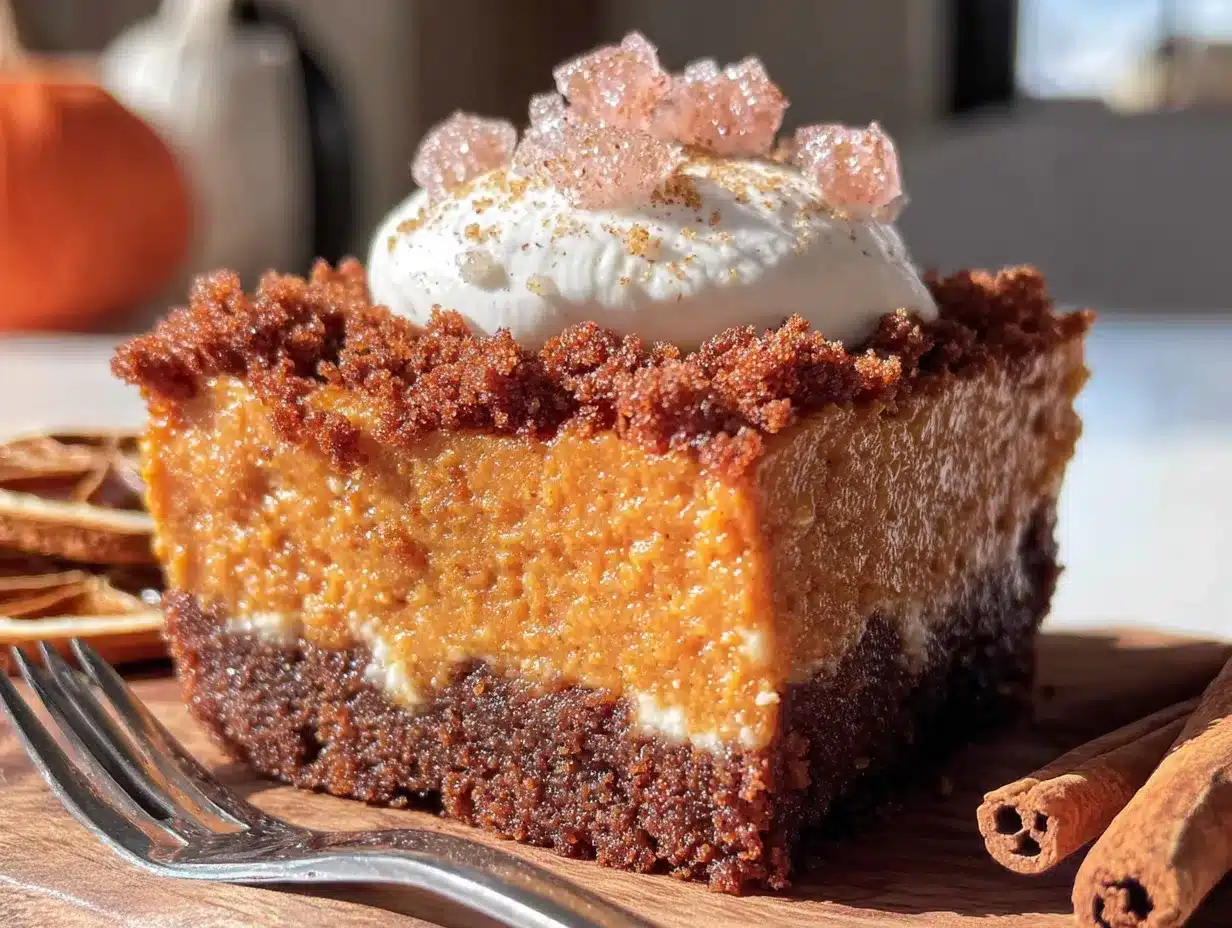
- 16 ounces (450g) cream cheese, softened – Full-fat is non-negotiable here. Low-fat makes the filling grainy. Leave it on the counter for an hour before starting.
- 3/4 cup (150g) granulated sugar – Not too much—the pumpkin and crust bring their own sweetness.
- 1 cup (240g) pumpkin puree – Canned is fine (Libby’s is my go-to), but make sure it’s 100% pumpkin, not pumpkin pie filling. If using fresh, drain it on paper towels for 30 minutes first.
- 2 large eggs, room temperature – Cold eggs can seize the cream cheese. Pop them in warm water for 5 minutes if you forgot.
- 1 teaspoon vanilla extract – Pure, not imitation. It makes a difference.
- 1 teaspoon pumpkin pie spice – Or make your own: 1/2 tsp cinnamon, 1/4 tsp ginger, 1/8 tsp nutmeg, 1/8 tsp cloves.
- 1/2 teaspoon ground cinnamon – Extra warmth because I’m greedy with cinnamon.
- 2 tablespoons all-purpose flour – This stabilizes the filling so it doesn’t crack. A little trick I learned after my third failed cheesecake.
For the Optional Topping
- 1/2 cup (120ml) heavy cream – For whipping into clouds of goodness.
- 1 tablespoon powdered sugar – Just enough to sweeten.
- Caramel sauce, for drizzling – Store-bought is fine, but homemade is a flex.
Equipment Needed
You don’t need a professional bakery setup for these bars. Here’s what I use every time:
- 9×9-inch baking pan – Glass or metal both work. Line it with parchment paper with overhang for easy lifting. I’ve ruined too many bars trying to pry them out of an unlined pan.
- Food processor or rolling pin – For crushing the gingersnaps. The processor is faster, but a ziplock bag and a rolling pin work just fine—and it’s oddly satisfying.
- Electric hand mixer or stand mixer – You need power to get the cream cheese silky smooth. A whisk will wear out your arm before the filling is ready.
- Mixing bowls – One medium, one large.
- Spatula – Silicone is best for scraping every last bit of filling.
- Measuring cups and spoons – For accuracy, especially with the spices.
- Parchment paper – Your best friend for easy removal.
If you don’t have a food processor, no worries. I used a hammer once (true story, don’t recommend it—crumbs everywhere). A sturdy bag and a heavy skillet work beautifully.
Preparation Method
Take your time with these steps. I promise, rushing is what leads to cracks and crumbles. Here’s how I do it every time.
- Preheat and Prep (5 minutes): Preheat your oven to 350°F (175°C). Line your 9×9 pan with parchment paper, leaving about 2 inches overhanging on two opposite sides. This creates handles for lifting the bars out later. Lightly grease the parchment with butter or non-stick spray.
- Make the Crust (10 minutes): In your food processor, pulse the gingersnap cookies until they turn into fine crumbs. You should have about 2 cups. Transfer to a medium bowl, add the sugar and salt, then pour in the melted butter. Stir with a fork until every crumb is coated. It should look like wet sand. Press this mixture firmly into the bottom of your prepared pan. I use the bottom of a measuring cup to really pack it down—this prevents the crust from falling apart when you cut the bars. Bake for 10 minutes, then set aside to cool slightly. The crust will firm up as it cools.
- Make the Filling (15 minutes): In a large bowl, beat the softened cream cheese with an electric mixer on medium speed until it’s completely smooth—about 2 minutes. Scrape down the sides and the bottom of the bowl. Add the sugar and beat for another minute until fluffy. Now, add the pumpkin puree, eggs (one at a time, beating well after each), vanilla, pumpkin pie spice, cinnamon, and flour. Beat on low speed just until combined. Do not overmix! Overbeating incorporates too much air, which causes cracks. The batter should be smooth, thick, and a gorgeous orange-brown color.
- Assemble and Bake (45-50 minutes): Pour the filling over the warm crust. Spread it evenly with a spatula. Give the pan a gentle tap on the counter to release any air bubbles. Bake at 350°F (175°C) for 40-45 minutes. The edges should be set and slightly puffed, but the center should still jiggle slightly when you shake the pan. That jiggle is your friend—it means the bars will be creamy, not dry. If the top starts browning too fast, tent loosely with foil after 30 minutes.
- Cool and Chill (4 hours minimum): Place the pan on a wire rack and let it cool completely at room temperature—about 1 hour. Then, cover with plastic wrap and refrigerate for at least 3 hours, preferably overnight. This step is crucial. The bars need time to set properly. Cutting them too early is like trying to slice pudding. I learned this the hard way.
- Cut and Serve (10 minutes): Once fully chilled, use the parchment handles to lift the whole block out of the pan. Place on a cutting board. Use a sharp knife (wipe it clean between cuts) to slice into 9 or 16 bars, depending on how generous you’re feeling. For clean cuts, dip the knife in hot water and dry it before each slice.
Cooking Tips & Techniques
I’ve made every mistake in the book so you don’t have to. Here’s what I’ve learned:
The Crust Secret: Don’t skip the pre-baking step. A raw gingersnap crust turns soggy under the wet filling. Pre-baking for 10 minutes creates a barrier. Also, press it down firmly—if there are loose crumbs, they’ll float up into the filling.
The Cream Cheese Rule: Cold cream cheese is the enemy of smooth filling. It creates lumps that no amount of beating will fix. Let it sit on the counter for 60 minutes. If you’re in a rush, cut it into cubes and microwave on low power for 10-second intervals until soft but not warm.
The No-Crack Guarantee: Cracks happen when the filling overbakes or when there’s too much air in the batter. Beat on low speed once the eggs are in. And pull the bars out when the center still has a slight wobble—it will firm up as it cools. Trust the jiggle.
Timing Strategy: Make these a day ahead. Seriously. They taste better after 24 hours in the fridge—the flavors meld, and the texture becomes ultra-creamy. Plus, it takes the stress out of hosting.
My Biggest Failure: I once tried to speed-cool the bars in the freezer. The filling separated and got weepy. Never again. Patience is a virtue with cheesecake.
Variations & Adaptations
One of the best things about this recipe is how flexible it is. Here are some twists I’ve tried and loved:
- Gluten-Free Version: Use gluten-free gingersnap cookies (I like Kinnikinnick brand). The filling is naturally gluten-free, so just swap the crust cookies. No one will notice the difference.
- Vegan Adaptation: Use vegan cream cheese (Miyoko’s is my favorite), a flax egg (1 tbsp ground flax + 3 tbsp water per egg), and vegan butter. The texture is slightly less firm but still delicious.
- Bourbon Pumpkin Bars: Add 2 tablespoons of bourbon to the filling with the vanilla. The warmth of the whiskey pairs beautifully with the spices. I did this for a grown-up Thanksgiving and it was a hit.
- Chocolate Swirl: Melt 1/4 cup of dark chocolate chips and drizzle it over the filling before baking. Use a knife to swirl it into ribbons. The chocolate-ginger-pumpkin combo is ridiculous.
- Low-Sugar Option: Reduce the sugar in the filling to 1/2 cup and skip the sugar in the crust. Use a sugar substitute like monk fruit sweetener if you prefer. The pumpkin carries enough natural sweetness.
Serving & Storage Suggestions
These bars are versatile. Here’s how I serve and store them:
Serving: Serve cold or at room temperature. I prefer them straight from the fridge—the filling is firmer and the crust stays crunchier. Top with a dollop of lightly sweetened whipped cream and a drizzle of caramel sauce. A sprinkle of extra cinnamon or crushed gingersnaps on top looks gorgeous.
Pairings: They’re perfect with a hot cup of coffee, spiced chai, or even a glass of cold milk. For dessert boards, they pair well with apple slices, salted nuts, and sharp cheddar cheese (trust me on the cheese).
Storage: Keep leftovers in an airtight container in the refrigerator for up to 5 days. The flavors actually deepen after day two. To freeze, wrap individual bars in plastic wrap, then foil, and place in a freezer bag. They’ll keep for 3 months. Thaw overnight in the fridge before serving.
Reheating: Don’t microwave these—the filling gets weird. If you want them warm, let them sit at room temperature for 20 minutes. The texture stays creamy and the crust stays crisp.
One note: the crust will soften slightly after day three. That’s normal. They’re still delicious, just a little less snappy.
Nutritional Information & Benefits
Here’s an approximate breakdown per bar (based on 16 servings):
- Calories: 285
- Fat: 18g
- Carbohydrates: 28g
- Protein: 5g
- Fiber: 1g
- Sugar: 19g
Health Benefits: Pumpkin is packed with vitamin A (great for eye health) and fiber. Cream cheese provides calcium and protein. The ginger in the crust has anti-inflammatory properties—so technically, these are health food, right? In all seriousness, this is a dessert, but it’s one made with real ingredients. No artificial flavors or preservatives.
Dietary Considerations: This recipe contains gluten, dairy, and eggs. For gluten-free or vegan options, see the variations section above. It’s naturally nut-free, making it safe for school events.
I personally love that these bars feel indulgent but aren’t over-the-top sweet. You get the satisfaction of cheesecake without the sugar coma.
Conclusion
These Creamy Pumpkin Cheesecake Bars with Gingersnap Crust are everything I want in a fall dessert—easy, beautiful, and deeply satisfying. They’ve saved me from last-minute dessert panic more times than I can count. The gingersnap crust is the unsung hero, adding a spicy crunch that makes every bite interesting. And the filling? It’s like pumpkin pie and cheesecake had a baby, and that baby is perfect.
I hope you make these and make them your own. Maybe you’ll add a swirl of caramel, or skip the whipped cream, or double the cinnamon. That’s the beauty of a good recipe—it’s a starting point, not a rulebook. Carol would approve.
When you make them (and I know you will), come back and let me know how they turned out. Did your family fight over the last bar? Did you discover a new favorite variation? I want to hear it all. Leave a comment below, share a photo, or tag me on social media. Happy baking, friend.
Frequently Asked Questions
Can I use fresh pumpkin instead of canned?
Absolutely! Just make sure to drain the fresh puree well. Spread it on a paper towel-lined plate for 30 minutes to remove excess moisture. Too much water will make the filling loose.
Why did my cheesecake bars crack on top?
Most likely from overbaking or overmixing. Pull them out when the center still jiggles slightly. Also, mix on low speed once you add the eggs to avoid incorporating too much air.
Can I make these bars ahead of time?
Yes, and I actually recommend it. They taste better after 24 hours in the fridge. Make them up to two days ahead, cover tightly, and refrigerate. Add whipped cream just before serving.
Can I use a different cookie for the crust?
Sure! Speculoos (Biscoff), shortbread, or even vanilla wafers work. Just keep in mind that the spice level will change. If using a plain cookie, add 1/2 teaspoon of ginger and 1/4 teaspoon of cloves to the crust mixture.
How do I get clean, neat slices?
Use a sharp knife and wipe it clean with a damp paper towel between each cut. For extra clean slices, dip the knife in hot water and dry it before cutting. Chilling the bars for at least 4 hours makes cutting much easier.
Pin This Recipe!
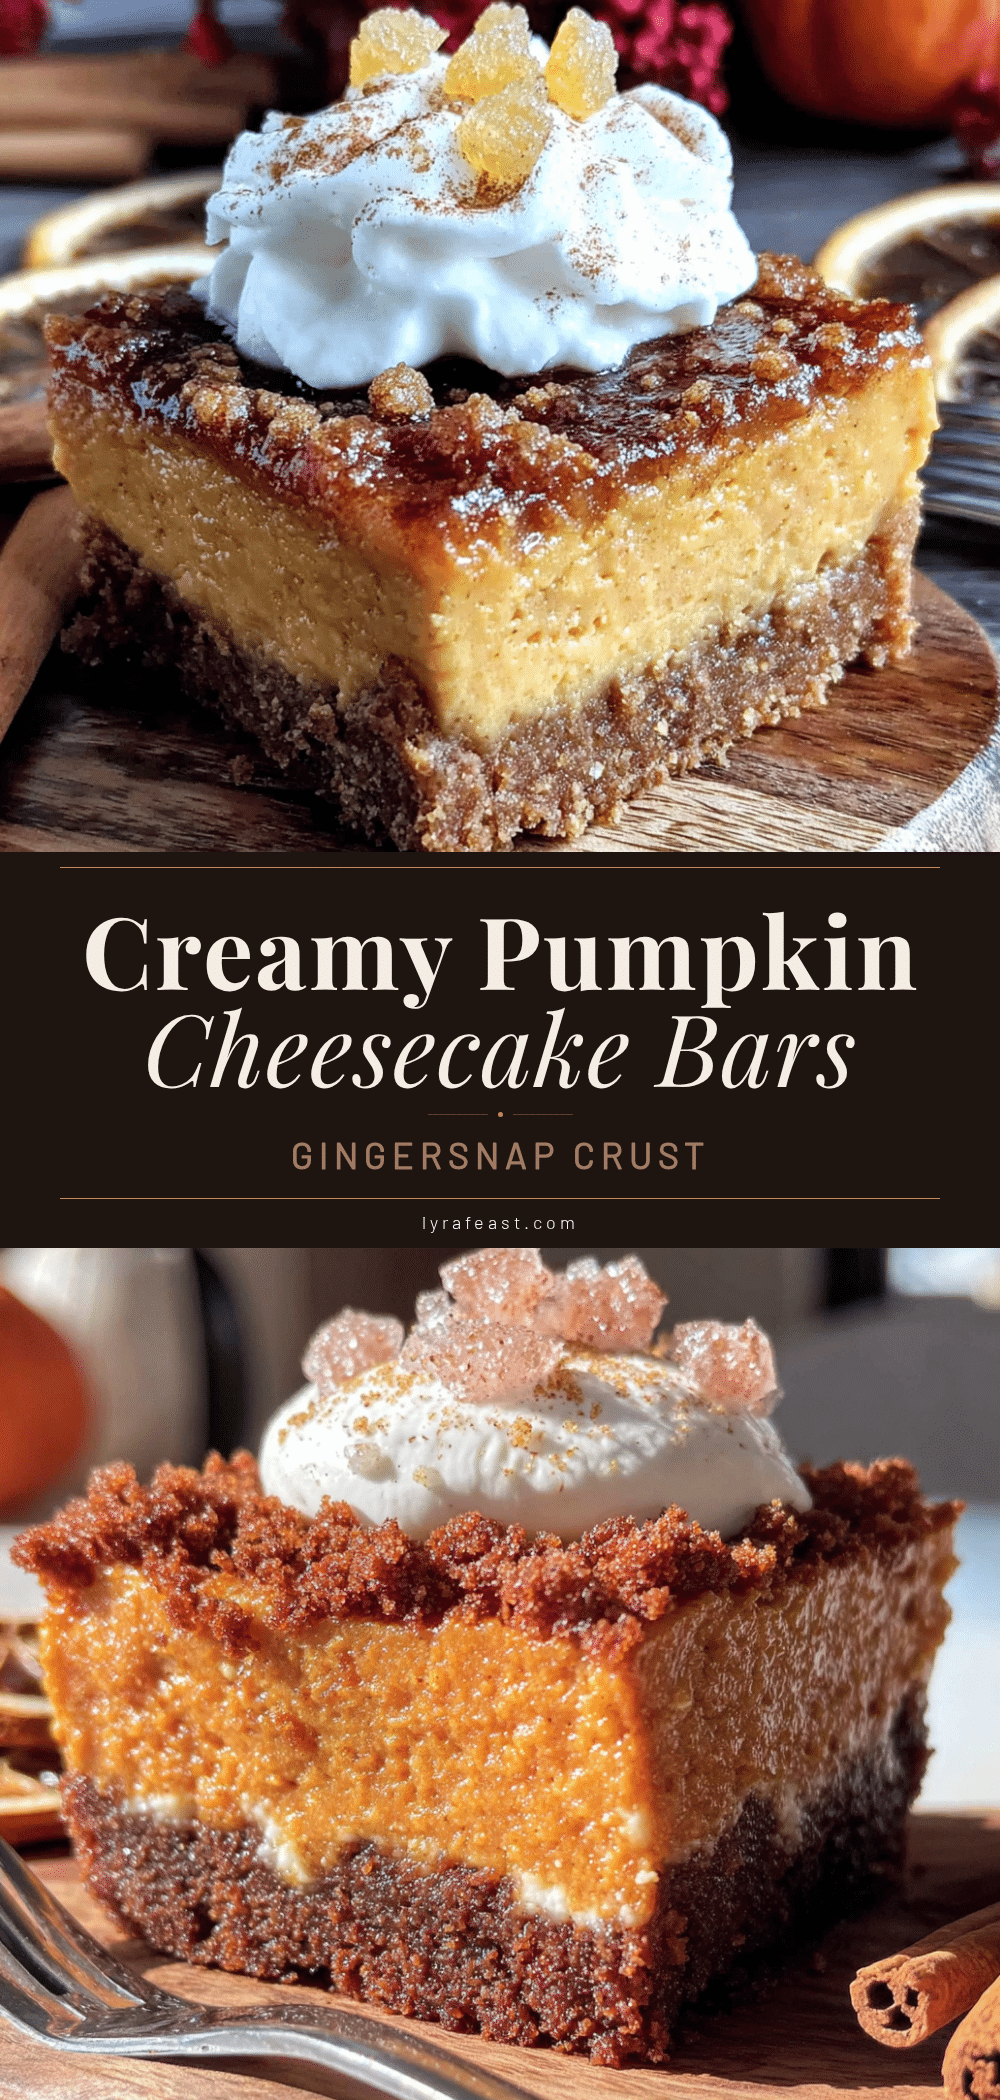
Creamy Pumpkin Cheesecake Bars with Gingersnap Crust
These creamy pumpkin cheesecake bars feature a crunchy gingersnap crust and a silky pumpkin filling. They’re the perfect easy fall dessert that disappears first at every gathering.
- Prep Time: 30 minutes
- Cook Time: 45 minutes
- Total Time: 4 hours 15 minutes (includes chilling)
- Yield: 16 servings 1x
- Category: Dessert
- Cuisine: American
Ingredients
- 2 cups (about 200g) crushed gingersnap cookies
- 1/4 cup (50g) granulated sugar
- 6 tablespoons (85g) unsalted butter, melted
- Pinch of salt
- 16 ounces (450g) cream cheese, softened
- 3/4 cup (150g) granulated sugar
- 1 cup (240g) pumpkin puree
- 2 large eggs, room temperature
- 1 teaspoon vanilla extract
- 1 teaspoon pumpkin pie spice
- 1/2 teaspoon ground cinnamon
- 2 tablespoons all-purpose flour
- 1/2 cup (120ml) heavy cream (optional topping)
- 1 tablespoon powdered sugar (optional topping)
- Caramel sauce, for drizzling (optional topping)
Instructions
- Preheat oven to 350°F (175°C). Line a 9×9-inch baking pan with parchment paper, leaving 2 inches overhanging on two opposite sides. Lightly grease the parchment.
- Make the crust: In a food processor, pulse gingersnap cookies into fine crumbs. Transfer to a medium bowl, add sugar and salt, then pour in melted butter. Stir until every crumb is coated. Press mixture firmly into the bottom of the prepared pan using the bottom of a measuring cup. Bake for 10 minutes, then set aside to cool slightly.
- Make the filling: In a large bowl, beat softened cream cheese with an electric mixer on medium speed until smooth, about 2 minutes. Scrape down sides and bottom of bowl. Add sugar and beat for another minute until fluffy. Add pumpkin puree, eggs (one at a time, beating well after each), vanilla, pumpkin pie spice, cinnamon, and flour. Beat on low speed just until combined. Do not overmix.
- Assemble and bake: Pour filling over warm crust and spread evenly with a spatula. Tap the pan gently on the counter to release air bubbles. Bake at 350°F (175°C) for 40-45 minutes, until edges are set and center jiggles slightly. If top browns too fast, tent loosely with foil after 30 minutes.
- Cool and chill: Place pan on a wire rack and cool completely at room temperature, about 1 hour. Cover with plastic wrap and refrigerate for at least 3 hours, preferably overnight.
- Cut and serve: Use parchment handles to lift the block out of the pan. Place on a cutting board. Use a sharp knife (wipe clean between cuts) to slice into 9 or 16 bars. For clean cuts, dip knife in hot water and dry before each slice.
Notes
For best results, make these a day ahead—they taste better after 24 hours in the fridge. The center should still jiggle slightly when you remove from the oven; it will firm up as it cools. Do not overmix the filling to prevent cracks. For gluten-free version, use gluten-free gingersnap cookies. For vegan adaptation, use vegan cream cheese, flax eggs, and vegan butter.
Nutrition
- Serving Size: 1 bar
- Calories: 285
- Sugar: 19
- Sodium: 220
- Fat: 18
- Saturated Fat: 10
- Carbohydrates: 28
- Fiber: 1
- Protein: 5
Keywords: pumpkin cheesecake bars, gingersnap crust, fall dessert, easy cheesecake bars, pumpkin dessert, Thanksgiving dessert



