Introduction
The office potluck was in less than two hours, and I’d completely blanked on bringing anything sweet. Everyone else was whipping up these fancy desserts with layers and garnishes that looked like they needed a full weekend to prepare. Meanwhile, I had exactly one bag of marshmallows, a box of Rice Krispies, and a lingering suspicion that my usual quick batch just wouldn’t cut it this time. Honestly, I was panicking—because let’s face it, plain Rice Krispie treats are fine, but they don’t exactly scream “ultimate indulgence.”
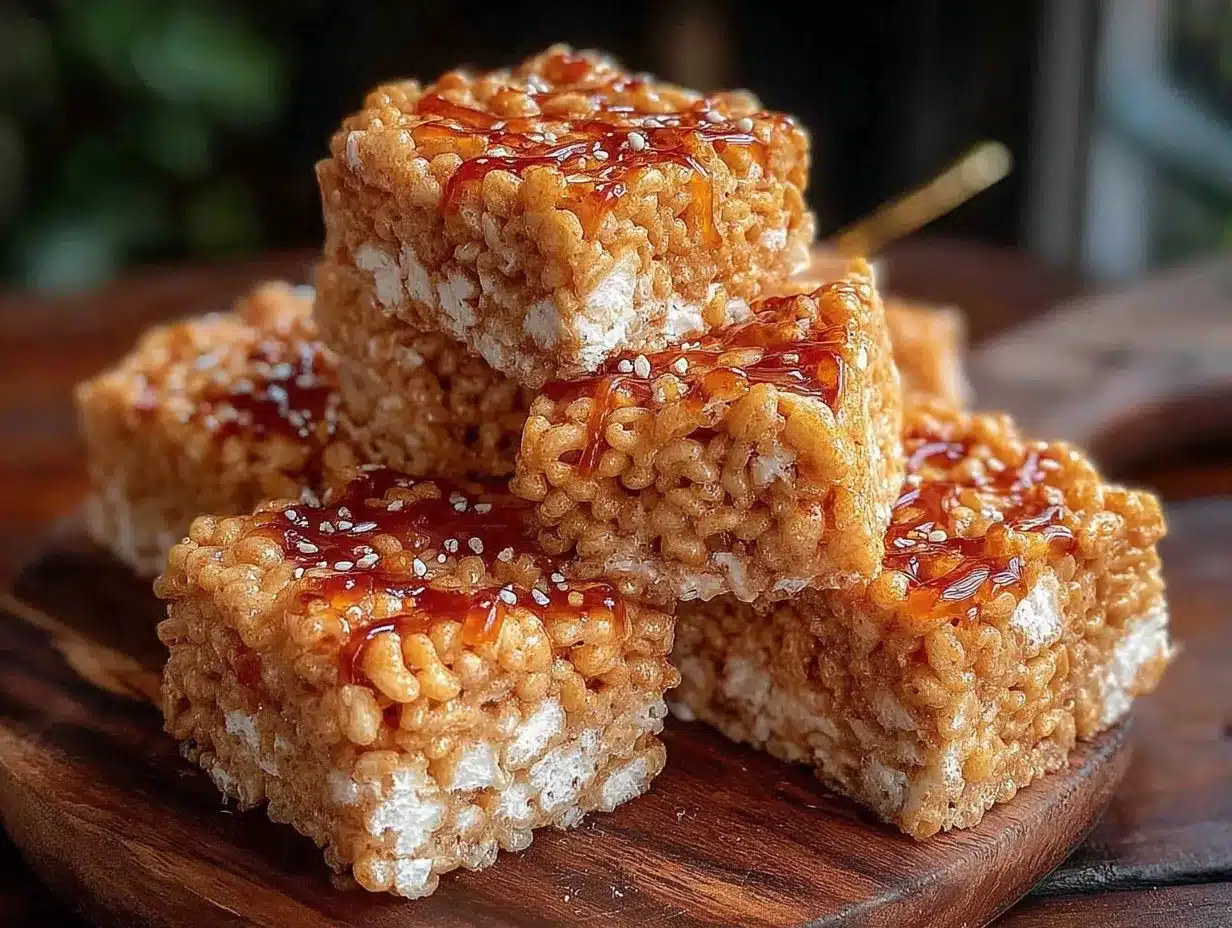
So, between answering emails and trying to keep my desk from drowning in paperwork, I remembered a trick I’d stumbled upon last Christmas while trying to salvage burnt butter. Instead of tossing it, I whisked that nutty brown butter into the melted marshmallows and mixed it all with the cereal. The result? These crispy brown butter Rice Krispie treats that crackled with extra flavor and crunch, totally stealing the spotlight at the party.
I’ll admit, the process was a bit chaotic—I managed to spill a bit of the butter onto my counter and had to clean up mid-mix. But you know that feeling when you bite into something unexpectedly amazing? Yeah, that’s why this recipe stuck with me. Maybe you’ve been there, scrambling to pull together something last-minute but still wanting it to feel special. That’s exactly what these treats bring to the table: simple ingredients, a quick fix, and a taste that feels like a little celebration in every bite.
Why You’ll Love This Recipe
Let me tell you, these crispy brown butter Rice Krispie treats aren’t just your average cereal squares. I’ve tested this recipe through countless rushed afternoons and neighborhood gatherings, and it’s always the one that gets the second helpings.
- Quick & Easy: Ready in under 20 minutes, they’re perfect for busy days or last-minute dessert emergencies.
- Simple Ingredients: You’ll use pantry staples—Rice Krispies, marshmallows, butter—nothing fancy or hard to find.
- Perfect for Any Occasion: Whether it’s a casual snack, a birthday party, or a holiday treat, these fit right in.
- Crowd-Pleaser: Kids, adults, picky eaters—you name it, everyone loves the rich, toasty flavor.
- Unbelievably Delicious: The brown butter adds this deep, nutty flavor and a crisp texture that takes the classic treat up a notch.
What makes this recipe stand out is the brown butter step. It’s that slightly caramelized, golden butter that brings out a richer aroma and crispiness you just don’t get with regular melted butter. Plus, the way the marshmallows soak up that flavor before hugging every Rice Krispie piece? Honestly, it’s magic.
This isn’t just another box cake kind of easy; it’s a simple recipe that feels like you’ve put in the effort without the fuss. I keep making it because it’s the kind of treat that makes you close your eyes and smile after the first bite—comfort food with a grown-up twist that’s impossible to resist.
What Ingredients You Will Need
This recipe uses simple, wholesome ingredients to deliver bold flavor and satisfying texture without the fuss. Most of these are pantry staples, and substitutions are easy if you need them.
- Unsalted Butter: 1/2 cup (1 stick, 113g), browned to bring that nutty richness
- Marshmallows: 10 oz (about 280g), regular or mini, your choice (I like Jet-Puffed for consistency)
- Rice Krispies Cereal: 6 cups (about 180g), crisp and fresh for that perfect crunch
- Vanilla Extract: 1 tsp, adds a subtle sweetness and depth
- Salt: A pinch, to balance the sweetness and enhance flavor
Ingredient Tips: Use fresh Rice Krispies—stale cereal will make these treats less crispy. If you want gluten-free options, make sure your cereal is certified gluten-free. For dairy-free, swap butter for coconut oil and use vegan marshmallows.
Equipment Needed
- Large heavy-bottomed saucepan or skillet – essential for browning butter evenly without burning
- Wooden spoon or heat-resistant spatula – for stirring marshmallows and cereal together
- 9×13-inch (23×33 cm) baking pan – for shaping the treats
- Parchment paper or non-stick spray – to line or grease the pan for easy removal
- Measuring cups and spoons – for accurate ingredient amounts
If you don’t have a heavy-bottomed pan, a thicker skillet works well to avoid hot spots. I’ve even used a cast iron skillet a few times, which adds an extra level of even heat but requires some care to clean afterward. For budget-friendly options, basic non-stick pans from your local store are fine—just watch the butter closely when browning.
Preparation Method
- Bread the butter: Place 1/2 cup (113g) unsalted butter in a large heavy-bottomed saucepan over medium heat. Stir often as the butter melts and then starts to foam. After a few minutes, it will turn golden brown with a nutty aroma and tiny brown flecks. This takes about 5-7 minutes. Watch closely to avoid burning—it can turn from perfect to charred fast.
- Add marshmallows: Immediately remove the pan from heat and add 10 oz (280g) marshmallows. Stir quickly and thoroughly until melted and smooth, about 2-3 minutes. The brown butter will infuse the marshmallows with a rich, toasty flavor you’ll notice right away.
- Season and flavor: Stir in 1 tsp vanilla extract and a pinch of salt to balance sweetness and deepen flavor. Mix well.
- Combine with cereal: Pour 6 cups (180g) Rice Krispies cereal into the marshmallow mixture. Fold gently with a spatula until every piece is coated. This step should be quick to keep the cereal crisp.
- Transfer to pan: Line your 9×13-inch (23×33 cm) baking pan with parchment or lightly grease it. Pour the mixture into the pan and press firmly but evenly with a buttered spatula or clean hands (lightly greased to prevent sticking). Aim for about 1-inch (2.5 cm) thickness.
- Cool and set: Let the treats cool at room temperature for at least 30 minutes until firm. For faster setting, you can pop the pan in the fridge for 15-20 minutes, but room temp works best for texture.
- Cut and serve: Once set, lift the treats from the pan using the parchment paper and cut into squares or rectangles with a sharp knife. Enjoy immediately or store as described below.
Note: If the mixture cools too much before pressing, it will be harder to spread and less sticky. Work swiftly after combining cereal.
Cooking Tips & Techniques
When making these crispy brown butter Rice Krispie treats, timing and temperature are your best friends. I’ve found the key is to brown the butter slowly over medium heat—rushing this step leads to uneven coloring or burnt spots that taste bitter. Stirring constantly helps; trust me, I’ve scorched more batches than I care to admit.
Another tip: don’t skimp on stirring the marshmallows into the brown butter. Getting them fully melted before adding cereal ensures a silky, smooth coating. If you add the cereal too soon, you’ll end up with clumps instead of that perfect even crunch.
When pressing the mixture into your pan, avoid packing it too tight. Press just enough for the treats to hold shape but keep them light and crispy. I sometimes butter my hands a little to prevent sticking and keep the surface smooth.
Finally, cut the treats when they’re fully cool. Warm treats tend to crumble or stick excessively to your knife. Letting them rest helps the texture settle, making them easier to slice cleanly.
Variations & Adaptations
Want to mix things up? Here are some ways I’ve played with this recipe:
- Chocolate Drizzle: Melt some dark or white chocolate and drizzle over the cooled treats for a rich finish.
- Nutty Crunch: Toss in 1/2 cup chopped toasted pecans or almonds with the cereal for an extra layer of texture and flavor.
- Seasonal Fruit: Swap the vanilla extract for a splash of orange or peppermint extract for holiday vibes.
- Gluten-Free: Use certified gluten-free crispy rice cereal to keep it safe for gluten-sensitive eaters.
- Dairy-Free: Replace butter with coconut oil and use vegan marshmallows to make these treats vegan-friendly.
I once swapped in puffed quinoa instead of Rice Krispies for a different crunch, and it was surprisingly delightful—more earthy and a bit heartier. Feel free to experiment with what you have on hand.
Serving & Storage Suggestions
Serve these crispy brown butter Rice Krispie treats at room temperature for the best texture. They’re fantastic as a quick snack or dessert, and pair well with a cold glass of milk or a warm cup of tea.
To store, keep them in an airtight container at room temperature for up to 3 days. If you want to keep them longer, wrap tightly and freeze for up to 2 months—just thaw at room temp before serving.
For reheating, a few seconds in the microwave can soften them slightly, but watch carefully to avoid melting the marshmallow too much and losing crispness.
Interestingly, the flavor deepens a bit after resting overnight, so if you have patience, letting them sit wrapped in the fridge for a few hours is worth it.
Nutritional Information & Benefits
Each crispy brown butter Rice Krispie treat (assuming 12 servings) has roughly:
| Calories | Fat | Carbohydrates | Protein |
|---|---|---|---|
| 150 kcal | 6g | 24g | 1g |
The brown butter adds a touch of healthy fats and antioxidants from the nutty browned milk solids. Rice Krispies provide light carbohydrates for quick energy. While this treat is definitely an indulgence, it’s made with recognizable ingredients and no artificial additives.
If you’re watching allergens, note that this recipe contains dairy and gluten (unless using gluten-free cereal). For those on a low-fat or sugar-reduced diet, smaller portions go a long way.
Conclusion
Crispy brown butter Rice Krispie treats are my go-to when I need something fast but want to feel like I’ve really made an effort. They’re simple, nostalgic, and just fancy enough to impress without the stress. Feel free to adjust the flavors and mix-ins based on what you love or have on hand.
I keep coming back to this recipe because it reminds me that sometimes the best things come from a little hustle and a pinch of creativity. If you give this a try, I’d love to hear how you made it your own—drop a comment or share your twists!
Happy snacking, and here’s to sweet moments made with a little crispy, buttery love.
FAQs
Can I use a different cereal instead of Rice Krispies?
Yes! Puff rice or gluten-free crispy rice cereals work well. Just avoid cereals that are too dense or sugary to keep the right texture.
How do I know when the butter is browned properly?
Look for a golden-brown color with tiny brown specks and a nutty aroma. Remove from heat immediately to prevent burning.
Can I make these treats ahead of time?
Absolutely. They store well at room temperature for a few days and freeze nicely for longer storage.
What’s the best way to cut Rice Krispie treats without them sticking?
Use a sharp knife and let the treats cool completely. Lightly greasing the knife or dipping it in warm water helps too.
Can I add mix-ins like chocolate chips or nuts?
Yes! Add-ins like chocolate chips, nuts, or dried fruit can be folded in with the cereal for extra flavor and texture.
PrintCrispy Brown Butter Rice Krispie Treats
These crispy brown butter Rice Krispie treats are a quick and easy homemade indulgence with a rich, nutty flavor and perfect crunch, ideal for any occasion.
- Prep Time: 10 minutes
- Cook Time: 10 minutes
- Total Time: 30-40 minutes
- Yield: 12 servings 1x
- Category: Dessert
- Cuisine: American
Ingredients
- 1/2 cup (1 stick, 113g) unsalted butter, browned
- 10 oz (about 280g) marshmallows, regular or mini
- 6 cups (about 180g) Rice Krispies cereal
- 1 tsp vanilla extract
- A pinch of salt
Instructions
- Place 1/2 cup unsalted butter in a large heavy-bottomed saucepan over medium heat. Stir often as the butter melts and foams. Brown the butter until golden with a nutty aroma and tiny brown flecks, about 5-7 minutes. Watch closely to avoid burning.
- Remove the pan from heat and add 10 oz marshmallows. Stir quickly and thoroughly until melted and smooth, about 2-3 minutes.
- Stir in 1 tsp vanilla extract and a pinch of salt to balance sweetness and deepen flavor. Mix well.
- Pour 6 cups Rice Krispies cereal into the marshmallow mixture. Fold gently with a spatula until every piece is coated, working quickly to keep the cereal crisp.
- Line a 9×13-inch baking pan with parchment paper or lightly grease it. Pour the mixture into the pan and press firmly but evenly to about 1-inch thickness using a buttered spatula or lightly greased hands.
- Let the treats cool at room temperature for at least 30 minutes until firm. For faster setting, refrigerate for 15-20 minutes.
- Once set, lift the treats from the pan using the parchment paper and cut into squares or rectangles with a sharp knife. Serve immediately or store as desired.
Notes
Brown the butter slowly over medium heat and stir constantly to avoid burning. Work quickly when mixing cereal with marshmallows to keep treats crispy. Press mixture evenly but not too tight to maintain light texture. Cut treats only after fully cooled to prevent crumbling or sticking.
Nutrition
- Serving Size: 1 treat (1/12 of rec
- Calories: 150
- Fat: 6
- Carbohydrates: 24
- Protein: 1
Keywords: Rice Krispie treats, brown butter, crispy, easy dessert, homemade, marshmallows, quick snack