It was 11:47 PM on a random Thursday in October, and I had a bag of hot dogs staring at me from the fridge with what I swear was judgment. My neighbor’s kid had just texted asking if I could “help” with the school Halloween party snacks the next morning—which meant I was now officially on the hook. I didn’t have time for anything fancy, and honestly, I was running on three hours of sleep and too much coffee. But I had crescent roll dough in the fridge (don’t ask why) and a desperate idea that arrived like a sugar-fueled hallucination.
What if I wrapped the hot dogs like mummies? Just thin strips of dough, a couple of mustard dots for eyes, and a quick bake? I mean, I was half-convinced I’d regret it in the morning. But the oven preheated anyway, and I started cutting that dough into ragged little ribbons. My fingers were sticky, the kitchen timer was beeping, and I may have accidentally used a pizza cutter that still had cheese on it from dinner. But when those mummies came out of the oven—golden, crispy, staring up at me with their little mustard eyes—I honestly felt like a Halloween miracle worker.
Maybe you’ve been there: the night before a party, no plan, and a vague promise to bring something “fun.” These Crispy Mummy-Wrapped Halloween Hot Dogs saved me that night, and they’ve been a staple ever since. They’re ridiculous in the best way, and they taste way better than they have any right to.
Why You’ll Love This Recipe
Let me tell you, as someone who has tested this recipe at three different parties and one very confused family dinner, these mummy dogs are the real deal. I’ve tried making them with puff pastry, biscuit dough, and even homemade dough (too much work, honestly), and crescent roll dough remains the undisputed champion. Here’s why this version wins every time:
- Quick & Easy: From fridge to table in under 15 minutes. I mean it—10 minutes of prep, 10 minutes in the oven. That’s it. Perfect for last-minute Halloween cravings or when you’ve forgotten about the school party until 10 PM the night before (not that I’m speaking from experience).
- Simple Ingredients: You likely already have hot dogs and crescent roll dough in your kitchen. If you don’t, a quick trip to the store will cost you under $10. No fancy grocery runs needed.
- Perfect for Halloween Parties: These are the kind of snacks that make kids (and adults) actually stop and smile. They’re creepy-cute, not creepy-gross, which is the sweet spot for Halloween food.
- Crowd-Pleaser: I’ve served these at three different Halloween gatherings, and they disappear every single time. Kids love the mummy look, and adults love that they’re actually tasty—not just “cute but dry.”
- Unbelievably Delicious: The contrast between the flaky, buttery dough and the savory, juicy hot dog is honestly addictive. The edges get all crispy and golden, while the center stays soft. It’s comfort food in mummy form.
What makes this recipe different from the dozens of other mummy dog recipes out there? It’s the technique. Most recipes tell you to wrap the dough in thick strips, which leaves raw, doughy patches. I’ve learned to cut the dough into thin ribbons—about a quarter-inch wide—so every bite has that perfect crispy-to-soft ratio. Plus, I add a tiny brush of melted butter on top before baking, which gives the mummies that gorgeous golden-brown “glow” that makes them look almost alive. Almost.
This recipe isn’t just good—it’s the kind that makes you close your eyes after the first bite. It’s Halloween food reimagined: faster, crispier, but with the same silly, soul-soothing satisfaction. Perfect for impressing guests without stress, or turning a simple snack into something memorable.
What Ingredients You Will Need
This recipe uses simple, everyday ingredients to deliver that perfect combination of flaky, crispy dough and juicy hot dog. Most of these are pantry staples, so you probably don’t need to make a special trip.
- Hot dogs (8 standard-sized): Use your favorite brand. I personally prefer beef hot dogs for their richer flavor, but turkey or chicken hot dogs work great too. (Look for ones that are plump and juicy—skinny hot dogs tend to get lost in the dough.)
- 1 can (8 oz) refrigerated crescent roll dough: This is the secret weapon. Pillsbury is my go-to, but any brand works. The dough is flaky, buttery, and bakes up perfectly golden. (If you can find the “sheets” version without perforations, even better—less cutting hassle.)
- 1 tablespoon unsalted butter, melted: This is optional but highly recommended. Brushing the dough with butter before baking gives the mummies that gorgeous golden-brown color and adds a subtle richness. (Use dairy-free butter if needed.)
- Mustard (yellow or Dijon) for the eyes: This is the fun part. Yellow mustard gives the most classic “mummy eye” look, but Dijon works in a pinch. You only need a tiny amount—about 1/4 teaspoon total. (I’ve also used sriracha for a spicier version, but that’s a story for another day.)
- Optional: Everything bagel seasoning or sesame seeds: For an extra crunchy, savory crust. I sprinkle a tiny pinch on the dough before baking when I’m feeling fancy. It’s not traditional, but it’s delicious.
Ingredient Selection Tip: For the best texture, choose hot dogs that are evenly sized and not too thin. I’ve found that Oscar Mayer or Nathan’s beef hot dogs work perfectly. If you’re using cocktail sausages or mini hot dogs, adjust the dough strip length accordingly—you’ll want shorter strips so the mummy looks proportional.
Substitution Guidance: Use gluten-free crescent roll dough if needed (it’s available at most major grocery stores). For a dairy-free version, skip the butter or use a plant-based alternative. If you don’t have crescent roll dough, puff pastry works too—just cut it into thin strips and bake at 400°F for 12-15 minutes. The texture will be flakier but less tender.
Equipment Needed
You don’t need much for this recipe, which is part of the beauty. Here’s what you’ll need:
- Baking sheet: A standard half-sheet pan works perfectly. Line it with parchment paper for easy cleanup—trust me, the butter and dough can get sticky.
- Parchment paper: Non-stick and makes cleanup a breeze. If you don’t have parchment, a silicone baking mat works too. Avoid greasing the pan directly—the dough can stick.
- Sharp knife or pizza cutter: For cutting the crescent roll dough into thin strips. A pizza cutter is faster and gives cleaner edges, but a sharp knife works just fine. (I’ve used both, and honestly, the pizza cutter is worth the extra 30 seconds to find it in the drawer.)
- Pastry brush (optional): For brushing the melted butter onto the dough. A silicone brush is ideal, but a paper towel dabbed in butter works in a pinch.
- Small bowl: For melting the butter. I use a microwave-safe bowl and heat it for 15 seconds at a time.
- Toothpick (optional): For adding the mustard eyes. A toothpick gives you more control than squeezing directly from the bottle. (I learned this the hard way after a mustard disaster on my first attempt.)
Budget-Friendly Tip: Don’t have a pastry brush? No problem. Just dip a clean finger in the melted butter and gently brush it over the dough. It’s not fancy, but it works perfectly.
Preparation Method
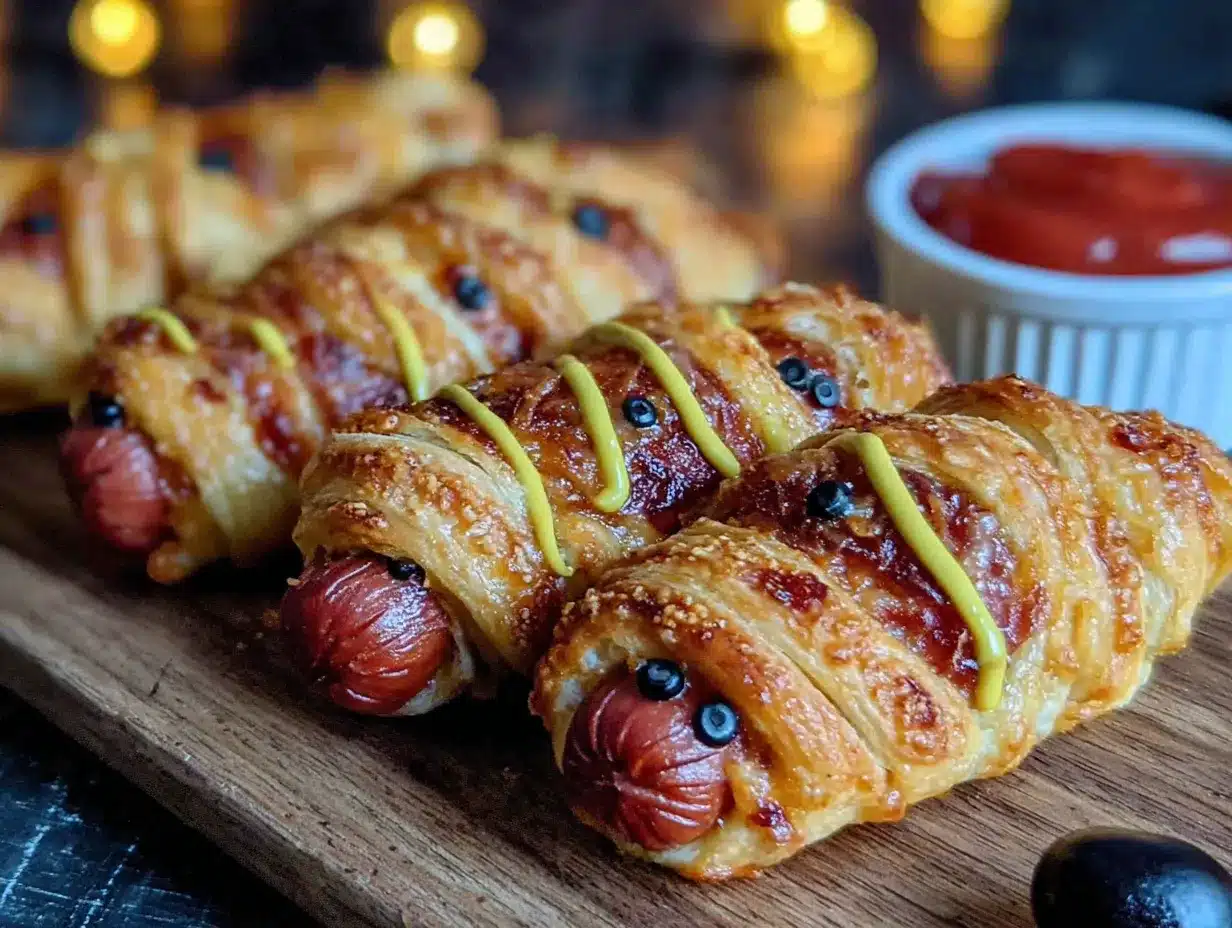
Alright, let’s get to the fun part. Here’s how to make these crispy little mummies step by step. I’ve included all the little details I wish someone had told me the first time.
- Preheat your oven to 375°F (190°C). Line a baking sheet with parchment paper. This is important—the dough can stick to unlined pans, and nobody wants to peel a mummy’s face off the metal.
- Unroll the crescent roll dough onto a clean cutting board. If you’re using the perforated version, press the seams together gently with your fingers to seal them. (Don’t overwork the dough—it’s delicate and gets tough if you handle it too much.)
- Cut the dough into thin strips. Using a sharp knife or pizza cutter, slice the dough lengthwise into strips about 1/4-inch wide. You should get about 8-10 strips per sheet. (The strips don’t have to be perfectly even—mummies are supposed to look a little messy.)
- Prepare the hot dogs. Pat the hot dogs dry with a paper towel. This helps the dough stick better. (If the hot dogs are wet, the dough will slide off during baking.)
- Wrap the mummies. Take 2-3 strips of dough and wrap them around each hot dog, starting at one end and overlapping slightly as you go. Leave a small gap at the top for the “face” (about 1/2 inch). The dough should look like bandages—don’t wrap too tightly, or the dough will tear. (I like to leave a little space between the strips so the hot dog peeks through like a mummy’s “skin.”)
- Place the wrapped hot dogs on the prepared baking sheet, leaving about 1 inch of space between each one. They’ll puff up a bit as they bake, so don’t crowd them.
- Brush with melted butter. Using a pastry brush (or your finger), gently brush the tops of the dough strips with the melted butter. This is what gives the mummies that gorgeous golden-brown color. Don’t skip this step—it makes a huge difference.
- Bake for 10-12 minutes, or until the dough is golden brown and crispy. The edges should be lightly browned, and the hot dogs should be heated through. (If you’re using thicker hot dogs, add 1-2 minutes to the baking time.)
- Let the mummies cool on the baking sheet for 2 minutes. This allows the dough to set and prevents it from tearing when you move them. (I learned this after a mummy crumbled in my hands on my first attempt.)
- Add the eyes. Using a toothpick or the tip of a knife, dab a tiny amount of mustard onto the exposed hot dog at the top of each mummy. Use two dots for eyes. (Don’t use too much mustard—it can get messy. A tiny dab is all you need.)
- Serve immediately. These are best enjoyed warm, while the dough is still crispy and the hot dog is juicy. (They’ll still be good at room temperature, but the crispy magic fades after about 30 minutes.)
Sensory Cue: When the mummies are done, the kitchen will smell like buttery, golden toast with a hint of savory hot dog. The dough should be puffed and golden, with crispy edges that look almost like toasted bandages. The mustard eyes should be bright yellow against the darker hot dog “face.”
Cooking Tips & Techniques
I’ve made these mummy dogs at least a dozen times now, and I’ve learned a few things the hard way. Here are my best tips to make sure yours turn out perfect every time.
Don’t overwork the dough. Crescent roll dough is delicate. If you handle it too much, it becomes tough and loses its flakiness. Cut the strips quickly and wrap them loosely. Imperfect wraps look more like real mummy bandages anyway.
Keep the dough cold. If the dough starts to get sticky or hard to handle, pop it in the fridge for 5 minutes. Cold dough is easier to cut and wrap. (I learned this on a hot summer day when my dough turned into a sticky mess within minutes.)
Leave a gap for the face. Don’t wrap the dough all the way to the top of the hot dog. Leaving a 1/2-inch gap at the top gives the mummy a recognizable “face” and makes the mustard eyes pop. (I’ve tried wrapping them completely, and they just look like sad bread logs.)
Use thin strips for maximum crispiness. Thick strips of dough will be doughy in the center, even after baking. Thin strips (about 1/4 inch) crisp up beautifully and give you that satisfying crunch in every bite.
Brush with butter, not egg wash. I’ve tried both, and butter wins every time. Egg wash gives a shiny, almost plastic-looking finish. Butter gives a natural golden-brown glow that looks more appetizing. Plus, it adds flavor.
My biggest failure: The first time I made these, I wrapped the dough too tightly. When the dough expanded in the oven, it tore in several places, and the hot dogs burst out like a horror movie. I’m not kidding—it was a mess. Now I wrap loosely, leaving a tiny bit of space between the strips. The dough needs room to puff up.
Variations & Adaptations
One of the best things about this recipe is how easy it is to customize. Here are a few variations I’ve tried and loved.
Spicy Mummy Dogs: Before wrapping, brush the hot dogs with sriracha or your favorite hot sauce. The heat pairs beautifully with the buttery dough. (I did this for a Halloween party, and they were gone in 10 minutes.)
Cheesy Mummy Dogs: Cut a slit lengthwise in each hot dog and stuff it with a thin strip of cheddar or pepper jack cheese. Wrap as usual. The cheese melts inside, creating a gooey, delicious surprise. (Be careful—the cheese gets hot and can burn your mouth.)
Vegetarian Mummy “Dogs”: Use your favorite plant-based hot dogs or sausages. I’ve tried this with Beyond Meat sausages, and they work perfectly. The cooking time stays the same. (Just make sure the plant-based hot dogs are fully cooked before wrapping, since some brands are pre-cooked and some aren’t.)
Puff Pastry Version: If you don’t have crescent roll dough, puff pastry works beautifully. Cut the pastry into thin strips and wrap as usual. Bake at 400°F for 12-15 minutes. The texture is flakier and more delicate. (I prefer crescent roll dough for its buttery flavor, but puff pastry is a great alternative.)
Air Fryer Method: For an even crispier result, cook the mummy dogs in an air fryer at 375°F for 6-8 minutes. No need to flip them. The air fryer gives the dough an extra-crunchy texture that’s hard to beat. (I’ve done this multiple times, and it’s my new favorite method.)
Serving & Storage Suggestions
These mummy dogs are best served warm, right out of the oven, when the dough is at its crispiest and the hot dog is perfectly juicy. But they’re also pretty good at room temperature, which makes them perfect for parties and potlucks.
Serving Ideas: Arrange the mummy dogs on a platter with a side of ketchup, mustard, or ranch dressing for dipping. For a Halloween-themed spread, serve them alongside “spider web” dip (spinach artichoke dip with sour cream drizzled in a web pattern) or “severed fingers” (carrot sticks with almond slivers for fingernails). They also pair beautifully with a bowl of warm tomato soup or a simple green salad for a quick dinner.
Storage: Leftover mummy dogs can be stored in an airtight container in the refrigerator for up to 3 days. The dough will soften as it sits, so they won’t be as crispy as fresh ones. To reheat, pop them in a 350°F oven for 5-7 minutes or in an air fryer at 350°F for 3-4 minutes. Avoid microwaving—it makes the dough soggy and rubbery.
Freezing: You can freeze the unbaked mummy dogs for up to 2 months. Arrange them on a baking sheet and freeze until solid (about 1 hour), then transfer to a freezer bag. To bake, add 2-3 minutes to the cooking time. No need to thaw first. (I’ve done this for Halloween parties, and it’s a lifesaver.)
Flavor Development: Honestly, these are best fresh. The dough loses its crispiness after about 30 minutes. If you’re making them for a party, bake them right before serving. Your guests will thank you.
Nutritional Information & Benefits
Let’s be real—these mummy dogs are a treat, not a health food. But they’re not as bad as you might think. Here’s the estimated nutritional breakdown per mummy dog (based on standard ingredients):
- Calories: 220-250
- Protein: 8-10g
- Carbohydrates: 18-22g
- Fat: 14-16g
- Saturated Fat: 5-7g
- Sodium: 600-700mg
Health Benefits: Hot dogs are a good source of protein and B vitamins (especially B12). Crescent roll dough provides quick energy from carbohydrates. And the butter? Well, it makes life better. If you’re looking for a slightly healthier version, use turkey hot dogs (lower in fat and calories) and skip the butter (or use a light brushing).
Dietary Considerations: This recipe is not gluten-free, dairy-free, or low-carb in its standard form. However, with the substitutions mentioned above (gluten-free dough, dairy-free butter, plant-based hot dogs), you can adapt it to fit most dietary needs. Always check the labels on your ingredients to ensure they meet your dietary requirements.
Potential Allergens: This recipe contains wheat (gluten), dairy (butter), and potentially soy (depending on the hot dog brand). If you’re serving these at a party, consider labeling them so guests with allergies can make informed choices.
Conclusion
These Crispy Mummy-Wrapped Halloween Hot Dogs are the kind of recipe that makes you feel like a kitchen genius, even when you’re running on three hours of sleep and desperation. They’re silly, they’re delicious, and they come together in under 15 minutes. Honestly, what more could you want from a Halloween snack?
I love this recipe because it’s proof that you don’t need fancy ingredients or hours of prep to make something memorable. Sometimes the best ideas come from staring at a bag of hot dogs at 11:47 PM and thinking, “What if I just… wrapped them in dough?” It’s ridiculous. It works. And it’s become a tradition in my house every October.
I’d love to hear how yours turn out! Did you add a spicy twist? Did your kids help with the wrapping? Did you accidentally make a mummy with three eyes like I did on my second attempt? Leave a comment below and share your mummy dog creations. And if you’re looking for more Halloween snack ideas, check out my spider web dip recipe or these pumpkin-shaped cheese balls—they’re perfect for a full spooky spread.
Happy Halloween, and happy snacking!
Frequently Asked Questions
Can I make these mummy dogs ahead of time?
Yes! You can assemble the mummy dogs up to 24 hours in advance and store them in the refrigerator, covered with plastic wrap. Bake them just before serving for the best texture. You can also freeze the unbaked mummy dogs for up to 2 months—just add 2-3 minutes to the baking time.
Why did my dough tear when wrapping?
This usually happens if the dough is too warm or if you’re wrapping too tightly. If the dough starts to tear, pop it in the fridge for 5 minutes to firm up. Also, make sure you’re wrapping loosely—the dough needs room to expand as it bakes. Overlapping the strips slightly helps prevent tearing too.
Can I use puff pastry instead of crescent roll dough?
Absolutely! Puff pastry gives a flakier, more delicate texture. Cut the pastry into thin strips (about 1/4 inch wide) and wrap as usual. Bake at 400°F for 12-15 minutes. The flavor is less buttery than crescent roll dough, so consider brushing with melted butter before baking.
How do I keep the mustard eyes from smudging?
The key is to use a tiny amount of mustard—just a small dab on the tip of a toothpick. Press it gently onto the hot dog and lift straight up. If you use too much mustard, it will spread and look messy. You can also add the eyes right before serving to keep them looking fresh.
What can I use instead of mustard for the eyes?
If you’re not a mustard fan, try using ketchup, sriracha, or even small dots of cream cheese. For a less messy option, use edible candy eyes (the kind used for cake decorating). Just press them onto the hot dog before baking—they’ll stay put during cooking.
Pin This Recipe!
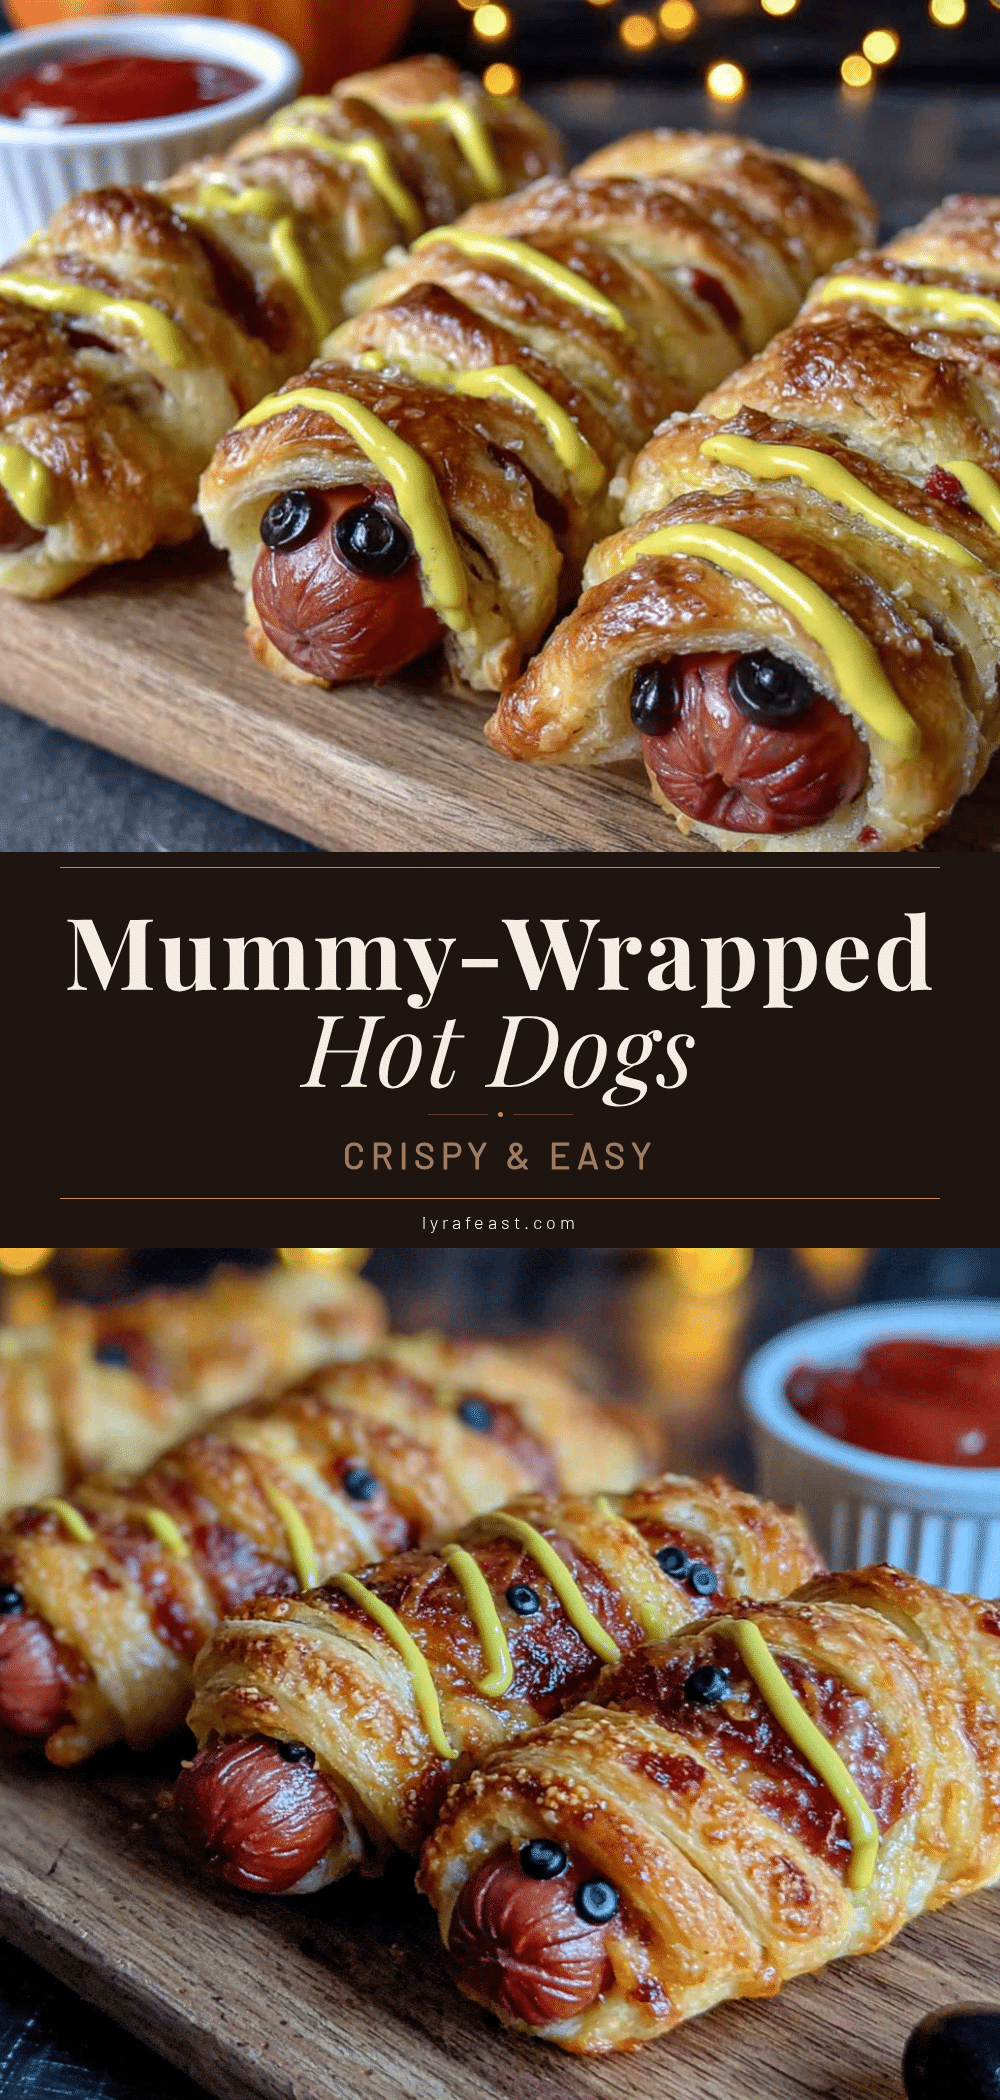
Crispy Mummy-Wrapped Halloween Hot Dogs: Easy 15-Minute Recipe
These crispy mummy-wrapped hot dogs are a quick, fun, and delicious Halloween snack made with crescent roll dough and hot dogs, ready in under 15 minutes. Perfect for last-minute parties or a spooky treat.
- Prep Time: 10 minutes
- Cook Time: 10 minutes
- Total Time: 20 minutes
- Yield: 8 servings 1x
- Category: Appetizer
- Cuisine: American
Ingredients
- 8 standard-sized hot dogs
- 1 can (8 oz) refrigerated crescent roll dough
- 1 tablespoon unsalted butter, melted
- Mustard (yellow or Dijon) for the eyes
- Optional: Everything bagel seasoning or sesame seeds
Instructions
- Preheat your oven to 375°F (190°C). Line a baking sheet with parchment paper.
- Unroll the crescent roll dough onto a clean cutting board. If using the perforated version, press the seams together gently with your fingers to seal them.
- Cut the dough into thin strips about 1/4-inch wide using a sharp knife or pizza cutter. You should get about 8-10 strips per sheet.
- Pat the hot dogs dry with a paper towel to help the dough stick.
- Take 2-3 strips of dough and wrap them around each hot dog, starting at one end and overlapping slightly as you go. Leave a small gap at the top for the ‘face’ (about 1/2 inch).
- Place the wrapped hot dogs on the prepared baking sheet, leaving about 1 inch of space between each one.
- Brush the tops of the dough strips with the melted butter using a pastry brush or your finger.
- Bake for 10-12 minutes, or until the dough is golden brown and crispy.
- Let the mummies cool on the baking sheet for 2 minutes.
- Using a toothpick or the tip of a knife, dab a tiny amount of mustard onto the exposed hot dog at the top of each mummy for eyes.
- Serve immediately.
Notes
For best results, use thin dough strips (about 1/4-inch wide) for maximum crispiness. Brush with melted butter for a golden-brown glow. Leave a gap at the top for the face. Serve immediately for the crispiest texture. Can be assembled ahead and refrigerated for up to 24 hours, or frozen unbaked for up to 2 months.
Nutrition
- Serving Size: 1 mummy dog
- Calories: 235
- Sugar: 4
- Sodium: 650
- Fat: 15
- Saturated Fat: 6
- Carbohydrates: 20
- Protein: 9
Keywords: Halloween, hot dogs, mummy, crescent roll, easy, 15-minute, party snack



