This was supposed to be a batch of perfectly round, classically iced sugar cookies for a Halloween party. I had the royal icing bagged, the sprinkles ready, and a vision of neat little ghosts and pumpkins. But somewhere between the second cup of coffee and a frantic search for my missing piping tip, I grabbed the wrong food coloring—neon green instead of gel black—and squeezed with way too much enthusiasm. The result was a lumpy, ghoulish green mess that looked nothing like a ghost. Honestly, I was ready to toss the whole tray. But my daughter, who was “helping” by eating raw dough, looked at the blobs and said, “They look like witch fingers!” And you know what? She was right. That happy accident—born from a distracted moment and a rogue squeeze of neon gel—turned into the most fun, creepily delicious cookie I’ve ever made.
I didn’t plan to make witch fingers that day. But now, I can’t imagine a Halloween without them. The best part? They’re actually easier than decorated cut-outs. No piping skills required—just a little shaping and a strategically placed almond slice for a fingernail. I mean, if I can pull these off while simultaneously burning popcorn and arguing with a toddler about why candy corn isn’t dinner, so can you. There’s something so satisfying about handing a plate of these to unsuspecting guests and watching their faces go from “Oh, cookies!” to “Wait… are those FINGERS?” It’s the kind of playful, slightly gross treat that makes Halloween magic happen. And honestly, they taste incredible—soft, buttery, with a hint of almond that perfectly matches the creepy nail.
Why You’ll Love This Recipe
Let me tell you, these Easy Witch Finger Halloween Sugar Cookies aren’t just a gimmick. They are genuinely delicious, and they solve the biggest Halloween baking problem: how to make something spooky without spending all day on intricate decorations. Here are the reasons why this recipe has become my non-negotiable Halloween tradition.
- No Special Skills Needed: Forget royal icing and piping bags. These cookies use a simple sugar cookie dough that you shape by hand. If you can roll a snake out of Play-Doh, you can make these.
- Simple Ingredients: This is a pantry-friendly recipe. Butter, sugar, eggs, flour, baking powder, salt, vanilla, and almond extract. The “nail” is just a sliced almond, and the “blood” is red jam or gel. No weird candy melts or specialty items.
- Perfect for Halloween Parties: These are the undisputed stars of any spooky spread. They get gasps, laughs, and a thousand photo requests. They are perfect for potlucks, classroom treats, or a creepy movie night.
- Crowd-Pleaser (and Kiddo-Approved): Kids absolutely love making (and eating) these. My niece, who normally won’t touch a cookie with “weird stuff” on it, ate three. The almond flavor is mild and classic.
- Unbelievably Realistic: The combination of the knuckle indentations and the almond fingernail creates an effect that is simultaneously hilarious and horrifying. It’s the perfect level of gross for Halloween.
What sets this recipe apart from other witch finger cookies is the texture. I’ve had versions that are too crunchy or too cakey. This dough uses a higher ratio of butter to shortening, which gives you that perfect sugar cookie balance: a slightly crisp edge with a soft, tender center. Plus, the almond extract is non-negotiable. It adds that subtle, almost marzipan-like flavor that makes people think they’re eating something fancier than a simple rolled cookie. It’s my secret weapon for making these taste as good as they look.
What Ingredients You Will Need
This recipe uses simple, wholesome ingredients to deliver that classic sugar cookie flavor with a delightfully creepy twist. Most of these are standard baking staples you probably already have in your pantry. Here’s what you’ll need, along with a few notes from my own kitchen trials.
- For the Cookie Dough:
- 1 cup (2 sticks) unsalted butter, softened: This is crucial. The butter needs to be at room temperature so it creams properly with the sugar. If it’s too cold, your dough will be lumpy. If it’s too melted, your cookies will spread. (I use Land O’Lakes, but any good brand works.)
- 1 cup granulated sugar: Standard white sugar is best here. It gives the cookies a nice, clean sweetness and a slightly crisp edge. Don’t substitute with brown sugar; it will change the color and texture.
- 1 large egg, room temperature: Room temperature eggs emulsify better into the butter-sugar mixture, creating a smoother dough. If you forget to take it out, place it in a bowl of warm water for 5 minutes.
- 1 teaspoon vanilla extract: Pure vanilla extract is always best, but imitation will work in a pinch. It adds warmth and depth to the flavor.
- 1 teaspoon almond extract: This is the star flavor. It gives the cookies that distinctive, slightly floral, marzipan-like taste that perfectly complements the almond “fingernails.” Don’t skip it!
- 2 ½ cups all-purpose flour: Spoon and level your flour for accuracy. Scooping directly from the bag can pack in too much flour, making the cookies dry and crumbly.
- 1 teaspoon baking powder: This gives the cookies a gentle lift, keeping them from being too dense or flat.
- ½ teaspoon salt: Salt balances the sweetness and enhances all the other flavors. I use fine sea salt.
- For the Decorations:
- 1 cup sliced almonds: Look for raw, unroasted almonds. They have a lighter color and a milder flavor that won’t overpower the cookie. You’ll need one per cookie finger. (Pro-tip: If they are roasted, they can look too dark and “toasted,” which ruins the pale, fleshy witch finger look.)
- Red jam or gel food coloring: Strawberry jam, raspberry jam, or a simple red gel icing works perfectly for the “bloody” cuticle area. I prefer a seedless jam for a smoother look, but the seeds can add to the gross-out factor if that’s your thing!
- Green food coloring (optional): Some people like to tint their dough a pale green for a more “witchy” skin tone. I prefer the natural golden-brown color, but a drop or two of green gel can be fun. If you do this, add it with the vanilla extract.
Equipment Needed
You don’t need a ton of fancy gadgets for this recipe, which is part of its beauty. Here’s what you’ll want to have on hand.
- Electric Mixer (Stand or Handheld): Creaming the butter and sugar by hand is possible, but an electric mixer makes it so much easier and ensures a light, fluffy texture. I use my trusty KitchenAid stand mixer, but a hand mixer works just as well.
- Baking Sheets: You’ll need at least two large baking sheets. If you can, use light-colored, non-stick sheets. Dark sheets can cause the bottoms of the cookies to brown too quickly.
- Parchment Paper or Silicone Baking Mats: These are non-negotiable for easy cleanup and preventing the cookies from sticking. I’m a die-hard fan of parchment paper because it’s disposable, but silicone mats work beautifully too.
- Sharp Knife or Bench Scraper: You’ll use this to make the small cuts on the “knuckles” of the cookies. A dull knife will just drag through the dough.
- Cooling Rack: A wire rack is essential for letting the cookies cool completely before you add the jam “blood.” If you add it while they’re hot, it will just melt into a puddle.
- Small Offset Spatula (Optional): This is helpful for transferring the delicate shaped dough to the baking sheet, but a thin metal spatula works too.
- Piping Bag or Small Zip-Top Bag: For applying the red jam. A small zip-top bag with the tip snipped off is the budget-friendly, mess-free option. I’ve used this method for years and it works perfectly.
Preparation Method
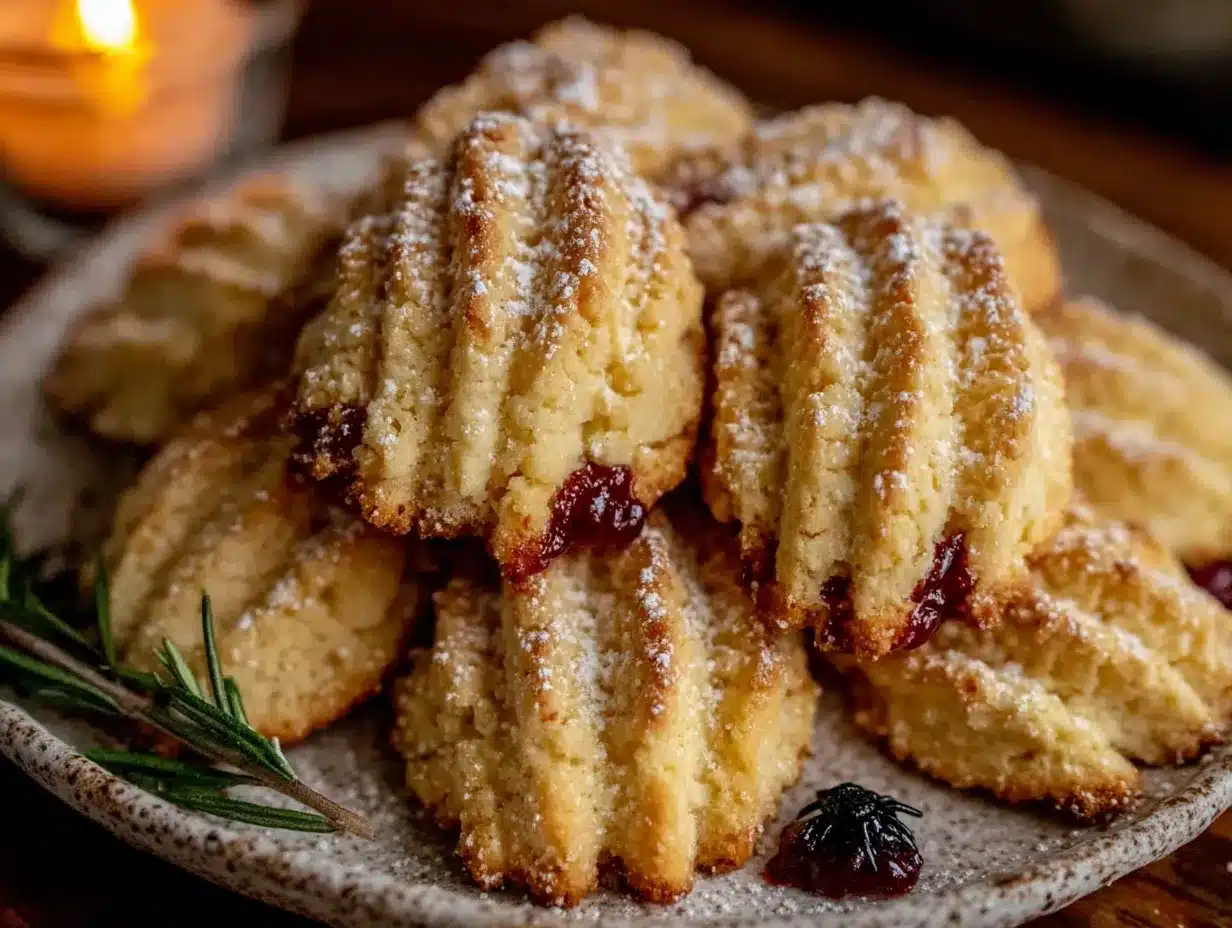
Alright, let’s get our hands dirty—literally. This is the fun part. The dough comes together quickly, and the shaping is where the magic (and the creepiness) happens. Follow these steps, and you’ll have a tray of disgustingly realistic witch fingers in no time.
- Cream the Butter and Sugar (5 minutes): In the bowl of your stand mixer fitted with the paddle attachment, beat the softened butter and granulated sugar together on medium speed until it’s light, fluffy, and pale in color. This should take about 3-5 minutes. Scrape down the sides of the bowl once or twice. You want to incorporate air here, which helps create a tender cookie.
- Add the Wet Ingredients (2 minutes): Add the room temperature egg, vanilla extract, and almond extract. Beat on medium speed until everything is well combined and smooth. The mixture might look a little curdled for a second, but don’t panic—it will come back together. Scrape the bowl again.
- Mix the Dry Ingredients (2 minutes): In a separate medium bowl, whisk together the all-purpose flour, baking powder, and salt. With the mixer on low speed, gradually add the dry ingredients to the wet ingredients. Mix just until the dough comes together. Do not overmix! Overmixing develops the gluten, which will make your cookies tough and chewy instead of tender and crumbly.
- Chill the Dough (30 minutes – 1 hour): This is the most important step! The dough will be very soft and sticky. Wrap it tightly in plastic wrap and flatten it into a disc. Refrigerate for at least 30 minutes, or up to overnight. Chilling the dough solidifies the butter, which prevents the cookies from spreading too much in the oven. I’ve skipped this step before, and my witch fingers turned into sad, flat blobs. Don’t be like me. Chill the dough.
- Preheat and Prepare (10 minutes): When you’re ready to bake, preheat your oven to 350°F (175°C). Line your baking sheets with parchment paper or silicone mats.
- Shape the Fingers (15-20 minutes): This is where the fun begins. Take a small amount of chilled dough (about 1 to 1.5 tablespoons). Roll it between your palms into a log shape, about 3-4 inches long. Then, gently taper one end to be slightly thinner (the fingertip) and leave the other end slightly thicker (the base of the finger). Place it on the prepared baking sheet.
- Create the Knuckles and Nail (5 minutes per tray): Using the back of a small knife or a bench scraper, gently press indentations into the dough to create the “knuckles.” Make 2-3 subtle cuts across the finger. Don’t cut all the way through! Next, take a sliced almond and gently press it into the tapered end of the finger to create the “fingernail.” Press it in firmly so it sticks during baking.
- Bake (10-12 minutes): Bake the cookies for 10-12 minutes, or until the edges are just barely starting to turn a light golden brown. The centers will still look very pale and soft. This is perfect. If you bake them until they are fully golden, they will be too hard. Let them cool on the baking sheet for 5 minutes before transferring them to a wire rack to cool completely.
- Add the “Blood” (5 minutes): Once the cookies are completely cool, it’s time for the finishing touch. Spoon your red jam or gel into a small piping bag or a zip-top bag with a tiny corner snipped off. Pipe a small dollop of red gel right at the base of the almond fingernail, where it meets the cookie. This creates the “bloody cuticle” effect. You can also add a few more drops on the knuckles for a gory, freshly severed look.
Cooking Tips & Techniques
I’ve made these cookies every single Halloween for the past five years, and I’ve learned a few things the hard way. Here are my best tips to ensure your witch fingers come out perfectly creepy every time.
- The Dough Must Be Cold: I cannot stress this enough. If your dough feels too soft to shape, pop it back in the fridge for 10 minutes. Warm dough will spread into puddles, and you’ll end up with flat, shapeless blobs instead of fingers. I once rushed this step and ended up with cookies that looked more like alien pancakes than witch fingers.
- Don’t Overwork the Dough: When you’re rolling the fingers, try to handle the dough as little as possible. The heat from your hands will warm the butter, making the dough sticky. If it gets too sticky, just wash your hands with cold water and dry them thoroughly before continuing.
- Almond Placement Matters: Make sure the pointed end of the almond is facing outward, away from the cookie. This creates a more realistic fingernail shape. I’ve accidentally put them on backward, and they just look like weird, pointy lumps.
- Use a Light Touch for Knuckles: You want the knuckle marks to be visible after baking, but not so deep that the cookie splits in half. A gentle press with the back of a butter knife is perfect. If you cut too deep, the finger will separate during baking.
- Bake Until Just Set: The key to a soft, tender sugar cookie is to pull them out of the oven when the edges are just barely golden. The centers will look pale and slightly underdone. They will continue to set on the hot baking sheet as they cool. Overbaking is the number one mistake that leads to dry, hard cookies.
- Cool Completely Before “Blood”: If you add the red jam to a warm cookie, it will melt and soak in, becoming a sticky, translucent mess. You want a thick, glossy, blood-like dollop. Patience is key here. Let them cool completely on a wire rack.
Variations & Adaptations
This recipe is incredibly versatile. Once you have the basic dough and shaping method down, you can get creative with different flavors and spooky looks. Here are a few of my favorite variations.
- Chocolate Witch Fingers: For a richer, darker cookie, replace ¼ cup of the all-purpose flour with ¼ cup of unsweetened cocoa powder. This gives the fingers a darker, more “earthy” look, like they belong to a swamp witch. Use a dark red gel for the blood to make it pop against the dark cookie.
- Gluten-Free Version: You can easily make these gluten-free by substituting the all-purpose flour with a 1:1 gluten-free baking flour blend. I’ve had great success with Bob’s Red Mill 1-to-1 Baking Flour. Make sure the blend contains xanthan gum, which helps mimic the structure of gluten. The texture will be slightly more crumbly, but still delicious.
- Spooky Spider Fingers: Instead of an almond nail, press a chocolate chip or a candy eyeball into the fingertip for a different kind of creepy. You can also add a few pretzel sticks sticking out of the base of the finger to look like broken bones. It’s a fun twist for a zombie-themed party.
- Lemon or Orange Zest: Add the zest of one lemon or one orange to the butter and sugar mixture before creaming. This adds a bright, citrusy note that cuts through the sweetness and complements the almond extract beautifully. It’s a surprisingly elegant flavor combination.
- Royal Icing “Blood”: For a more glossy, professional-looking “blood,” use a simple royal icing made with powdered sugar, a little milk, and red gel food coloring. It dries hard and shiny, creating a very realistic, gore-like effect. I did this once for a party, and people were genuinely grossed out.
Serving & Storage Suggestions
These cookies are best served at room temperature, and they are a guaranteed conversation starter. The presentation is half the fun.
- Serving: Arrange the witch fingers on a platter in a way that looks like a dismembered hand. You can scatter them around a bowl of red punch for a truly gruesome effect. They are perfect for a Halloween party snack table, a spooky movie night, or a school bake sale. I like to serve them on a black or dark purple platter to make the “blood” stand out.
- Complementary Dishes: These cookies pair wonderfully with a glass of cold milk, a warm mug of apple cider, or a scoop of vanilla ice cream. For a truly themed party, serve them alongside a bowl of “witches’ brew” (green punch) or “zombie brains” (buffalo chicken dip).
- Storage: Store the undecorated cookies (without the jam) in an airtight container at room temperature for up to 5 days. The jam can make the cookies a little sticky, so I recommend storing them separately and adding the “blood” just before serving. If you’ve already added the jam, they will still be fine for 2-3 days, but the jam might soak in slightly.
- Freezing: You can freeze the baked, undecorated cookies for up to 3 months. Place them in a single layer in a freezer-safe container or bag, separated by parchment paper. To serve, thaw them at room temperature for about 30 minutes, then add the jam. You can also freeze the raw, shaped dough. Place the shaped fingers on a baking sheet and freeze until solid, then transfer them to a freezer bag. Bake from frozen, adding 2-3 minutes to the baking time.
- How Flavors Develop: Like most sugar cookies, these taste even better the next day. The flavors meld together, and the texture becomes perfectly soft. If you can resist eating them all immediately, they are even more delicious on day two.
Nutritional Information & Benefits
While these are definitely a “treat” and not a health food, here’s a general idea of what’s in them. A single cookie (using the recipe as written) contains roughly 150-180 calories, 8-10 grams of fat, 20-22 grams of carbohydrates, and 2-3 grams of protein. The exact numbers will vary depending on the size of your cookies and the specific ingredients you use.
The main health benefit here is the almond! Almonds are a great source of healthy monounsaturated fats, vitamin E, and magnesium. They are also a good source of fiber, which can help with digestion. So, while the cookie itself is a sugary indulgence, the almond “fingernail” adds a tiny, accidental health boost. If you want to make them slightly lighter, you can try using a sugar substitute like monk fruit sweetener in place of the granulated sugar, but I haven’t tested this myself, so I can’t vouch for the texture.
This recipe contains common allergens: wheat (gluten), dairy (butter), eggs, and tree nuts (almonds). If you are serving these at a party, it’s a good idea to put a small sign nearby indicating they contain nuts, as the almond fingernails can be a choking hazard for very young children. For a nut-free version, you can use a candy corn or a piece of dried apricot for the fingernail instead of an almond.
Conclusion
These Easy Witch Finger Halloween Sugar Cookies are everything a Halloween treat should be: fun to make, hilarious to serve, and genuinely delicious to eat. They started as a total kitchen disaster—a batch of ruined royal icing and a handful of wrong ingredients—and turned into my most requested holiday recipe. That’s the beauty of baking, you know? Sometimes the best things come from the messiest mistakes.
I encourage you to make these your own. Play with the colors, try different jams, or add a little extra almond extract for a stronger flavor. The dough is incredibly forgiving, and the shaping is so much fun, especially if you get the kids involved. There’s nothing quite like the look on someone’s face when they realize the “finger” they’re about to bite into is just a cookie.
So, go ahead and get a little creepy in the kitchen this Halloween. I promise you won’t regret it. And when you make them, I’d love to hear about it! Drop a comment below and tell me how they turned out, or share a photo of your spooky creations. Did your kids love shaping them? Did you try a fun variation? Let me know! Happy Halloween, and happy baking!
Frequently Asked Questions
- Can I make these cookies ahead of time? Absolutely! You can make the dough up to 3 days in advance and keep it wrapped in the fridge. You can also bake the cookies and store them undecorated for up to 5 days. Just add the jam “blood” right before you serve them for the best look.
- My dough is too sticky to work with. What do I do? This usually happens if the dough hasn’t been chilled long enough or if your butter was too soft. Pop the dough back in the fridge for 30 minutes to firm up. You can also lightly dust your hands with a little bit of flour, but be careful not to incorporate too much extra flour into the dough.
- Can I use a different type of nut for the fingernails? Yes, you can! Sliced almonds are the classic choice because they have the perfect shape and size. But you can also use a pecan half, a pistachio, or even a candy corn for a sweeter, nut-free option. Just make sure whatever you use is flat enough to press into the dough.
- Why did my cookies spread out and lose their finger shape? This is almost always because the dough was too warm when it went into the oven. Make sure you chill the dough for at least 30 minutes before shaping. If your kitchen is warm, you can also pop the shaped cookies on the baking sheet into the fridge for 10 minutes before baking.
- How do I make the “blood” look more realistic? For the most realistic, glossy blood, use a red gel icing or a seedless red jam like strawberry or raspberry. You can also mix a drop of red food coloring with a little bit of corn syrup for a super shiny, sticky effect. Avoid using a thin, runny sauce, as it will just soak into the cookie.
Pin This Recipe!
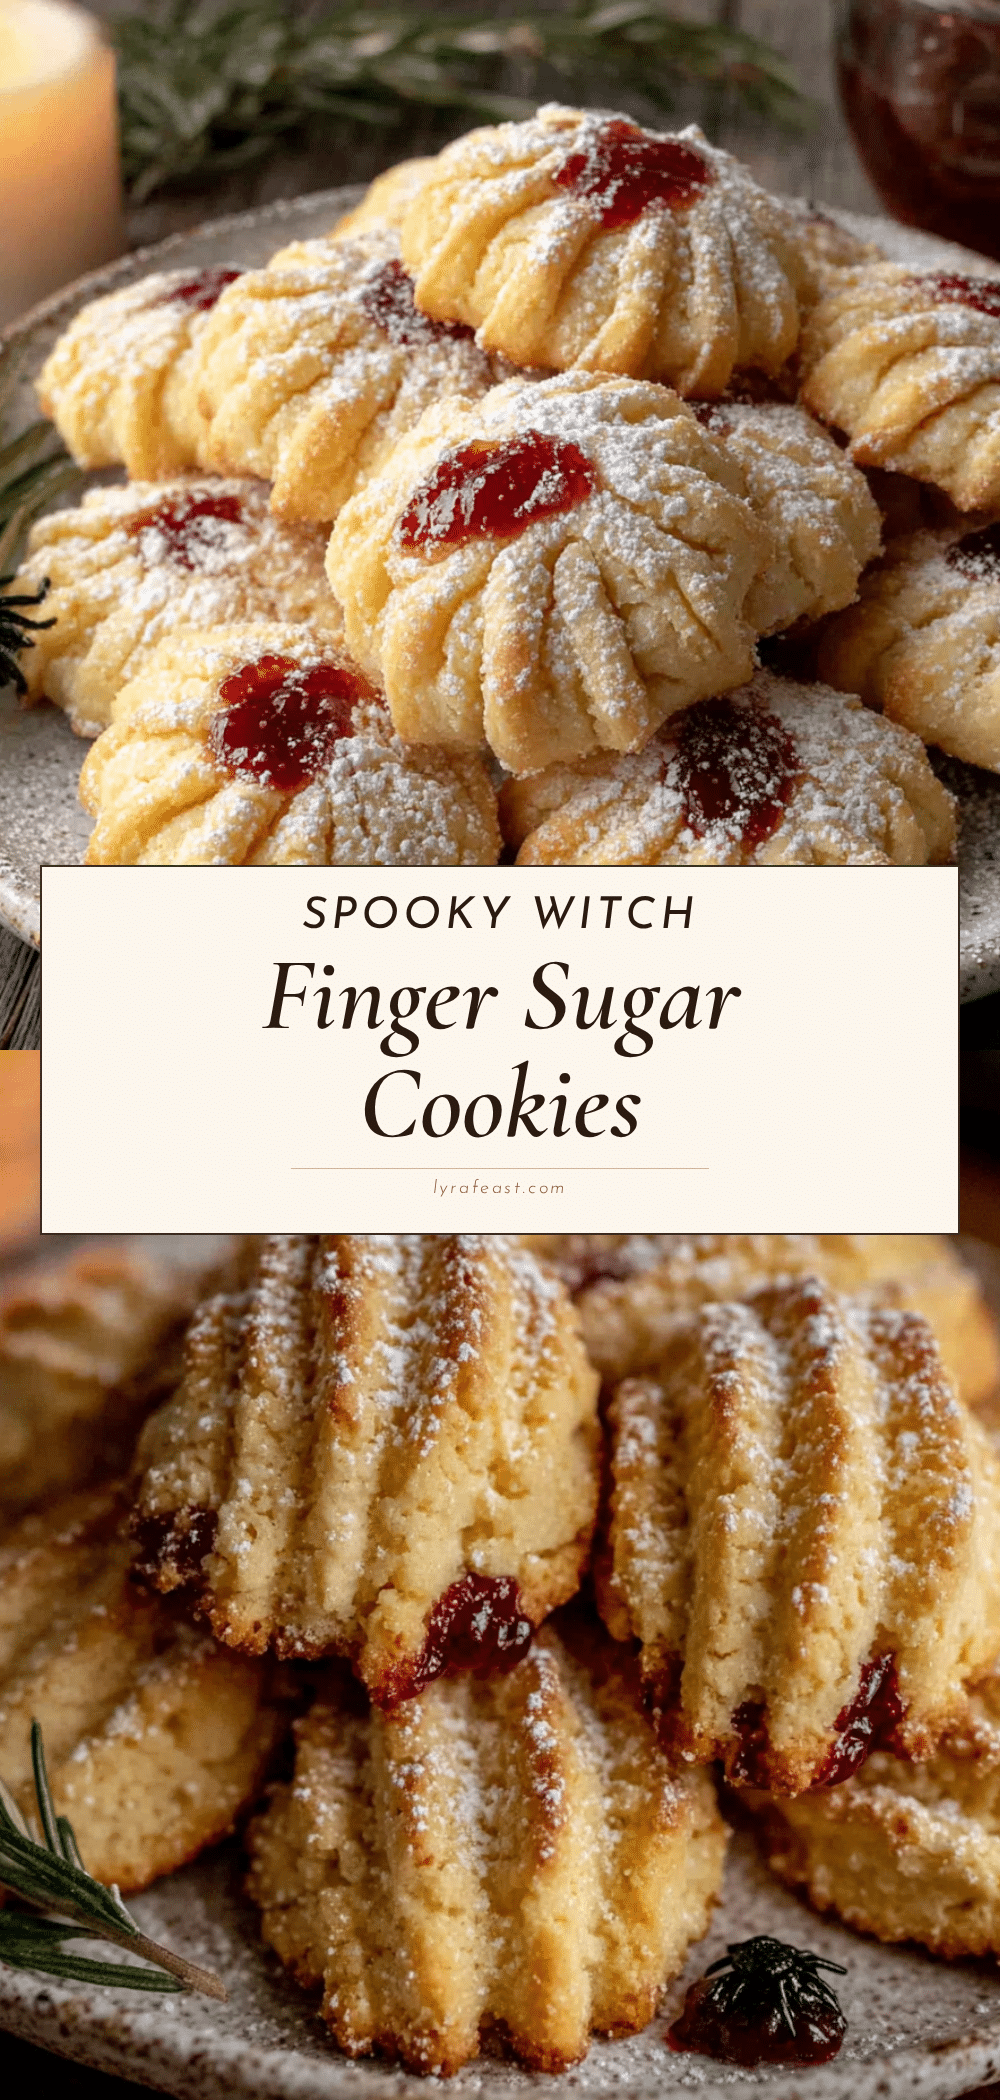
Easy Witch Finger Halloween Cookies

These Easy Witch Finger Halloween Sugar Cookies are a fun, spooky treat that started as a kitchen accident. They are simple to make, require no special decorating skills, and are guaranteed to be the star of any Halloween party.
- Prep Time: 30 minutes
- Cook Time: 12 minutes
- Total Time: 1 hour 42 minutes
- Yield: 24 servings 1x
- Category: Dessert
- Cuisine: American
Ingredients
- 1 cup (2 sticks) unsalted butter, softened
- 1 cup granulated sugar
- 1 large egg, room temperature
- 1 teaspoon vanilla extract
- 1 teaspoon almond extract
- 2 ½ cups all-purpose flour
- 1 teaspoon baking powder
- ½ teaspoon salt
- 1 cup sliced almonds (raw, unroasted)
- Red jam or gel food coloring (for ‘blood’)
- Green food coloring (optional, for dough tint)
Instructions
- Cream the butter and sugar: In a stand mixer fitted with the paddle attachment, beat the softened butter and granulated sugar on medium speed until light, fluffy, and pale (about 3-5 minutes). Scrape down the sides.
- Add the wet ingredients: Add the room temperature egg, vanilla extract, and almond extract. Beat on medium speed until well combined and smooth (about 2 minutes). Scrape the bowl again.
- Mix the dry ingredients: In a separate bowl, whisk together the flour, baking powder, and salt. With the mixer on low, gradually add the dry ingredients to the wet ingredients. Mix just until the dough comes together. Do not overmix.
- Chill the dough: Wrap the dough tightly in plastic wrap and flatten into a disc. Refrigerate for at least 30 minutes, or up to overnight.
- Preheat and prepare: Preheat oven to 350°F (175°C). Line baking sheets with parchment paper or silicone mats.
- Shape the fingers: Take about 1 to 1.5 tablespoons of chilled dough. Roll into a log shape about 3-4 inches long. Taper one end slightly thinner (fingertip) and leave the other end thicker (base). Place on prepared baking sheet.
- Create knuckles and nail: Using the back of a small knife, gently press 2-3 indentations into the dough for knuckles. Press a sliced almond into the tapered end for the fingernail, pointed end outward.
- Bake: Bake for 10-12 minutes, until edges are just barely golden. Centers will look pale. Let cool on baking sheet for 5 minutes, then transfer to a wire rack to cool completely.
- Add the ‘blood’: Once completely cool, spoon red jam or gel into a piping bag or zip-top bag with a tiny corner snipped off. Pipe a small dollop at the base of the almond fingernail (the cuticle area). Optionally add a few drops on the knuckles.
Notes
Chill the dough thoroughly to prevent spreading. Handle dough as little as possible to keep it from getting sticky. Use a light touch for knuckle marks. Bake until just set; overbaking leads to dry cookies. Cool completely before adding jam ‘blood’ to prevent it from melting. Store undecorated cookies in an airtight container at room temperature for up to 5 days. Freeze baked, undecorated cookies for up to 3 months.
Nutrition
- Serving Size: 1 cookie
- Calories: 165
- Sugar: 10
- Sodium: 95
- Fat: 9
- Saturated Fat: 5
- Carbohydrates: 21
- Fiber: 1
- Protein: 3
Keywords: witch finger cookies, Halloween cookies, sugar cookies, easy Halloween treat, spooky cookies, almond cookies



