“You know that moment when you walk into a kitchen and the smell just stops you in your tracks?” That’s exactly what happened to me one crisp October afternoon at my friend Ben’s fall harvest party. Ben wasn’t the type to fuss over desserts—he’s more of a grill-and-beer guy—but that day, he pulled out a homemade apple pie that seemed to capture everything cozy and comforting about classic American celebrations.
Honestly, I wasn’t expecting much. I mean, apple pie is everywhere, right? But this one had a golden, flaky crust that shattered beautifully under your fork, while the filling was a perfect balance of tart and sweet, with just the right hint of cinnamon and nutmeg. The edges were a little rustic—Ben confessed he forgot to crimp them neatly—but that imperfection only made it feel more genuine. (Also, I might have knocked over a glass of cider mid-bite, but hey, it was worth it.)
That pie stayed with me, and I couldn’t stop thinking about how to recreate it at home. This recipe is my take on that unforgettable Perfect All-American Apple Pie for Classic Celebrations. It’s straightforward, uses simple ingredients you probably already have, and hits that nostalgic spot every time. Maybe you’ve been there too—searching for a pie that feels like a warm hug at a family gathering or a neighborhood potluck. Let me tell you, this one delivers exactly that.
Why You’ll Love This Recipe
This apple pie isn’t just any dessert; it’s a tried-and-true crowd-pleaser that I’ve made countless times for everything from backyard barbecues to Thanksgiving dinners. Here’s why it’s worth pulling out your rolling pin for:
- Quick & Easy: Comes together in about 45 minutes of prep time plus baking, perfect for busy weekends or last-minute celebrations.
- Simple Ingredients: No need for fancy or hard-to-find items; pantry staples and fresh apples are all you need.
- Perfect for Classic Celebrations: Whether it’s the Fourth of July, Thanksgiving, or just a Sunday dinner, this pie fits right in.
- Crowd-Pleaser: Kids and adults alike keep going back for seconds — it’s that good.
- Unbelievably Delicious: The flaky crust with its buttery crunch paired with tender, spiced apple filling makes you close your eyes with every bite.
What makes this recipe stand out is the way the crust is handled — a little bit of cold butter mixed with just enough ice water to bring it together without toughening it up. Plus, I add a splash of lemon juice to keep the apple slices bright and flavorful, which is a small trick I picked up from my pastry chef days. It’s not just an apple pie; it’s your new go-to classic that feels both comforting and special.
What Ingredients You Will Need
This recipe uses simple, wholesome ingredients to deliver bold flavor and satisfying texture without the fuss. Most of these are pantry staples, and the fresh apples are the real star here. Feel free to swap apples based on what’s in season or your personal preference.
- For the crust:
- 2 ½ cups (315g) all-purpose flour (I recommend King Arthur for best texture)
- 1 teaspoon salt
- 1 tablespoon granulated sugar (adds a subtle sweetness to the crust)
- 1 cup (226g) unsalted butter, cold and cut into small cubes
- 4-6 tablespoons ice water (start with 4 and add more if needed)
- For the filling:
- 6-7 medium apples (about 3 pounds/1.4kg) – a mix of Granny Smith and Honeycrisp works great for balance
- ½ cup (100g) granulated sugar
- ¼ cup (55g) packed light brown sugar
- 1 teaspoon ground cinnamon
- ¼ teaspoon ground nutmeg
- 1 tablespoon all-purpose flour (helps thicken the filling)
- 1 tablespoon lemon juice (prevents browning and adds brightness)
- 1 teaspoon vanilla extract (optional, for warmth and depth)
- For assembly:
- 1 egg, beaten (for egg wash to get that golden crust)
- 1 tablespoon coarse sugar (optional, for sprinkling on top)
If you want a gluten-free option, you can replace the all-purpose flour with a gluten-free blend, but note the texture may vary slightly. For a dairy-free crust, swap butter with a plant-based solid fat, but keep it cold for flakiness.
Equipment Needed
- 9-inch (23cm) pie dish (glass or ceramic works best for even baking)
- Mixing bowls (one large for dough, one medium for filling)
- Pastry blender or food processor (helps cut butter into flour efficiently)
- Rolling pin (a wooden or silicone one, depending on preference)
- Sharp paring knife or apple corer/slicer (for peeling and slicing apples)
- Baking sheet (to catch any drips from the pie during baking)
- Wire cooling rack (to let the pie cool properly)
If you don’t have a pastry blender, two forks or your fingertips work just fine, though it may take a bit longer. I personally like using a food processor for the crust because it speeds things up, but hand mixing gives you better control over dough texture. For rolling, a silicone mat can help with less sticking and easier cleanup.
Preparation Method
- Make the crust: In a large bowl, whisk together the flour, salt, and sugar. Add the cold butter cubes and use a pastry blender or your fingertips to cut the butter into the flour until the mixture resembles coarse crumbs with pea-sized bits of butter. This usually takes about 3-5 minutes.
- Add ice water: Drizzle in 4 tablespoons of ice water, mixing gently with a fork. If the dough doesn’t come together when pinched, add more water, one tablespoon at a time. Stop as soon as the dough holds together without being sticky. Form the dough into two discs, wrap in plastic wrap, and chill for at least 1 hour (or up to 2 days).
- Prepare the filling: Peel, core, and slice the apples into ¼-inch (6mm) thick slices. In a medium bowl, toss the apples with lemon juice. Add the granulated sugar, brown sugar, cinnamon, nutmeg, flour, and vanilla extract. Stir gently until evenly coated. Let sit while you roll out the dough.
- Roll out the bottom crust: On a lightly floured surface, roll out one disc into a 12-inch (30cm) circle, about ⅛-inch (3mm) thick. Transfer it to the pie dish by gently folding it in half and unfolding over the dish. Press it into the edges and trim any excess dough hanging over the sides.
- Fill the pie: Pour the apple filling into the crust, spreading it evenly. Use a slotted spoon if you want to leave excess juice behind to prevent sogginess.
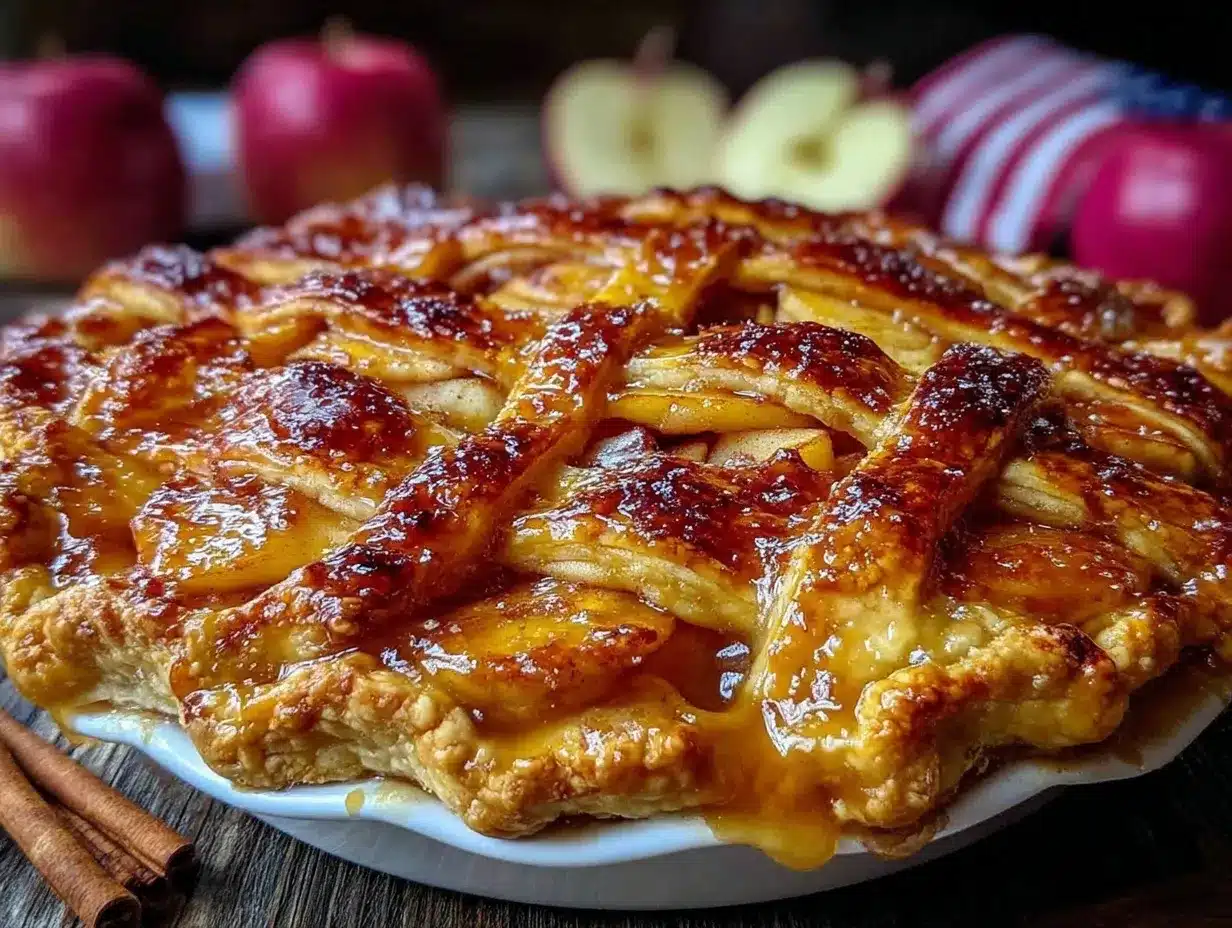
- Roll out the top crust: Roll out the second dough disc into another 12-inch circle. You can either place it whole on top or cut strips for a lattice pattern. If making a lattice, weave the strips over the filling.
- Seal and crimp edges: Trim any excess dough and press the edges together to seal. Use your fingers or a fork to crimp decoratively. Brush the top crust with beaten egg, then sprinkle with coarse sugar if desired.
- Cut vents: If using a full top crust, cut 3-4 small slits to allow steam to escape during baking.
- Bake: Place the pie on a baking sheet and bake in a preheated oven at 425°F (220°C) for 15 minutes. Then reduce heat to 350°F (175°C) and bake for another 35-45 minutes, or until the crust is golden and the filling bubbles through the vents. If the edges brown too fast, cover them with foil or a pie shield after 25 minutes.
- Cool: Let the pie cool on a wire rack for at least 2 hours before slicing. This helps the filling set and makes serving easier.
Tip: If you notice the crust shrinking or toughening, it might be from overworking the dough or not chilling it enough. I learned the hard way—once I skipped the chill and ended up with a crust that barely held together. Patience makes all the difference here.
Cooking Tips & Techniques
To get that iconic flaky crust, keep everything cold—your butter, water, even the bowl if you can. Cold butter creates little pockets that puff up during baking. Don’t overmix the dough; it should just come together. Overworking leads to a tough crust, and nobody wants that.
When preparing the filling, mixing different apple varieties balances sweetness and tartness. Granny Smiths keep the filling firm, while Honeycrisps add natural sweetness. Also, tossing apple slices with lemon juice prevents them from browning while you roll out the dough.
Baking at a higher temperature initially helps set the crust and starts caramelizing sugars quickly, but you want to lower the heat after 15 minutes to avoid burning. Keep an eye on the edges—if they brown too fast, foil is your best friend. I usually wrap the edges after 20 minutes, based on experience.
Remember, every oven bakes differently. If your pie isn’t bubbling by 40 minutes at the lower temperature, give it extra time in 5-minute increments. You want that filling hot enough to bubble through the vents—that’s a sign it’s done.
Variations & Adaptations
Feel like switching things up? Here are some fun ways to make this pie your own:
- Spiced Bourbon Apple Pie: Add 2 tablespoons of bourbon to the filling for a warm, boozy twist. It’s a crowd favorite during holiday parties.
- Gluten-Free Version: Use a gluten-free flour blend for the crust and a bit more water to get the dough consistency right. I’ve had great results with Bob’s Red Mill 1-to-1 gluten-free baking flour.
- Vegan Apple Pie: Swap butter for coconut oil or vegan margarine and use a flax egg (1 tablespoon ground flaxseed + 3 tablespoons water) for the egg wash.
- Caramel Apple Pie: Drizzle ½ cup of caramel sauce over the apples before adding the top crust, or serve slices with a scoop of caramel ice cream.
- Mini Apple Pies: Use muffin tins to make individual-sized pies, perfect for parties or gifts.
I remember trying the vegan version once when a friend showed up unexpectedly—turns out it was just as flaky and delicious as the original. You can definitely make this classic yours, no matter your dietary needs or cravings.
Serving & Storage Suggestions
This pie tastes best slightly warm or at room temperature. I love serving it with a scoop of vanilla ice cream or a dollop of whipped cream for an extra indulgence. It pairs beautifully with hot apple cider or a cup of black coffee, especially on chilly days.
Store leftover pie loosely covered at room temperature for up to 2 days, or refrigerate for up to 4 days. For longer storage, wrap well and freeze for up to 3 months. When reheating, warm slices in a 350°F (175°C) oven for about 15 minutes to refresh the crust’s crispness.
Flavors actually deepen after a day, so if you can resist, letting the pie rest overnight is worth it. The spices mellow, and the apples soak up that perfect blend of sugars and juices. Honestly, sometimes I make the pie a day ahead just for that reason.
Nutritional Information & Benefits
An average slice (1/8th of the pie) contains approximately 320 calories, with 14g of fat, 45g of carbohydrates, and 3g of fiber. The apples provide vitamin C and antioxidants, making this dessert a bit more than just empty calories. Using unsalted butter and controlling sugar amounts keeps it balanced.
This recipe can be adapted for gluten-free or vegan diets, making it accessible for many. It’s a better choice than store-bought pies loaded with preservatives and artificial flavors. I appreciate how it brings wholesome ingredients to the table and still feels like a treat.
Conclusion
The Perfect All-American Apple Pie for Classic Celebrations is one of those recipes that feels timeless and personal all at once. It’s easy enough for a novice baker but rewarding enough to impress even the toughest apple pie critics. I love this recipe because it captures the warmth of home, the joy of sharing, and the simple pleasure of biting into a flaky crust filled with tender, spiced apples.
Feel free to make it your own with the variations and tips shared here. And when you do, please drop a comment or share your experience—I’d love to hear how your pie turned out or any creative twists you tried. After all, nothing beats the joy of a homemade apple pie to bring people together. So roll up your sleeves and get baking—you won’t regret it!
Frequently Asked Questions
What type of apples are best for apple pie?
Using a mix of tart and sweet apples like Granny Smith and Honeycrisp gives the best balance of flavor and texture. Granny Smith keeps the filling firm, while Honeycrisp adds natural sweetness.
Can I make the pie crust ahead of time?
Yes! You can prepare the dough up to two days in advance and keep it chilled in the fridge. Just bring it back to a cold temperature before rolling out.
How do I prevent a soggy bottom crust?
Use a slotted spoon to leave excess juice behind when filling the pie. Also, baking on a lower oven rack and preheating the oven properly helps crisp the bottom.
Can I freeze apple pie?
Absolutely. Wrap the pie tightly and freeze for up to 3 months. Thaw overnight in the fridge, then reheat in the oven for best results.
What’s the best way to reheat leftover pie?
Reheat slices in a 350°F (175°C) oven for about 15 minutes to restore the crust’s flakiness. Avoid microwaving as it can make the crust soggy.
PrintPerfect All-American Apple Pie
A classic homemade apple pie with a flaky, buttery crust and a perfectly spiced apple filling, ideal for celebrations and family gatherings.
- Prep Time: 45 minutes
- Cook Time: 50-60 minutes
- Total Time: 1 hour 35 minutes to 1 hour 45 minutes
- Yield: 8 servings 1x
- Category: Dessert
- Cuisine: American
Ingredients
- 2 ½ cups (315g) all-purpose flour
- 1 teaspoon salt
- 1 tablespoon granulated sugar
- 1 cup (226g) unsalted butter, cold and cut into small cubes
- 4–6 tablespoons ice water
- 6–7 medium apples (about 3 pounds/1.4kg) – mix of Granny Smith and Honeycrisp
- ½ cup (100g) granulated sugar
- ¼ cup (55g) packed light brown sugar
- 1 teaspoon ground cinnamon
- ¼ teaspoon ground nutmeg
- 1 tablespoon all-purpose flour
- 1 tablespoon lemon juice
- 1 teaspoon vanilla extract (optional)
- 1 egg, beaten (for egg wash)
- 1 tablespoon coarse sugar (optional, for sprinkling)
Instructions
- In a large bowl, whisk together flour, salt, and sugar. Add cold butter cubes and cut into flour using a pastry blender or fingertips until mixture resembles coarse crumbs with pea-sized bits of butter (3-5 minutes).
- Drizzle in 4 tablespoons ice water, mixing gently. Add more water one tablespoon at a time if dough doesn’t hold together. Form dough into two discs, wrap in plastic, and chill for at least 1 hour.
- Peel, core, and slice apples into ¼-inch thick slices. Toss with lemon juice, then add granulated sugar, brown sugar, cinnamon, nutmeg, flour, and vanilla extract. Stir gently to coat.
- Roll out one dough disc on a floured surface into a 12-inch circle, about ⅛-inch thick. Transfer to a 9-inch pie dish, pressing into edges and trimming excess dough.
- Pour apple filling evenly into crust, leaving excess juice behind if desired.
- Roll out second dough disc into a 12-inch circle. Place whole on top or cut into strips for lattice. If lattice, weave strips over filling.
- Trim excess dough and seal edges by pressing together and crimping decoratively. Brush top crust with beaten egg and sprinkle with coarse sugar if desired.
- Cut 3-4 small slits in top crust if using a full crust to allow steam to escape.
- Place pie on baking sheet and bake at 425°F (220°C) for 15 minutes. Reduce heat to 350°F (175°C) and bake for 35-45 minutes until crust is golden and filling bubbles. Cover edges with foil if browning too fast.
- Cool pie on wire rack for at least 2 hours before slicing to allow filling to set.
Notes
Keep butter and water cold to ensure a flaky crust. Do not overwork dough to avoid toughness. Use a slotted spoon to leave excess juice behind to prevent soggy crust. Cover edges with foil if browning too fast. Let pie cool for at least 2 hours before slicing for best results.
Nutrition
- Serving Size: 1 slice (1/8th of pi
- Calories: 320
- Fat: 14
- Carbohydrates: 45
- Fiber: 3
Keywords: apple pie, classic apple pie, homemade apple pie, fall dessert, Thanksgiving dessert, easy apple pie, flaky crust, spiced apple filling