Introduction
“I swear, it was the sound of the ice cream truck that got me,” my neighbor Jake said last Fourth of July as we both reached for the last bag of frozen berries at the corner store. Honestly, I was just trying to put together something quick and cheerful for the neighborhood block party, something that felt like summer in every bite. That’s when the idea of these Refreshing Red White & Blue Popsicles popped into my head—literally and figuratively.
It wasn’t a fancy plan or some elaborate recipe from a fancy chef. No, it began with a few simple ingredients I had on hand, a slightly cracked popsicle mold I’d forgotten I owned, and a little bit of improvisation when I realized I’d run out of one berry. You know that feeling when you’re halfway through a recipe and have to rethink your entire approach? That’s exactly how these popsicles came to be—an unexpected hit born from a last-minute summer scramble.
Maybe you’ve been there too, staring at your freezer, wanting something cool but not loaded with sugar and artificial colors. These popsicles are all about fresh fruit, pure flavors, and that perfect balance of sweet and tart that makes you close your eyes and smile with the first bite. Plus, they’re a feast for the eyes—those vibrant red, white, and blue layers bring the party right to your tongue.
Let me tell you, once I made these, they became a staple for every hot day, every picnic, and every casual get-together. Even Jake, who claimed he wasn’t much for cooking, asked for the recipe. That’s how you know something’s good—when it breaks through the usual snack options and becomes a must-have. So, if you’re ready for an easy, fun, and genuinely refreshing summer treat, you’re in the right place.
Why You’ll Love This Recipe
From my many summer kitchen experiments (and a few sun-soaked afternoons with friends), these Refreshing Red White & Blue Popsicles stand out for several reasons:
- Quick & Easy: You can whip these up in under 15 minutes, perfect for those last-minute cravings or when you want a fuss-free dessert after a long day.
- Simple Ingredients: No need for exotic fruits or fancy syrups; just fresh or frozen berries, yogurt, and a touch of natural sweetener.
- Perfect for Summer Celebrations: Whether it’s a backyard barbecue, a pool party, or a patriotic holiday, these popsicles bring that festive vibe effortlessly.
- Crowd-Pleaser: Kids and adults alike love the fruity flavors and the cool, creamy texture from the yogurt layer.
- Unbelievably Delicious: The combo of tart berries with smooth, slightly tangy yogurt is honestly next-level refreshing.
What makes this recipe different? The layering technique creates a visually stunning treat that’s as fun to make as it is to eat. Plus, I’ve balanced the sweetness just right—no overpowering sugar, just pure, clean flavors that let the fruit shine. I even like to add a pinch of fresh mint to the blue layer sometimes, which gives it a subtle surprise. This isn’t just another popsicle recipe; it’s the one I keep coming back to, especially when the heat is relentless and you need something that cools you down and brightens your day.
What Ingredients You Will Need
This recipe uses simple, wholesome ingredients to deliver bold flavor and satisfying texture without the fuss. Most of these are kitchen staples or easy-to-find fresh or frozen fruits, and there’s room to swap out a few elements depending on what’s in season or what you prefer.
- For the Red Layer:
- Fresh or frozen strawberries (about 1 cup, hulled and chopped)
- 1 tablespoon honey or maple syrup (optional, depending on berry sweetness)
- 1 teaspoon fresh lemon juice (brightens the flavor)
- For the White Layer:
- 1 cup plain Greek yogurt (I prefer Fage for its creamy texture)
- 1 tablespoon honey (adjust to taste)
- 1/2 teaspoon vanilla extract (adds warmth and depth)
- For the Blue Layer:
- Fresh or frozen blueberries (about 1 cup)
- 1 tablespoon honey or maple syrup (optional)
- 1 teaspoon fresh lemon juice
- Optional: a few fresh mint leaves for a subtle herbal note
Ingredient Tips: If fresh berries aren’t available, frozen work just as well and make the popsicles extra refreshing. For a dairy-free version, swap Greek yogurt for coconut yogurt—just be sure to pick one that’s thick and creamy. And if you like it less sweet, feel free to reduce or skip the honey altogether. The lemon juice is key for balancing the sweetness and enhancing those fruity flavors.
Equipment Needed
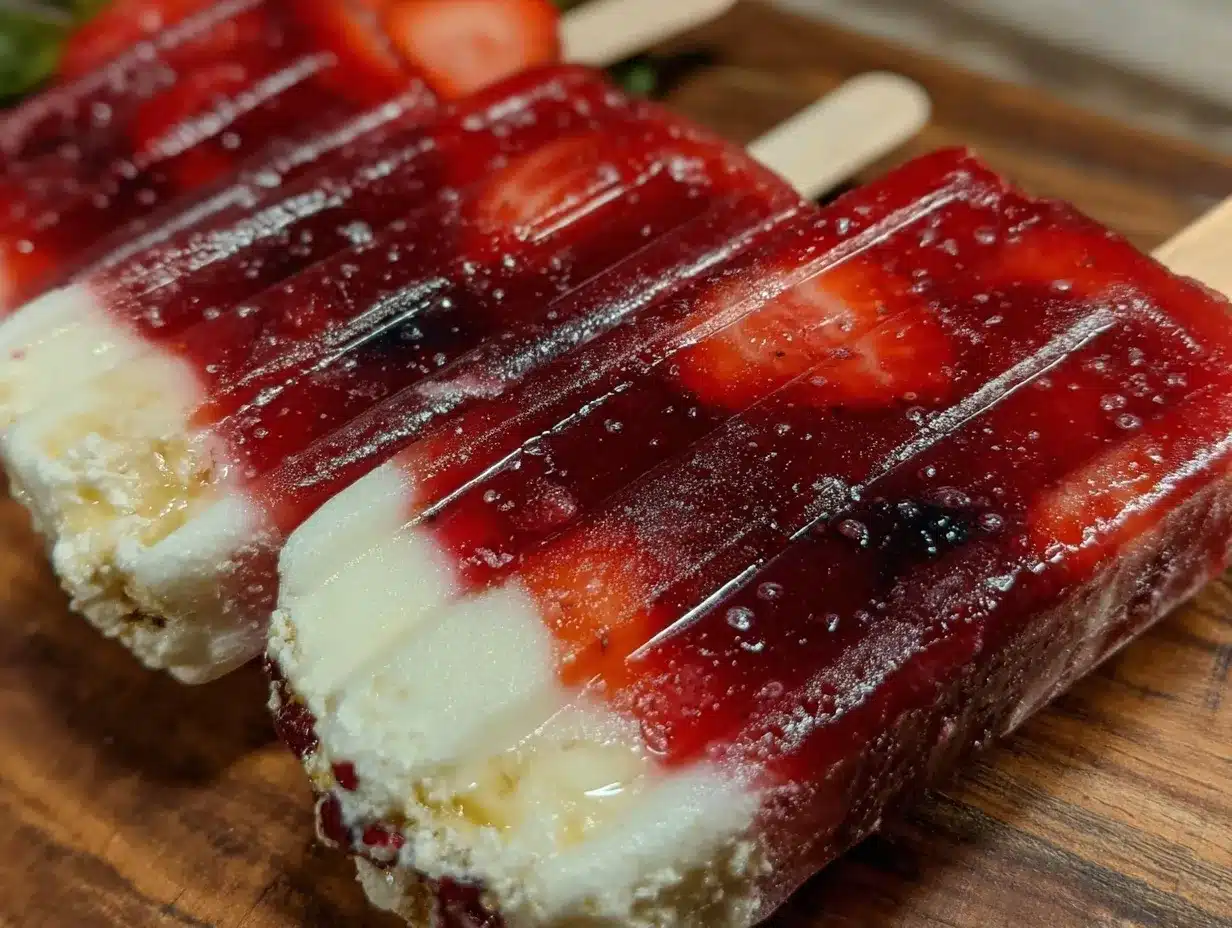
- Popsicle molds: Essential for shaping your popsicles. You can find affordable sets online or at kitchen stores. If you don’t have molds, small paper cups with wooden sticks work fine in a pinch.
- Blender or food processor: To puree the berries smoothly. A handheld immersion blender also does the trick if you prefer.
- Measuring cups and spoons: For accuracy, especially with the sweeteners and lemon juice.
- Mixing bowls: A few small bowls to mix each layer separately.
- Freezer-safe tray or plate: To place molds on a flat surface in the freezer so they don’t tip over.
Honestly, I’ve made these with everything from fancy silicon molds to old yogurt containers, so don’t sweat if you don’t have a dedicated popsicle set. Just make sure whatever you use is sturdy enough to hold the liquid and cold enough to freeze solid. Also, cleaning your blender or food processor promptly makes life easier—berries can stain if you leave them too long!
Preparation Method
- Prepare the red layer: Place the strawberries, honey, and lemon juice in your blender or food processor. Puree until smooth. Taste and adjust sweetness if needed. Pour this mixture into the popsicle molds, filling each about one-third full. Freeze for about 45 minutes to 1 hour, until firm but not fully solid.
- Mix the white layer: In a bowl, whisk together Greek yogurt, honey, and vanilla extract until smooth. Once the red layer is set, spoon the yogurt mixture over it, filling the molds to two-thirds full. Tap the molds gently to remove air bubbles. Freeze again for 45 minutes to 1 hour.
- Prepare the blue layer: Combine blueberries, honey, lemon juice, and mint leaves (if using) in the blender. Puree until smooth. Strain if you prefer a smoother texture or leave as is for a bit of pulp. Pour this mixture over the yogurt layer to fill the molds. Insert popsicle sticks straight down the center.
- Freeze for the final time: Place the molds in the freezer for at least 4 hours or overnight until fully frozen.
- To serve: Run warm water briefly over the outside of the molds to loosen the popsicles before gently pulling them out.
Pro tip: Don’t rush the layers. Letting each set partially freeze helps keep the colors distinct and the popsicles looking beautiful. If you’re in a hurry, you can speed things along by placing molds on a cold metal baking sheet.
Cooking Tips & Techniques
Making these popsicles is straightforward, but a few tricks make all the difference between a so-so treat and a wow-worthy one.
- Layering patience: Let each layer firm up well before adding the next. I once tried rushing it and ended up with a messy swirl instead of crisp stripes. It was tasty but less visually fun.
- Sweetness balance: Different berries have varying sweetness levels. Taste each puree before adding honey, and remember that freezing dulls sweetness slightly, so keep that in mind.
- Texture matters: For a creamier middle layer, Greek yogurt is your friend. If you want a lighter option, try mixing yogurt with a little coconut milk.
- Keep it cold: Always freeze popsicles on a flat, stable surface. If your freezer shelves are uneven, place a baking sheet under your molds to avoid spills.
- Multi-tasking: While one layer freezes, prep the next. It keeps the process efficient and less boring.
Honestly, I learned most of this the hard way—like the time I forgot the yogurt layer in the fridge for hours and it got too thick to spread nicely. Live and learn, right?
Variations & Adaptations
There’s plenty of room to make these popsicles your own. Here are a few of my favorite twists:
- Dietary swaps: Use coconut or almond yogurt for a dairy-free version. Swap honey for agave syrup to keep it vegan.
- Seasonal fruits: In fall, try swapping blueberries for blackberries or raspberries instead. In summer, fresh peaches or mangoes can add a tropical vibe.
- Flavor twists: Add a splash of lime juice instead of lemon for a zesty punch. Or mix fresh herbs like basil or mint into the fruit purees for a fresh twist.
- Alcohol-infused: Adults might enjoy adding a spoonful of vodka or rum to the fruit layers for a boozy summer treat—but freeze well to keep structure.
One time, I made a batch using frozen cherries for the red layer and tossed in a handful of chia seeds in the white layer for some crunch. It was a hit at a friend’s picnic and got me thinking about texture play in popsicles.
Serving & Storage Suggestions
These popsicles are best enjoyed straight from the freezer on a hot day. Serve them in a fun summer setting—think picnic blankets, poolside loungers, or after a backyard barbecue. They pair well with light snacks like mixed nuts, fresh fruit salad, or even a scoop of vanilla ice cream for those extra sweet moments.
To store, keep them tightly covered in the freezer to avoid freezer burn and prevent them from absorbing other flavors. If you don’t have a popsicle cover, wrapping the mold tightly with plastic wrap works fine. They keep well for up to two weeks.
When reheating for serving (yes, sometimes you need to soften them a bit!), hold the mold under warm running water for 10-15 seconds or let sit at room temperature for a couple of minutes. The flavors actually develop a bit more as the pops soften, making them even more enjoyable.
Nutritional Information & Benefits
Each popsicle averages around 70-90 calories depending on sweetener use, making them a light and guilt-free summer snack. The fresh berries pack antioxidants and vitamins, especially vitamin C, which helps support your immune system.
Greek yogurt adds protein and probiotics, great for digestion and satiety. This recipe is naturally gluten-free and can be adapted for dairy-free diets.
Personally, I appreciate having a homemade treat that’s wholesome and satisfying without the excess sugar or artificial ingredients you find in many store-bought popsicles. It’s a simple way to treat yourself and your family to something fun and nourishing during those scorching summer months.
Conclusion
If you’re looking for a festive, cool, and genuinely tasty summer snack, these Refreshing Red White & Blue Popsicles are a winner. They’re simple to make, show-stopping in presentation, and versatile enough to tweak according to your taste or dietary needs.
I keep coming back to this recipe because it reminds me of those easy, joyful summer moments that don’t require much fuss but bring loads of smiles. So go ahead, gather your ingredients, and give them a try. I’d love to hear how you make them your own—drop a comment or share your favorite variations!
Here’s to many sunny days filled with cool, colorful bites that brighten your summer!
FAQs
Can I use frozen berries instead of fresh ones?
Absolutely! Frozen berries work just as well and often make the popsicles even more refreshing. Just thaw slightly before blending for easier pureeing.
What if I don’t have popsicle molds?
You can use small paper cups or silicone muffin liners and insert wooden sticks. Just make sure they’re freezer-safe and stable.
How long do these popsicles last in the freezer?
They’re best eaten within two weeks for optimal flavor and texture but can safely last up to a month if well wrapped.
Can I make these ahead of time for a party?
Yes! Make them the day before and keep them frozen until serving. Just run warm water on the molds briefly before serving to release the popsicles easily.
Is it possible to make these sugar-free?
Yes, you can skip the honey or use a natural sugar substitute like stevia or monk fruit, but be mindful that sweetness levels may vary depending on the berries’ natural sugar.
For more fun summer treats, you might enjoy trying my crispy garlic chicken recipe, which pairs wonderfully with light, fruity desserts like these popsicles.
Pin This Recipe!
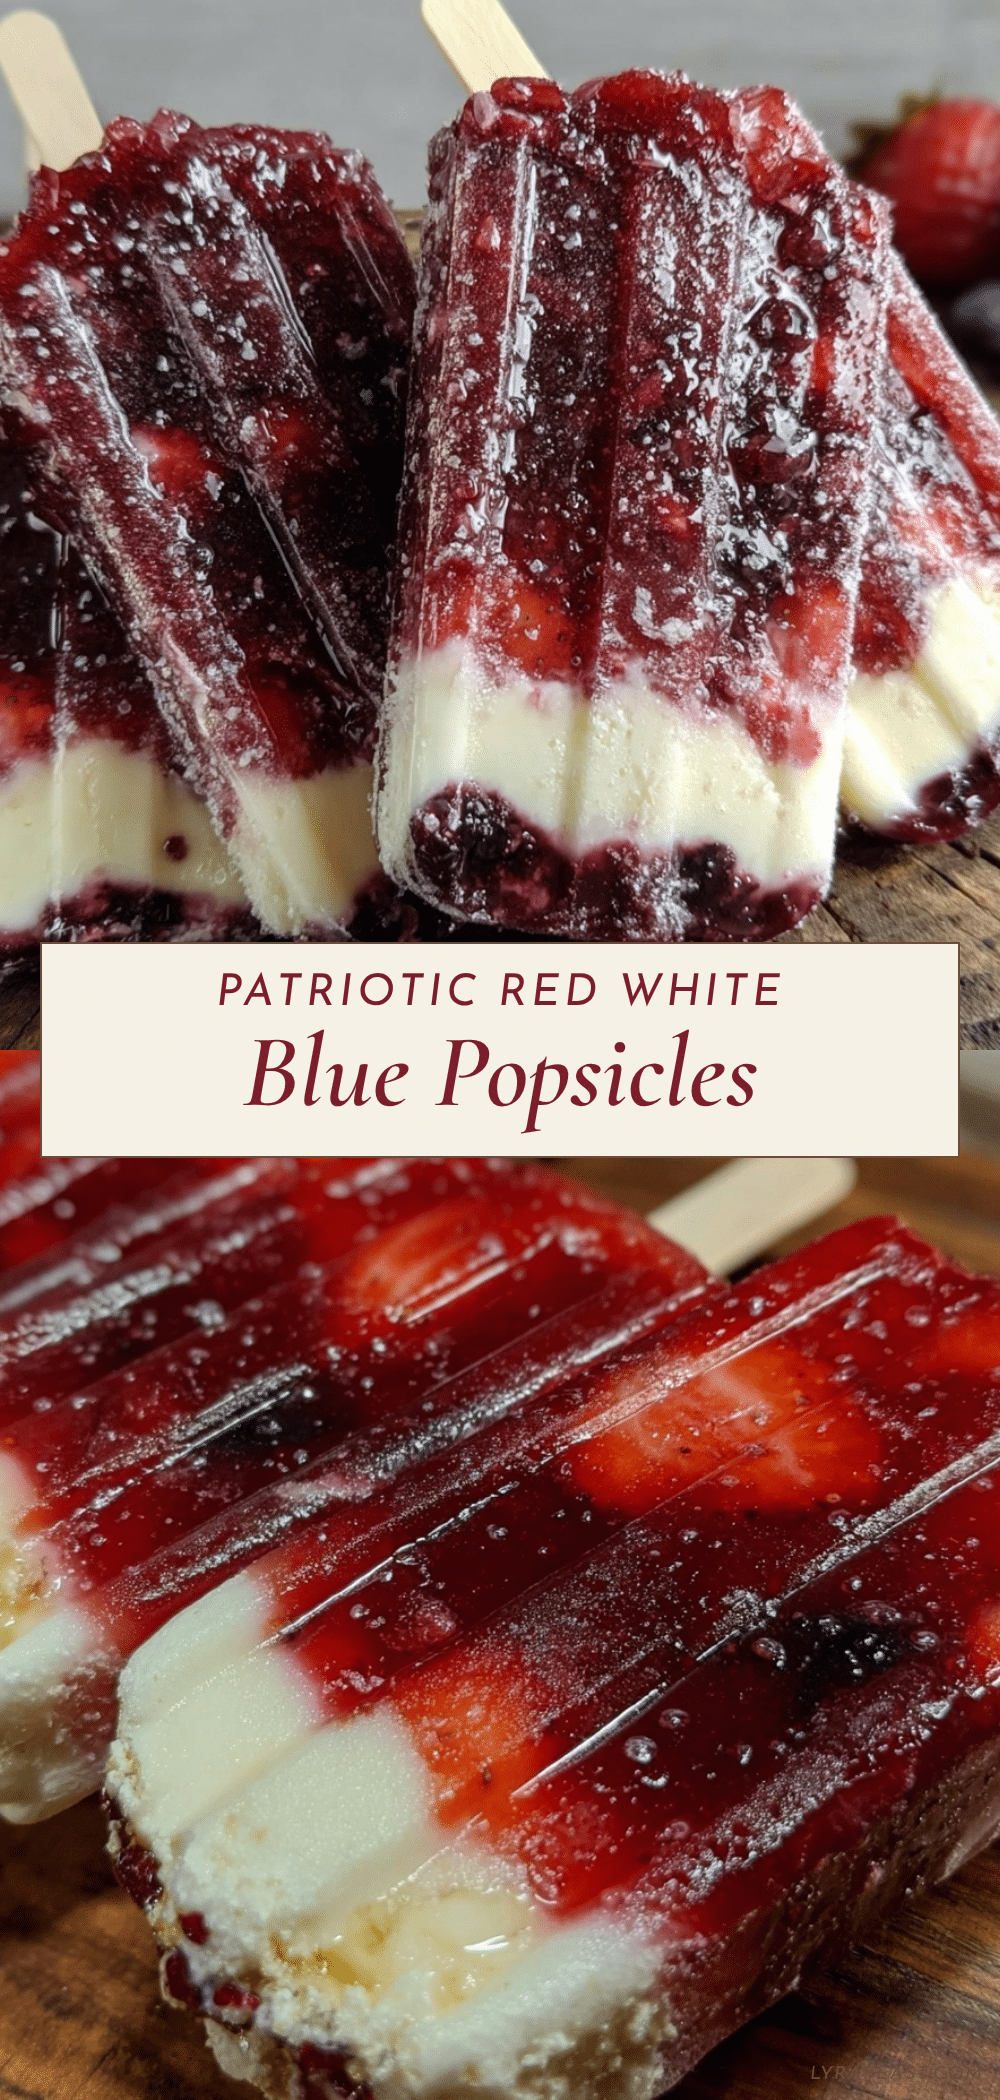
Refreshing Red White & Blue Popsicles
These easy homemade popsicles feature vibrant red, white, and blue layers made from fresh or frozen berries and creamy Greek yogurt, perfect for a refreshing summer treat.
- Prep Time: 15 minutes
- Cook Time: 6 hours
- Total Time: 6 hours 15 minutes
- Yield: 6 popsicles 1x
- Category: Dessert
- Cuisine: American
Ingredients
- 1 cup fresh or frozen strawberries, hulled and chopped
- 1 tablespoon honey or maple syrup (optional)
- 1 teaspoon fresh lemon juice
- 1 cup plain Greek yogurt
- 1 tablespoon honey
- 1/2 teaspoon vanilla extract
- 1 cup fresh or frozen blueberries
- 1 tablespoon honey or maple syrup (optional)
- 1 teaspoon fresh lemon juice
- Optional: a few fresh mint leaves
Instructions
- Prepare the red layer: Place the strawberries, honey, and lemon juice in your blender or food processor. Puree until smooth. Taste and adjust sweetness if needed. Pour this mixture into the popsicle molds, filling each about one-third full. Freeze for about 45 minutes to 1 hour, until firm but not fully solid.
- Mix the white layer: In a bowl, whisk together Greek yogurt, honey, and vanilla extract until smooth. Once the red layer is set, spoon the yogurt mixture over it, filling the molds to two-thirds full. Tap the molds gently to remove air bubbles. Freeze again for 45 minutes to 1 hour.
- Prepare the blue layer: Combine blueberries, honey, lemon juice, and mint leaves (if using) in the blender. Puree until smooth. Strain if you prefer a smoother texture or leave as is for a bit of pulp. Pour this mixture over the yogurt layer to fill the molds. Insert popsicle sticks straight down the center.
- Freeze for the final time: Place the molds in the freezer for at least 4 hours or overnight until fully frozen.
- To serve: Run warm water briefly over the outside of the molds to loosen the popsicles before gently pulling them out.
Notes
Let each layer partially freeze before adding the next to keep colors distinct. Use frozen berries if fresh are unavailable. For dairy-free, substitute Greek yogurt with coconut yogurt. Adjust sweetness to taste. Run warm water on molds briefly to release popsicles.
Nutrition
- Serving Size: 1 popsicle
- Calories: 80
- Sugar: 12
- Sodium: 40
- Fat: 1.5
- Saturated Fat: 1
- Carbohydrates: 15
- Fiber: 2
- Protein: 3
Keywords: popsicles, summer treats, red white and blue, homemade popsicles, berry popsicles, Greek yogurt, healthy dessert



