I swore I didn’t need another pumpkin cookie recipe. For years, I held onto that position with the kind of stubbornness that only a baker who has tested seventeen pumpkin cookie recipes can claim. They were always either too cakey—basically a frosted muffin in flat form—or they spread into sad, greasy puddles on the baking sheet. Then a Tuesday afternoon in late September happened, and I caught my neighbor, a man who had once told me he “didn’t do pumpkin desserts,” standing at my kitchen counter, reaching for a fourth cookie.
The truth is, I wasn’t even trying to impress anyone that day. I was just chasing that perfect texture—the soft, pillowy center of a snickerdoodle with the warm, spiced soul of pumpkin bread. My kitchen looked like a flour bomb had gone off, and I had accidentally used salted butter instead of unsalted. Honestly, I almost scraped the whole batch. But something stopped me. Maybe it was the way the cinnamon-sugar mixture smelled when it hit the butter, or maybe I just didn’t have the energy to start over. I baked them anyway, and let me tell you, that happy accident changed everything.
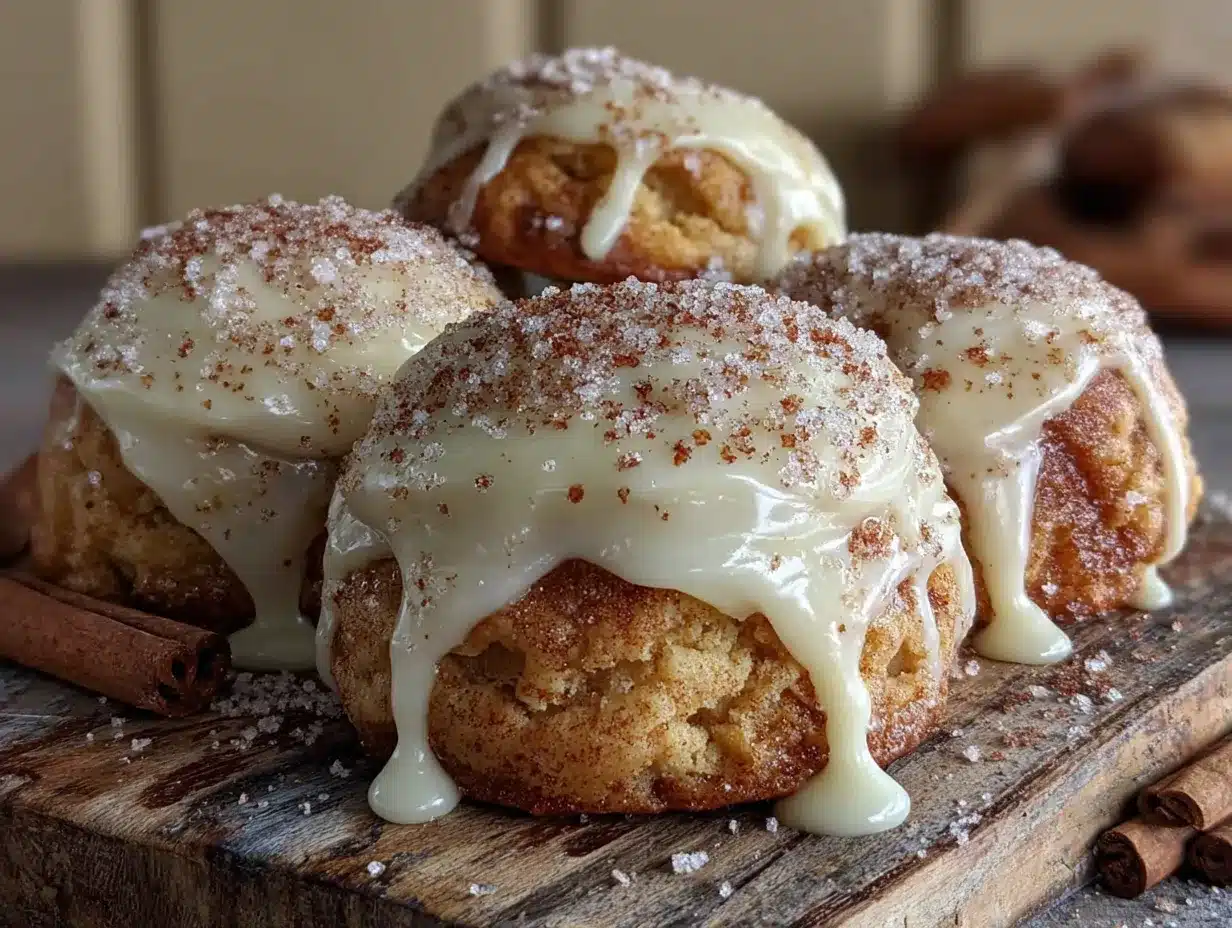
These soft baked iced pumpkin snickerdoodle cookies have that elusive quality you only get when a recipe has been tested into submission. They’re thick without being dense, tender without being fragile, and that simple vanilla icing on top? It seeps into the cracks just enough to make every bite feel like the best one. Maybe you’ve been there—chasing that one pumpkin cookie that actually delivers on its promise. I found mine on a messy Tuesday, and I haven’t stopped making them since.
Why You’ll Love This Recipe
Let’s be honest—pumpkin cookies have a reputation problem. Most of them are dry, bland, or just plain disappointing. These soft baked iced pumpkin snickerdoodle cookies are here to change that narrative, one perfectly spiced bite at a time. I’ve tested this recipe more times than I care to admit, tweaking the flour ratio, the spice blend, and the chilling time until everything clicked.
- Soft and Pillowy Texture: The secret is the perfect balance of pumpkin puree and butter, plus a short chill time that lets the flavors meld without making you wait all day. These cookies stay soft for days—if they last that long.
- Simple Pantry Ingredients: No trips to specialty stores required. You probably have cinnamon, nutmeg, and vanilla in your cabinet right now. The pumpkin puree is the only “special” ingredient, and it’s available everywhere this time of year.
- Perfect for Fall Gatherings: Whether it’s a Thanksgiving dessert table, a cozy book club meeting, or just a Tuesday that needs a little extra warmth, these cookies fit right in. They’re impressive enough for guests but easy enough for a random weekday bake.
- Crowd-Pleasing Flavor: The combination of pumpkin, warm spices, and that crackly cinnamon-sugar coating hits every note. Even the self-proclaimed pumpkin skeptics (like my neighbor) can’t resist.
- That Icing Makes the Difference: A simple vanilla glaze transforms these from great to unforgettable. It adds sweetness, moisture, and that beautiful finish that makes cookies look bakery-worthy.
What makes this recipe different from every other pumpkin cookie out there is the technique. Instead of using all butter or all pumpkin, I found the sweet spot where both work together. The cookies rise beautifully, hold their shape, and develop that signature snickerdoodle crackle on top. It’s comfort food at its finest—familiar enough to feel like home, but special enough to feel like a treat.
What Ingredients You Will Need
This recipe uses simple, wholesome ingredients to deliver bold flavor and satisfying texture without the fuss. Most of these are pantry staples, which means you can whip up a batch whenever the craving hits—and trust me, it will hit.
For the Cookies
- Unsalted butter, softened: I use Land O’Lakes for its consistent fat content. Softened to room temperature, not melted—melting changes the spread.
- Granulated sugar: Adds sweetness and helps create that tender crumb. Don’t substitute with brown sugar here; the texture changes.
- Pumpkin puree: Not pumpkin pie filling! Look for 100% pure pumpkin. Libby’s is my go-to for its consistent moisture content.
- Large egg, room temperature: Helps the cookies rise evenly. Cold eggs can seize the butter mixture.
- Vanilla extract: Pure vanilla makes a difference here. Imitation works in a pinch, but the flavor won’t be as warm.
- All-purpose flour: Unbleached, like King Arthur Flour, gives the best structure. Spoon and level your measuring—scooping packs the flour.
- Baking soda: Helps the cookies spread just enough and keeps them tender.
- Baking powder: Adds lift for that soft, pillowy center.
- Salt: Balances the sweetness and enhances the spices.
- Ground cinnamon: The backbone of snickerdoodle flavor. Use fresh spices for the best punch.
- Ground nutmeg: Adds warmth without overpowering. Freshly grated is amazing if you have it.
- Ground ginger: A little goes a long way for that subtle heat.
- Ground cloves: Optional, but I love the depth it adds.
For the Cinnamon-Sugar Coating
- Granulated sugar: For that signature crackly crust.
- Ground cinnamon: The star of the coating. Don’t skimp here.
For the Vanilla Icing
- Powdered sugar: Sifted to avoid lumps. Confectioners’ sugar is the same thing.
- Milk: Whole milk gives the creamiest consistency, but 2% works fine. Add slowly—you can always add more, but you can’t take it out.
- Vanilla extract: The same pure vanilla from the cookies. Consistency matters.
- Pinch of salt: Sounds weird, but it balances the sweetness perfectly.
Equipment Needed
You don’t need a professional bakery setup for these cookies. A few basic tools will get the job done beautifully.
- Electric mixer: A stand mixer with the paddle attachment is ideal, but a hand mixer works perfectly. I’ve made these with both, and the hand mixer actually gives me more control over the butter-sugar creaming.
- Mixing bowls: One large, one medium. Glass or stainless steel—avoid plastic if you can, as it can retain grease.
- Baking sheets: Heavy-duty aluminum sheets distribute heat best. Avoid dark nonstick pans—they brown the bottoms too fast.
- Parchment paper: Non-negotiable. Silicone mats work too, but parchment gives the best spread and easy cleanup.
- Cookie scoop: A 1.5-tablespoon scoop ensures uniform cookies. I’ve used a regular spoon in a pinch, but the scoop makes a noticeable difference in even baking.
- Cooling rack: Wire racks let air circulate so the bottoms don’t steam. Stacking cookies on a plate while warm ruins that soft texture.
- Whisk: For the icing. A fork works if you’re in a hurry, but a whisk gives smoother results.
- Measuring cups and spoons: Accurate measurements are key. Use dry measuring cups for flour and sugar, liquid measuring cups for pumpkin and milk.
Preparation Method
Let’s get baking. Follow these steps closely, and you’ll have the softest, most delicious pumpkin snickerdoodles you’ve ever tasted.
- Preheat your oven to 350°F (175°C). Line two baking sheets with parchment paper. This gives the cookies a clean surface to spread on without sticking.
- In a medium bowl, whisk together the dry ingredients. Combine 2 ½ cups (315g) all-purpose flour, 1 teaspoon baking soda, 1 teaspoon baking powder, ½ teaspoon salt, 2 teaspoons ground cinnamon, ½ teaspoon ground nutmeg, ½ teaspoon ground ginger, and ¼ teaspoon ground cloves. Whisk until evenly combined. Set aside.
- Cream the butter and sugar. In a large bowl, beat ½ cup (113g) unsalted butter with 1 cup (200g) granulated sugar until light and fluffy, about 3 minutes. Scrape the bowl halfway through. The mixture should look pale and airy—that’s how you know it’s ready.
- Add the wet ingredients. Beat in ½ cup (120g) pumpkin puree, 1 large egg, and 1 teaspoon vanilla extract. Mix until just combined. Don’t overbeat—the mixture might look slightly curdled at this point, which is normal thanks to the pumpkin’s moisture.
- Combine wet and dry. Gradually add the flour mixture to the wet ingredients, mixing on low speed. Stop as soon as the flour disappears. Overmixing develops gluten and makes cookies tough. The dough will be soft and slightly sticky—that’s perfect.
- Chill the dough. Cover the bowl with plastic wrap and refrigerate for at least 30 minutes. This step is crucial. Chilling firms up the butter, prevents excessive spreading, and allows the spices to meld. I’ve skipped this before, and the cookies turned into flat, greasy discs. Learn from my mistake.
- Prepare the cinnamon-sugar coating. In a small bowl, mix ¼ cup (50g) granulated sugar with 2 teaspoons ground cinnamon. Set aside.
- Shape the cookies. Using a 1.5-tablespoon cookie scoop, portion out the chilled dough. Roll each portion into a smooth ball between your palms. The dough will be slightly sticky but manageable. If it’s too sticky, chill it another 10 minutes.
- Coat each ball. Roll each dough ball in the cinnamon-sugar mixture until fully coated. Place them 2 inches apart on the prepared baking sheets. Don’t press them down—they’ll spread naturally in the oven.
- Bake. Bake for 10-12 minutes, or until the edges look set and the tops are slightly cracked. The centers will look soft and puffy—that’s the goal. Overbaking dries them out. I start checking at 10 minutes because every oven runs differently.
- Cool. Let the cookies cool on the baking sheet for 5 minutes. This allows them to set without breaking. Then transfer to a wire rack to cool completely before icing. Warm cookies will melt the icing into a puddle.
- Make the icing. In a small bowl, whisk together 1 cup (120g) powdered sugar, 2 tablespoons milk, ½ teaspoon vanilla extract, and a pinch of salt. Whisk until smooth. The consistency should be thick but drizzle-able. Add more milk a teaspoon at a time if needed.
- Ice the cookies. Once the cookies are completely cool, drizzle the icing over the tops using a spoon or a piping bag. Let the icing set for about 15 minutes before serving. The slight crunch of the set icing against the soft cookie is pure magic.
Cooking Tips & Techniques
After more batches than I care to count, I’ve picked up a few tricks that make these cookies consistently perfect. Here’s what I wish someone had told me the first time.
Don’t skip the chill time. I know it’s tempting to rush, but that 30-minute rest is non-negotiable. The first time I made these, I was in a hurry and skipped it. The cookies spread into thin, crispy discs that barely resembled snickerdoodles. The pumpkin adds extra moisture, and without chilling, that moisture works against you. Chilled dough bakes up thick, soft, and perfectly domed.
Measure your flour correctly. Scooping directly into the bag packs the flour, giving you up to 25% more than the recipe calls for. That extra flour makes cookies dry and dense. Instead, spoon the flour into your measuring cup and level it off with a knife. It takes an extra five seconds and makes a huge difference.
Watch the oven temperature. Every oven runs differently. I use an oven thermometer because my oven runs 25 degrees hot. If your cookies are browning too fast on the bottom, lower the rack or reduce the temperature by 25 degrees. If they’re pale after 12 minutes, your oven might run cool.
Use room temperature ingredients. Cold butter doesn’t cream properly, and cold egg can seize the mixture. Let your butter and egg sit on the counter for 30 minutes before starting. The pumpkin puree can come straight from the fridge—it’s thin enough that it won’t cause issues.
Parchment paper is your friend. I’ve baked these on greased sheets, silicone mats, and parchment. Parchment gives the best results—even browning, easy cleanup, and no sticking. Silicone mats work but can make the bottoms slightly paler. Avoid greasing the pan directly; it encourages too much spread.
Test one cookie first. If you’re unsure about your oven or dough consistency, bake one cookie as a test. Check the spread, the color, and the texture. Adjust the rest of the batch accordingly. It saves you from ruining an entire sheet.
Variations & Adaptations
One of the best things about this recipe is how adaptable it is. Here are a few ways I’ve tweaked it depending on what I’m craving or who I’m baking for.
Gluten-Free Version: Substitute the all-purpose flour with a 1:1 gluten-free baking blend that contains xanthan gum. I’ve used Bob’s Red Mill with great results. The dough will be slightly more delicate, so handle it gently and chill it for a full 45 minutes. The texture stays soft and tender—honestly, you won’t miss the gluten.
Dairy-Free Adaptation: Use vegan butter sticks (not tub margarine) and replace the milk in the icing with oat milk or almond milk. I like Miyoko’s European Style Cultured Vegan Butter for its rich flavor. The cookies bake up slightly less tender but still delicious. Let them cool completely before icing, as vegan butter holds heat longer.
Spice It Up: For a bolder flavor, add ¼ teaspoon of cardamom or allspice to the dough. I tried this on a whim one rainy Sunday, and the cardamom added this floral warmth that paired beautifully with the pumpkin. You can also increase the cinnamon in the coating to 3 teaspoons for an extra punch.
Pumpkin Seed Crunch: Press a few raw pumpkin seeds into the top of each dough ball before baking for a subtle crunch. The seeds toast in the oven and add a lovely nutty flavor. Make sure they’re raw, not salted, or the salt will overpower the sweet coating.
Maple Icing Variation: Replace the vanilla extract in the icing with maple syrup and reduce the milk slightly. Use 1 tablespoon maple syrup and 1 tablespoon milk instead of 2 tablespoons milk. The maple flavor complements the pumpkin spices perfectly. I made this for a Thanksgiving gathering and got more compliments than the turkey.
Small Batch Option: Halve the recipe easily if you don’t need two dozen cookies. Use 1 egg yolk instead of a whole egg—the white adds too much moisture in a smaller batch. The baking time stays the same, but check at 9 minutes.
Serving & Storage Suggestions
These cookies are best enjoyed slightly warm, when the centers are still soft and the icing has just set. But they’re also fantastic at room temperature, and the flavors actually deepen after a day or two.
Serving Temperature: Serve at room temperature or slightly warm. If you want that fresh-from-the-oven feel, pop them in a 300°F (150°C) oven for 3-4 minutes. The icing will soften slightly but won’t melt off. Avoid microwaving—it makes the cookies rubbery and melts the icing unevenly.
Presentation Ideas: Arrange them on a rustic wooden board or a simple white platter. A dusting of extra cinnamon over the top adds visual appeal. For gifting, stack them in a tin lined with parchment paper. They travel well and stay fresh for several days.
Complementary Pairings: A hot cup of chai tea or a spiced latte is the perfect companion. For a dessert spread, serve them alongside pumpkin cheesecake bars or a warm apple crisp. They also pair surprisingly well with a glass of cold milk—the classic snickerdoodle experience.
Storage Instructions: Store in an airtight container at room temperature for up to 5 days. Layer them with parchment paper between stacks to prevent sticking. Do not refrigerate—the cold air dries them out and hardens the icing. If your kitchen is warm, they’ll keep fine on the counter for 3 days.
Freezing Instructions: Freeze the un-iced baked cookies for up to 3 months. Wrap each cookie individually in plastic wrap, then place in a freezer bag. Thaw at room temperature, then ice them fresh. The icing doesn’t freeze well, so always add it after thawing. You can also freeze the dough balls before coating—just roll them, place on a sheet pan, freeze until solid, then transfer to a bag. Bake from frozen, adding 2 minutes to the baking time.
How Flavors Develop: These cookies taste even better on day two. The spices mellow and meld together, and the texture stays remarkably soft. Don’t be surprised if you find yourself reaching for one at breakfast—I won’t judge.
Nutritional Information & Benefits
While these are definitely a treat, they do have some redeeming qualities worth mentioning. Here’s the estimated nutritional breakdown per cookie (based on 24 cookies with icing):
| Nutrient | Amount Per Cookie |
|---|---|
| Calories | 145 |
| Total Fat | 5g |
| Saturated Fat | 3g |
| Cholesterol | 20mg |
| Sodium | 95mg |
| Total Carbohydrates | 23g |
| Dietary Fiber | 1g |
| Sugars | 14g |
| Protein | 2g |
Health Highlights: Pumpkin puree is packed with vitamin A and fiber, which supports eye health and digestion. Cinnamon has anti-inflammatory properties and may help regulate blood sugar. The butter provides a small amount of vitamin A and healthy fats. While these cookies are not health food, they’re a more nutrient-dense option than many store-bought desserts.
Dietary Considerations: This recipe contains gluten, dairy, and eggs. For gluten-free and dairy-free adaptations, see the Variations section above. The cookies are nut-free as written, making them safe for school events and nut-free households. If you’re watching sugar intake, reduce the icing amount or skip it entirely—the cookies are still delicious without it.
My Perspective: I believe in balance. These cookies are meant to be enjoyed, not analyzed. They’re a celebration of fall flavors and cozy moments. One cookie with a cup of tea won’t derail any healthy eating plan—it’ll just make your day a little sweeter.
Conclusion
These soft baked iced pumpkin snickerdoodle cookies are everything I want in a fall dessert—warm, spiced, tender, and just sweet enough to feel like a real treat. They came from a messy kitchen and a stubborn refusal to settle for mediocre pumpkin cookies, and honestly, I’m so glad I kept testing. The combination of that cinnamon-sugar coating, the soft pumpkin center, and the simple vanilla icing is something special.
I hope you give these a try and make them your own. Maybe you’ll add extra cinnamon, or skip the icing, or double the batch for a party. That’s the beauty of baking—it’s personal. These cookies have become my go-to for fall gatherings, lazy Sunday afternoons, and any day that needs a little extra warmth. They’re proof that a simple recipe, made with care, can be truly memorable.
I’d love to hear how yours turn out. Drop a comment below and let me know if you tried any variations, or tag me in your photos if you share them online. Happy baking, and may your kitchen smell like cinnamon and pumpkin all season long!
Frequently Asked Questions
Can I use pumpkin pie filling instead of pumpkin puree?
No, please don’t. Pumpkin pie filling contains added sugar and spices that will throw off the balance of this recipe. Stick with 100% pure pumpkin puree for the best results. If you only have pie filling, the cookies will be overly sweet and the texture will be gummy.
Why did my cookies spread too much?
The most common culprit is skipping the chill time. The dough needs at least 30 minutes in the fridge to firm up the butter. Other causes include using melted butter (always use softened), not measuring flour correctly, or your baking sheets being too warm. Let sheets cool completely between batches.
Can I make the dough ahead of time?
Absolutely. You can refrigerate the dough for up to 48 hours before baking. Just wrap it tightly in plastic wrap to prevent it from drying out. Let it sit at room temperature for 10 minutes before scooping—it’ll be too firm to scoop straight from the fridge.
How do I know when the cookies are done baking?
Look for set edges and slightly cracked tops. The centers will look soft and puffy, which is exactly what you want. If the edges are browning, they’re overdone. I always err on the side of underbaking—they continue to set on the hot baking sheet during the 5-minute cooling period.
Can I freeze the baked and iced cookies?
I recommend freezing them without the icing. The icing can become sticky and smear during thawing. Freeze the baked, un-iced cookies for up to 3 months, then thaw and ice them fresh. If you must freeze iced cookies, place them in a single layer in an airtight container with parchment between layers. Thaw in the refrigerator to minimize condensation.
Pin This Recipe!
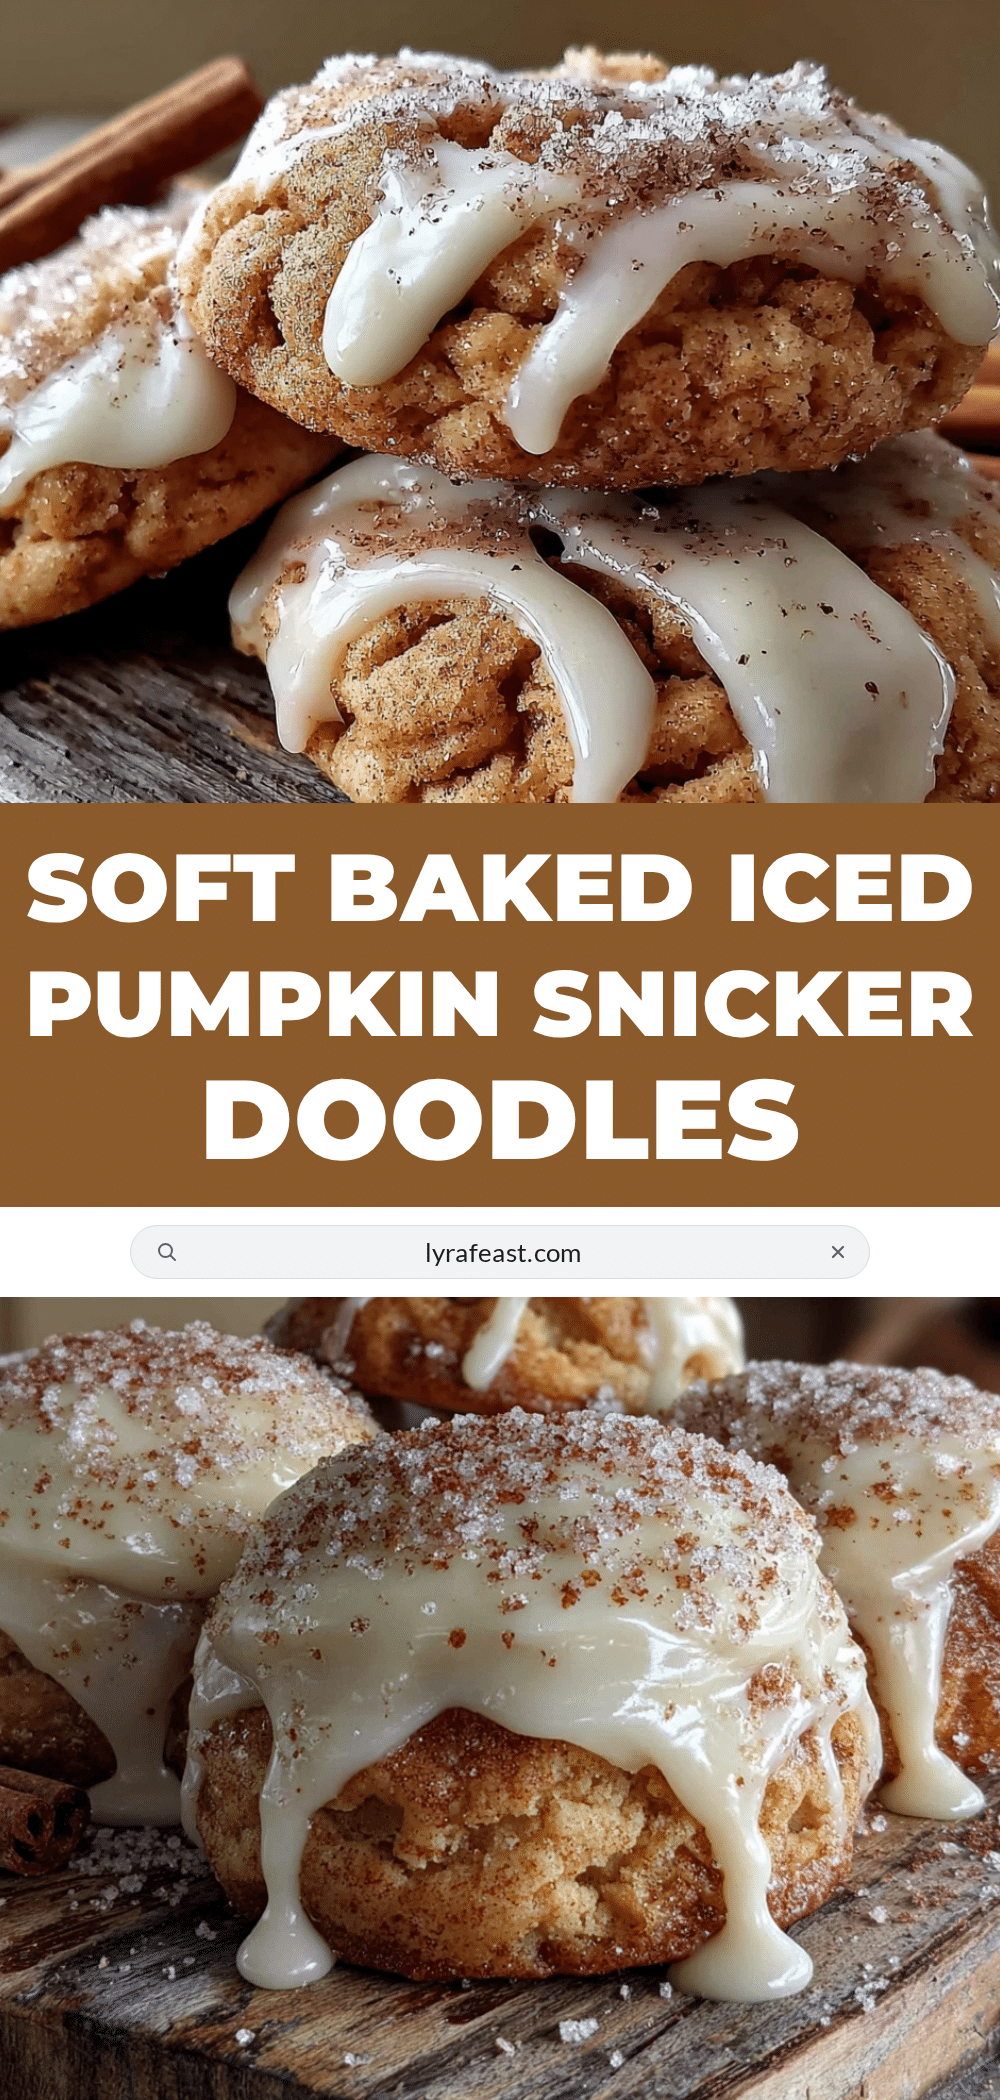
Soft Baked Pumpkin Snickerdoodle Cookies
These soft baked iced pumpkin snickerdoodle cookies have that elusive quality you only get when a recipe has been tested into submission. They’re thick without being dense, tender without being fragile, and that simple vanilla icing on top seeps into the cracks just enough to make every bite feel like the best one.
- Prep Time: 15 minutes
- Cook Time: 12 minutes
- Total Time: 1 hour 2 minutes (including 30 minutes chilling)
- Yield: 24 cookies 1x
- Category: Dessert
- Cuisine: American
Ingredients
- For the Cookies:
- 1/2 cup (113g) unsalted butter, softened
- 1 cup (200g) granulated sugar
- 1/2 cup (120g) pumpkin puree (not pumpkin pie filling)
- 1 large egg, room temperature
- 1 teaspoon vanilla extract
- 2 1/2 cups (315g) all-purpose flour
- 1 teaspoon baking soda
- 1 teaspoon baking powder
- 1/2 teaspoon salt
- 2 teaspoons ground cinnamon
- 1/2 teaspoon ground nutmeg
- 1/2 teaspoon ground ginger
- 1/4 teaspoon ground cloves
- For the Cinnamon-Sugar Coating:
- 1/4 cup (50g) granulated sugar
- 2 teaspoons ground cinnamon
- For the Vanilla Icing:
- 1 cup (120g) powdered sugar, sifted
- 2 tablespoons milk (whole milk preferred)
- 1/2 teaspoon vanilla extract
- Pinch of salt
Instructions
- Preheat your oven to 350°F (175°C). Line two baking sheets with parchment paper.
- In a medium bowl, whisk together the dry ingredients: 2 1/2 cups (315g) all-purpose flour, 1 teaspoon baking soda, 1 teaspoon baking powder, 1/2 teaspoon salt, 2 teaspoons ground cinnamon, 1/2 teaspoon ground nutmeg, 1/2 teaspoon ground ginger, and 1/4 teaspoon ground cloves. Set aside.
- In a large bowl, beat 1/2 cup (113g) unsalted butter with 1 cup (200g) granulated sugar until light and fluffy, about 3 minutes. Scrape the bowl halfway through.
- Beat in 1/2 cup (120g) pumpkin puree, 1 large egg, and 1 teaspoon vanilla extract. Mix until just combined.
- Gradually add the flour mixture to the wet ingredients, mixing on low speed. Stop as soon as the flour disappears. The dough will be soft and slightly sticky.
- Cover the bowl with plastic wrap and refrigerate for at least 30 minutes.
- In a small bowl, mix 1/4 cup (50g) granulated sugar with 2 teaspoons ground cinnamon for the coating.
- Using a 1.5-tablespoon cookie scoop, portion out the chilled dough. Roll each portion into a smooth ball.
- Roll each dough ball in the cinnamon-sugar mixture until fully coated. Place them 2 inches apart on the prepared baking sheets. Do not press them down.
- Bake for 10-12 minutes, or until the edges look set and the tops are slightly cracked. The centers will look soft and puffy.
- Let the cookies cool on the baking sheet for 5 minutes, then transfer to a wire rack to cool completely before icing.
- In a small bowl, whisk together 1 cup (120g) powdered sugar, 2 tablespoons milk, 1/2 teaspoon vanilla extract, and a pinch of salt until smooth. The consistency should be thick but drizzle-able.
- Once the cookies are completely cool, drizzle the icing over the tops. Let the icing set for about 15 minutes before serving.
Notes
Don’t skip the chill time—it prevents excessive spreading. Measure flour correctly by spooning and leveling. Use room temperature ingredients for best results. Parchment paper is recommended for even browning. Test one cookie first if unsure about oven temperature. Cookies taste even better on day two as flavors meld.
Nutrition
- Serving Size: 1 cookie
- Calories: 145
- Sugar: 14
- Sodium: 95
- Fat: 5
- Saturated Fat: 3
- Carbohydrates: 23
- Fiber: 1
- Protein: 2
Keywords: pumpkin snickerdoodle cookies, soft baked cookies, fall cookies, pumpkin cookies, snickerdoodle recipe, iced cookies, pumpkin dessert



