The woman at the craft table next to mine watched me struggle with a piping bag for a good ten minutes before she said anything. I was at a local Halloween market, attempting to decorate a pre-made cookie with royal icing that had the consistency of soup, and let me tell you — it was not going well. She didn’t laugh, though she had every right to. Instead, she reached into her apron pocket and pulled out a crumpled index card with a recipe written in purple ink.
“My granddaughter makes these every year,” she said, handing it over. “Black cat sugar cookies. They’re easier than they look.” Her name was Margie, and she’d been selling handmade Halloween decorations at that same market for twenty-three years. The card had a tiny cat face drawn in the corner, whiskers and all. I thanked her, tucked it into my bag, and honestly forgot about it for almost a year.
Then last October, I was cleaning out my recipe box and found that purple-inked card. I had a bag of flour, some butter, and a sudden urge to make something that felt like Halloween in cookie form. Margie’s black cat sugar cookies became an instant tradition in my kitchen. The first batch? Let’s just say the cats looked more like blobs with ears. But by the third try, I had it down. These adorable black cat Halloween sugar cookies are now the thing my neighbors text me about every October. Maybe you’ve been there — wanting to make something festive but not wanting to spend hours on something that looks like a Pinterest fail. These cookies are the answer.
Why You’ll Love This Recipe
Let me be honest with you. I’ve tested a lot of sugar cookie recipes over the years, and most of them fall into two camps: they taste amazing but spread into unrecognizable blobs, or they hold their shape perfectly but taste like cardboard. These adorable black cat Halloween sugar cookies? They’re the sweet spot. No pun intended.
- Easy Enough for Beginners : No fancy piping skills required. If you can roll dough and press a cookie cutter, you can make these. The decorating is forgiving — even imperfect cats look cute.
- Simple Ingredients : Butter, sugar, flour, eggs, vanilla — you probably have everything already. No trips to three different stores for obscure extracts.
- Perfect for Halloween Parties : Whether it’s a school bake sale, a spooky movie night, or a Halloween potluck, these cookies disappear fast. I brought a batch to my book club and they were gone before we finished discussing the first chapter.
- Holds Its Shape : The dough doesn’t spread weirdly in the oven. Your cat faces will actually look like cat faces, not melted blobs. That’s a win in my book.
- Crowd-Pleaser : Kids love them because they’re cute. Adults love them because they taste like a classic sugar cookie with a Halloween twist. Everyone wins.
What makes this recipe different from all the other black cat cookies out there? It’s the texture. The dough has just the right amount of cream cheese in it — not enough to taste, but enough to make the cookies soft in the center with slightly crisp edges. It’s the kind of cookie that makes you close your eyes after the first bite. Comfort food reimagined for the spookiest season of the year.
What Ingredients You Will Need
This recipe uses simple, wholesome ingredients to deliver bold flavor and satisfying texture without the fuss. Most of these are pantry staples, which means you can decide at 8 PM on a Tuesday that you need black cat cookies and actually make it happen.
For the Cookie Dough
- 2 ¾ cups all-purpose flour (spooned and leveled — don’t scoop directly from the bag or you’ll get too much)
- 1 cup unsalted butter, softened to room temperature (I use Kerrygold for the flavor, but any good butter works)
- 1 cup granulated sugar
- 1 large egg, room temperature
- 2 teaspoons vanilla extract (pure, not imitation — it really does make a difference)
- 2 ounces cream cheese, softened (this is the secret ingredient for that perfect texture)
- ½ teaspoon salt
- ½ teaspoon baking powder
For the Royal Icing
- 2 cups powdered sugar, sifted (lumps are the enemy of smooth icing)
- 2 tablespoons meringue powder (you can find this in the baking aisle — it helps the icing set hard)
- 3-4 tablespoons water (add slowly — you can always add more but can’t take it out)
- Black gel food coloring (liquid coloring will mess up the consistency, so stick with gel)
- Orange or white gel food coloring (for the eyes — optional but adorable)
For Decoration
- Black sanding sugar (optional, for extra sparkle)
- Edible candy eyes (the little white ones with black pupils — available at craft stores)
- Piping bags or zip-top bags (snip a tiny corner for decorating)
If you’re looking for a gluten-free option, swap the all-purpose flour with a 1:1 gluten-free baking flour. I’ve tested this with Bob’s Red Mill and it worked beautifully. The texture is slightly more delicate, so handle the dough gently. For a dairy-free version, use vegan butter and dairy-free cream cheese. Just know the cookies might spread a tiny bit more, so chill the dough an extra 15 minutes before baking.
Equipment Needed
You don’t need a professional bakery setup for these adorable black cat Halloween sugar cookies. Here’s what you’ll actually use:
- Stand mixer or hand mixer — A stand mixer makes creaming the butter and sugar effortless, but a hand mixer works just fine. I’ve made these with both, and honestly, the hand mixer version tastes exactly the same.
- Rolling pin — A standard rolling pin works. If you have adjustable rolling rings, they help get even thickness, but I’ve rolled these out with a wine bottle in a pinch. No judgment here.
- Cat-shaped cookie cutter — This is the one specialty item. You can find them online or at craft stores. Look for one that’s about 3 inches wide — big enough to decorate easily, small enough to fit multiple on a sheet.
- Baking sheets — Two or three, lined with parchment paper or silicone baking mats. The mats help prevent spreading.
- Piping bags or squeeze bottles — For the royal icing. I prefer squeeze bottles for the outline and piping bags with small tips for details.
- Cooling rack — Essential for letting the cookies cool completely before decorating. Patience is key here.
Budget-friendly tip: Skip the fancy piping tips and just snip a tiny corner off a zip-top bag. It works perfectly for the cat faces, and you can toss it when you’re done. No cleanup required.
Preparation Method
Alright, let’s make these adorable black cat Halloween sugar cookies. I’ll walk you through every step, including the mistakes I’ve made so you don’t have to repeat them.
-
Cream the butter and sugar. In a large mixing bowl, beat the softened butter and granulated sugar together on medium speed for about 3 minutes until light and fluffy. Scrape down the sides halfway through. You want it to look pale and airy — this is where the texture starts. Don’t rush this step. I once tried to speed through it and ended up with dense cookies. Never again.
-
Add the wet ingredients. Beat in the cream cheese until smooth, about 30 seconds. Then add the egg and vanilla extract. Mix on low until just combined. The mixture might look slightly curdled at this point — that’s normal, especially if your cream cheese was a little cold. Don’t panic.
-
Mix the dry ingredients. In a separate bowl, whisk together the flour, salt, and baking powder. Gradually add this to the wet mixture, mixing on low speed. Stop as soon as the dough comes together. Overmixing will make the cookies tough. The dough should be soft but not sticky. If it feels too sticky, add a tablespoon more flour.
-
Chill the dough. Divide the dough in half, flatten each half into a disc, wrap in plastic wrap, and refrigerate for at least 1 hour. This step is non-negotiable. Chilled dough holds its shape when baked. I learned this the hard way when I skipped it and my first batch of cats looked more like abstract art. The dough needs to be firm enough to roll without sticking.
-
Preheat and prep. When you’re ready to bake, preheat your oven to 350°F (175°C). Line your baking sheets with parchment paper or silicone mats. Take one disc of dough out of the fridge — leave the other one in there until you need it.
-
Roll and cut. On a lightly floured surface, roll the dough to about ¼-inch thickness. I use a rolling pin with rings to keep it even, but you can eyeball it. Dip your cat cookie cutter in flour before each cut to prevent sticking. Press straight down — don’t twist the cutter. Twisting seals the edges and the cookies won’t bake evenly. Place the cut cookies about 2 inches apart on the prepared baking sheets.
-
Bake. Bake for 8-10 minutes, until the edges are just barely golden. The centers will look slightly underdone — that’s what you want. They’ll continue to set as they cool. Let them rest on the baking sheet for 5 minutes before transferring to a wire rack to cool completely. This is important — moving them too soon can break them.
-
Make the royal icing. While the cookies cool, make the icing. In a medium bowl, whisk together the powdered sugar and meringue powder. Add 3 tablespoons of water and whisk until smooth. The consistency should be thick but flowy — think glue, not water. Add more water a teaspoon at a time if needed. Stir in black gel food coloring until you get a deep, dark black. Start with a tiny amount — a little goes a long way.
-
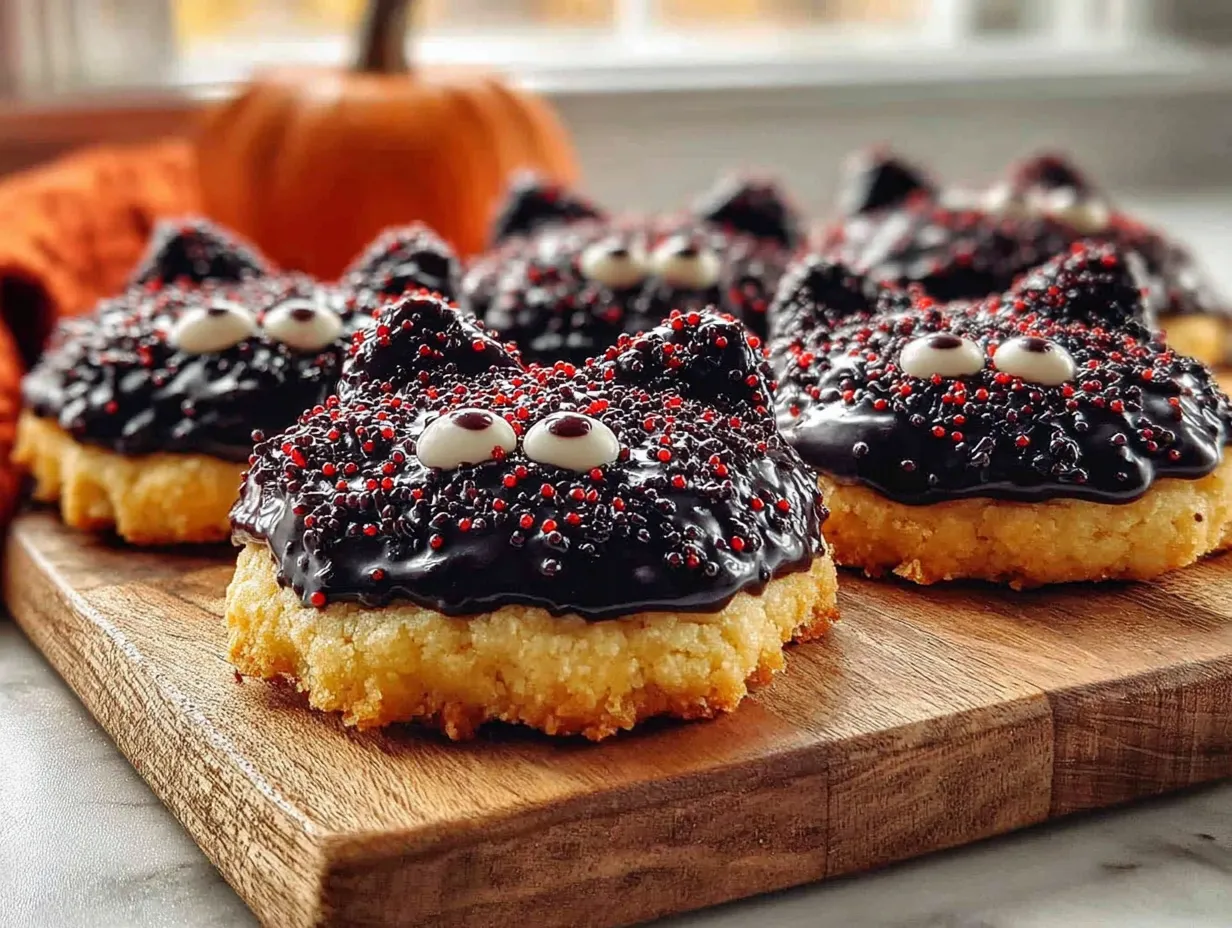
Decorate the cats. Once the cookies are completely cool, it’s time to decorate. Transfer the black icing to a piping bag or squeeze bottle. Outline each cat cookie, then fill in the center with more icing. Use a toothpick to spread it into corners. While the icing is still wet, add candy eyes or pipe on orange eyes. For the whiskers, use a tiny piping tip or snip an even tinier corner off a bag. Let the icing set for at least 2 hours before stacking or storing.
Cooking Tips & Techniques
I’ve made these adorable black cat Halloween sugar cookies more times than I can count, and I’ve definitely made every mistake in the book. Here’s what I’ve learned:
Chill the dough between batches. If you’re rolling out multiple rounds, pop the unused dough back in the fridge between batches. Warm dough spreads. I once left the second disc on the counter while I decorated the first batch, and by the time I rolled it out, the cats came out looking like they’d been stepped on. Not cute.
Get the icing consistency right. This is the trickiest part. If your royal icing is too thick, it won’t spread smoothly. If it’s too thin, it’ll run off the edges. The perfect consistency is when you lift the whisk and the ribbon of icing sits on the surface for about 5 seconds before disappearing. Test a small area first. I always keep a little extra powdered sugar and water nearby to adjust.
Use a scribe tool or toothpick. When you’re flooding the cookies with icing, air bubbles happen. A toothpick or scribe tool helps pop them and spread the icing into the edges. I use a wooden skewer — works perfectly and costs pennies.
Work in an assembly line. Outline all the cookies first, then flood them all. This way the icing has time to settle slightly before you add details. Trying to do one cookie at a time from start to finish takes forever and the results are less consistent.
Don’t overbake. Sugar cookies continue to bake on the hot sheet after you pull them out. The moment you see the edges turn the slightest bit golden, pull them. Overbaked cookies are dry and crumbly, and they don’t hold the icing as well.
Variations & Adaptations
One of the best things about this recipe is how easy it is to adapt. Here are some ways I’ve switched it up over the years:
Spooky Cat Variations. Instead of black icing, try making the cats gray or white for a ghostly look. I did a batch of white cats with red eyes one year and they were a hit at a Halloween party. You can also add a small pumpkin or bat stencil on the cat’s side for extra detail.
Dietary Adaptations. For a vegan version, use plant-based butter and a flax egg (1 tablespoon ground flaxseed mixed with 3 tablespoons water, let sit for 5 minutes). The texture is slightly different — a bit more cake-like — but still delicious. For a lower-sugar option, reduce the sugar in the dough to ¾ cup and use a sugar-free powdered sugar substitute for the icing. Just know the icing might not set as hard.
Flavor Twists. Add ½ teaspoon of cinnamon or pumpkin pie spice to the dough for a fall flavor boost. I tried a batch with orange zest in the dough and a touch of orange extract in the icing, and it tasted like Halloween in a cookie. Another fun option: add a tablespoon of cocoa powder to the dough for a darker base color that matches the black icing.
Different Shapes. Don’t have a cat cutter? Use a round cutter and pipe cat ears onto the icing. Or use a bat, pumpkin, or ghost cutter and adjust the decorating. The dough works for any shape, honestly. I’ve made these as black cats for Halloween and then used the same dough with heart cutters for Valentine’s Day.
Serving & Storage Suggestions
These adorable black cat Halloween sugar cookies are best served at room temperature. The royal icing needs a couple of hours to fully set, so plan ahead if you’re bringing them to a party. I usually bake and decorate them the day before, then stack them in a container overnight.
Storage. Store the decorated cookies in an airtight container at room temperature for up to 5 days. Layer them between sheets of parchment paper to prevent the icing from sticking. Don’t refrigerate them — the humidity in the fridge can make the icing soft and sticky. I made that mistake once and ended up with smudged cat faces. Not ideal.
Freezing. You can freeze the undecorated cookies for up to 3 months. Bake and cool them completely, then freeze in a single layer on a baking sheet. Once frozen, transfer to a freezer bag. When you’re ready to decorate, thaw them at room temperature for about 30 minutes, then ice as usual. I’ve also frozen the raw dough discs for up to 2 months. Just thaw in the fridge overnight before rolling and cutting.
Serving Suggestions. These cookies pair beautifully with a warm mug of apple cider, a pumpkin spice latte, or a glass of cold milk. For a Halloween dessert table, arrange them on a black or orange platter with some candy corn and mini pumpkins. They also make great favors for Halloween parties — just pop a few in a cellophane bag with a twist tie.
Nutritional Information & Benefits
Let’s be real — these are sugar cookies. They’re a treat, not a health food. But here’s the estimated nutritional breakdown per cookie (based on 24 cookies):
- Calories: 185
- Total Fat: 8g
- Saturated Fat: 5g
- Carbohydrates: 27g
- Sugar: 16g
- Protein: 2g
- Sodium: 85mg
On the plus side, the cream cheese adds a small amount of protein and calcium, and the butter provides vitamin A. The cookies are also free of artificial flavors if you use pure vanilla extract. If you’re watching your sugar intake, you can reduce the icing amount or skip the sanding sugar. For those with dietary restrictions, the gluten-free and vegan variations work well.
My personal philosophy? Life is short. Eat the cookie. Halloween comes once a year, and these are worth every single calorie.
Conclusion
These adorable black cat Halloween sugar cookies have become my favorite October tradition, and I think they’ll become yours too. They’re simple enough to make on a weeknight, but special enough to bring to any Halloween gathering. The dough comes together in minutes, the decorating is forgiving, and the result is genuinely impressive — even if your cats look a little wonky at first.
I love that this recipe came from a stranger at a craft market. It reminds me that the best recipes often come from unexpected places. Margie’s purple-inked card is still in my recipe box, stained with butter and vanilla, and I pull it out every October like clockwork.
So go ahead — preheat your oven, dust off your rolling pin, and make some black cats. Don’t worry if they’re not perfect. My first batch looked like potatoes with ears, and they still tasted amazing. The imperfect ones are the ones with the most personality, honestly.
I’d love to see your creations! Drop a comment below and tell me how your cats turned out. Did you add any fun variations? Did your kids help decorate? Share your photos and tag me — I can’t wait to see your spooky cookie creations. Happy Halloween, and happy baking!
Frequently Asked Questions
Can I make the dough ahead of time?
Absolutely. The dough can be refrigerated for up to 3 days or frozen for up to 2 months. Just wrap it tightly in plastic wrap and then in foil. When you’re ready to use it, let it sit at room temperature for about 10 minutes to soften slightly before rolling.
Why did my cookies spread in the oven?
This usually happens for one of three reasons: the dough wasn’t chilled enough, the butter was too soft, or the baking sheet was warm. Make sure your dough is thoroughly chilled (at least 1 hour) and use cool baking sheets. If you’re reusing a sheet, let it cool completely between batches.
Can I use liquid food coloring instead of gel?
I don’t recommend it. Liquid food coloring adds too much extra moisture to the royal icing, which can make it runny and prevent it from setting properly. Gel food coloring gives you a deep color without changing the consistency. You can find it at most grocery stores or online.
How do I get the icing perfectly black?
Getting a true black takes patience. Start with a small amount of black gel coloring and mix it in. The color will look gray at first. Add more coloring a tiny bit at a time until you reach the desired shade. Let the icing sit for about 10 minutes — the color will deepen as it rests. If you’re struggling to get it dark enough, try adding a tiny drop of purple coloring to intensify the black.
Can I skip the royal icing and use store-bought frosting?
You can, but the results won’t be the same. Store-bought frosting is much softer and won’t set hard like royal icing. The cookies will be stickier and harder to stack. If you’re in a pinch, you can use melted chocolate or candy melts for a quick decorating alternative. Just let them set completely before handling.
Pin This Recipe!

Black Cat Halloween Sugar Cookies

These adorable black cat Halloween sugar cookies are soft in the center with slightly crisp edges, thanks to a secret cream cheese addition. Easy to decorate and perfect for Halloween parties, they hold their shape beautifully and are a crowd-pleaser for kids and adults alike.
- Prep Time: 20 minutes
- Cook Time: 10 minutes
- Total Time: 1 hour 30 minutes (includes 1 hour chilling and 2 hours icing setting)
- Yield: 24 servings 1x
- Category: Dessert
- Cuisine: American
Ingredients
- 2 ¾ cups all-purpose flour, spooned and leveled
- 1 cup unsalted butter, softened to room temperature
- 1 cup granulated sugar
- 1 large egg, room temperature
- 2 teaspoons pure vanilla extract
- 2 ounces cream cheese, softened
- ½ teaspoon salt
- ½ teaspoon baking powder
- 2 cups powdered sugar, sifted
- 2 tablespoons meringue powder
- 3–4 tablespoons water
- Black gel food coloring
- Orange or white gel food coloring (optional, for eyes)
- Black sanding sugar (optional)
- Edible candy eyes (optional)
Instructions
- Cream the butter and sugar: In a large mixing bowl, beat the softened butter and granulated sugar together on medium speed for about 3 minutes until light and fluffy. Scrape down the sides halfway through.
- Add the wet ingredients: Beat in the cream cheese until smooth, about 30 seconds. Then add the egg and vanilla extract. Mix on low until just combined.
- Mix the dry ingredients: In a separate bowl, whisk together the flour, salt, and baking powder. Gradually add this to the wet mixture, mixing on low speed. Stop as soon as the dough comes together.
- Chill the dough: Divide the dough in half, flatten each half into a disc, wrap in plastic wrap, and refrigerate for at least 1 hour.
- Preheat and prep: Preheat your oven to 350°F (175°C). Line your baking sheets with parchment paper or silicone mats.
- Roll and cut: On a lightly floured surface, roll the dough to about ¼-inch thickness. Dip your cat cookie cutter in flour before each cut. Press straight down without twisting. Place cut cookies about 2 inches apart on prepared baking sheets.
- Bake: Bake for 8-10 minutes, until the edges are just barely golden. Let them rest on the baking sheet for 5 minutes before transferring to a wire rack to cool completely.
- Make the royal icing: In a medium bowl, whisk together the powdered sugar and meringue powder. Add 3 tablespoons of water and whisk until smooth. Add more water a teaspoon at a time if needed. Stir in black gel food coloring until deep black.
- Decorate the cats: Once cookies are completely cool, transfer black icing to a piping bag or squeeze bottle. Outline each cat cookie, then fill in the center. Use a toothpick to spread icing into corners. While icing is wet, add candy eyes or pipe on orange eyes. For whiskers, use a tiny piping tip. Let icing set for at least 2 hours before stacking or storing.
Notes
Chill dough between batches to prevent spreading. For perfect icing consistency, the ribbon of icing should sit on the surface for about 5 seconds before disappearing. Work in an assembly line: outline all cookies first, then flood them all. Don’t overbake; cookies continue to bake on the hot sheet after removal. Store decorated cookies in an airtight container at room temperature for up to 5 days. Freeze undecorated cookies for up to 3 months.
Nutrition
- Serving Size: 1 cookie
- Calories: 185
- Sugar: 16
- Sodium: 85
- Fat: 8
- Saturated Fat: 5
- Carbohydrates: 27
- Protein: 2
Keywords: black cat cookies, Halloween sugar cookies, sugar cookies, Halloween cookies, black cat Halloween cookies, easy Halloween cookies



