I wasn’t expecting cooking advice from the man fixing my washing machine, but there I was, standing in my mudroom with a handful of lint, listening to him describe exactly how to make apple butter snack cake. His name was Dave, he had been repairing appliances for thirty-seven years, and apparently, his wife’s grandmother had been famous in their small town for this very cake. He told me about it while tightening a hose clamp, almost offhandedly, like it was nothing. But the way he said “butter glaze” made me stop folding laundry and actually pay attention.
Honestly, I almost forgot to write it down. I grabbed the back of an old receipt and scribbled his words as he talked—a little bit of this, a handful of that, and a whole lot of butter. The recipe was scribbled on that crumpled piece of paper for a month before I actually tried it. Let me tell you, that first bite was a revelation. The cake was impossibly moist, with that deep, spiced apple butter flavor you usually only get from something that simmered on the stove all day. And that glaze? It soaked right into the warm cake, creating this almost caramelized top that I still dream about.
Maybe you’ve been there—you get a recipe from the most unlikely source, and it ends up becoming your most-requested bake. That’s exactly what this cozy apple butter snack cake became for me. It’s the kind of cake you make on a rainy Tuesday afternoon, just because. It doesn’t need a fancy occasion, and it certainly doesn’t need a mixer. I’ve made it at least a dozen times since that day in the mudroom, and every single time, I think of Dave and his wife’s grandmother. This recipe stayed with me because it’s simple, it’s forgiving, and it tastes like a hug.
Why You’ll Love This Recipe
Let’s be real for a second—there are a million snack cake recipes out there, but this one is different. I’ve tested it in my own kitchen more times than I can count, tweaking the flour ratio and the glaze consistency until it was absolutely perfect. It’s the kind of recipe that makes you look like you spent hours in the kitchen when, honestly, you barely broke a sweat.
- Quick & Easy: From start to finish, this cake is ready in about 40 minutes. No stand mixer, no complicated techniques—just a bowl, a whisk, and a pan.
- Simple Ingredients: You probably have everything in your pantry right now. Apple butter is the star, and it does all the heavy lifting for flavor.
- Perfect for Cozy Days: This is your go-to for fall afternoons, holiday brunches, or just a quiet Sunday with a cup of coffee.
- Crowd-Pleaser: I’ve brought this to potlucks and book club meetings, and it disappears every single time. Kids and adults both go for seconds.
- Unbelievably Delicious: The texture is tender and soft, almost like a muffin top in cake form. The butter glaze seeps in and creates this glossy, sweet crust that is pure magic.
What makes this recipe stand out is the technique. Instead of creaming butter and sugar, you whisk the wet ingredients together and fold in the dry—simple, fast, and it keeps the cake incredibly moist. The apple butter provides both sweetness and moisture, so you don’t need a ton of oil or butter in the batter. It’s comfort food reimagined: quicker than a traditional coffee cake, but with the same soul-soothing satisfaction.
What Ingredients You Will Need
This recipe uses simple, wholesome ingredients to deliver bold flavor and satisfying texture without the fuss. Most of these are pantry staples, so you can whip this up on a whim.
- Apple butter (1 cup) – The heart of the recipe. I prefer using a good-quality store-bought brand like Musselman’s or Stonewall Kitchen, but homemade works beautifully too. Look for a thick, dark apple butter with warm spices already in it.
- All-purpose flour (1 ¾ cups) – Provides structure. Spoon and level it into your measuring cup for the most accurate result.
- Granulated sugar (¾ cup) – Adds sweetness and helps with browning. You can reduce this slightly if your apple butter is very sweet.
- Baking soda (1 teaspoon) – The leavening agent that gives the cake its rise.
- Baking powder (½ teaspoon) – Works with the baking soda for a lighter crumb.
- Ground cinnamon (1 teaspoon) – Enhances the apple butter’s spice profile. I always use Ceylon cinnamon for its milder, sweeter flavor.
- Ground nutmeg (¼ teaspoon) – Adds warmth. Freshly grated is best if you have it.
- Salt (½ teaspoon) – Balances the sweetness and brings out the other flavors.
- Large eggs (2, room temperature) – Binds the batter and adds richness. Let them sit out for 30 minutes before baking.
- Vegetable oil (½ cup) – Keeps the cake tender. You can use melted coconut oil or a neutral oil like canola.
- Buttermilk (½ cup) – Adds tanginess and activates the baking soda. No buttermilk? Add 1 tablespoon of lemon juice or vinegar to regular milk and let it sit for 5 minutes.
- Vanilla extract (1 teaspoon) – Pure vanilla adds depth. I recommend Nielsen-Massey for a clean flavor.
For the butter glaze:
- Unsalted butter (3 tablespoons) – Melted and slightly cooled.
- Powdered sugar (1 cup) – Sifted to avoid lumps.
- Vanilla extract (½ teaspoon) – Adds that classic bakery flavor.
- Milk (2-3 tablespoons) – Adjust for desired consistency. Whole milk gives the richest glaze.
Equipment Needed
You don’t need a fancy kitchen to make this apple butter snack cake. Here’s what I use every time:
- 8-inch square baking pan – This is my go-to size for snack cakes. Glass or metal both work, but metal gives a slightly crisper edge. If you only have a 9-inch round pan, that works too—just check for doneness a few minutes early.
- Mixing bowls – One large bowl for the wet ingredients and another for the dry. I love my set of Pyrex nesting bowls.
- Whisk – A good balloon whisk is all you need. No electric mixer required.
- Rubber spatula – For folding the batter and scraping every last bit into the pan.
- Parchment paper – Line the pan for easy removal. I learned this the hard way after my first cake stuck to the bottom.
- Cooling rack – Essential for letting the cake cool evenly before glazing.
- Small saucepan or microwave-safe bowl – For melting the butter for the glaze.
- Measuring cups and spoons – Accurate measurements matter here, especially for the flour and baking soda.
If you don’t have an 8-inch pan, a 9-inch square pan will work—just reduce the baking time by about 5 minutes. And honestly, I’ve made this in a loaf pan before, and it turned out great; you just need to double the baking time and keep an eye on it.
Preparation Method
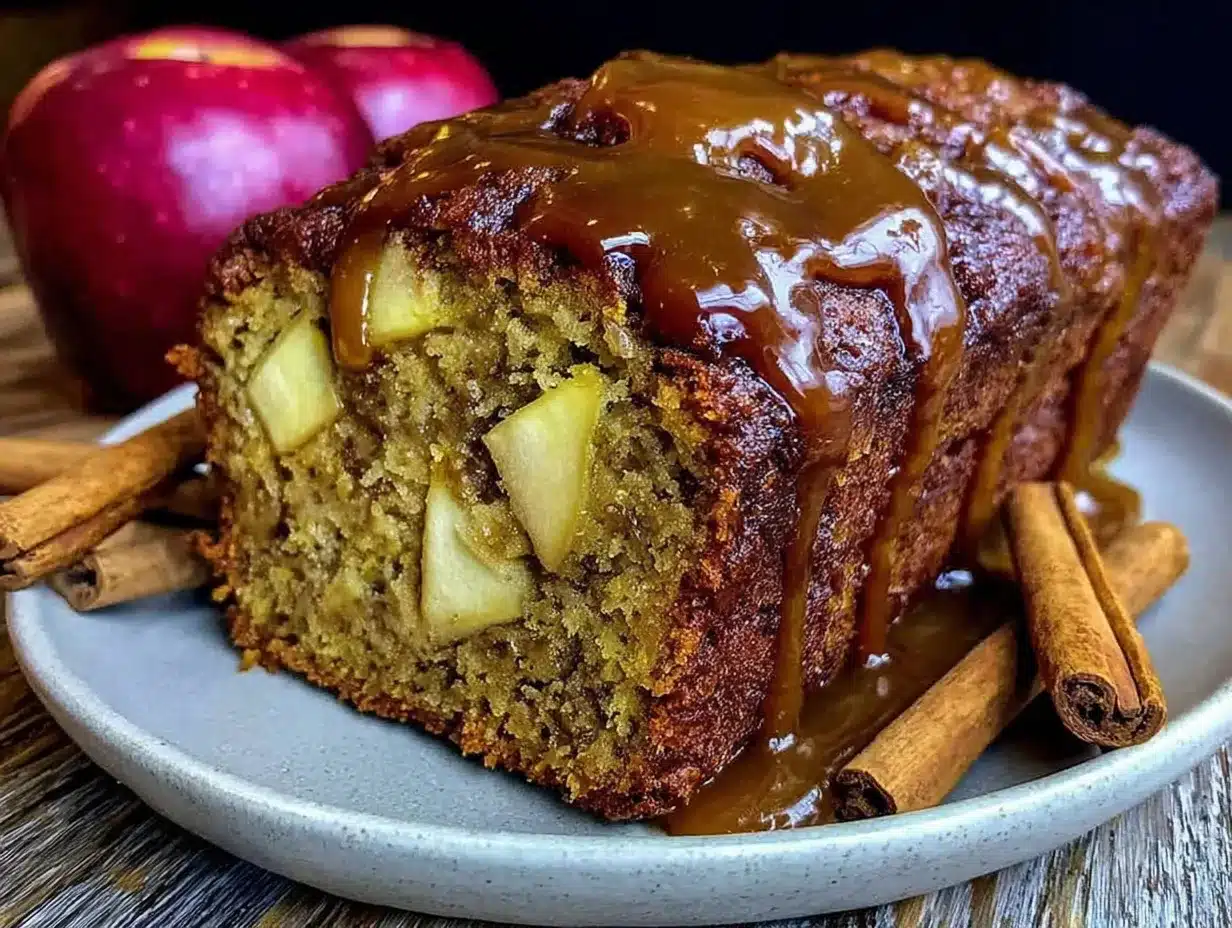
Let’s get baking. This is a straightforward, one-bowl situation, which is my favorite kind of baking. Take your time, and don’t rush the steps—your cake will thank you.
- Preheat and prepare the pan. Set your oven to 350°F (175°C). Cut a piece of parchment paper to fit the bottom and sides of your 8-inch square pan, leaving a little overhang on two sides. Lightly grease the pan and parchment with butter or nonstick spray. This makes lifting the cake out so much easier.
- Whisk the dry ingredients. In a medium bowl, combine 1 ¾ cups all-purpose flour, 1 teaspoon baking soda, ½ teaspoon baking powder, 1 teaspoon ground cinnamon, ¼ teaspoon ground nutmeg, and ½ teaspoon salt. Whisk them together until evenly distributed. This only takes about 20 seconds.
- Mix the wet ingredients. In a large bowl, crack 2 room-temperature eggs. Add ¾ cup granulated sugar and whisk vigorously for about a minute until the mixture looks pale and slightly thickened. Pour in ½ cup vegetable oil, ½ cup buttermilk, 1 cup apple butter, and 1 teaspoon vanilla extract. Whisk until everything is smooth and combined. The batter will look a little thin—that’s normal.
- Combine wet and dry. Pour the dry ingredients into the bowl with the wet ingredients. Use a rubber spatula to fold them together gently. Stir just until you see no more streaks of flour. A few small lumps are totally fine—overmixing will make the cake tough. Trust me, I’ve made that mistake before.
- Bake the cake. Pour the batter into your prepared pan and spread it evenly with the spatula. Tap the pan on the counter once or twice to release any air bubbles. Bake for 28 to 32 minutes, or until a toothpick inserted in the center comes out clean or with just a few moist crumbs. The top should be golden brown and spring back when lightly touched.
- Cool the cake. Place the pan on a cooling rack and let the cake cool in the pan for about 10 minutes. Then, using the parchment overhang, lift the cake out and transfer it to the rack to cool completely. Don’t skip this step—if you glaze a hot cake, the glaze will just melt into a puddle.
- Make the butter glaze. In a small bowl, whisk together 3 tablespoons melted unsalted butter, 1 cup sifted powdered sugar, and ½ teaspoon vanilla extract. Add milk, 1 tablespoon at a time, whisking until you get a smooth, pourable consistency. You want it thick enough to coat the back of a spoon but thin enough to drizzle.
- Glaze and serve. Once the cake is completely cool, pour the glaze over the top. Use the back of a spoon to spread it gently to the edges. Let it set for about 10 minutes before slicing. The glaze will firm up slightly but stay soft and glossy.
Cooking Tips & Techniques
Over the years, I’ve learned a few things the hard way so you don’t have to. Here are my best tips for this apple butter snack cake.
Don’t overmix the batter. This is the number one mistake I see with quick breads and snack cakes. Once you add the flour, stir only until it’s incorporated. Overmixing develops gluten, which leads to a dense, rubbery cake. A few lumps are your friend here.
Use room temperature ingredients. I know it’s annoying to wait, but cold eggs and cold buttermilk will seize the batter and create a lumpy mess. Let everything sit out for 30 minutes before you start. If you’re in a rush, place the eggs in a bowl of warm water for 5 minutes.
Check your apple butter consistency. Some apple butters are thicker than others. If yours is very thick and almost spreadable, you might need to add an extra tablespoon of buttermilk to loosen the batter. If it’s runny, reduce the buttermilk by a tablespoon. The batter should be slightly thicker than pancake batter.
Test for doneness early. Ovens vary wildly. Start checking your cake at the 25-minute mark. Insert a toothpick into the center—if it comes out clean, it’s done. If there’s wet batter on it, give it another 3 minutes and check again.
Let the glaze set before slicing. I’ve been impatient more times than I’d like to admit, and cutting into a glazed cake too early just makes a mess. Give it at least 10 minutes. The glaze will form a delicate shell that cracks beautifully when you slice.
Variations & Adaptations
This recipe is wonderfully flexible. Here are some ways I’ve adapted it over the years:
Gluten-free version: Substitute the all-purpose flour with a 1:1 gluten-free baking flour blend that contains xanthan gum. I’ve used Bob’s Red Mill with great success. The texture will be slightly more tender, but the flavor is spot on.
Vegan adaptation: Replace the eggs with 2 flax eggs (2 tablespoons ground flaxseed mixed with 6 tablespoons water, let sit for 5 minutes). Use a plant-based buttermilk (add 1 tablespoon lemon juice to ½ cup oat milk). For the glaze, use vegan butter and a non-dairy milk like almond or oat.
Spice it up: Add ¼ teaspoon ground cloves and ¼ teaspoon ground ginger to the dry ingredients for a more complex, chai-like flavor. I did this once when I ran out of nutmeg, and it was a happy accident.
Add texture: Fold in ½ cup chopped pecans or walnuts after combining the wet and dry ingredients. The nuts add a lovely crunch against the soft crumb. Toasted walnuts are my personal favorite.
Apple butter swap: No apple butter? Use pumpkin butter for a fall twist, or even pear butter. The flavor will change, but the moisture content is similar enough that the recipe will still work.
Serving & Storage Suggestions
This cake is delicious at room temperature, but I have a confession—I love it slightly warm with a scoop of vanilla ice cream. The contrast between the warm cake and the cold ice cream is just incredible.
Serving: Slice the cake into 9 squares. Serve on a plate with a drizzle of extra glaze or a dusting of cinnamon. It pairs beautifully with a hot cup of chai, black coffee, or a cold glass of milk. For a brunch spread, I like to cut it into smaller squares and serve it on a platter with fresh apple slices.
Storage: Keep the cake in an airtight container at room temperature for up to 3 days. The glaze will soften slightly over time, but that’s part of its charm. If your kitchen is very warm, you can store it in the refrigerator, but let it come to room temperature before serving for the best texture.
Freezing: This cake freezes beautifully. Wrap the unglazed cake tightly in plastic wrap, then in a layer of aluminum foil. Freeze for up to 3 months. When you’re ready to serve, thaw it overnight in the refrigerator, then bring it to room temperature and glaze it fresh. I’ve done this for holiday prep, and it works like a charm.
Reheating: Pop a slice in the microwave for 10 to 15 seconds for that just-baked warmth. Or, place slices on a baking sheet in a 300°F oven for 5 minutes. The flavors actually deepen after a day or two, so day-old cake is still fantastic.
Nutritional Information & Benefits
While this is definitely a treat, there are a few redeeming qualities worth mentioning. One serving (1/9 of the cake) contains approximately:
- Calories: 320
- Fat: 14g
- Carbohydrates: 46g
- Protein: 4g
- Fiber: 1g
- Sugar: 28g
Health benefits of key ingredients: Apple butter is made from concentrated apples, so it contains some fiber and vitamin C. Cinnamon has anti-inflammatory properties and can help regulate blood sugar. Using buttermilk adds a touch of probiotics and calcium. Of course, this is still a dessert, but it’s made from real, recognizable ingredients—no artificial flavors or preservatives here.
Dietary considerations: This recipe is vegetarian. For gluten-free or vegan options, see the variations section above. It contains dairy (butter, buttermilk) and gluten (flour), so it’s not suitable for those with allergies to those ingredients without modification.
Conclusion
Honestly, this cozy apple butter snack cake has earned a permanent spot in my baking rotation. It’s the recipe I turn to when I want something that feels special but doesn’t require a trip to the store or an hour of cleanup. That butter glaze is the kind of simple perfection you don’t forget, and the cake itself is so forgiving that even a beginner baker can nail it on the first try.
I hope you give this recipe a chance and make it your own. Maybe you’ll add a pinch of cardamom like my friend Sarah does, or double the glaze like I sometimes do when nobody’s watching. Whatever you choose, I’d love to hear about it. Drop a comment below and tell me how your cake turned out—did you make any substitutions? Did your family love it as much as mine does? And if you have a recipe from an unlikely source, share that too. After all, the best recipes come from the most unexpected places.
Frequently Asked Questions
Can I use homemade apple butter for this recipe?
Absolutely! Homemade apple butter works perfectly. Just make sure it’s thick and not too watery. If your homemade version is thinner than store-bought, reduce the buttermilk by a tablespoon to compensate.
Do I have to use buttermilk?
Not necessarily. You can make a quick buttermilk substitute by adding 1 tablespoon of lemon juice or white vinegar to ½ cup of regular milk. Let it sit for 5 minutes before using. The acid is important for activating the baking soda, so don’t skip it.
Why did my cake sink in the middle?
This usually happens if the oven door is opened too early, or if the baking soda is old. Make sure your oven is fully preheated and avoid opening the door for the first 25 minutes. Also, check that your baking soda is fresh—it should fizz when mixed with vinegar.
Can I make this into muffins instead?
Yes! Grease a 12-cup muffin tin or line it with paper liners. Divide the batter evenly and bake at 350°F for 15 to 18 minutes. The glaze can be drizzled over the cooled muffins. They’re perfect for grab-and-go breakfasts.
How do I know when the glaze is the right consistency?
The glaze should be thick enough to coat the back of a spoon but still flow slowly when you lift the spoon. If it’s too thick, add milk one teaspoon at a time. If it’s too thin, add a little more sifted powdered sugar. You want it to hold its shape slightly on the cake.
PrintCozy Apple Butter Snack Cake with Easy Butter Glaze
This impossibly moist apple butter snack cake is topped with a glossy butter glaze that seeps into the warm cake, creating a caramelized top. It’s a simple, forgiving recipe that tastes like a hug and is perfect for cozy days.
- Prep Time: 15 minutes
- Cook Time: 30 minutes
- Total Time: 45 minutes
- Yield: 9 servings 1x
- Category: Dessert
- Cuisine: American
Ingredients
- 1 cup apple butter
- 1 ¾ cups all-purpose flour
- ¾ cup granulated sugar
- 1 teaspoon baking soda
- ½ teaspoon baking powder
- 1 teaspoon ground cinnamon
- ¼ teaspoon ground nutmeg
- ½ teaspoon salt
- 2 large eggs, room temperature
- ½ cup vegetable oil
- ½ cup buttermilk
- 1 teaspoon vanilla extract
- 3 tablespoons unsalted butter, melted
- 1 cup powdered sugar, sifted
- ½ teaspoon vanilla extract
- 2–3 tablespoons milk
Instructions
- Preheat oven to 350°F (175°C). Line an 8-inch square baking pan with parchment paper, leaving overhang on two sides. Lightly grease the pan and parchment.
- In a medium bowl, whisk together flour, baking soda, baking powder, cinnamon, nutmeg, and salt.
- In a large bowl, whisk eggs and sugar until pale and slightly thickened, about 1 minute. Add oil, buttermilk, apple butter, and vanilla; whisk until smooth.
- Pour dry ingredients into wet ingredients. Fold with a rubber spatula until just combined (a few lumps are fine).
- Pour batter into prepared pan and spread evenly. Tap pan on counter to release air bubbles.
- Bake for 28-32 minutes, until a toothpick inserted in center comes out clean or with a few moist crumbs. Cool in pan for 10 minutes, then lift out onto a cooling rack to cool completely.
- For the glaze: In a small bowl, whisk together melted butter, powdered sugar, and vanilla. Add milk 1 tablespoon at a time until smooth and pourable.
- Pour glaze over cooled cake and spread gently. Let set for 10 minutes before slicing.
Notes
Don’t overmix the batter; a few lumps are fine. Use room temperature ingredients for best results. Check apple butter consistency—if very thick, add an extra tablespoon of buttermilk; if runny, reduce buttermilk by a tablespoon. Let glaze set before slicing. For gluten-free, use a 1:1 gluten-free flour blend. For vegan, use flax eggs and plant-based buttermilk and butter.
Nutrition
- Serving Size: 1 slice (1/9 of cake
- Calories: 320
- Sugar: 28
- Sodium: 280
- Fat: 14
- Saturated Fat: 4
- Carbohydrates: 46
- Fiber: 1
- Protein: 4
Keywords: apple butter snack cake, butter glaze, easy cake, fall dessert, snack cake, apple butter recipe



