My niece asked why I couldn’t just use candy corn instead of melting down those fancy orange and yellow candies. I started to explain why that wouldn’t work — then stopped. I honestly had no good reason. I’d been making these crispy treats for years, always following the same method with colored marshmallows or food coloring. The kid had a point.
So I grabbed a bag of candy corn from the pantry — the one I’d bought “for decorating” and never touched — and tossed a handful into the melting marshmallows. Let me tell you, I was fully prepared to fish out clumps of unmelted sugar blobs. The power went out halfway through that first batch. Not kidding. I stood there in the dim kitchen, stirring by flashlight, thinking this was either going to be a disaster or the best accident I’d ever had.
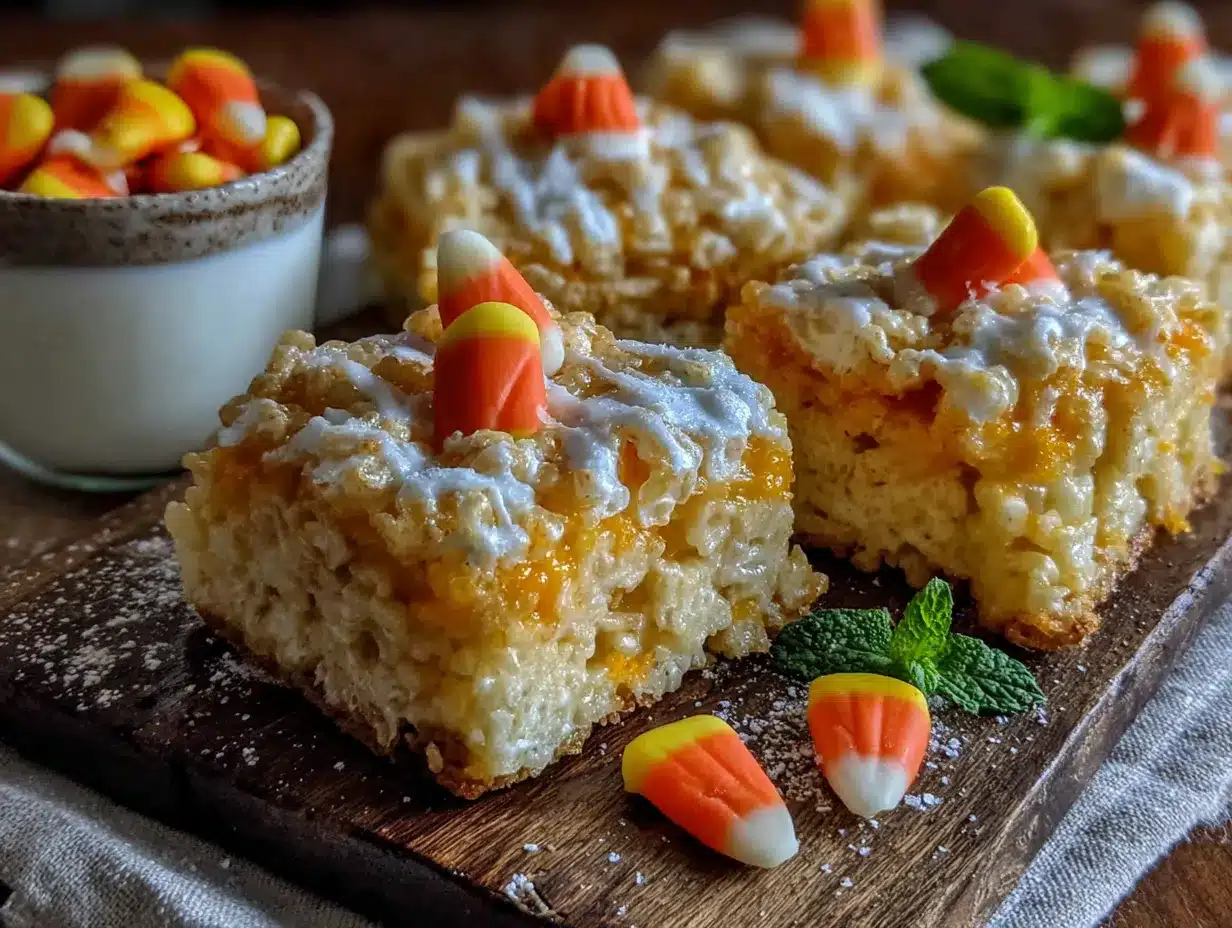
It was the best accident. The candy corn melted into this gorgeous, sunset-colored swirl — no artificial dye needed, no separate bowls, no fuss. The texture turned out chewier than regular Rice Krispie treats, with little pockets of that distinct candy corn sweetness. My niece looked at me like, “Told you so.” And she was right.
These Easy Candy Corn Rice Krispie Treats have become my go-to fall dessert. They’re ridiculously simple — three ingredients, one pot, ten minutes — but they look like you spent forever. Maybe you’ve been there, overcomplicating something that really didn’t need it. That’s what this recipe taught me: sometimes the best ideas come from the person who hasn’t learned all the “rules” yet.
Why You’ll Love This Recipe
These aren’t your average Rice Krispie treats. The candy corn does something magical here — it melts down into the marshmallow base, creating a naturally marbled look that screams autumn without any special techniques or tools. I’ve tested this recipe about seven times now, tweaking the candy corn to marshmallow ratio until it hit that sweet spot.
- Only 3 Ingredients: Butter, marshmallows, Rice Krispies cereal, and candy corn. That’s it. No food coloring, no fancy extracts, no trips to specialty stores.
- 10 Minutes of Work: From start to finish, you’re looking at about ten minutes of active cooking. The hardest part is not eating all the candy corn before it goes in the pot.
- Perfect for Fall Gatherings: These look stunning on a Halloween dessert table, at a Thanksgiving potluck, or just for a cozy afternoon snack. The colors naturally match the season.
- Kid-Friendly to Make: My niece helped with the second batch, and she felt like a genius. This is the kind of recipe that builds confidence in young cooks.
- Naturally Festive: No artificial dyes needed. The candy corn gives you those warm orange and yellow tones without any neon weirdness.
What makes these different from every other crispy treat recipe out there? It’s the texture. The candy corn adds a subtle chewiness that regular marshmallow-only treats don’t have. They’re not rock-hard the next day either — they stay soft and slightly gooey for days. I mean, if they last that long in your house.
This is the kind of recipe that makes you close your eyes after the first bite. It’s nostalgic but fresh, familiar but surprising. Perfect for when you want to impress people without actually trying very hard.
What Ingredients You Will Need
This recipe uses simple, pantry-friendly ingredients to create something that looks way more complicated than it actually is. The candy corn does double duty here — it adds color, sweetness, and that unique texture all at once.
- 3 tablespoons unsalted butter (salted butter works too, just skip any added salt later — I prefer Land O’Lakes for consistent flavor)
- 1 bag (10 ounces) marshmallows (standard size, not mini — Jet-Puffed is my go-to for even melting)
- 6 cups Rice Krispies cereal (or any crispy rice cereal — the generic store brand works fine, just check the freshness date)
- 1 cup candy corn (Brach’s is the classic choice — avoid the “autumn mix” with pumpkins, stick to straight candy corn for best melting)
Ingredient Selection Tips: Look for fresh candy corn — stale candy corn gets hard and won’t melt as smoothly. If the bag feels rock-solid in the store, grab a different one. For the marshmallows, day-old slightly stale marshmallows actually melt better than super fresh ones. Funny how that works.
Substitution Guidance: Use vegan butter and vegan marshmallows for a dairy-free version — Dandies brand works beautifully. For a gluten-free option, most crispy rice cereals are already gluten-free, but double-check the label. You can swap half the candy corn for candy pumpkins if you want more color variation, though the pumpkins take a bit longer to melt.
Seasonal Note: Candy corn shows up in stores around late August and sticks around through November. Stock up when you see it — I always grab an extra bag for “testing purposes.” The leftovers make great additions to snack mixes too.
Equipment Needed
You don’t need much for this recipe, which is part of the appeal. Here’s what you’ll need:
- Large pot or Dutch oven: 5-quart or larger — you need room to stir everything without flinging cereal across the kitchen. I use my old enameled cast iron pot, but any heavy-bottomed pot works.
- Wooden spoon or silicone spatula: Wooden spoons are cheap and sturdy — I’ve broken too many plastic spatulas on stiff marshmallow mixtures. Get a good wooden one.
- 9×13-inch baking pan: Glass or metal both work. Line it with parchment paper for easy removal — trust me on this one.
- Parchment paper: Not wax paper. Wax paper melts. Learned that one the hard way.
- Sharp knife: For cutting the cooled treats. A chef’s knife works better than a butter knife — clean cuts without squishing.
- Measuring cups and spoons: For accuracy, though this recipe is forgiving enough that you can eyebit it after the first time.
Budget-Friendly Options: Skip the fancy silicone baking mat — parchment paper costs pennies and works just as well. No need for a stand mixer here, your arm does all the work. That’s part of the charm.
Preparation Method
Let’s get to the good part. This whole process takes about 15 minutes from start to finish, including cooling time. Seriously.
- Prepare your pan. Line a 9×13-inch baking pan with parchment paper, leaving some overhang on two sides. This creates “handles” for lifting the finished treats out. Spray the parchment lightly with nonstick cooking spray — this prevents sticking and makes cleanup a breeze.
- Melt the butter. Place your large pot over medium-low heat. Add the 3 tablespoons of butter and let it melt slowly. Don’t rush this — butter burns easily, and burnt butter flavor will compete with the candy corn sweetness. Swirl the pot occasionally as it melts.
- Add the marshmallows. Once the butter is fully melted, dump in the entire bag of marshmallows. Stir constantly with your wooden spoon. The marshmallows will start to puff up and then collapse into a gooey puddle. This takes about 3-4 minutes. Keep the heat on medium-low — high heat makes the sugar seize up.
- Add the candy corn. Here’s the fun part. Pour in the cup of candy corn and stir it into the melted marshmallow mixture. At first, it’ll look like a mess — orange and yellow streaks everywhere. Keep stirring. The candy corn will start to soften and melt, creating a beautiful swirled effect. Don’t over-stir if you want distinct color ribbons. This takes about 2 minutes.
- Check the consistency. The mixture should be smooth and glossy with visible streaks of orange and yellow. If you see chunks of unmelted candy corn, that’s okay — they’ll soften as the mixture cools. Just make sure most of it has melted.
- Add the cereal. Turn off the heat. Pour in the 6 cups of Rice Krispies cereal all at once. Fold gently — I mean gently — until the cereal is evenly coated. Over-stirring crushes the cereal and gives you dense, hard treats. You want light, airy results.
- Transfer to the pan. Scrape the mixture into your prepared pan. Use a second piece of parchment paper or a spatula sprayed with cooking spray to press it into an even layer. Press firmly but don’t smash it flat — you want some texture.
- Let it cool. Let the treats cool at room temperature for at least 30 minutes. Don’t put them in the fridge — that creates condensation and makes them soggy. I know it’s tempting to speed things up, but patience pays off here.
- Cut and serve. Once completely cool, lift the whole block out using the parchment handles. Use a sharp knife to cut into squares. Wipe the knife clean between cuts for neat edges. I like 2-inch squares, but you do you.
Sensory Cues: The mixture should look like a sunset — warm oranges and yellows swirling together. When you press it into the pan, it should feel springy, not stiff. The smell is pure childhood — butter, sugar, and that distinct Rice Krispies snap.
Cooking Tips & Techniques
I’ve made more batches of these than I care to count, and I’ve messed up plenty along the way. Here’s what I’ve learned:
The Low Heat Rule: Keep your heat on medium-low the entire time. High heat makes the sugar in the marshmallows and candy corn seize up, leaving you with a grainy, separated mess. I learned this the hard way when I tried to rush a batch before a party. The treats turned out hard and crumbly. Not cute.
The Candy Corn Melting Trick: If your candy corn isn’t melting smoothly, add a tablespoon of water to the pot before adding it. The steam helps break down the sugar crystals. Weird but effective.
Don’t Over-Press: When you’re pressing the mixture into the pan, use gentle, even pressure. Pressing too hard makes the treats dense and tough. You want them to be light and airy, like a cloud that happens to taste like fall.
Timing Strategy: Have everything measured and ready before you start. Once the marshmallows melt, you need to work fast. I keep my cereal measured in a bowl and my pan prepped before I even turn on the stove. Multitasking is overrated when sugar is involved.
Consistency Check: The mixture should hold together when you press it but still feel slightly soft. If it’s too sticky, you’ve undercooked the marshmallows. If it’s hard and brittle, you’ve overcooked them. Aim for that Goldilocks zone — soft, pliable, and slightly warm.
Variations & Adaptations
These treats are a blank canvas. Here are some ways to make them your own:
Chocolate Drizzle: Melt half a cup of chocolate chips and drizzle it over the cooled treats. The chocolate pairs beautifully with the candy corn sweetness. I tried this for a Halloween party and they disappeared in minutes.
Nutty Crunch: Add half a cup of chopped pecans or walnuts with the cereal. Toast the nuts first for extra flavor — just toss them in a dry pan over medium heat for 3-4 minutes until fragrant.
Spiced Version: Add a teaspoon of pumpkin pie spice or cinnamon to the marshmallow mixture before adding the cereal. This gives them a warm, cozy fall flavor that’s perfect for Thanksgiving.
Vegan Adaptation: Use vegan butter and vegan marshmallows. Dandies brand marshmallows melt beautifully and taste almost identical to the regular kind. The candy corn is naturally vegan, so you’re good there.
Gluten-Free Option: Most crispy rice cereals are gluten-free, but check the label. Nature’s Path Organic Crispy Rice Cereal is a reliable gluten-free option.
Extra Festive: Sprinkle the tops with Halloween sprinkles or colored sugar before the mixture sets. My niece went wild with this — she used orange, black, and purple sprinkles and called them “monster treats.”
Personal Variation: I once made a batch with half candy corn and half caramel candies. The caramel added a deeper sweetness and a chewier texture. It was a little messy — the caramel wanted to stick to everything — but absolutely worth it.
Serving & Storage Suggestions
These treats are best served at room temperature. The texture is soft and chewy, and the candy corn flavor really shines when they’re not cold. Cut them into squares and arrange them on a platter — they look gorgeous on a simple white plate or a rustic wooden board.
Complementary Pairings: Serve these with a glass of cold milk, a hot apple cider, or a pumpkin spice latte. They also pair surprisingly well with vanilla ice cream — crumble a treat over a scoop for a quick dessert.
Storage Instructions: Store leftover treats in an airtight container at room temperature. They’ll stay fresh for up to 5 days. Layer them with parchment paper between each layer to prevent sticking. Do not refrigerate — the cold air makes them hard and stale.
Freezer Tips: You can freeze these treats for up to 3 months. Wrap each square individually in plastic wrap, then place them in a freezer bag. Thaw at room temperature for about 30 minutes before serving. They taste almost as good as fresh.
Flavor Development: These treats actually get better after a day or two. The flavors meld together, and the texture softens slightly. I’ve been known to hide a few squares just for myself — they’re that good on day three.
Nutritional Information & Benefits
Let’s be real — these are a treat, not a health food. But here’s the breakdown for one square (based on 16 servings per batch):
- Calories: Approximately 180 per square
- Fat: 4 grams
- Carbohydrates: 36 grams
- Sugar: 22 grams
- Protein: 1 gram
- Sodium: 120 milligrams
Health Highlights: The butter provides a small amount of vitamin A, and the cereal is fortified with iron and B vitamins. The candy corn adds zero nutritional value, but honestly — sometimes joy is the point. These treats are naturally nut-free (check your cereal label) and can be made vegan with simple swaps.
Dietary Considerations: These are not low-carb or keto-friendly due to the sugar content. They contain gluten unless you use certified gluten-free cereal. They’re a great option for Halloween parties, bake sales, or any occasion where you need a crowd-pleaser that won’t break the bank.
Personal Perspective: I believe in balance. These treats are part of a happy life — not an everyday snack, but a special occasion indulgence. And honestly, sometimes you just need something sweet and silly to make a Tuesday feel like a celebration.
Conclusion
These Easy Candy Corn Rice Krispie Treats are proof that the best recipes don’t need to be complicated. Three ingredients, one pot, and about ten minutes of your time — that’s all it takes to create something that looks like you spent hours on it. The candy corn melts into a beautiful sunset swirl, the texture is perfectly chewy, and the flavor is pure autumn nostalgia.
I love that this recipe came from a moment of being wrong. My niece taught me that sometimes the simplest ideas are the best ones. So go ahead — grab a bag of candy corn and give these a try. Customize them with chocolate, nuts, or spices. Make them your own. And if you come up with a variation I haven’t tried, I’d love to hear about it.
Drop a comment below and let me know how your batch turned out. Did you add anything unexpected? Did your kids have any brilliant suggestions? I’m always ready to learn something new — especially if it comes in the form of a sweet, crispy treat.
Frequently Asked Questions
Can I use stale candy corn for this recipe?
Fresh candy corn melts better, but stale candy corn will still work. If your candy corn is rock-hard, add a tablespoon of water to the pot to help it soften. The texture might be slightly grainier, but the flavor will still be delicious.
Why did my treats turn out hard?
Overcooking the marshmallows or pressing the mixture too firmly into the pan can make treats hard. Keep the heat on medium-low and stir just until the marshmallows melt. When pressing into the pan, use gentle, even pressure — you want them light and airy.
Can I use mini marshmallows instead of regular-sized ones?
Yes, mini marshmallows work perfectly. They actually melt faster, so keep an eye on them. Use about 4 cups of mini marshmallows for every 10-ounce bag of regular marshmallows.
How do I get clean cuts without squishing the treats?
Use a sharp chef’s knife and wipe it clean between each cut. You can also spray the knife with nonstick cooking spray for extra-smooth cuts. Let the treats cool completely before cutting — warm treats will squish and stick.
Can I double this recipe?
Absolutely. Double all the ingredients and use a 12×17-inch half-sheet pan. You might need to work in batches if your pot isn’t big enough. The cooking time stays the same, but the cooling time will be slightly longer.
Pin This Recipe!

Easy Candy Corn Rice Krispie Treats: 3 Ingredient Fall Dessert

These Easy Candy Corn Rice Krispie Treats are a 3-ingredient fall dessert that comes together in just 10 minutes. The candy corn melts into a beautiful sunset-colored swirl, creating a chewy, nostalgic treat perfect for Halloween or Thanksgiving.
- Prep Time: 5 minutes
- Cook Time: 10 minutes
- Total Time: 45 minutes
- Yield: 16 servings 1x
- Category: Dessert
- Cuisine: American
Ingredients
- 3 tablespoons unsalted butter
- 1 bag (10 ounces) marshmallows (standard size)
- 6 cups Rice Krispies cereal
- 1 cup candy corn (Brach’s recommended)
Instructions
- Line a 9×13-inch baking pan with parchment paper, leaving overhang on two sides. Spray lightly with nonstick cooking spray.
- Place a large pot over medium-low heat. Add 3 tablespoons of butter and melt slowly, swirling occasionally.
- Once butter is fully melted, add the entire bag of marshmallows. Stir constantly until marshmallows are fully melted and gooey, about 3-4 minutes.
- Pour in 1 cup of candy corn and stir into the melted marshmallow mixture. Continue stirring until candy corn softens and creates a swirled effect, about 2 minutes. Do not over-stir if you want distinct color ribbons.
- Turn off the heat. Pour in 6 cups of Rice Krispies cereal all at once. Fold gently until cereal is evenly coated.
- Scrape mixture into prepared pan. Use a second piece of parchment paper or a spatula sprayed with cooking spray to press into an even layer. Press firmly but do not smash flat.
- Let treats cool at room temperature for at least 30 minutes. Do not refrigerate.
- Once completely cool, lift the block out using parchment handles. Use a sharp knife to cut into squares. Wipe knife clean between cuts.
Notes
Keep heat on medium-low throughout to prevent sugar from seizing. If candy corn isn’t melting smoothly, add a tablespoon of water to the pot. Do not over-press the mixture into the pan to keep treats light and airy. Store in an airtight container at room temperature for up to 5 days. Can be frozen for up to 3 months.
Nutrition
- Serving Size: 1 square (2-inch)
- Calories: 180
- Sugar: 22
- Sodium: 120
- Fat: 4
- Saturated Fat: 2
- Carbohydrates: 36
- Protein: 1
Keywords: candy corn, Rice Krispie treats, fall dessert, Halloween treats, 3 ingredient dessert, no bake dessert, easy dessert