The lady at the craft store register watched me load up on candy eyeballs and white melting wafers last October, and she didn’t say anything at first. Then she just smiled and said, “You’re making those mummy things, aren’t you? My granddaughter made them last year and I swear they were gone before the kids even came to the door.” She was right, of course. I’d been standing in that checkout line with my arms full of Halloween supplies, already mentally planning my annual treat-making marathon, and somehow this total stranger knew exactly what I was up to. It felt like being part of a secret club of people who understand that sometimes the best Halloween treats aren’t the ones you spend all day slaving over.
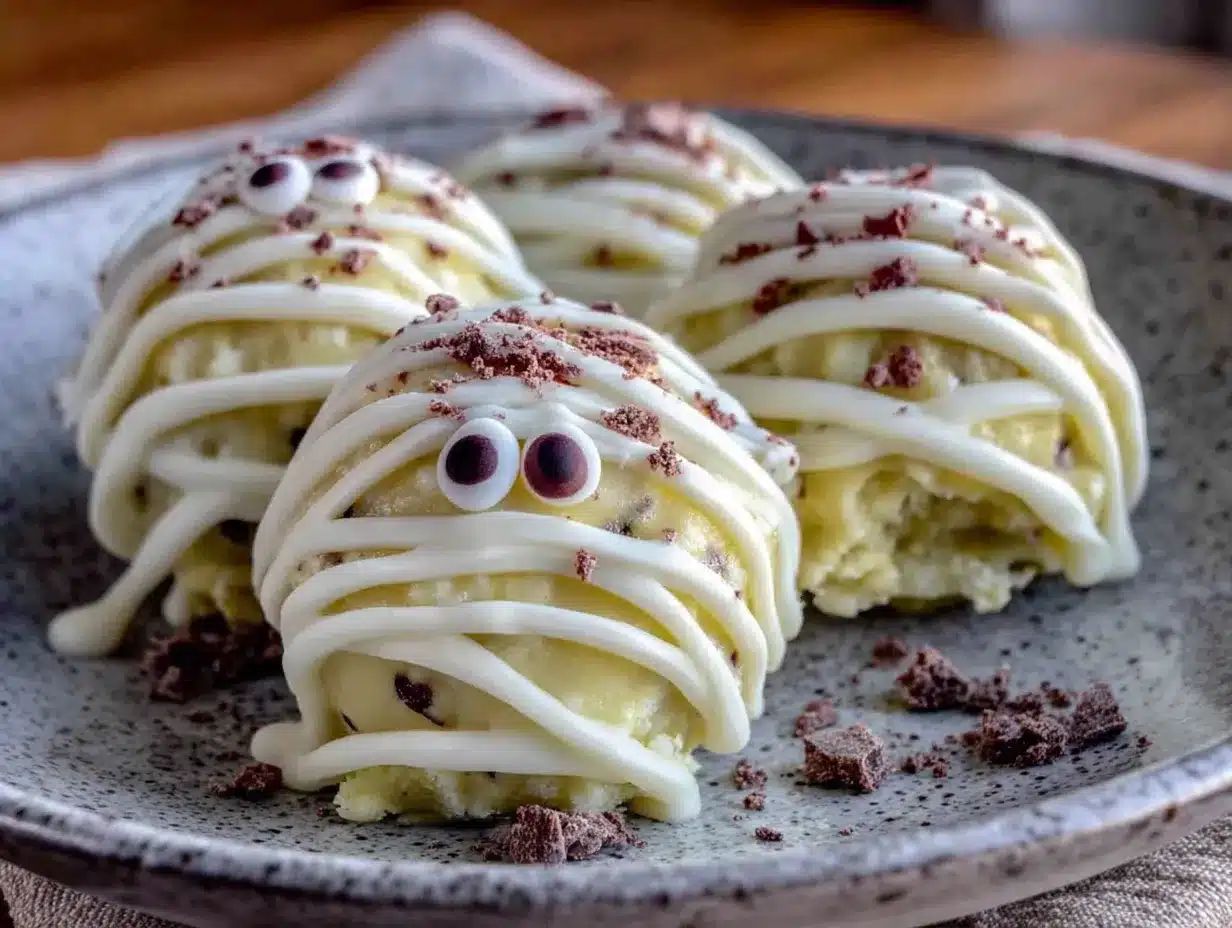
Honestly, that conversation stuck with me because it reminded me why I keep coming back to these Easy No-Bake Mummy Oreo Truffles year after year. They’re not complicated, they don’t require any fancy equipment, and somehow they manage to be both ridiculously cute and completely delicious at the same time. I mean, you’re basically taking Oreos and cream cheese—which is already a winning combination—and turning them into little ghostly mummies that look like they crawled straight out of a Halloween movie. Let me tell you, there’s something deeply satisfying about watching people’s faces light up when they realize those adorable little mummies are actually bite-sized truffles.
Maybe you’ve been there too, scrolling through Pinterest looking for Halloween treats that won’t make you want to pull your hair out. The kind of recipe that looks impressive but doesn’t require a pastry degree or a trip to three different specialty stores. These mummy truffles are exactly that. They’re the recipe you make when you want to bring something fun to a party without spending your entire Saturday in the kitchen. They’re the treat that makes kids squeal and adults sneak extras when they think nobody’s looking. And honestly, they’re the kind of recipe that becomes a tradition—the one people start asking about in September because they’re already planning their Halloween menus.
Why You’ll Love This Recipe
Let me be real with you for a second. I’ve tested a lot of Halloween recipes over the years, and most of them fall into one of two categories: either they look amazing but taste like cardboard, or they taste incredible but look like a hot mess. These Easy No-Bake Mummy Oreo Truffles somehow manage to nail both. They’re genuinely delicious—like, I’ve caught myself eating the filling straight from the bowl before I even formed the balls—and they look so stinking cute that people will think you spent hours on them. Here’s why this recipe works:
- No baking required: Seriously, zero oven time. If you can crush cookies and stir cream cheese, you can make these. Perfect for hot October days when you don’t want to turn on the oven.
- Simple ingredients: You only need four main ingredients—Oreos, cream cheese, white chocolate, and candy eyes. That’s it. No weird specialty items you’ll never use again.
- Perfect for Halloween parties: These little guys are the life of the party. Kids love the mummy design, and adults love that they’re basically cheesecake truffles in disguise.
- Crowd-pleaser guaranteed: I’ve brought these to Halloween potlucks, school parties, and family gatherings, and they always disappear first. Always.
- Customizable and fun: You can make them spooky, silly, or somewhere in between. Plus, decorating them is genuinely fun—even my non-crafty friends enjoy wrapping the white chocolate “bandages.”
What makes this recipe different from other Oreo truffles you’ve seen? It’s the texture. I’ve perfected the ratio of Oreos to cream cheese so you get that perfect truffle consistency—firm enough to dip, soft enough to melt in your mouth. And the white chocolate coating? I’ve got tips to keep it from seizing up or getting too thick, because nothing ruins a batch of truffles faster than lumpy chocolate. This isn’t just another version of mummy truffles—it’s the version I’ve tweaked and tested until it was exactly right.
What Ingredients You Will Need
This recipe uses simple, everyday ingredients to create something that looks far more complicated than it actually is. The beauty of these truffles is that you probably already have most of these items in your pantry, which means you can whip up a batch on a whim without a special grocery trip. Here’s what you’ll need:
For the Truffle Base
- 1 (14.3 oz) package Oreo cookies (about 36 cookies) – Regular Oreos work best, but you can use Double Stuf if that’s what you have. Just note that the truffles will be slightly sweeter and a bit softer. I prefer using classic Oreos for the best texture.
- 8 oz cream cheese, softened to room temperature – Full-fat cream cheese gives the best flavor and texture. Let it sit out for about 30 minutes before mixing so it blends smoothly. Low-fat works in a pinch, but the truffles won’t be as creamy.
For the Coating
- 12 oz white chocolate melting wafers or white chocolate chips – I recommend Ghirardelli white chocolate melting wafers for the smoothest results. White chocolate chips can work, but they often need a little coconut oil (about 1 teaspoon) to thin them out for dipping.
- 1 teaspoon coconut oil or vegetable shortening (optional, but helps thin the chocolate for smoother dipping)
For Decoration
- 1-2 packages candy eyeballs – You can find these at craft stores, Walmart, or online. Get the small ones for the best proportion on the truffles. I like the Wilton brand ones best.
- 2 tablespoons black decorating gel or black frosting (optional, for making the mouth if you want extra detail)
A few ingredient notes from my personal experience: Don’t skimp on the cream cheese quality. I’ve tried this with store-brand cream cheese and the texture just isn’t as smooth. Philadelphia is my go-to for consistent results. For the Oreos, I’ve experimented with different flavors—peanut butter Oreos make a surprisingly good variation, but stick with classic for the first batch. And here’s a tip I learned the hard way: make sure your white chocolate is actually white chocolate and not almond bark or white confectionery coating. Real white chocolate melts more smoothly and tastes better, though melting wafers are more forgiving for beginners.
Equipment Needed
The equipment list for these truffles is refreshingly short. You don’t need a stand mixer, a double boiler, or any of those fancy kitchen gadgets that take up cabinet space. Here’s what you’ll actually use:
- Food processor or rolling pin – A food processor makes quick work of crushing the Oreos into fine crumbs. If you don’t have one, put the cookies in a zip-top bag and go to town with a rolling pin. It’s therapeutic, honestly.
- Large mixing bowl – For combining the cookie crumbs with cream cheese.
- Baking sheet lined with parchment paper or wax paper – For holding the formed truffles as they chill.
- Microwave-safe bowl or small saucepan – For melting the white chocolate. A microwave is faster, but a double boiler gives you more control.
- Fork or dipping tool – For dipping the truffles in chocolate. I use a regular dinner fork, but you can also buy special candy dipping tools.
- Small piping bag or zip-top bag – For drizzling the white chocolate “bandages.” A zip-top bag with the corner snipped off works perfectly.
- Refrigerator space – You’ll need room to chill the truffles at various stages.
If you don’t have a food processor, honestly, the rolling pin method is totally fine. I actually prefer it sometimes because I can control the texture better—some people like a few tiny cookie chunks in their truffles for texture. My grandmother used to crush cookies by hand for her famous cheesecake crust, and she always said it made them taste better because you put love into it. I’m not sure that’s scientifically accurate, but I do think there’s something to be said for the hands-on approach.
Preparation Method
Making these Easy No-Bake Mummy Oreo Truffles is a straightforward process, but there are a few tricks I’ve learned along the way that make a big difference. Follow these steps and you’ll have perfect little mummies in no time.
- Crush the Oreos into fine crumbs. Place all 36 Oreos (filling included—don’t remove it!) in your food processor and pulse until you have fine, uniform crumbs. If you’re using the bag-and-rolling-pin method, seal the cookies in a zip-top bag and crush them until no large pieces remain. You should end up with about 3 cups of crumbs. The filling helps bind everything together, so don’t be tempted to scrape it out.
- Mix the cream cheese and cookie crumbs. In a large bowl, combine the Oreo crumbs with the softened cream cheese. Use a spatula or your hands to mix until everything is fully incorporated. The mixture should hold together when pressed—if it seems too dry, add another tablespoon of cream cheese. If it’s too sticky, add a few more crushed Oreos. This is where experience comes in; the texture should be similar to play dough.
- Form the truffle balls. Scoop out about 1 tablespoon of the mixture and roll it between your palms to form a smooth ball. Place each ball on the parchment-lined baking sheet. You should get about 24 truffles from this recipe. Don’t worry if they’re not perfectly uniform—slight variations make them look more homemade and charming.
- Chill the truffle balls. Place the baking sheet in the refrigerator for at least 30 minutes, or up to 1 hour. This step is crucial—the truffles need to be firm enough to dip without falling apart in the warm chocolate. I’ve skipped this step before when I was in a hurry, and let me tell you, it was a disaster. The truffles started crumbling in the chocolate and I ended up with chocolate soup with Oreo chunks floating in it. Learn from my mistakes.
- Melt the white chocolate. Place the white chocolate melting wafers in a microwave-safe bowl. Microwave in 30-second intervals, stirring thoroughly between each interval, until the chocolate is completely smooth and melted. If you’re using white chocolate chips, add 1 teaspoon of coconut oil to help thin it out. Be careful not to overheat—white chocolate burns easily and becomes grainy. It should be warm but not hot to the touch.
- Dip the chilled truffles. Remove the truffle balls from the refrigerator. Using a fork or dipping tool, lower one truffle into the melted white chocolate. Gently tap the fork on the edge of the bowl to let excess chocolate drip off. Place the coated truffle back on the parchment paper. Repeat with all truffles. Work quickly—if the truffles warm up too much, they’ll start to soften and fall apart.
- Add the candy eyes. While the white chocolate is still wet, press two candy eyeballs onto each truffle. You want them positioned at the top of the truffle so the “bandages” can drape down from above. If the chocolate starts to set before you add the eyes, just dab a tiny bit of melted chocolate on the back of each eye to glue it in place.
- Create the mummy bandages. Transfer the remaining melted white chocolate to a small piping bag or zip-top bag. Snip off a tiny corner—and I mean tiny, like 1/8 inch. Drizzle the chocolate back and forth over each truffle to create the mummy bandage effect. You want to cover most of the truffle but leave the eyes visible. Don’t overthink this part—the messier the bandages, the more authentic the mummy look.
- Final chill. Return the decorated truffles to the refrigerator for another 15-20 minutes to set the chocolate completely. Once firm, they’re ready to serve. The white chocolate should be solid and the truffles should hold their shape when picked up.
Cooking Tips & Techniques
After making these truffles more times than I care to count, I’ve collected a few tricks that separate good mummy truffles from great ones. Here’s what I’ve learned the hard way so you don’t have to.
The cream cheese temperature matters more than you think. I cannot stress this enough. Cold cream cheese will leave you with lumpy, uneven truffles that don’t hold together well. Room temperature cream cheese blends into the cookie crumbs like a dream, creating that smooth, cheesecake-like texture. Set it out 30-45 minutes before you start, or if you’re impatient like me, microwave it for about 10 seconds to soften it up.
Don’t overmix the truffle base. I know it’s tempting to keep stirring until everything is perfectly uniform, but overmixing can make the truffles dense and greasy. Mix just until the crumbs are evenly moistened and the mixture holds together when pressed. A few tiny cookie chunks are totally fine and actually add nice texture.
White chocolate is temperamental. It’s the diva of the chocolate world. It seizes up if you look at it wrong. If your white chocolate starts to thicken or get lumpy while you’re dipping, add another teaspoon of coconut oil and stir vigorously. If it’s already seized, you might need to start over—trust me, I’ve tried to salvage seized chocolate and it never works.
Work in batches. Don’t take all the truffles out of the fridge at once. Take out 6-8 at a time, dip them, and return them to the fridge. This keeps them cold and firm, which makes dipping much easier. The first time I made these, I took all 24 out at once and by the time I got to the last few, they were too soft to dip properly.
Chill between steps. If you’re making a large batch or the weather is warm, pop the truffles back in the fridge for 5-10 minutes between the initial dip and the bandage drizzle. This prevents the bandages from sliding off and pooling at the bottom.
Variations & Adaptations
One of the best things about this recipe is how easily it adapts to different tastes, dietary needs, and occasions. Here are some variations I’ve tried and loved:
Gluten-free version: Use gluten-free chocolate sandwich cookies instead of regular Oreos. The texture will be slightly different—gluten-free cookies tend to be a bit crumblier—but the truffles will still taste amazing. Just make sure to check that your white chocolate is also gluten-free.
Spooky spider version: Instead of making mummies, turn these into spiders! Dip the truffles in dark chocolate instead of white, then attach eight pretzel stick legs (break them in half for shorter legs) and two candy eyes. They look terrifyingly cute and are perfect for kids who want something a little more creepy.
Peanut butter twist: Swap half the Oreos for peanut butter Oreos. The peanut butter flavor pairs beautifully with the cream cheese and white chocolate. This is my personal favorite variation—I made it for a Halloween party last year and people were literally asking for the recipe before they finished eating.
Vegan option: Use vegan cream cheese and dairy-free chocolate sandwich cookies. There are several good vegan cream cheese brands available now, and many dark chocolate options are accidentally vegan. White chocolate is trickier to find vegan, but there are some great dairy-free white chocolate bars on the market.
Mini mummy bites: For a smaller, poppable version, roll the truffle mixture into 1-teaspoon balls instead of 1-tablespoon. You’ll get about 48 mini mummies, perfect for party platters or lunchbox surprises. Just reduce the chilling time slightly since they’re smaller.
Serving & Storage Suggestions
These mummy truffles are best served chilled, right out of the refrigerator. The cold temperature keeps the white chocolate coating firm and the truffle center creamy. I like to arrange them on a black platter or Halloween-themed serving dish to make the white bandages pop. Add some fake spiderwebs or plastic spiders around the platter for extra Halloween vibes.
For storage, keep the truffles in an airtight container in the refrigerator. They’ll stay fresh for up to 1 week, though honestly, they never last that long in my house. Layer them between sheets of parchment paper so the bandages don’t stick together. If you’re stacking them, be gentle—the white chocolate drizzle is delicate and can break off easily.
These truffles also freeze beautifully. Place them in a single layer on a baking sheet and freeze until solid, then transfer to a freezer-safe container or zip-top bag. They’ll keep for up to 3 months in the freezer. To serve, thaw them in the refrigerator for about 2 hours. I’ve made these weeks ahead of Halloween and they tasted just as fresh as the day I made them.
One thing I love about these truffles is that the flavors actually meld and improve after a day or two in the fridge. The Oreo and cream cheese flavors marry together, and the white chocolate coating sets up perfectly. So don’t stress about making them at the last minute—they’re actually better if you make them a day ahead.
Nutritional Information & Benefits
Let’s be honest—these are a treat, not a health food. But here’s the nutritional breakdown if you’re curious. Per truffle (based on 24 servings): approximately 180 calories, 11g fat, 20g carbohydrates, 2g protein, and 14g sugar. The portion size is small, so it’s easy to enjoy one or two without going overboard.
On the bright side, there are a few redeeming qualities. The cream cheese adds a small amount of calcium and protein. The Oreos contain a tiny bit of iron from the enriched flour. And hey, dark chocolate lovers can swap the white chocolate for dark chocolate to get some antioxidants—though I’ll warn you, it changes the mummy aesthetic completely.
If you’re watching your sugar intake, you can make a few adjustments. Use reduced-fat cream cheese to cut some calories. Try sugar-free white chocolate, though I haven’t tested this myself and can’t vouch for the texture. Or simply make smaller truffles—the mini version I mentioned earlier gives you the same great taste with fewer calories per piece.
As always, these truffles contain dairy (cream cheese and white chocolate) and gluten (Oreos). They’re also made in facilities that process nuts, so if you have severe allergies, check your ingredient labels carefully. But for most people, these are a perfectly reasonable Halloween indulgence.
Conclusion
These Easy No-Bake Mummy Oreo Truffles have become a non-negotiable part of my Halloween celebrations, and I think they deserve a spot in yours too. They’re the kind of recipe that proves you don’t need fancy skills or expensive equipment to create something truly memorable. Four ingredients, a little bit of patience, and you’ve got a platter of adorable mummies that will steal the show at any Halloween gathering.
What I love most about this recipe is how it brings people together. There’s something about making these truffles that turns into a mini event—friends gather around the kitchen counter to help dip and decorate, kids fight over who gets to place the candy eyes, and everyone ends up covered in a little bit of white chocolate by the time we’re done. That’s the kind of Halloween magic you can’t buy at the store.
So go ahead and give these a try. Make them your own—add extra eyes, make them extra messy with the bandages, or experiment with different cookie flavors. And when you do, I’d love to hear about it. Drop a comment below and tell me how your mummies turned out, or share a photo of your creation. Happy Halloween, and happy truffle making!
Frequently Asked Questions
Can I use Double Stuf Oreos for this recipe?
Yes, you can! Double Stuf Oreos will make the truffle mixture slightly softer and sweeter because of the extra filling. You may need to add a few more crushed Oreos to compensate for the extra moisture. I recommend starting with the standard amount and adjusting as needed.
How do I keep the white chocolate from seizing up?
White chocolate is sensitive to heat and moisture. Make sure your bowl and utensils are completely dry—even a drop of water can cause seizing. Melt the chocolate slowly in 30-second intervals, stirring thoroughly between each. If it starts to thicken, add a teaspoon of coconut oil to thin it out.
Can I make these truffles ahead of time?
Absolutely! These truffles are perfect for making ahead. You can prepare them up to 1 week in advance and store them in an airtight container in the refrigerator. They also freeze well for up to 3 months. I actually think they taste better after a day or two in the fridge.
My truffle mixture is too sticky. What should I do?
If your mixture is too sticky to roll into balls, add more crushed Oreos, one tablespoon at a time, until the mixture holds together without sticking to your hands. This usually happens if your cream cheese was too soft or if you used Double Stuf Oreos. Don’t worry—it’s an easy fix.
Can I use milk chocolate or dark chocolate instead of white?
You can, but the mummy effect won’t be as visible since dark or milk chocolate won’t show the white bandages. If you want to switch it up, try using dark chocolate for the base dip and white chocolate for the bandages—it creates a nice contrast and tastes delicious.
Pin This Recipe!
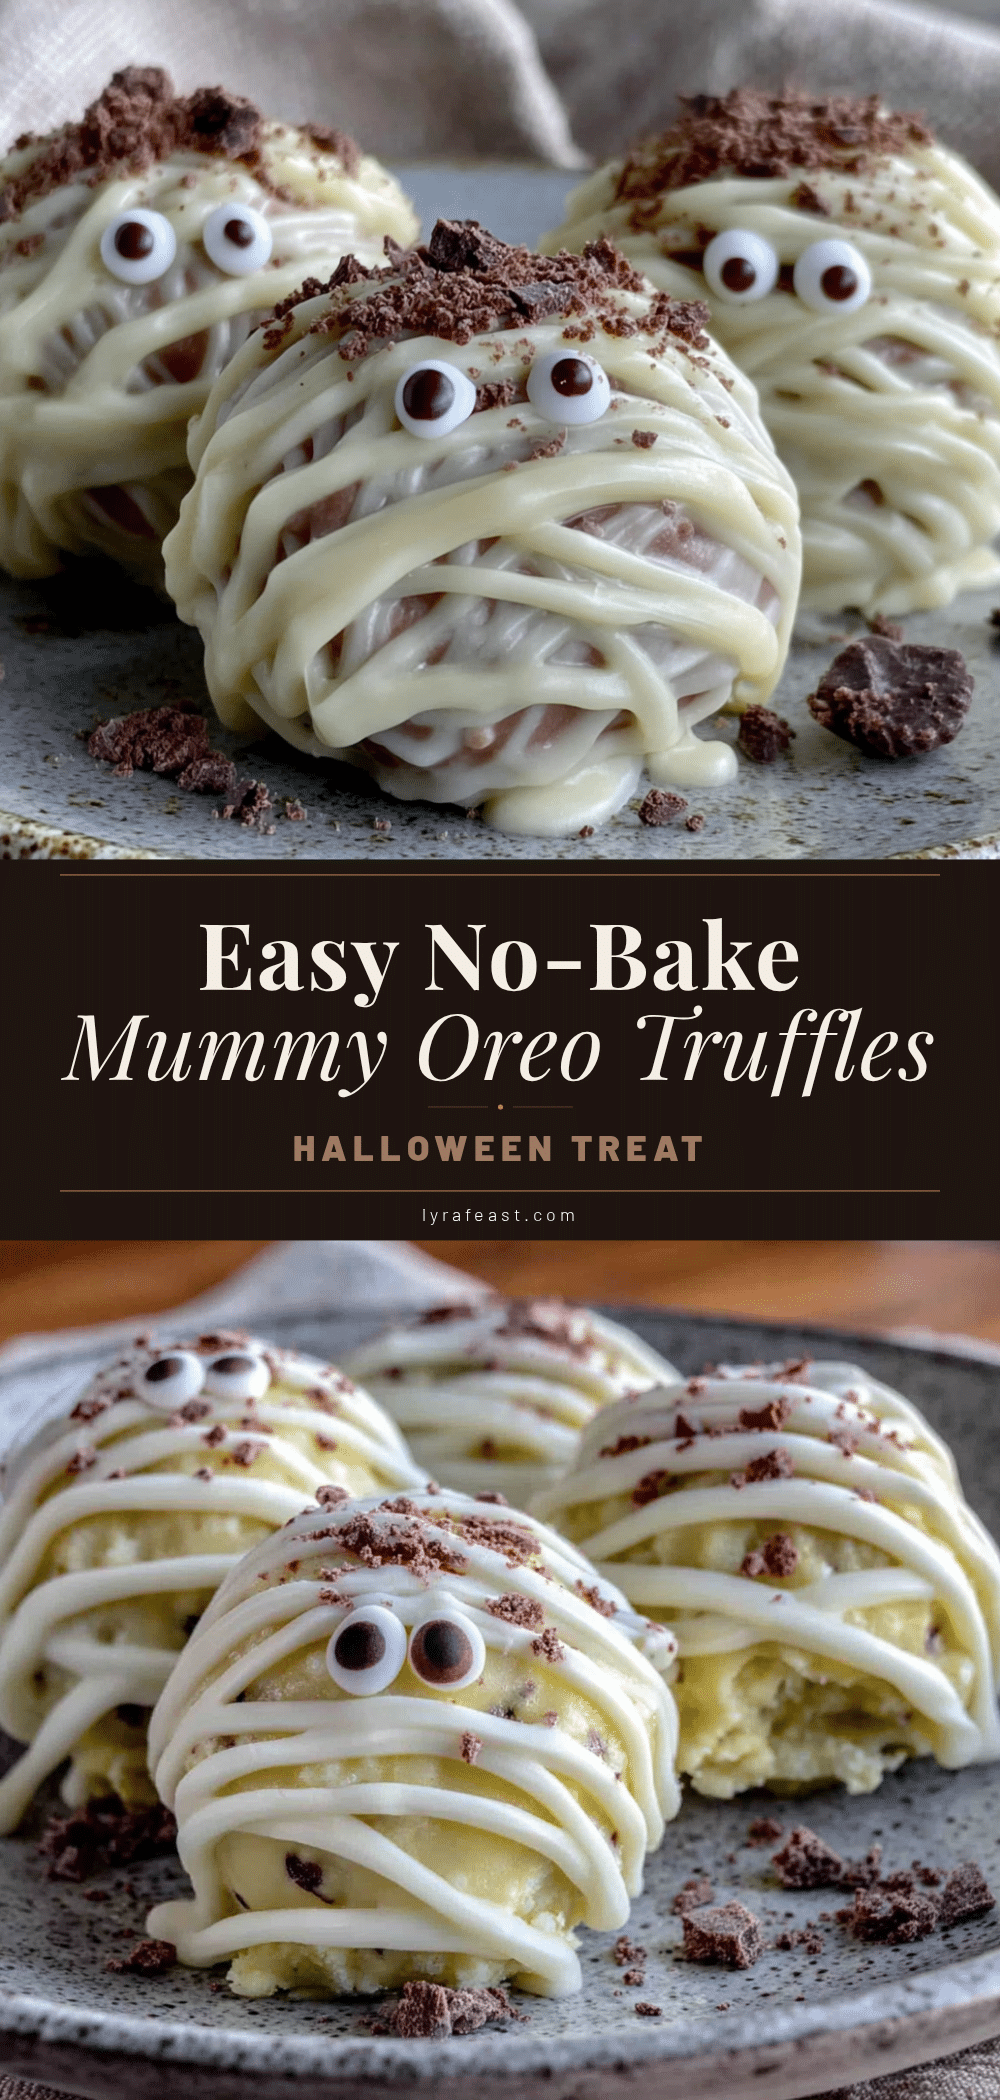
Easy No-Bake Mummy Oreo Truffles: The Best Halloween Treat
These adorable no-bake mummy truffles combine crushed Oreos and cream cheese, dipped in white chocolate and decorated with candy eyes. They’re the perfect Halloween treat that looks impressive but requires minimal effort.
- Prep Time: 30 minutes
- Cook Time: 0 minutes
- Total Time: 1 hour 30 minutes
- Yield: 24 servings 1x
- Category: Dessert
- Cuisine: American
Ingredients
- 1 (14.3 oz) package Oreo cookies (about 36 cookies)
- 8 oz cream cheese, softened to room temperature
- 12 oz white chocolate melting wafers or white chocolate chips
- 1 teaspoon coconut oil or vegetable shortening (optional)
- 1–2 packages candy eyeballs
- 2 tablespoons black decorating gel or black frosting (optional)
Instructions
- Crush the Oreos into fine crumbs using a food processor or by placing them in a zip-top bag and crushing with a rolling pin.
- In a large bowl, combine the Oreo crumbs with the softened cream cheese. Mix until fully incorporated; the mixture should hold together when pressed.
- Scoop about 1 tablespoon of the mixture and roll into smooth balls. Place on a parchment-lined baking sheet. You should get about 24 truffles.
- Chill the truffle balls in the refrigerator for at least 30 minutes, or up to 1 hour.
- Melt the white chocolate in a microwave-safe bowl in 30-second intervals, stirring between each, until smooth. If using white chocolate chips, add 1 teaspoon of coconut oil to thin.
- Dip each chilled truffle into the melted white chocolate using a fork, letting excess drip off. Place back on the parchment paper.
- While the white chocolate is still wet, press two candy eyeballs onto each truffle.
- Transfer remaining melted white chocolate to a piping bag or zip-top bag with a tiny corner snipped off. Drizzle over each truffle to create mummy bandages, leaving the eyes visible.
- Return the decorated truffles to the refrigerator for 15-20 minutes to set the chocolate completely.
Notes
Make sure cream cheese is at room temperature for smooth blending. White chocolate is sensitive to heat and moisture; melt slowly and avoid water. Work in batches to keep truffles cold for easier dipping. Truffles can be made up to 1 week ahead and stored in the refrigerator, or frozen for up to 3 months.
Nutrition
- Serving Size: 1 truffle
- Calories: 180
- Sugar: 14
- Sodium: 120
- Fat: 11
- Saturated Fat: 6
- Carbohydrates: 20
- Protein: 2
Keywords: Halloween, no-bake, Oreo truffles, mummy, easy, treat, party



