I swore I wasn’t going to do a themed charcuterie board. For years, actually. They felt gimmicky to me—all those plastic spider rings and store-bought fake cobwebs plopped on top of good cheese. It felt like the opposite of what a grazing board should be: thoughtful, delicious, and a little bit elegant. Then last October, my best friend Sarah texted me a photo of her “spooky snack spread” for her annual Halloween movie marathon. It was a mess. Orange-dyed popcorn next to sad, pre-sliced cheddar. And honestly? It looked like she’d just dumped a grocery bag onto a cutting board. I made a sarcastic comment back, something like, “Want me to show you how it’s actually done?” She called my bluff. The next Friday night, I found myself standing in my kitchen at 9 PM, three types of cheese on the counter, a bag of black olives, and a very specific mission. I was going to build a Halloween board that actually tasted as good as it looked—no gimmicks, just good food dressed up for the party. And let me tell you, the moment I laid it out and saw Sarah’s face, I knew I’d been wrong. Maybe you’ve been there too, rolling your eyes at the overly decorated stuff but secretly wanting something that hits that sweet spot between creepy and classy. This Spooky Halloween Charcuterie Board is that perfect middle ground. It’s the one I keep coming back to every year because it actually works—the flavors are balanced, the presentation is dramatic, and I didn’t have to buy a single thing from a Halloween aisle.
Why You’ll Love This Spooky Halloween Charcuterie Board
Look, I’ve tested a lot of themed boards over the years. Some were total flops (don’t ask about the “mummy meatballs” incident). This one? It’s the real deal. Here’s what makes it stand out from every other Halloween snack spread you’ve seen on Pinterest.
- Comes Together in Under 30 Minutes: No complicated cooking or baking. You’re mostly slicing, arranging, and adding a few clever spooky touches. Perfect for last-minute Halloween gatherings or a quiet night in with a horror movie.
- Uses Simple, Grocery-Store Ingredients: You don’t need a specialty food shop or a trip to a gourmet market. Everything on this board is something you can find at your regular supermarket. No stress, no special orders.
- Perfect for Parties of All Sizes: Whether you’re hosting a big Halloween bash or just feeding your family before trick-or-treating, this board scales up or down effortlessly. It’s the ultimate crowd-pleaser.
- Visually Stunning Without Being Tacky: This is the board that gets the photos taken before anyone touches it. The colors—deep blacks, rich oranges, creamy whites—are naturally Halloween-themed. You’ll get compliments before anyone even takes a bite.
- Unbelievably Delicious: This isn’t just a pretty face. The flavor combinations are carefully chosen. The salty prosciutto against the sweet fig jam, the sharp cheddar next to the honey-roasted almonds, the creamy brie with a drizzle of spicy honey. It’s a flavor experience, not just a snack.
This recipe is the kind that makes you close your eyes after the first bite. It’s comfort food reimagined for the spookiest season—faster, easier, but with the same soul-soothing satisfaction. Perfect for impressing guests without stress, or turning a simple Friday night into something memorable.
What Ingredients You Will Need
This recipe uses simple, wholesome ingredients to deliver bold flavor and satisfying texture without the fuss. The key is choosing items that naturally fit the Halloween color palette—deep purples, blacks, oranges, and greens. Here’s what you’ll need to gather.
The Cheeses (The Stars of the Board)
- Brie or Camembert (8 oz wheel): This is your creamy, decadent element. I prefer a good-quality double cream brie. (Look for one that feels slightly springy to the touch—it’ll be perfectly ripe.)
- Aged Cheddar (6 oz): The sharp, crumbly texture and deep orange color are perfect for Halloween. I love a good Cabot or Kerrygold reserve cheddar. Cut it into thick, uneven wedges.
- Manchego or Gouda (6 oz): A semi-hard cheese for variety. Manchego has a nutty, slightly salty flavor that pairs beautifully with the sweet elements. Slice it into thin triangles.
- Smoked Gouda (4 oz): Optional, but highly recommended. The smoky flavor adds a “campfire” vibe that feels very October. Plus, the orange rind is perfect for the theme.
The Meats (The Savory Backbone)
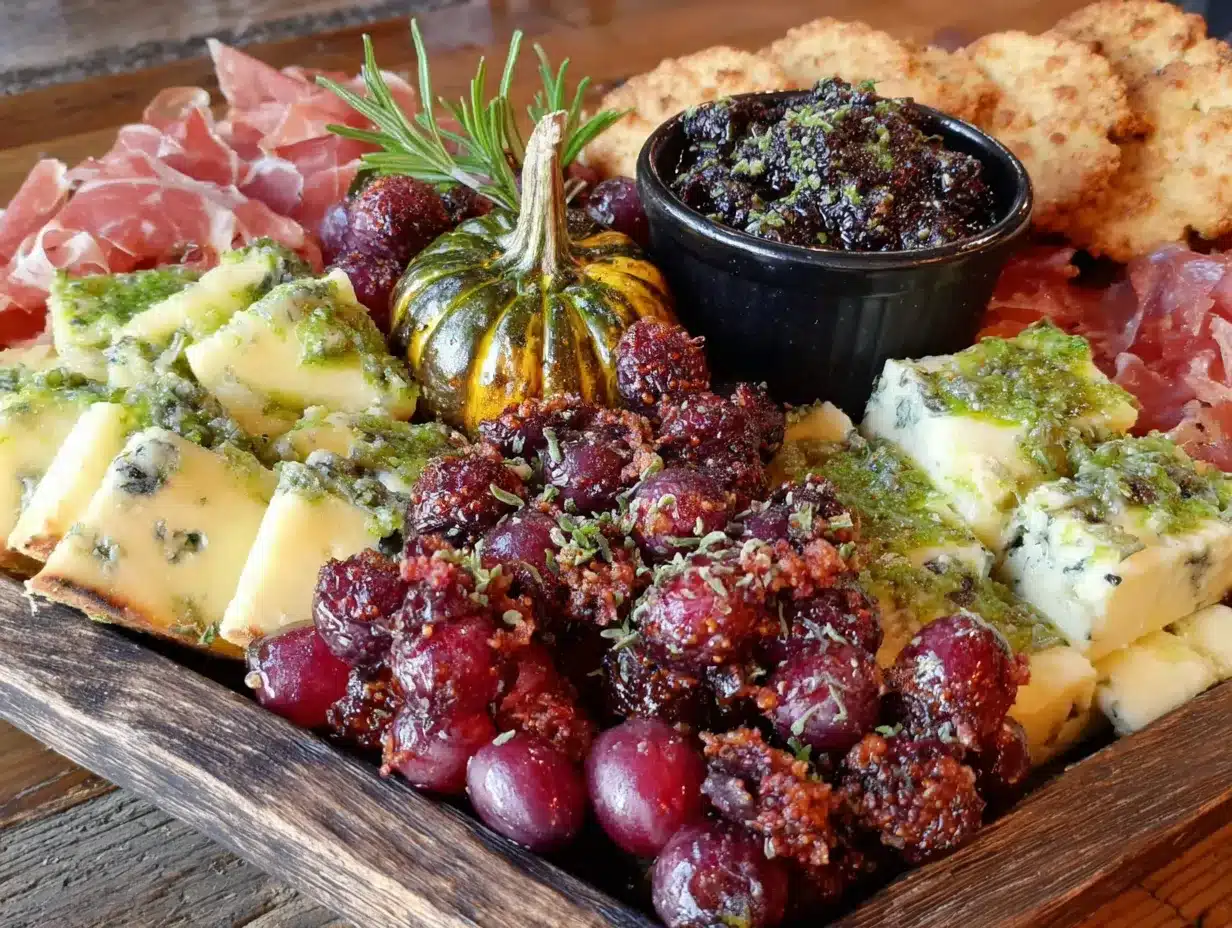
- Prosciutto (4 oz): Thinly sliced, salty, and elegant. Drape it in loose ribbons across the board.
- Salami (4 oz): Use a variety like Genoa or a peppered salami. Cut some into thin rounds and leave others in small, foldable slices. (Peppered salami looks like it has little black specks—very spooky!)
- Pepperoni (3 oz): For a fun, kid-friendly option. Use mini pepperoni if you can find them, or cut regular ones into smaller pieces.
The Produce (The Color and Crunch)
- Black Olives (½ cup): Use both kalamata and black olives for color and briny flavor. They look like little eyeballs—perfect for the theme.
- Red and Green Grapes (1 cup each): The red grapes look like little jewels, and the green grapes add a pop of color. “Fingers” of green grapes can be placed to look like witch’s fingers.
- Dried Apricots or Dried Figs (½ cup): Their deep orange and purple-brown colors are very Halloween-appropriate. They add natural sweetness.
- Fresh Rosemary Sprigs (a few): Use these as “trees” or “bushes” on your board. They add a lovely aroma and a dark green color.
- Pomegranate Seeds (¼ cup): These look like little rubies or drops of blood. They add a tart, juicy pop.
The Crunchy Elements (The Texture)
- Crackers (1 box): Use a mix of shapes and flavors. I like a plain water cracker, a rosemary and olive oil cracker, and a whole-wheat option. (Ritz crackers are great for dipping.)
- Breadsticks or Grissini (a handful): These look like witch’s broomsticks, especially if you tie a little rosemary sprig to the end with kitchen twine.
- Honey-Roasted Almonds or Marcona Almonds (½ cup): The salty-sweet crunch is irresistible. Marcona almonds are softer and richer.
- Pretzel Sticks (a handful): Another great “broomstick” option. They are also perfect for scooping up soft cheese or jam.
The Spreads & Dips (The Flavor Boosters)
- Fig Jam or Blackberry Jam (¼ cup): The deep, dark color and sweet-tart flavor are perfect. Place it in a small bowl on the board.
- Honey (2 tbsp): Drizzle over the brie or serve alongside the manchego. A spicy honey (infused with chili flakes) adds a fantastic kick.
- Whole-Grain Mustard (2 tbsp): A tangy, savory option that cuts through the richness of the cheese and meat.
The Spooky Decorations (The Fun Part)
- Black Sesame Seeds (1 tbsp): Sprinkle these over the brie or soft cheese to make it look like it’s been “dusted” with something mysterious.
- Edible Eyes (a small bag): These are optional, but they are a huge hit with kids. Stick them on olives or cheese cubes using a tiny dab of honey.
- Mini Plastic Spiders or Bats (optional): Place them strategically around the board for a fun, non-food scare. Just make sure guests know they are not edible!
Equipment Needed
You don’t need a lot of fancy equipment to make a beautiful charcuterie board. Here’s what I use and recommend.
- A Large Wooden Board or Slate Platter (at least 12×18 inches): This is your canvas. A wooden board is classic and warm, but a slate board looks incredibly dramatic for Halloween. If you don’t have a large board, use a baking sheet or a large cutting board.
- Small Ramekins or Bowls (2-3): For the jam, honey, and mustard. I use small, white ceramic bowls for contrast.
- A Good Cheese Knife Set (or just one sharp paring knife): You’ll need a knife for soft cheese (brie) and one for hard cheese (cheddar). A small paring knife is great for detail work.
- Tongs or Small Forks: For serving the olives, grapes, and meat. It keeps things tidy.
- Kitchen Twine (optional): For tying rosemary to breadsticks to make “witches’ broomsticks.”
- Paper Towels: For wiping up any spills or sticky fingers as you work.
If you don’t have a slate board, don’t worry. A large, light-colored wooden board or even a clean, white baking sheet will work beautifully. The key is having enough surface area to spread everything out. I once used a clean, flat pizza stone in a pinch, and it looked fantastic.
Preparation Method
This is the fun part. Follow these steps, and you’ll have a show-stopping board in under 30 minutes.
- Prep Your Cheeses (5 minutes): Take your cheeses out of the fridge about 15 minutes before you start assembling. This allows them to come to room temperature, which makes them creamier and more flavorful. Cut your hard cheeses (cheddar, manchego, gouda) into slices or cubes. Leave the brie wheel whole—it looks beautiful as a centerpiece.
- Prep Your Produce (5 minutes): Wash and dry your grapes. Rinse the pomegranate seeds if they’re from a fresh pomegranate. Drain your olives and pat them dry with a paper towel. (Wet olives make the board soggy.)
- Arrange the Bowls First (2 minutes): Place your small bowls of fig jam, honey, and whole-grain mustard on the board. Space them out evenly. These act as anchors for the rest of your arrangement. I usually put one in the top left, one in the bottom right, and one in the center.
- Place the Brie (2 minutes): Put the whole brie wheel in a prominent spot. I like to place it slightly off-center. Drizzle a little honey over the top and sprinkle with black sesame seeds for that “mysterious dust” effect. (It looks amazing.)
- Add the Meat (3 minutes): Drape the prosciutto in loose, wavy ribbons around the board. Fold the salami slices into quarters or roll them into little cylinders. Place the pepperoni in small piles. Don’t be too neat—a little messy looks more natural and inviting.
- Add the Hard Cheeses (3 minutes): Fan out your cheddar wedges, manchego slices, and smoked gouda pieces near the meats. Create little “clusters” of cheese. Leave some space between clusters so the board doesn’t look crowded.
- Fill in with Produce (4 minutes): Scatter the grapes in small bunches. Place the olives in little piles (they look like creepy little eyes). Sprinkle the dried apricots and pomegranate seeds around. Tuck the rosemary sprigs in between everything—they add height and a spooky, forest-like feel.
- Add the Crunchy Elements (3 minutes): Arrange your crackers and breadsticks in small, organized piles. I like to fan them out in a semi-circle around a cheese or a bowl. Place the pretzel sticks and almonds in small clusters near the edges.
- Add the Spooky Touches (3 minutes): This is where you get creative. If you have edible eyes, stick a few on the olives or cheese cubes. Tie a rosemary sprig to the end of a few breadsticks with kitchen twine to make “witches’ broomsticks.” Place a few mini plastic spiders or bats in the empty spaces. (I once used a tiny plastic skeleton hand reaching out from behind the brie—it was a huge hit.)
- Final Check (1 minute): Step back and look at your board. Are there any empty spots? Fill them with extra grapes, almonds, or a few more crackers. The goal is to make it look abundant and full, but not overcrowded. You want every inch to have something delicious.
Cooking Tips & Techniques
I’ve made about a dozen of these boards over the years, and I’ve learned a few things the hard way. Here are my best tips.
- Don’t Overcrowd the Board: This is the number one mistake. You want people to be able to reach everything without knocking over a bowl of jam. Leave a little breathing room between clusters. You can always add more later.
- Think About Color Contrast: Place dark items (olives, blackberries) next to light items (brie, crackers) for visual impact. The contrast makes everything pop. A board that’s all one color looks flat and boring.
- Use Height: Don’t lay everything flat. Drape the prosciutto in waves, stack some crackers, and let the rosemary sprigs stand up a bit. A board with varying heights is more dynamic and interesting to look at.
- Prep Everything Before You Start Arranging: Have all your cheeses cut, your fruit washed, and your bowls filled before you touch the board. Once you start arranging, you don’t want to stop to slice more cheese. It breaks the flow.
- Keep It Cold (But Not Too Cold): If you’re not serving the board immediately, cover it loosely with plastic wrap and put it in the fridge. But remember to take it out 15-20 minutes before serving to let the cheese come to room temperature. Cold cheese is flavorless cheese.
- Make It a “Grazing” Board, Not a “Dinner” Board: This is meant to be picked at over a long period of time. Don’t put out so much that people feel stuffed after 10 minutes. A good rule of thumb is about 2-3 ounces of cheese and 2 ounces of meat per person.
One time, I forgot to take the plastic wrap off the brie before I put it on the board. I had a beautiful, honey-drizzled, sesame-topped wheel of brie… with a clear plastic wrapper underneath. My guests were too polite to say anything, but I noticed them trying to cut through it. Learn from my mistake!
Variations & Adaptations
This board is incredibly flexible. Here are a few ways to make it your own.
- Vegetarian Version: Simply omit the meats. Add more cheese varieties (like a soft-ripened goat cheese log or a crumbly blue cheese) and extra veggies (like roasted red peppers, artichoke hearts, or marinated mushrooms). The board will still be hearty and delicious.
- Gluten-Free Version: Use gluten-free crackers and pretzel sticks. Most cheeses, meats, olives, and produce are naturally gluten-free. Just double-check the labels on your jams and mustards.
- Sweet Tooth Version: Swap the savory meats for more sweet treats. Add chocolate-covered pretzels, candy corn, gummy worms (for a spooky touch), and mini pumpkin-shaped cookies. Use a chocolate hazelnut spread instead of fig jam.
- “Healthy” Halloween Board: Focus on veggies. Use cucumber slices, bell pepper strips, and carrot sticks as your “crackers.” Add hummus and a white bean dip instead of cheese. Use apple slices and pear slices for sweetness.
- Spicy Version: Add spicy salami, pepper jack cheese, and a jalapeño jam. Drizzle the brie with hot honey. Add a few pickled jalapeño slices for an extra kick. The heat pairs surprisingly well with the sweet and salty elements.
My personal favorite variation? I once made a “Breakfast for Dinner” Halloween board with mini pancakes, bacon strips, scrambled eggs, and maple syrup. I used a ghost-shaped cookie cutter for the pancakes. It was a total hit with my niece and nephew.
Serving & Storage Suggestions
This board is best served at room temperature, so take it out of the fridge about 20 minutes before your guests arrive. Arrange it on a large board or platter and place it in the center of the table. Let everyone graze at their own pace.
What to Serve With It: This board is a meal in itself, but it pairs beautifully with a crisp, dry white wine like Sauvignon Blanc or a light, fruity red like Beaujolais. For a non-alcoholic option, sparkling water with a splash of pomegranate juice is perfect. If you’re serving it as an appetizer, it goes great before a simple soup or a hearty salad.
How to Store Leftovers: This is the tricky part. You can’t really store an assembled board. You have to deconstruct it. Here’s what I do:
- Cheese: Wrap each cheese separately in wax paper or parchment paper, then place in a zip-top bag. Hard cheeses will last 1-2 weeks. Soft cheeses like brie will last 3-5 days.
- Meats: Wrap tightly in plastic wrap. They’ll last 3-5 days.
- Produce: Store grapes, olives, and dried fruit in separate airtight containers in the fridge. They’ll last about a week.
- Crackers and Nuts: Store in an airtight container at room temperature. They’ll last for weeks.
- Jams and Mustards: Return to the fridge. They’ll last for months.
Reheating: You don’t really reheat a charcuterie board. If you have leftover brie, you can bake it! Place it in a small oven-safe dish, top with a little honey and some chopped nuts, and bake at 350°F for 10-15 minutes until it’s warm and gooey. Serve with the leftover crackers.
Nutritional Information & Benefits
Please note that these are estimated values and will vary based on your specific ingredient choices and portion sizes. This board is meant to be shared, so it’s hard to calculate an exact serving.
| Nutrient | Approx. Per Serving (1/8 of board) |
|---|---|
| Calories | 350-450 |
| Fat | 25-30g |
| Saturated Fat | 12-15g |
| Carbohydrates | 20-25g |
| Fiber | 3-5g |
| Sugar | 10-15g |
| Protein | 15-20g |
| Sodium | 600-800mg |
Health Benefits: This board offers a surprising amount of nutritional value. Cheese is a great source of calcium and protein. Nuts provide healthy fats and vitamin E. Grapes and pomegranates are packed with antioxidants. The prosciutto and salami offer iron and B vitamins. It’s a balanced, satisfying snack that provides sustained energy. Just be mindful of portion sizes, as it can be easy to overeat!
Conclusion
So there you have it. My Spooky Halloween Charcuterie Board that turned me from a skeptic into a true believer. It’s proof that Halloween food can be fun without being foolish, and delicious without being complicated. The best part? Watching people’s faces light up when they see it. That moment of “Whoa, that’s so cool!” followed by “Mmm, this cheese is amazing.” It’s a double win.
I really hope you give this a try for your next Halloween gathering. Don’t be afraid to make it your own—swap in your favorite cheese, use whatever meat you have on hand, and get as creative as you want with the spooky decorations. The beauty of a charcuterie board is that there are no rules. Just good food, arranged beautifully, shared with people you love.
I’d love to see your creations! Tag me in your photos on social media or leave a comment below telling me what spooky touches you added. Did you use edible eyes? A plastic skeleton hand? Something I haven’t thought of? Let me know! Happy Halloween, and happy snacking!
Frequently Asked Questions
Can I make this board a day ahead of time?
You can prep all the ingredients a day ahead—slice the cheese, wash the fruit, and portion out the nuts and crackers. But I recommend assembling the board no more than 2-3 hours before serving. The crackers can get stale if they sit out too long, and the cheese can dry out.
How much food do I need per person?
A good rule of thumb for a charcuterie board that’s the main course is about 3-4 ounces of cheese and 2-3 ounces of meat per person. If it’s just an appetizer before a meal, you can cut those amounts in half. For a crowd of 8-10 people, the ingredient list above is perfect.
What if I can’t find black sesame seeds?
No problem at all! You can substitute with poppy seeds, or simply skip them. The brie will still look beautiful with just a honey drizzle. You could also use a sprinkle of smoked paprika for a different kind of “spooky” effect.
How do I keep the board from getting messy as people eat?
Provide small plates and napkins for each guest. This encourages them to take what they want rather than picking directly off the board. You can also put out small forks or toothpicks for the olives and cheese cubes. A little planning goes a long way!
Can I use a different type of board?
Absolutely! A large wooden cutting board is classic. A slate board looks very dramatic for Halloween. A clean baking sheet or even a large, flat serving platter will work perfectly. The key is having enough surface area to spread everything out so it looks abundant and inviting.
Pin This Recipe!
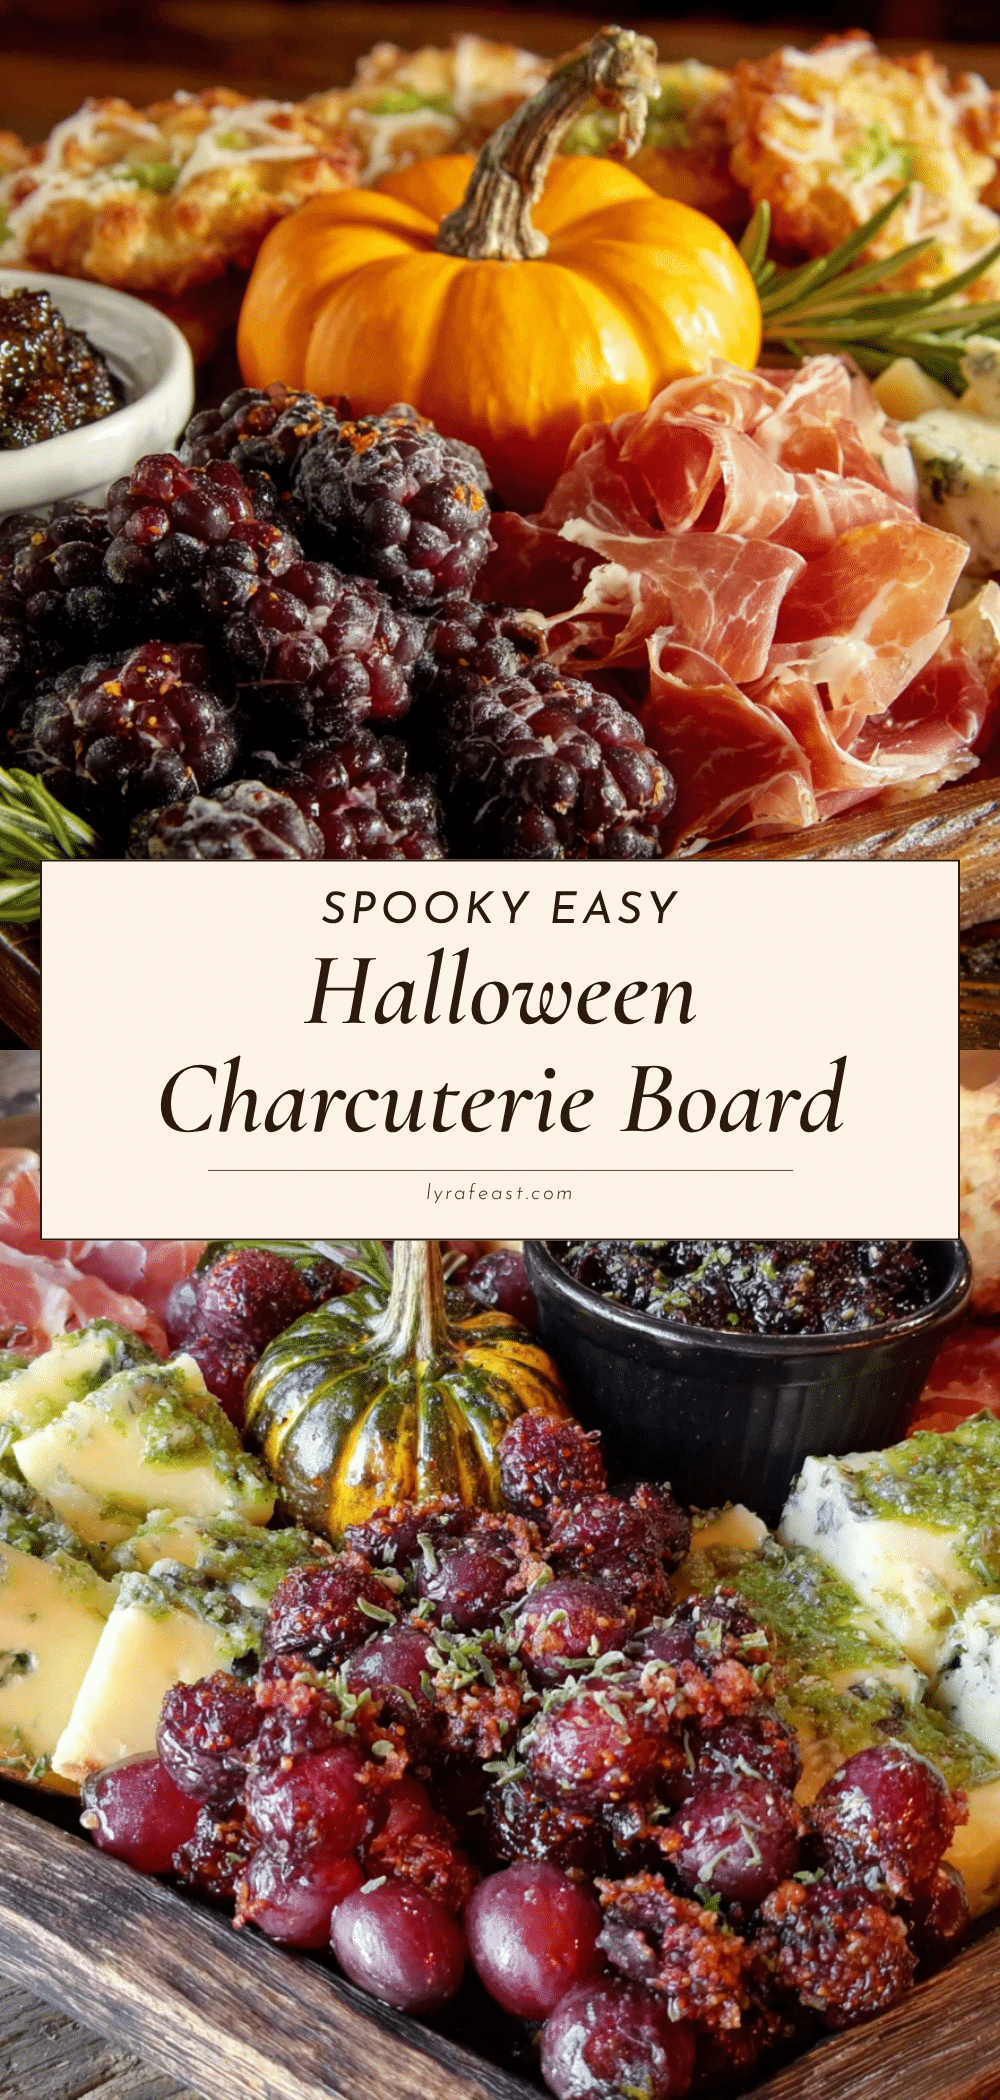
Spooky Halloween Charcuterie Board
A stunning and delicious Halloween charcuterie board that comes together in under 30 minutes using simple grocery-store ingredients. Perfect for parties, movie nights, or any spooky gathering.
- Prep Time: 15 minutes
- Cook Time: 0 minutes
- Total Time: 30 minutes
- Yield: 8 servings
- Category: Appetizer
- Cuisine: American
Ingredients
- Brie or Camembert (8 oz wheel)
- Aged Cheddar (6 oz)
- Manchego or Gouda (6 oz)
- Smoked Gouda (4 oz, optional)
- Prosciutto (4 oz)
- Salami (4 oz)
- Pepperoni (3 oz)
- Black Olives (½ cup, kalamata and black)
- Red Grapes (1 cup)
- Green Grapes (1 cup)
- Dried Apricots or Dried Figs (½ cup)
- Fresh Rosemary Sprigs (a few)
- Pomegranate Seeds (¼ cup)
- Crackers (1 box, mix of shapes and flavors)
- Breadsticks or Grissini (a handful)
- Honey-Roasted Almonds or Marcona Almonds (½ cup)
- Pretzel Sticks (a handful)
- Fig Jam or Blackberry Jam (¼ cup)
- Honey (2 tbsp)
- Whole-Grain Mustard (2 tbsp)
- Black Sesame Seeds (1 tbsp)
- Edible Eyes (a small bag, optional)
- Mini Plastic Spiders or Bats (optional)
Instructions
- Prep Your Cheeses (5 minutes): Take cheeses out of fridge 15 minutes before assembling. Cut hard cheeses into slices or cubes. Leave brie wheel whole.
- Prep Your Produce (5 minutes): Wash and dry grapes. Rinse pomegranate seeds. Drain olives and pat dry.
- Arrange the Bowls First (2 minutes): Place small bowls of fig jam, honey, and whole-grain mustard on the board, spaced evenly.
- Place the Brie (2 minutes): Put whole brie wheel in a prominent spot, slightly off-center. Drizzle with honey and sprinkle with black sesame seeds.
- Add the Meat (3 minutes): Drape prosciutto in loose ribbons. Fold salami into quarters or roll into cylinders. Place pepperoni in small piles.
- Add the Hard Cheeses (3 minutes): Fan out cheddar wedges, manchego slices, and smoked gouda pieces near the meats in clusters.
- Fill in with Produce (4 minutes): Scatter grapes in small bunches. Place olives in piles. Sprinkle dried apricots and pomegranate seeds. Tuck rosemary sprigs in between.
- Add the Crunchy Elements (3 minutes): Arrange crackers and breadsticks in small organized piles. Place pretzel sticks and almonds in clusters near edges.
- Add the Spooky Touches (3 minutes): Stick edible eyes on olives or cheese cubes. Tie rosemary to breadsticks with kitchen twine for ‘witches’ broomsticks’. Place plastic spiders or bats in empty spaces.
- Final Check (1 minute): Step back and fill any empty spots with extra grapes, almonds, or crackers. Aim for abundant but not overcrowded.
Notes
Prep all ingredients before arranging. Don’t overcrowd the board. Use color contrast and height for visual impact. Keep board cold if not serving immediately, but let cheese come to room temperature before serving. For leftovers, deconstruct and store components separately.
Nutrition
- Serving Size: 1/8 of board
- Calories: 350450
- Sugar: 1015
- Sodium: 600800
- Fat: 2530
- Saturated Fat: 1215
- Carbohydrates: 2025
- Fiber: 35
- Protein: 1520
Keywords: Halloween charcuterie board, spooky snack board, Halloween appetizer, easy charcuterie board, party food, grazing board



